February 15, 2023
Moody Green Primary Bedroom Reveal – Our Mississippi Home
posted in:
You may recall that in the fall of 2021 (wow that feels like ages ago…), Stephen and I tackled the DIY remodel of our primary bathroom. While we were working on that, it made the most sense logistically to tackle our bedroom at the same time. By the grace of God, we managed to finish both projects while I was pregnant with Sophie and with little Ellie always “helping” at our sides. Shortly after it was finished, Sophie made her way into the world so I didn’t get a chance to share the room reveal on here while it was occupied by her crib, chair, etc. I am SO EXCITED to finally be sharing it with you! It’s a space Stephen and I both absolutely love to retreat to at the end of the day and I think is proof that paint and a few simple DIYs can make a world of a difference.
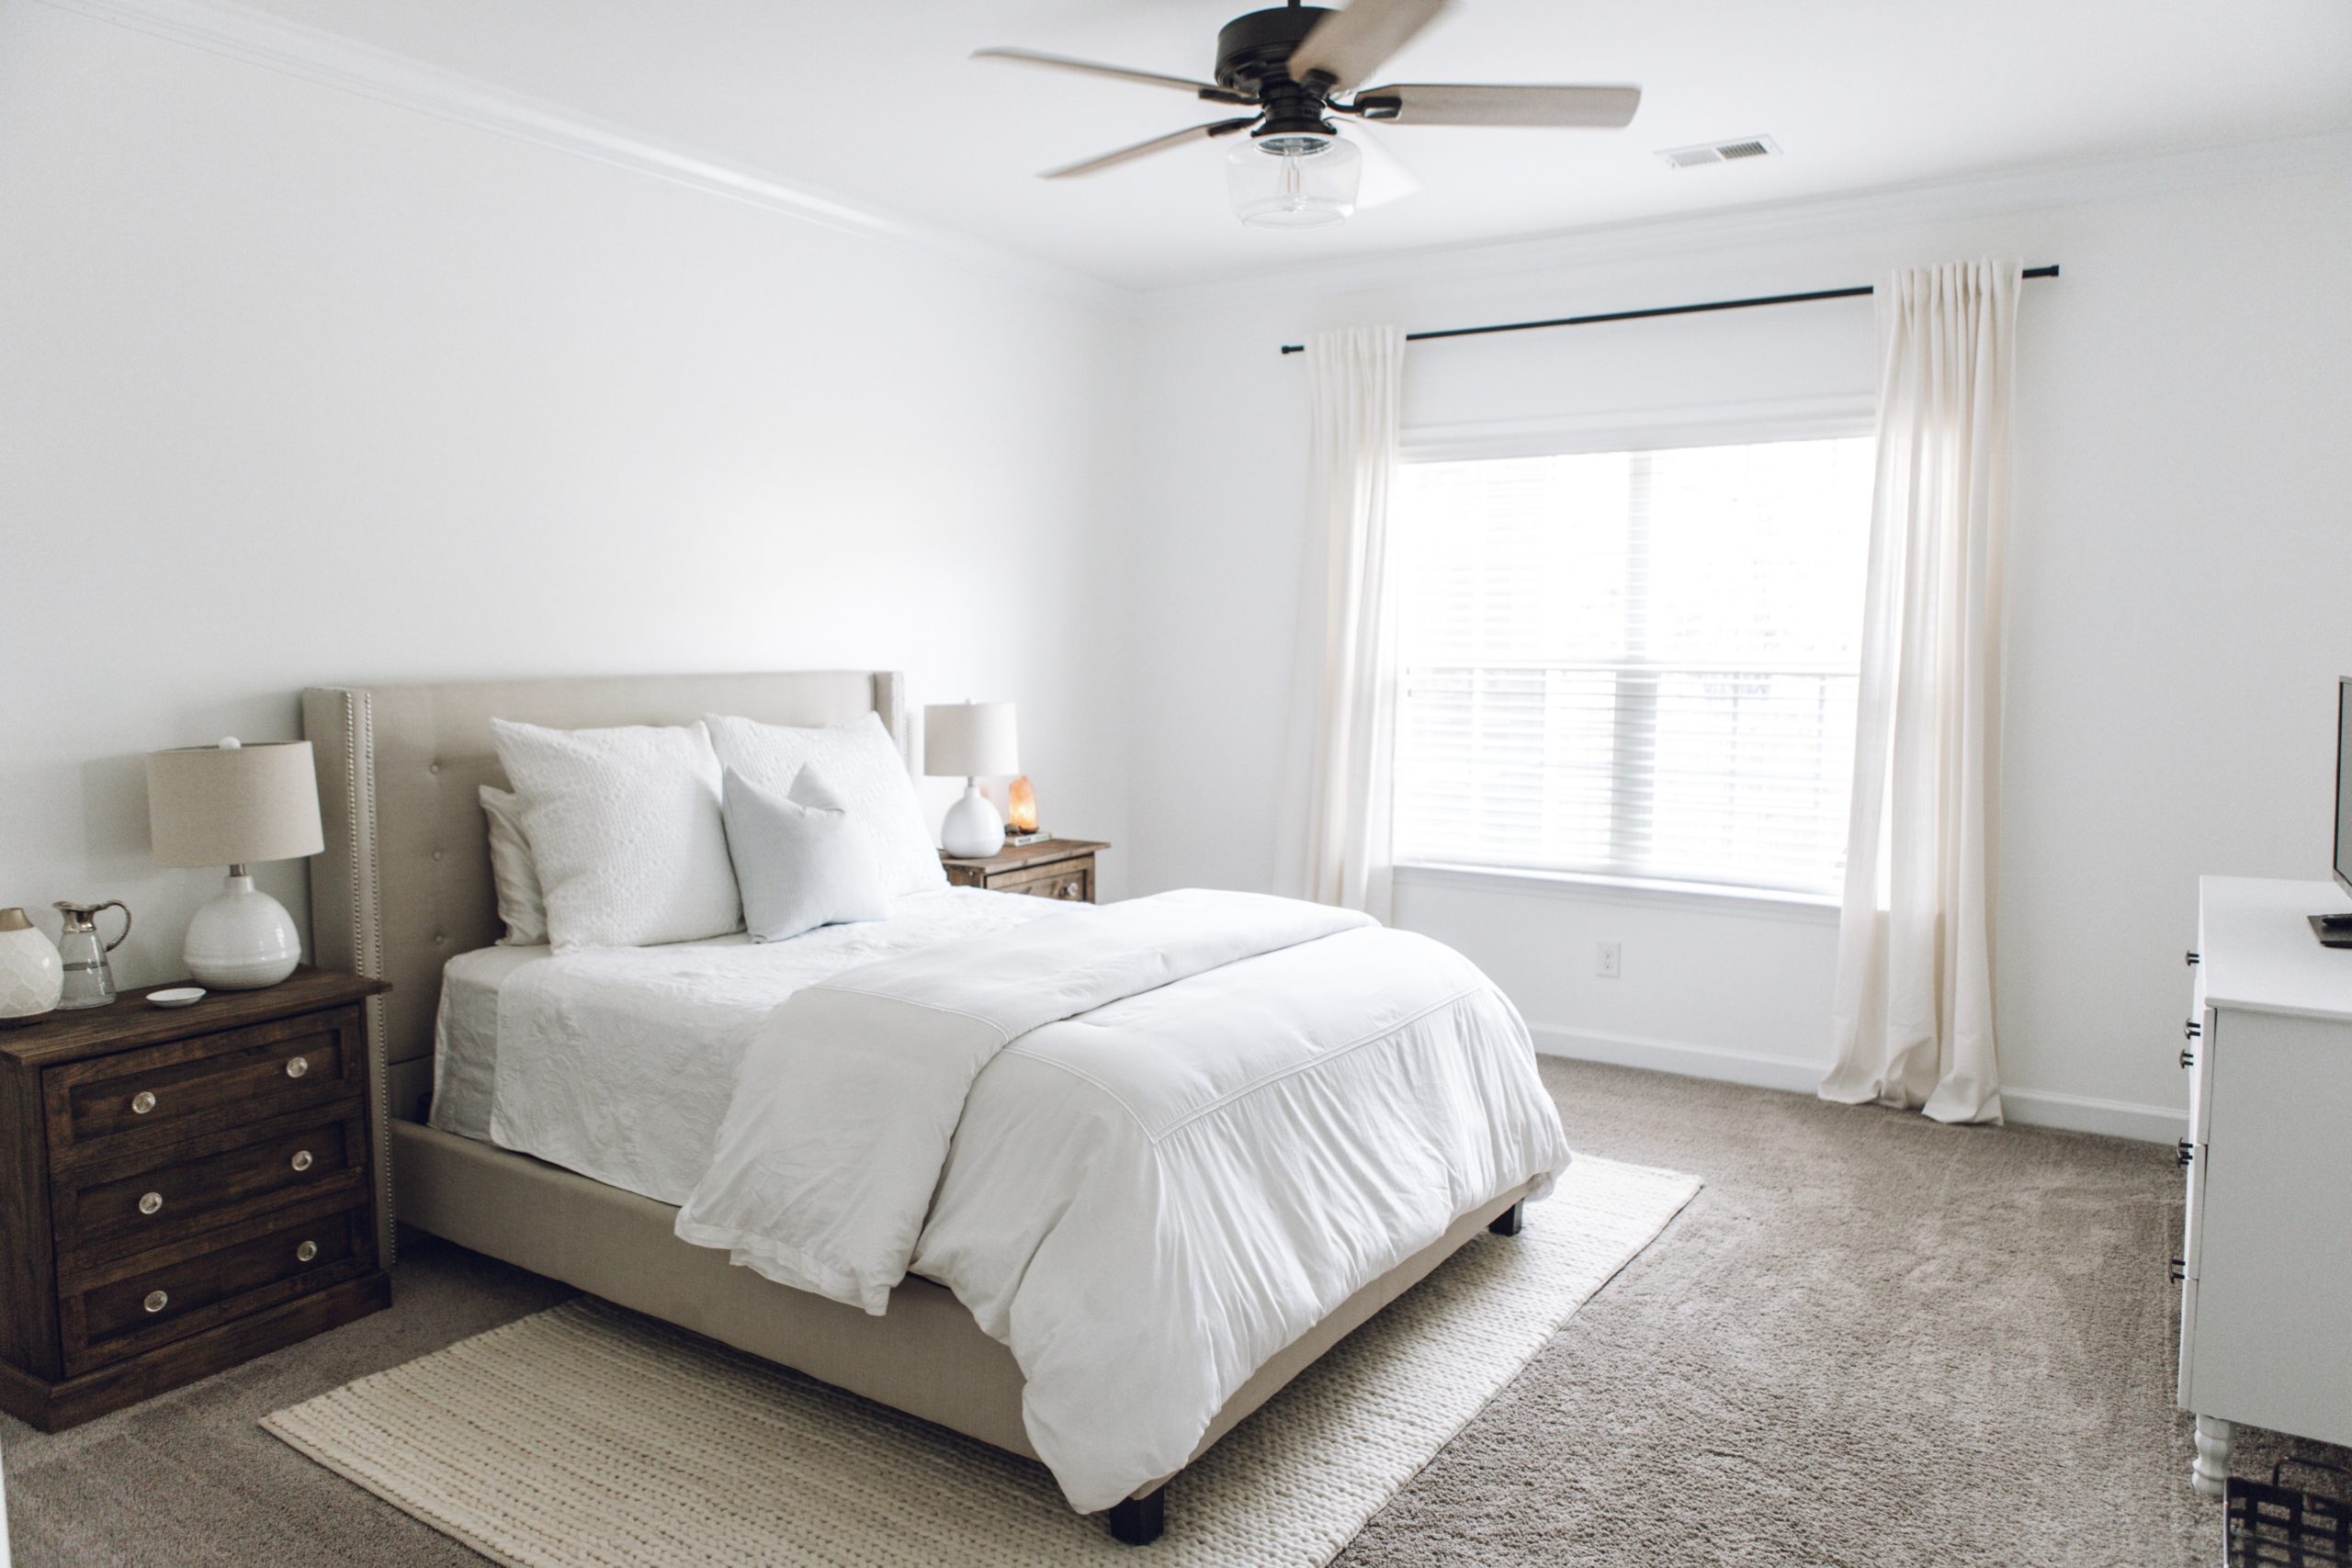
When coming up with the design for our room, Stephen and I agreed we wanted to go with something unexpected for us – something moody and dark. You can see the original design plan, the color options we decided between, and more before photos in this post. For a little refresher, here is what we were working with before.
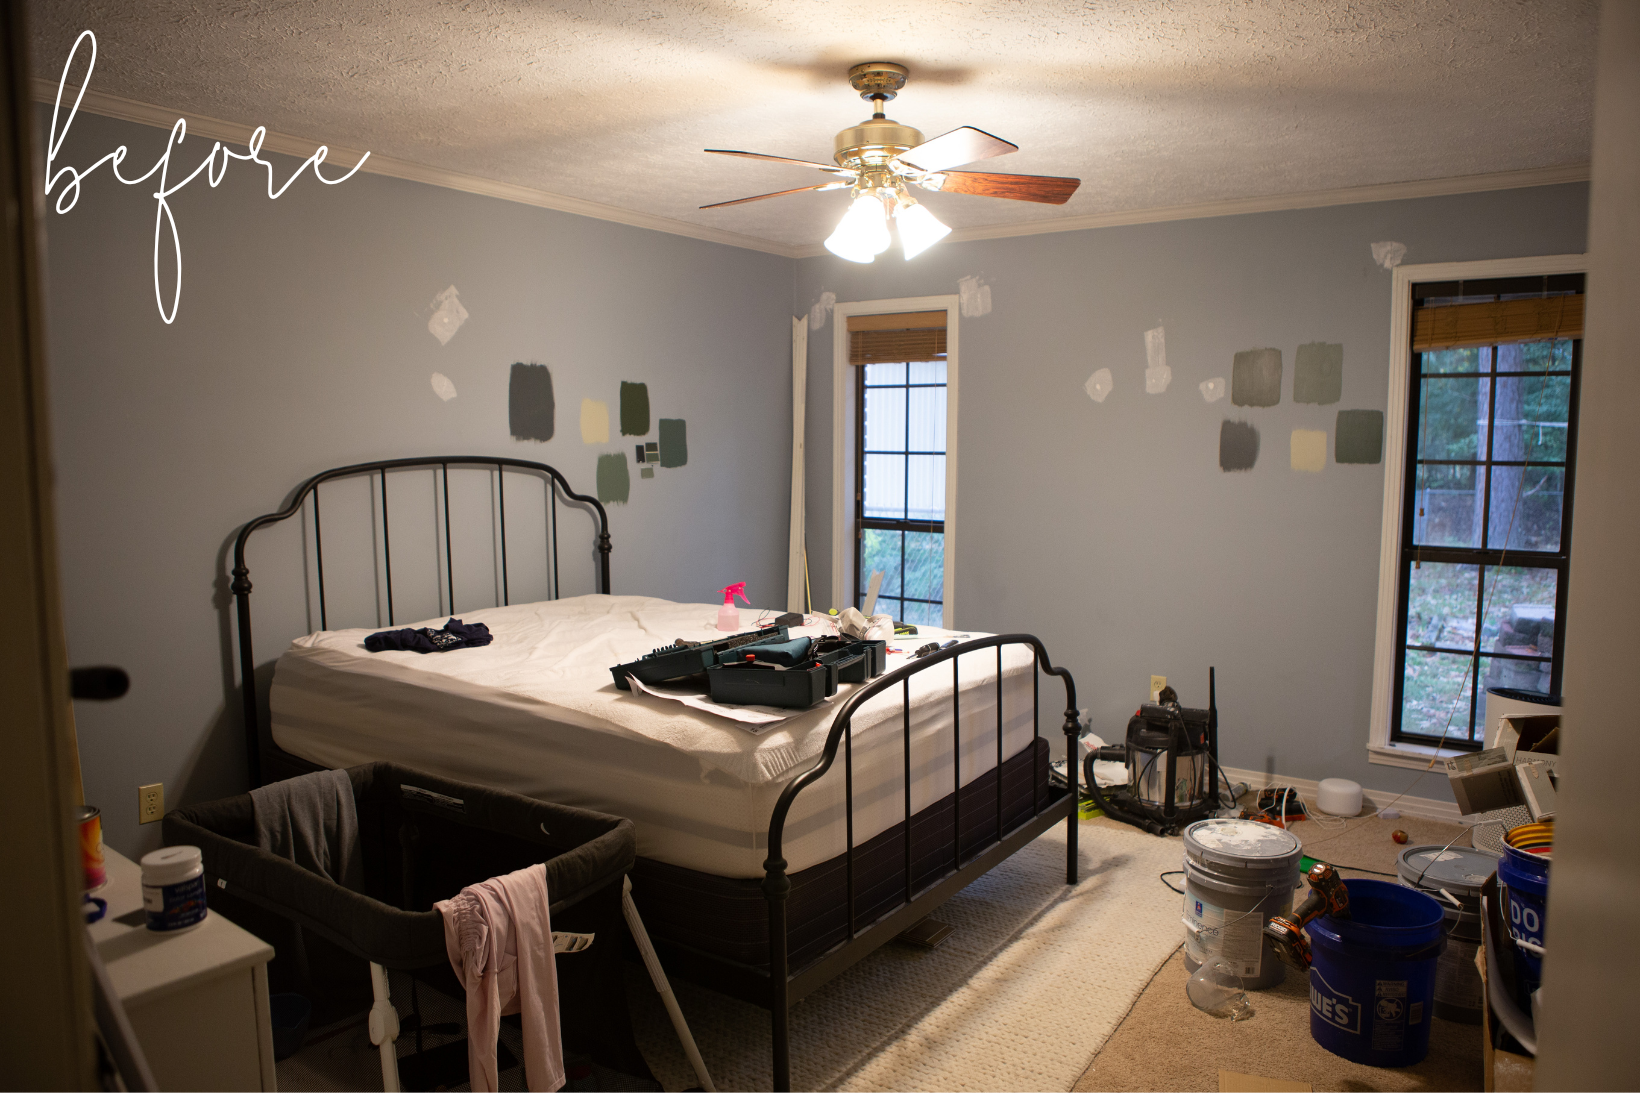
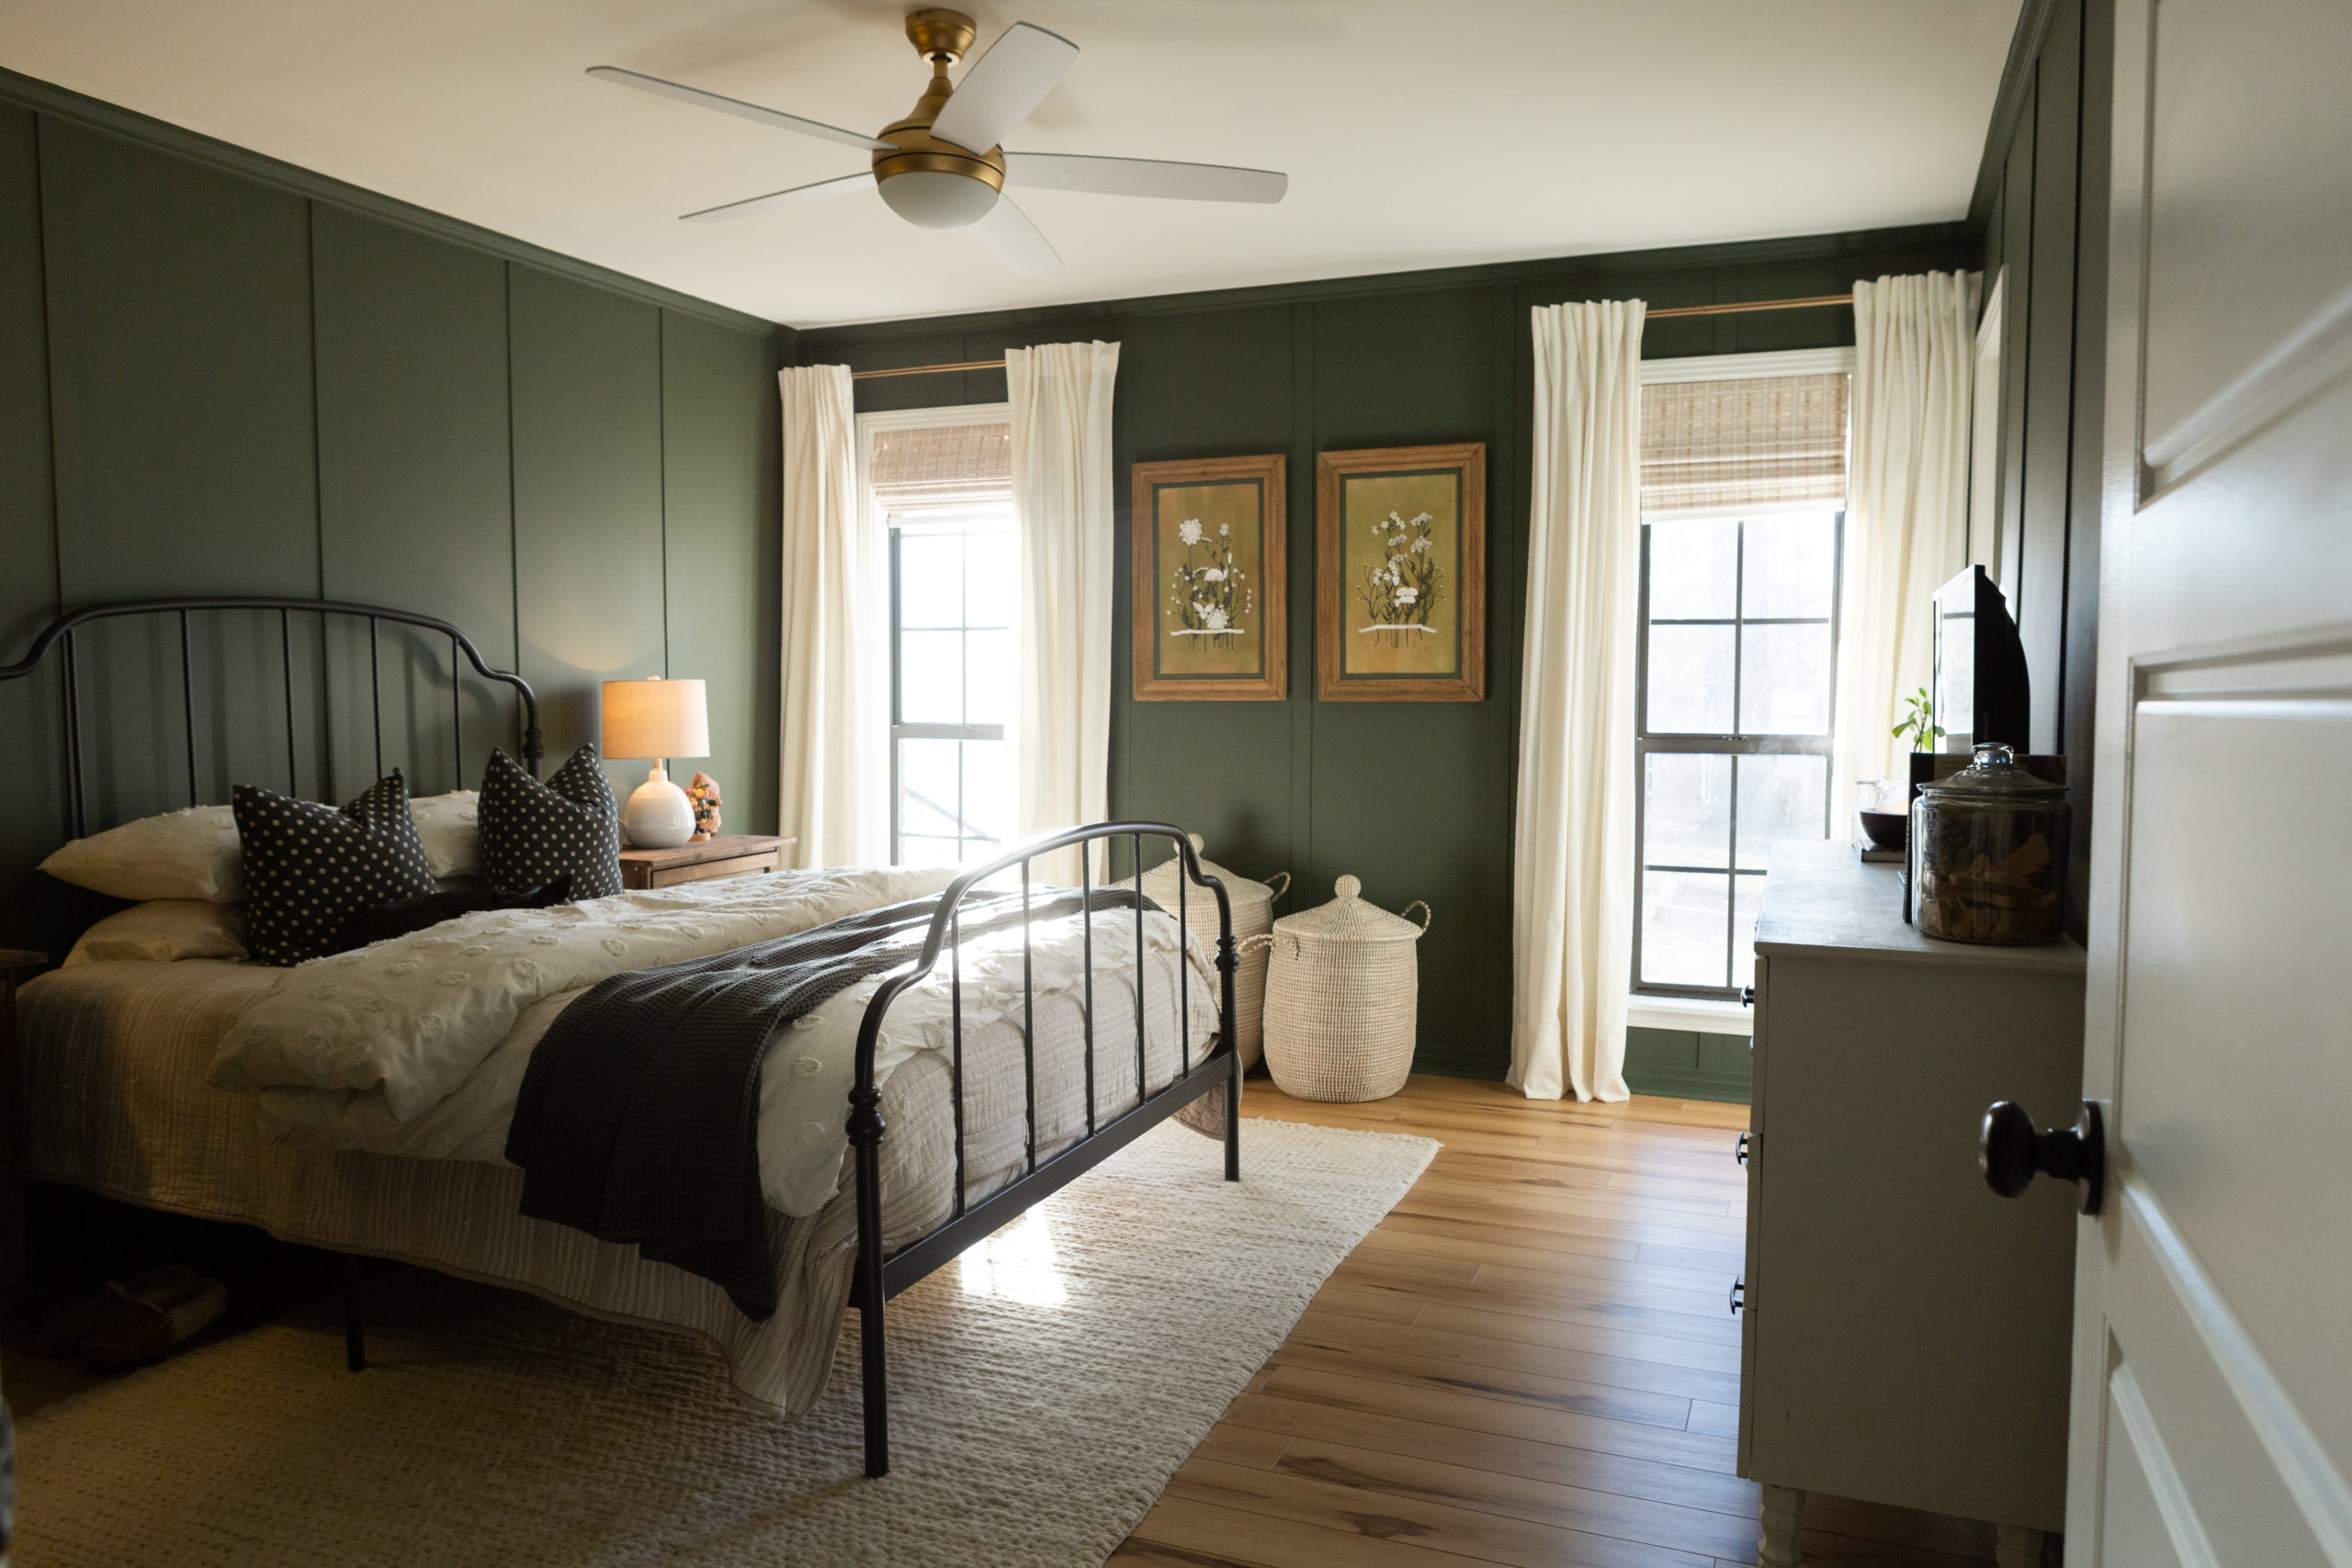
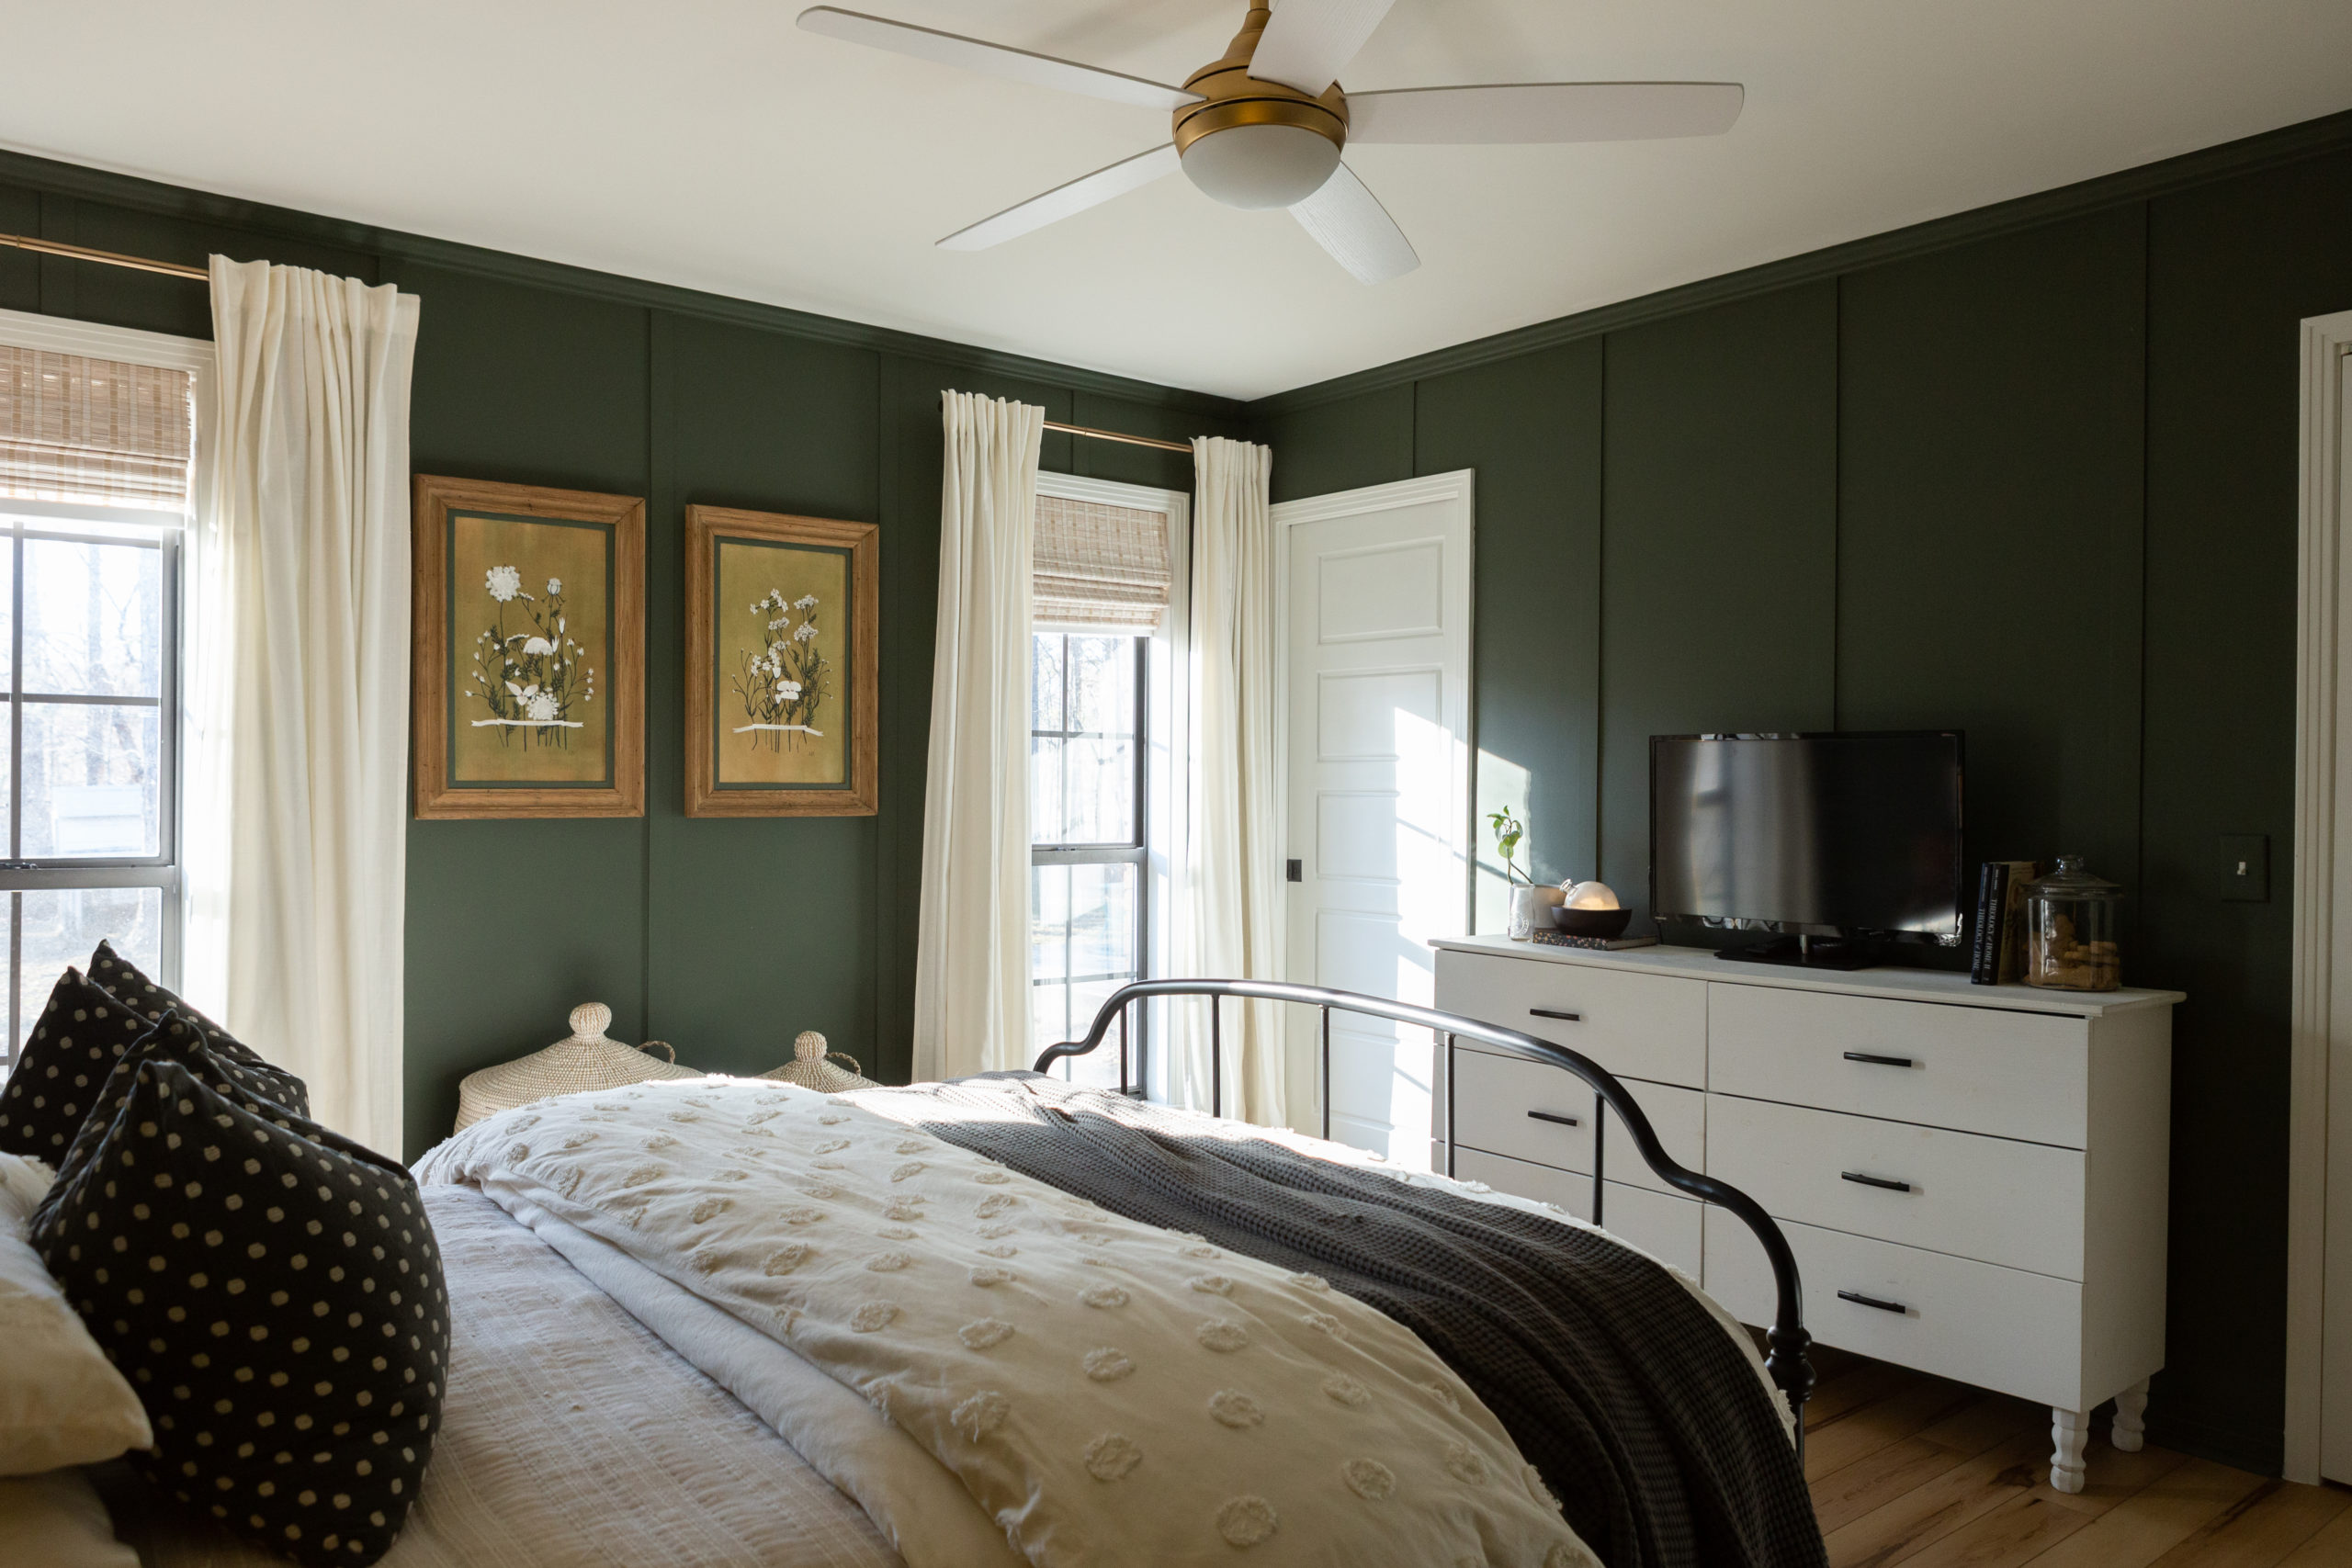
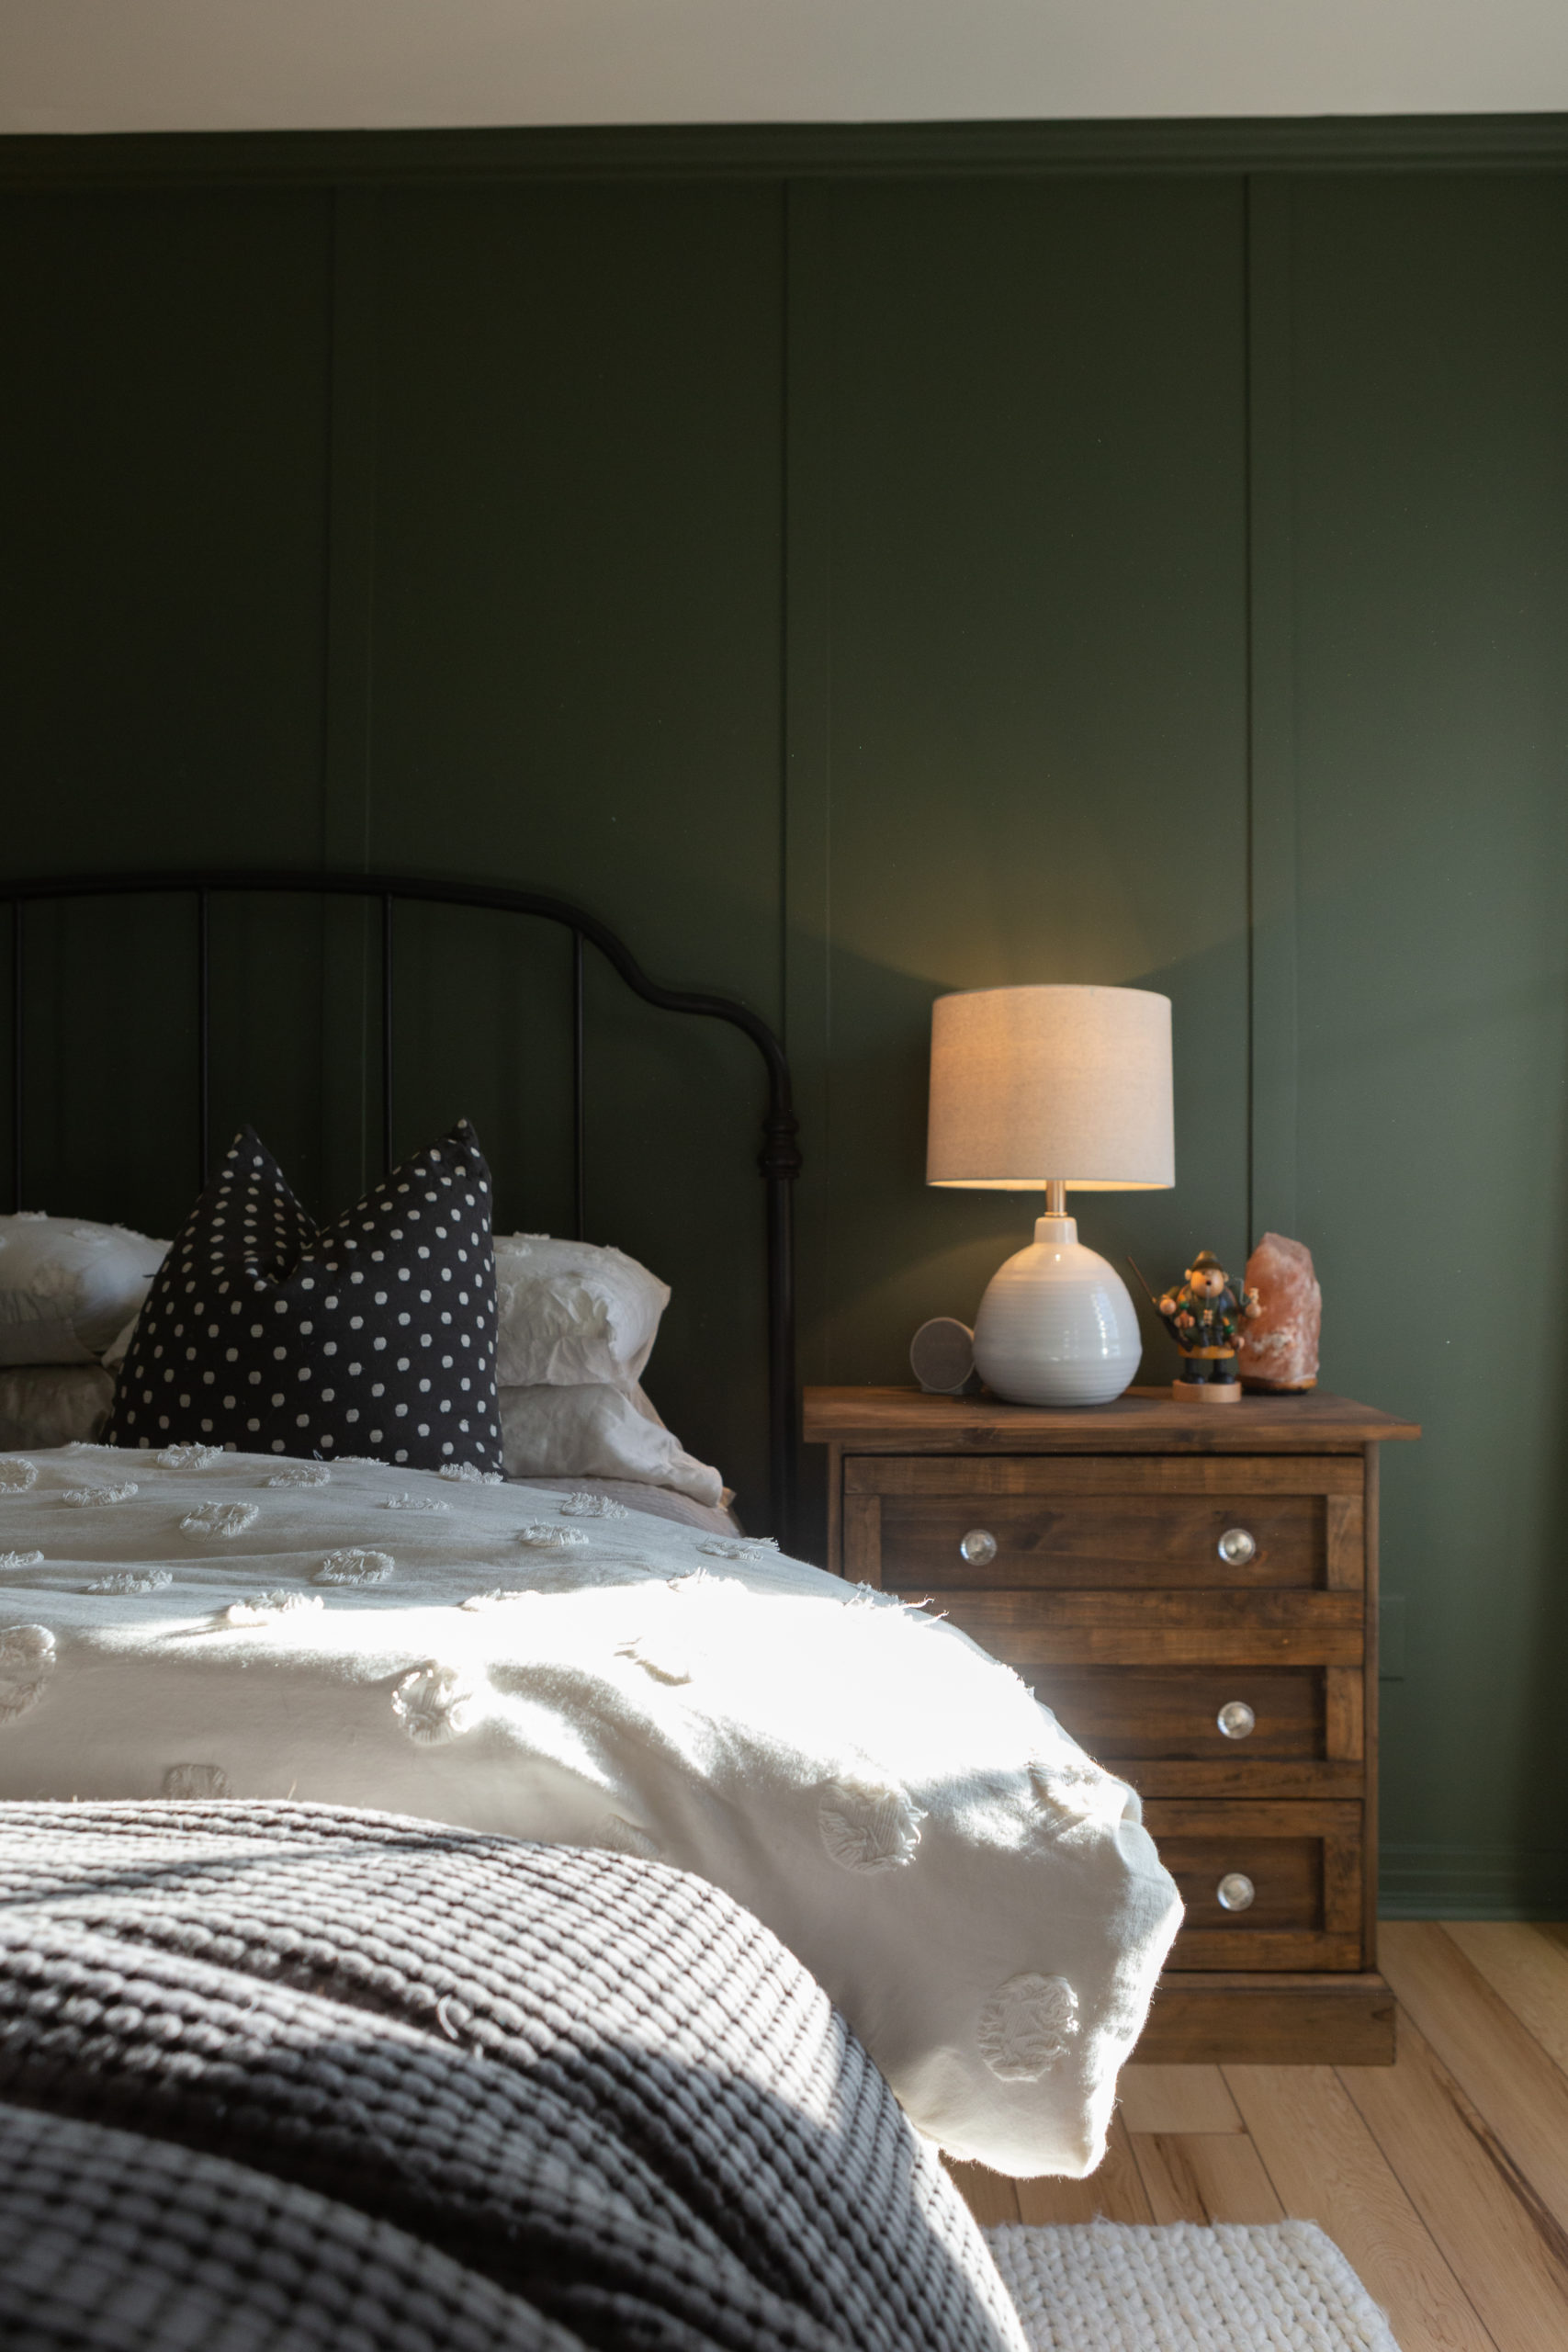
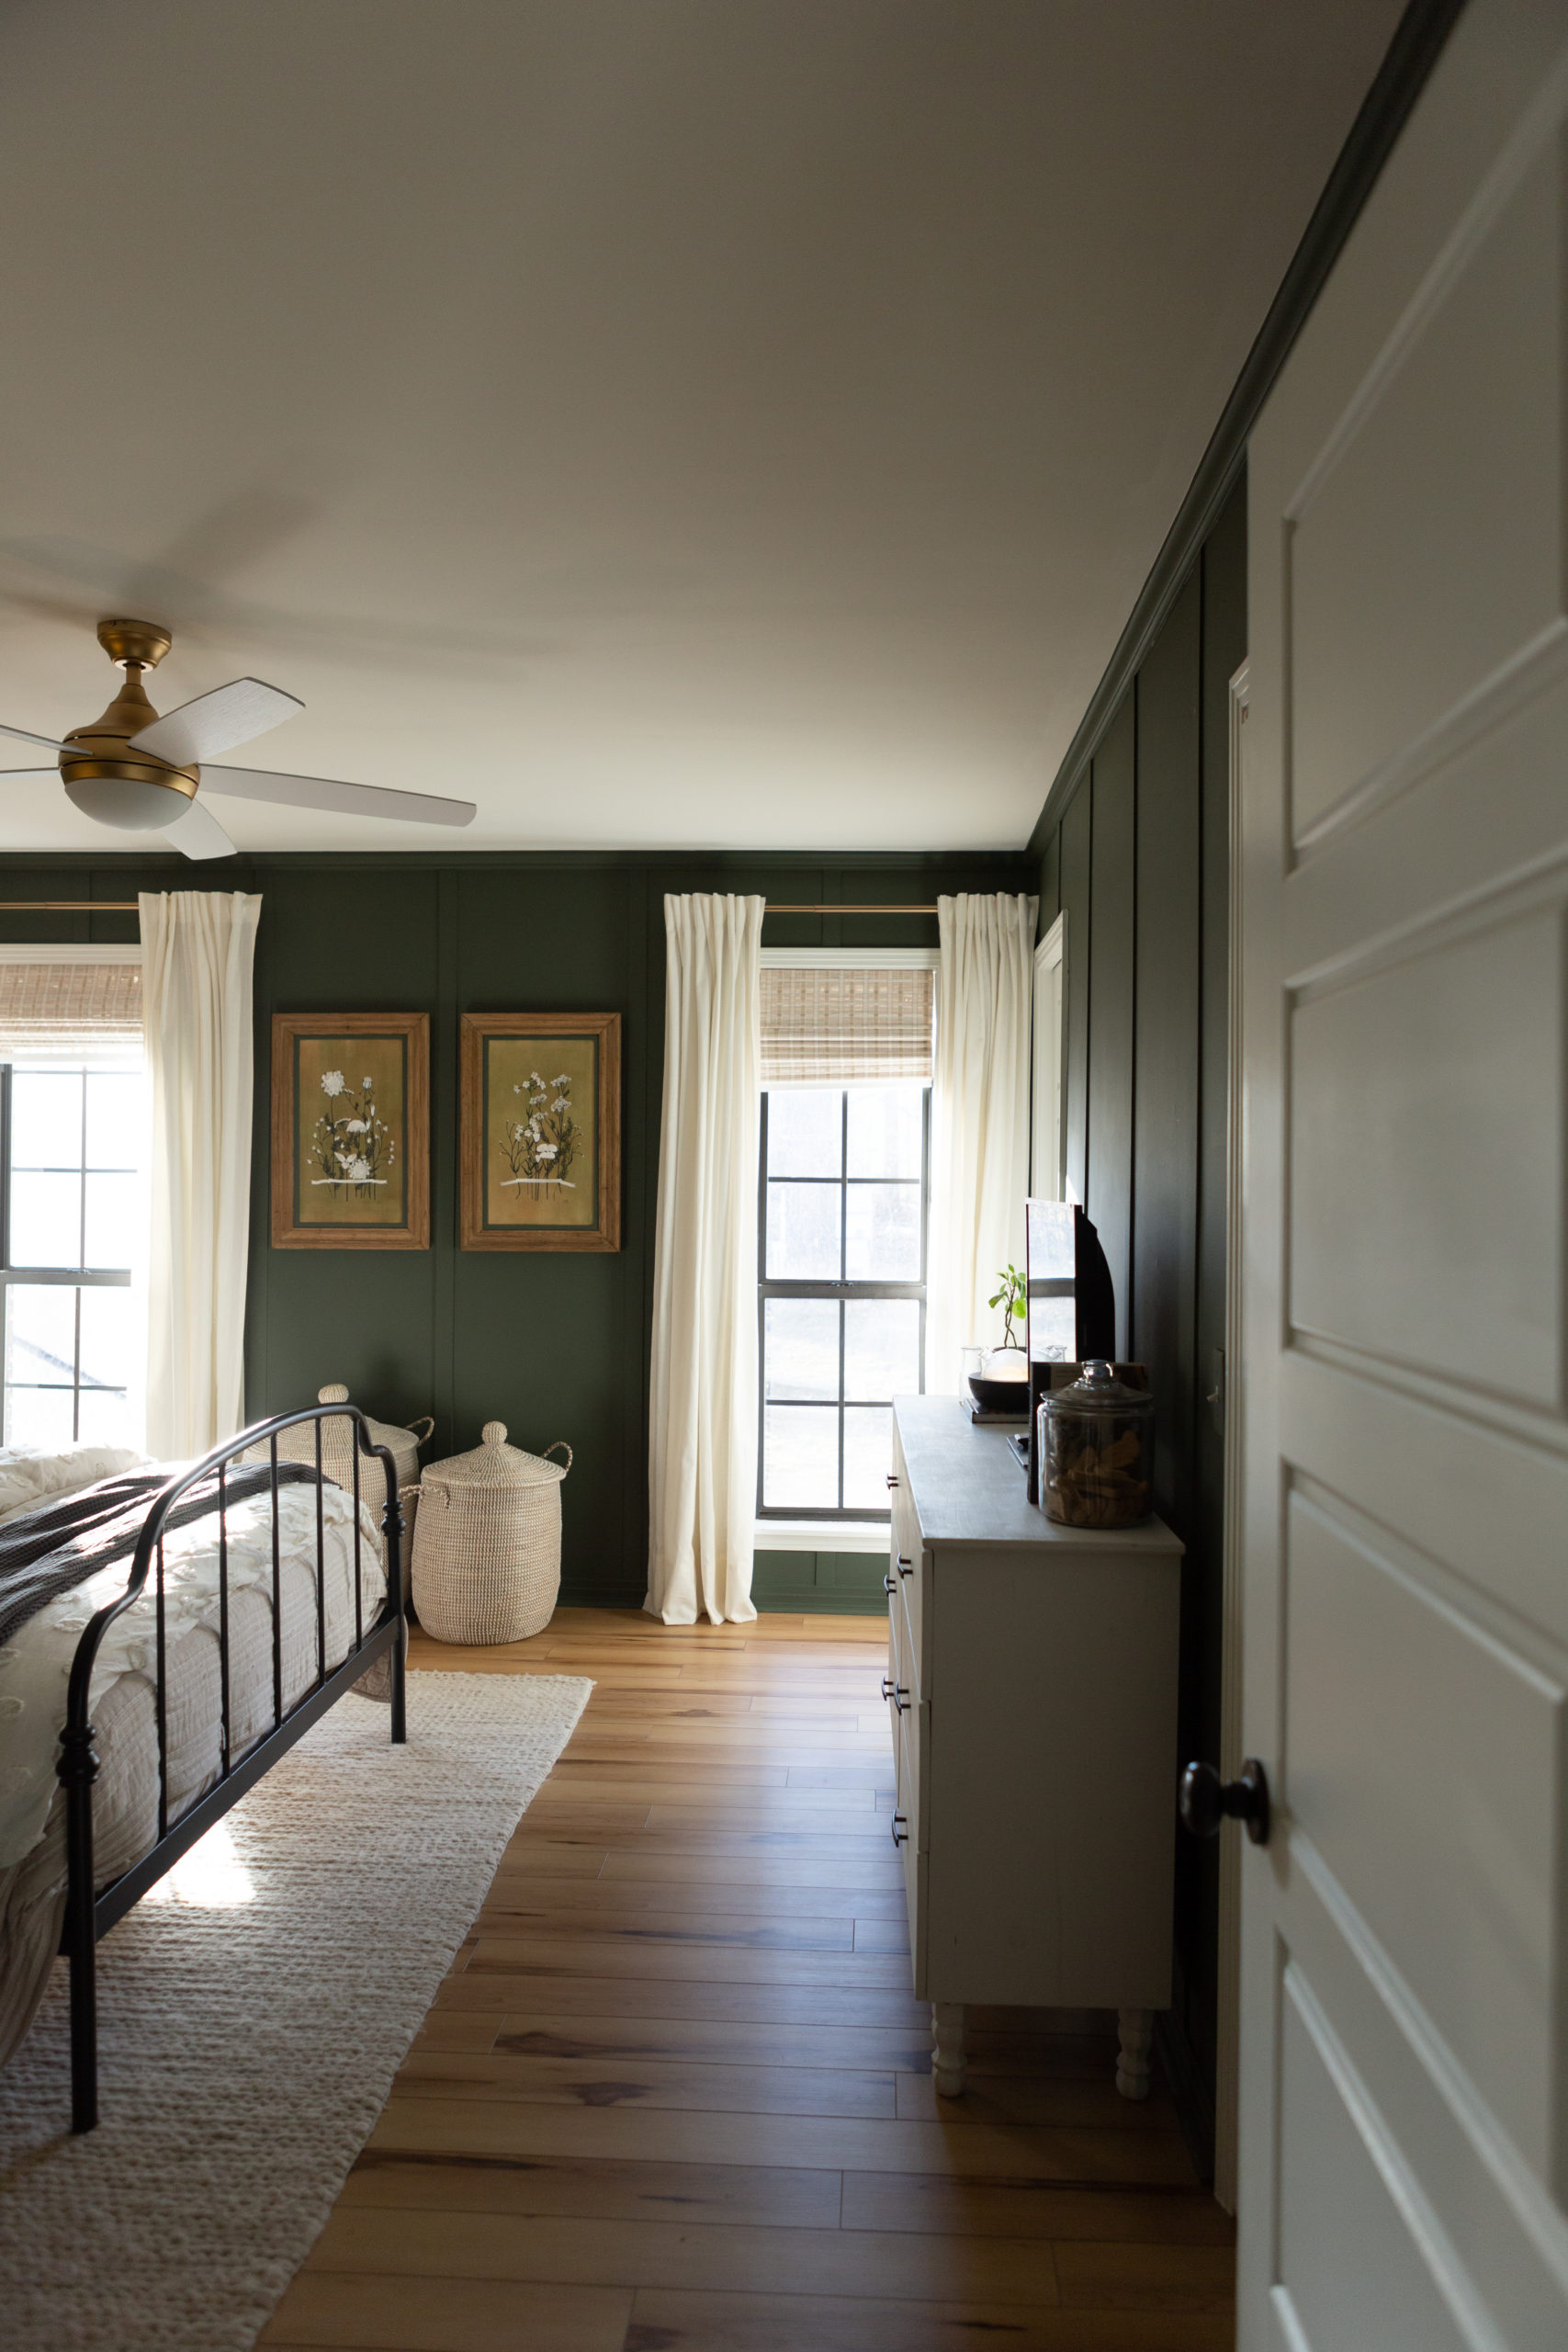
And here it is now!
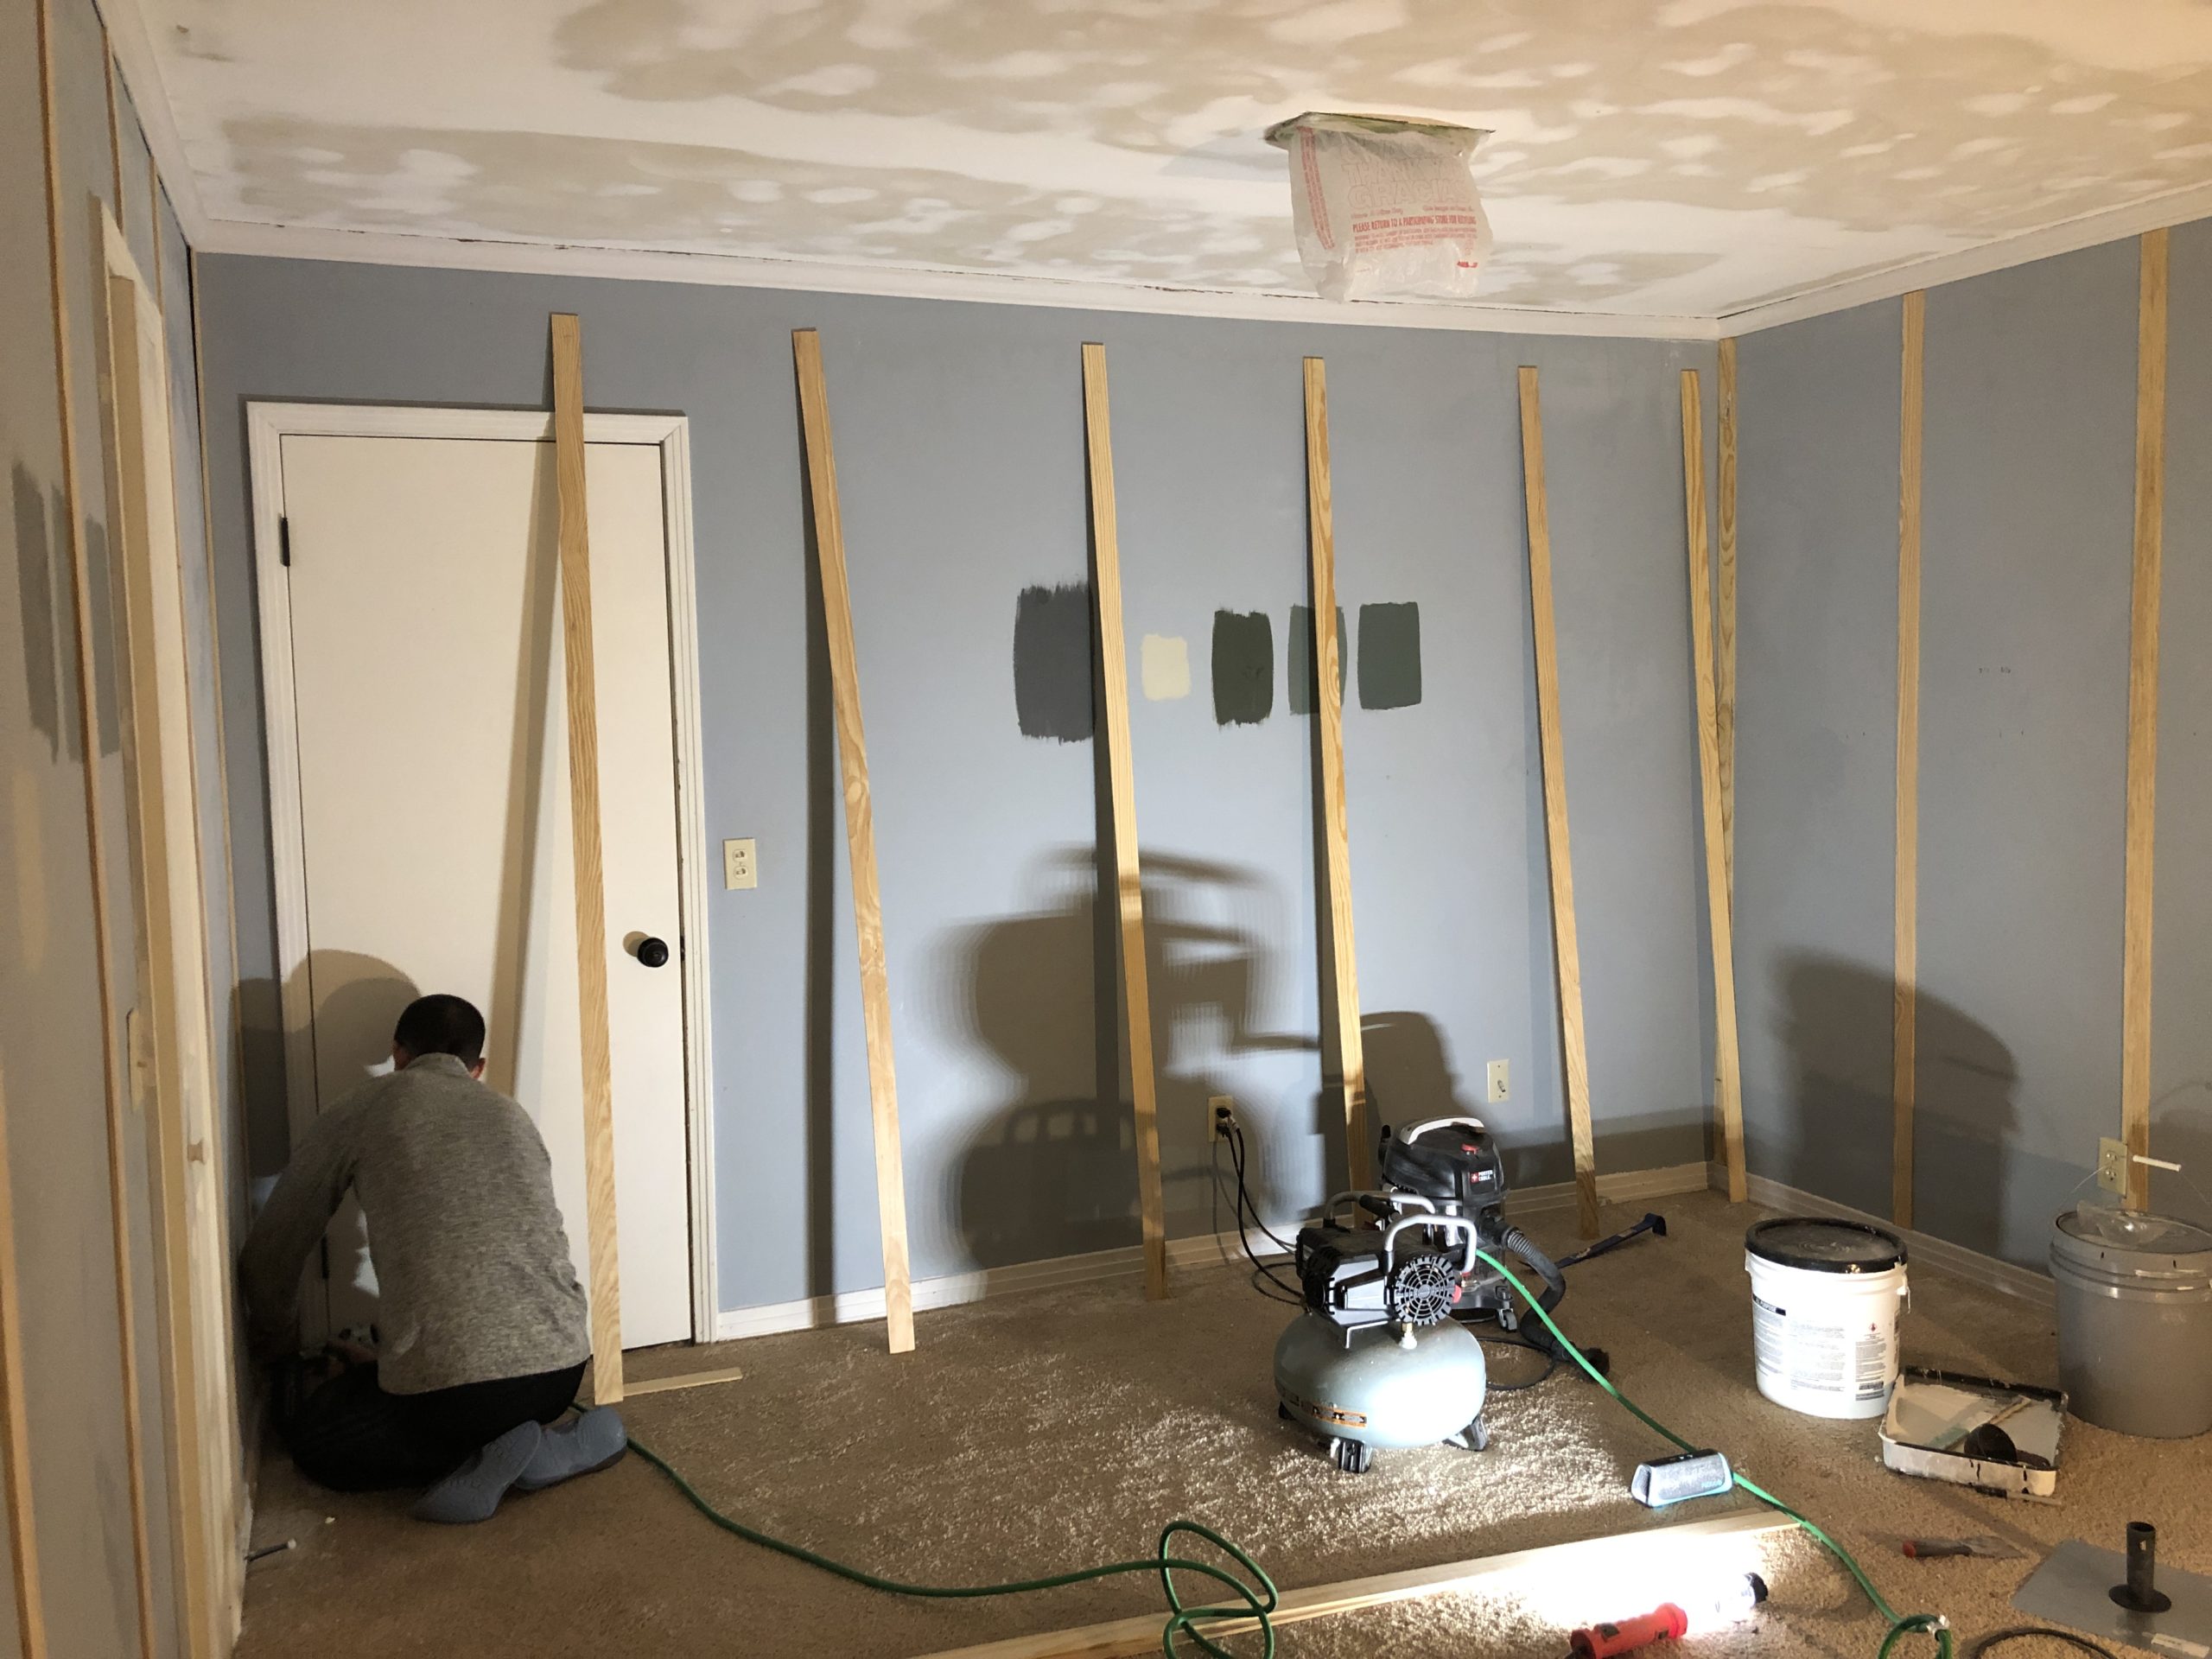
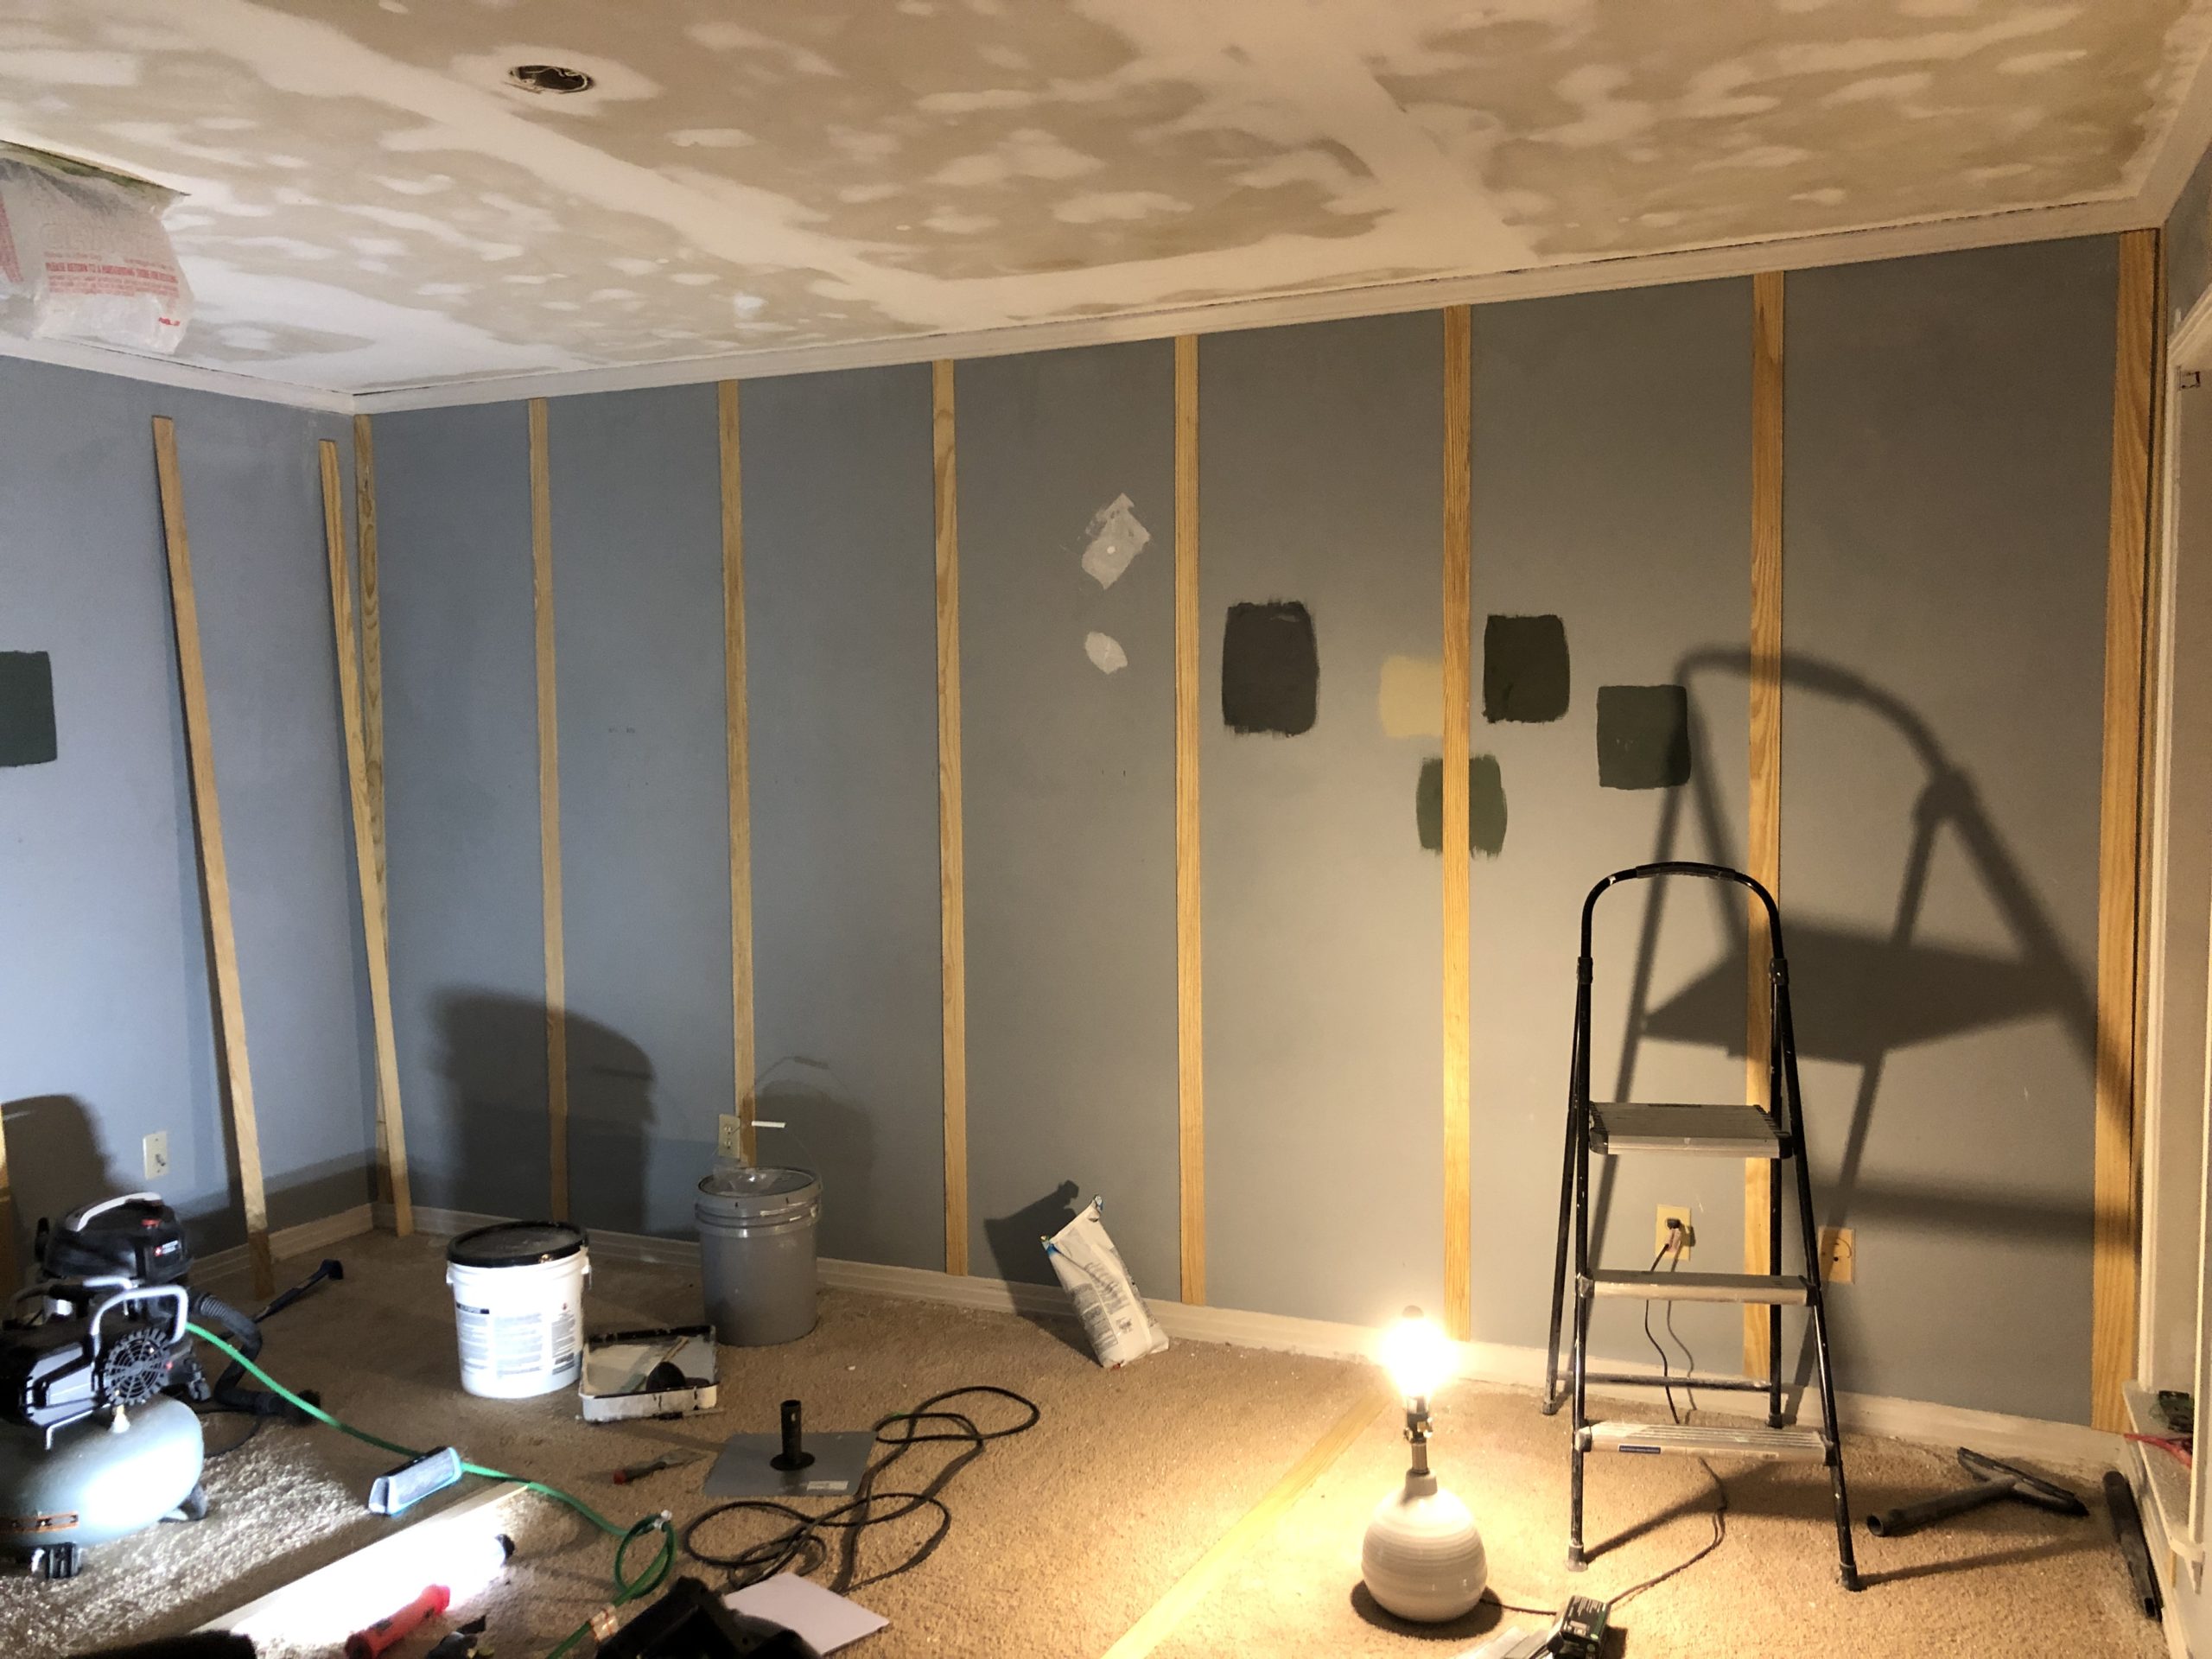
We (by “we” I mean Stephen) started out by removing the texture from the ceiling using his tried and true method that he’s used throughout the house. It will never cease to amaze me how much of a difference it makes to have a flat, clean ceiling. My goodness. We could’ve called the room good and done right then and there! Only partially kidding… Next up we added board and batten around the entire room to add a little bit more character and dimension. We used the same materials and method we used in the black board and batten in the entryway except that we took the battens from the top of the baseboard all the way up to the crown molding. To determine the width between your battens, our advice is to lay out the furring strips first starting with the outer edges of each wall (so where two walls meet to form a corner, two battens should also meet), then from there we laid down a few equidistant from each other to determine how close we wanted them. We ended up doing 22.75″ on two walls and 22.25″ on the other two (the room is not a square and the difference in distance is not noticeable). Most likely there will be a small gap between the two furring strips where they meet in the corner due to your walls not being perfectly straight (you can spot this issue in the second photo below on the right side corner). Do not worry! A quick fill of the gap with caulk fixes that problem instantly.
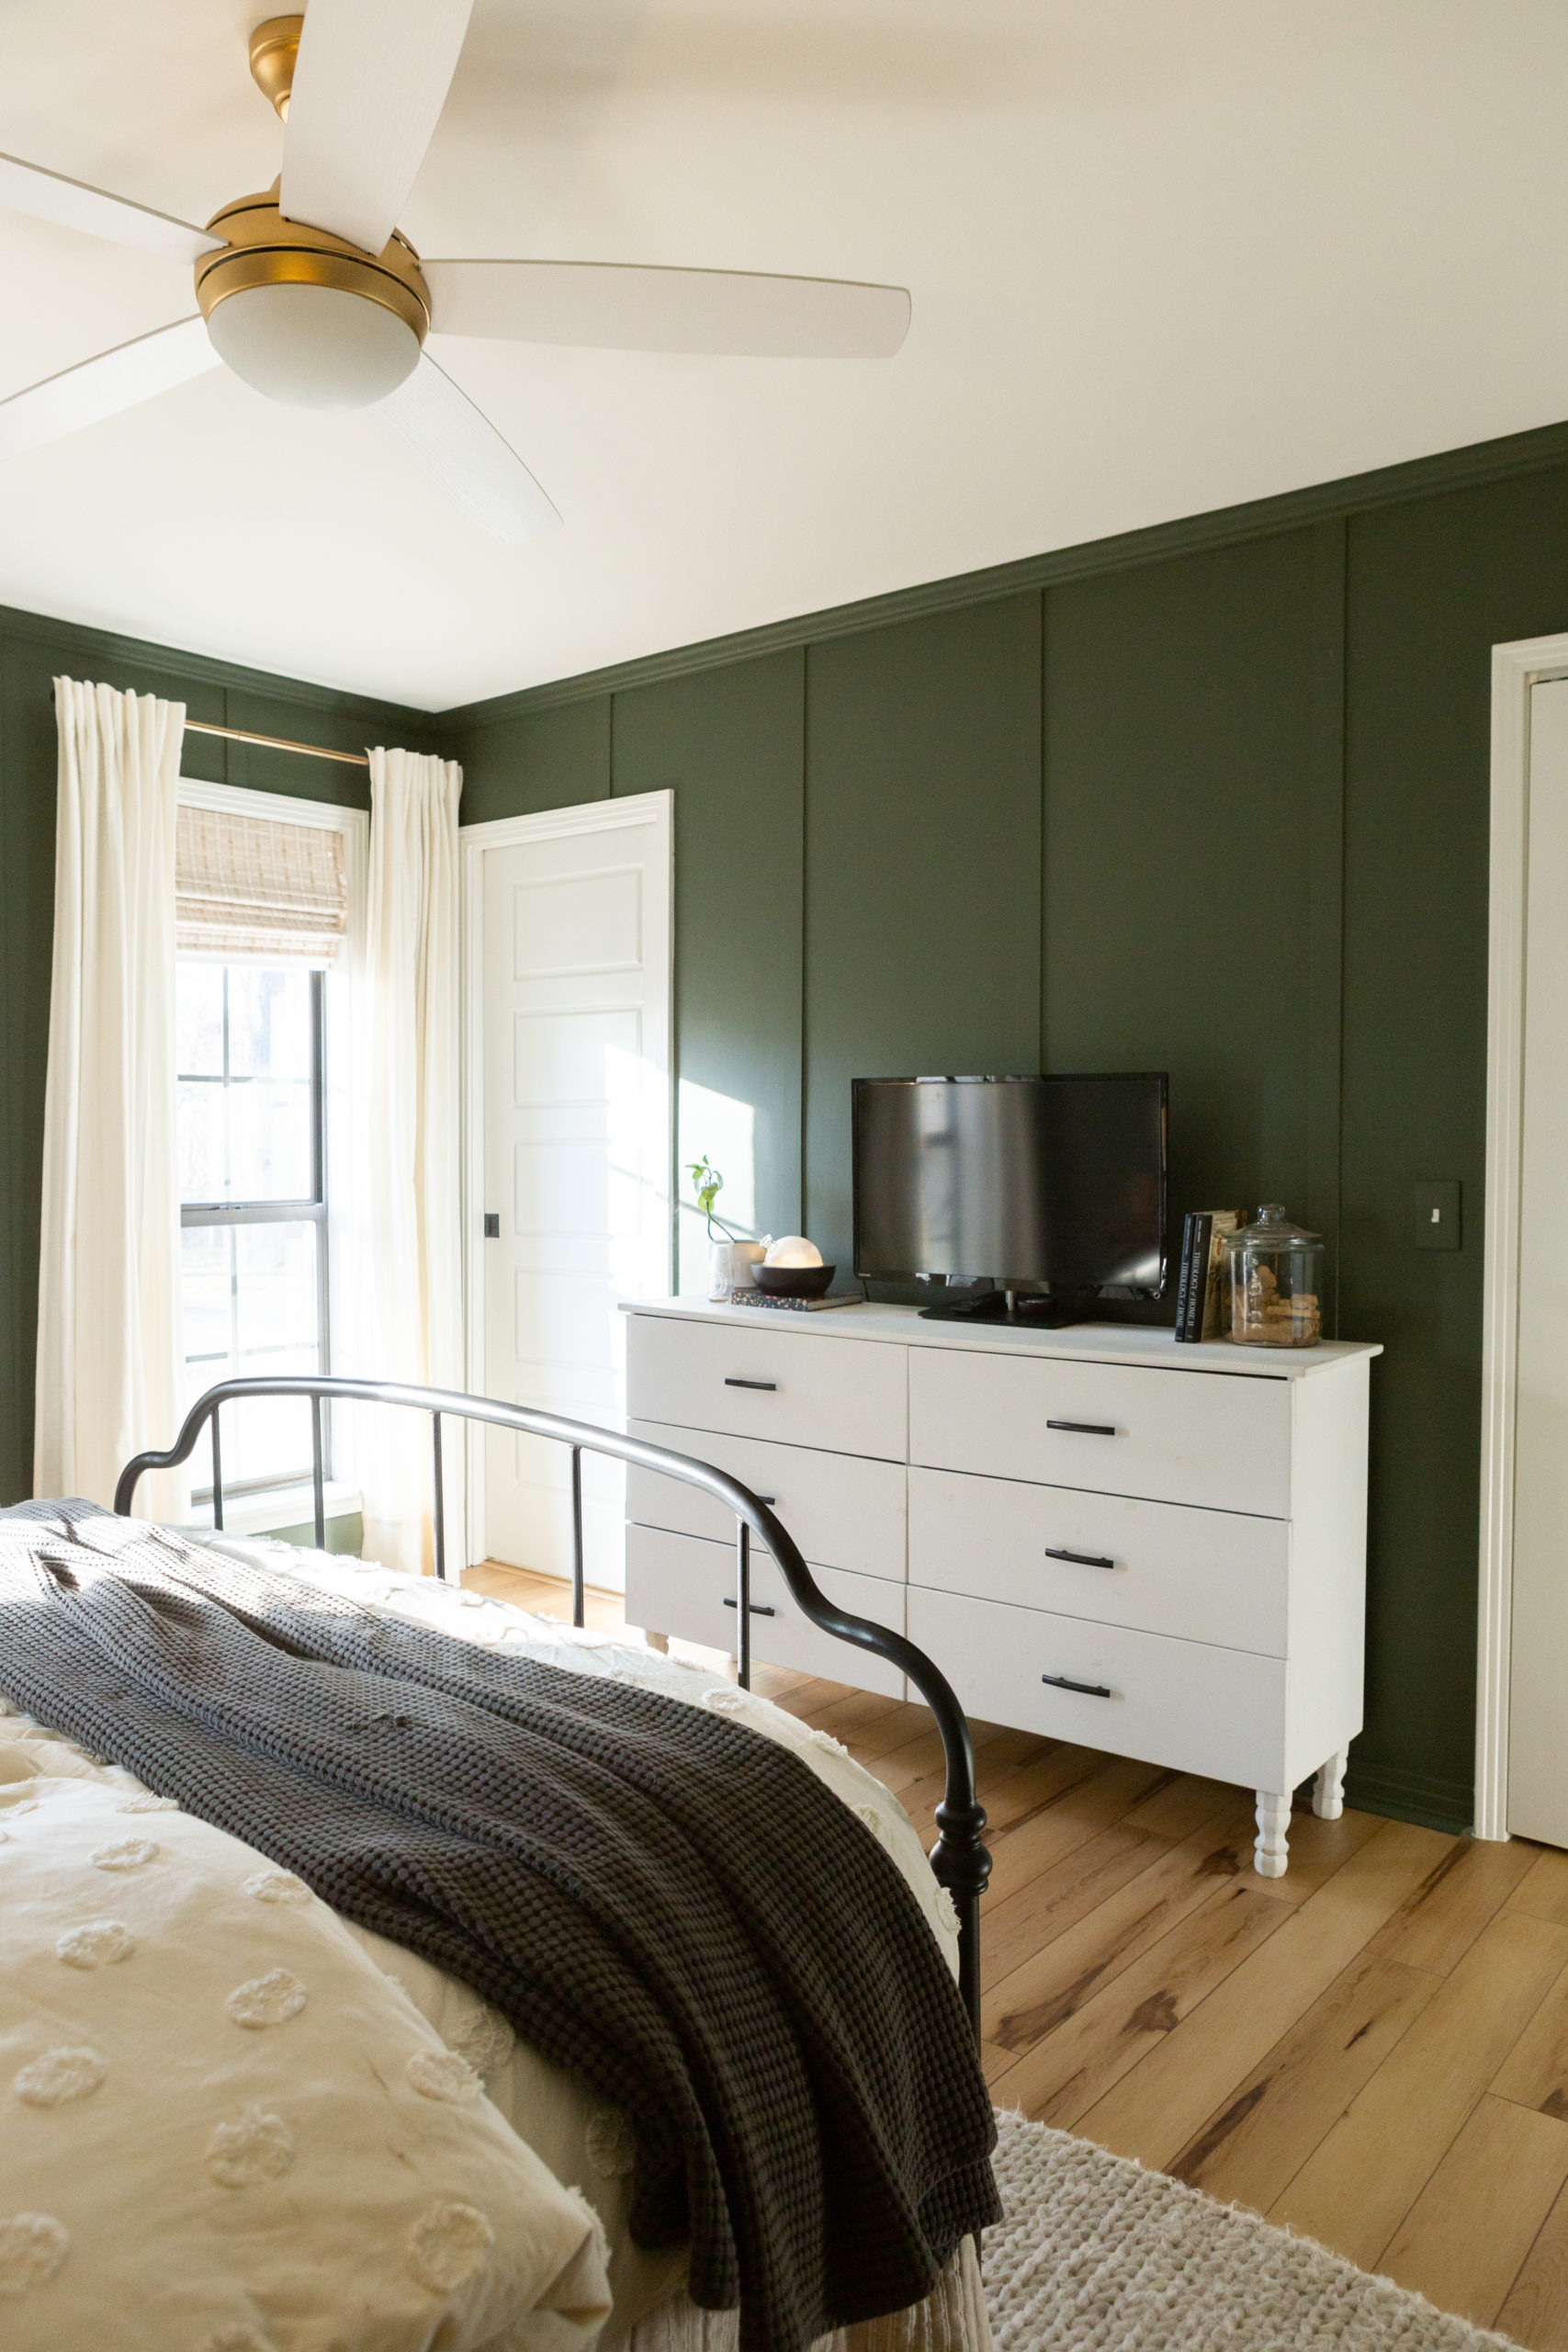
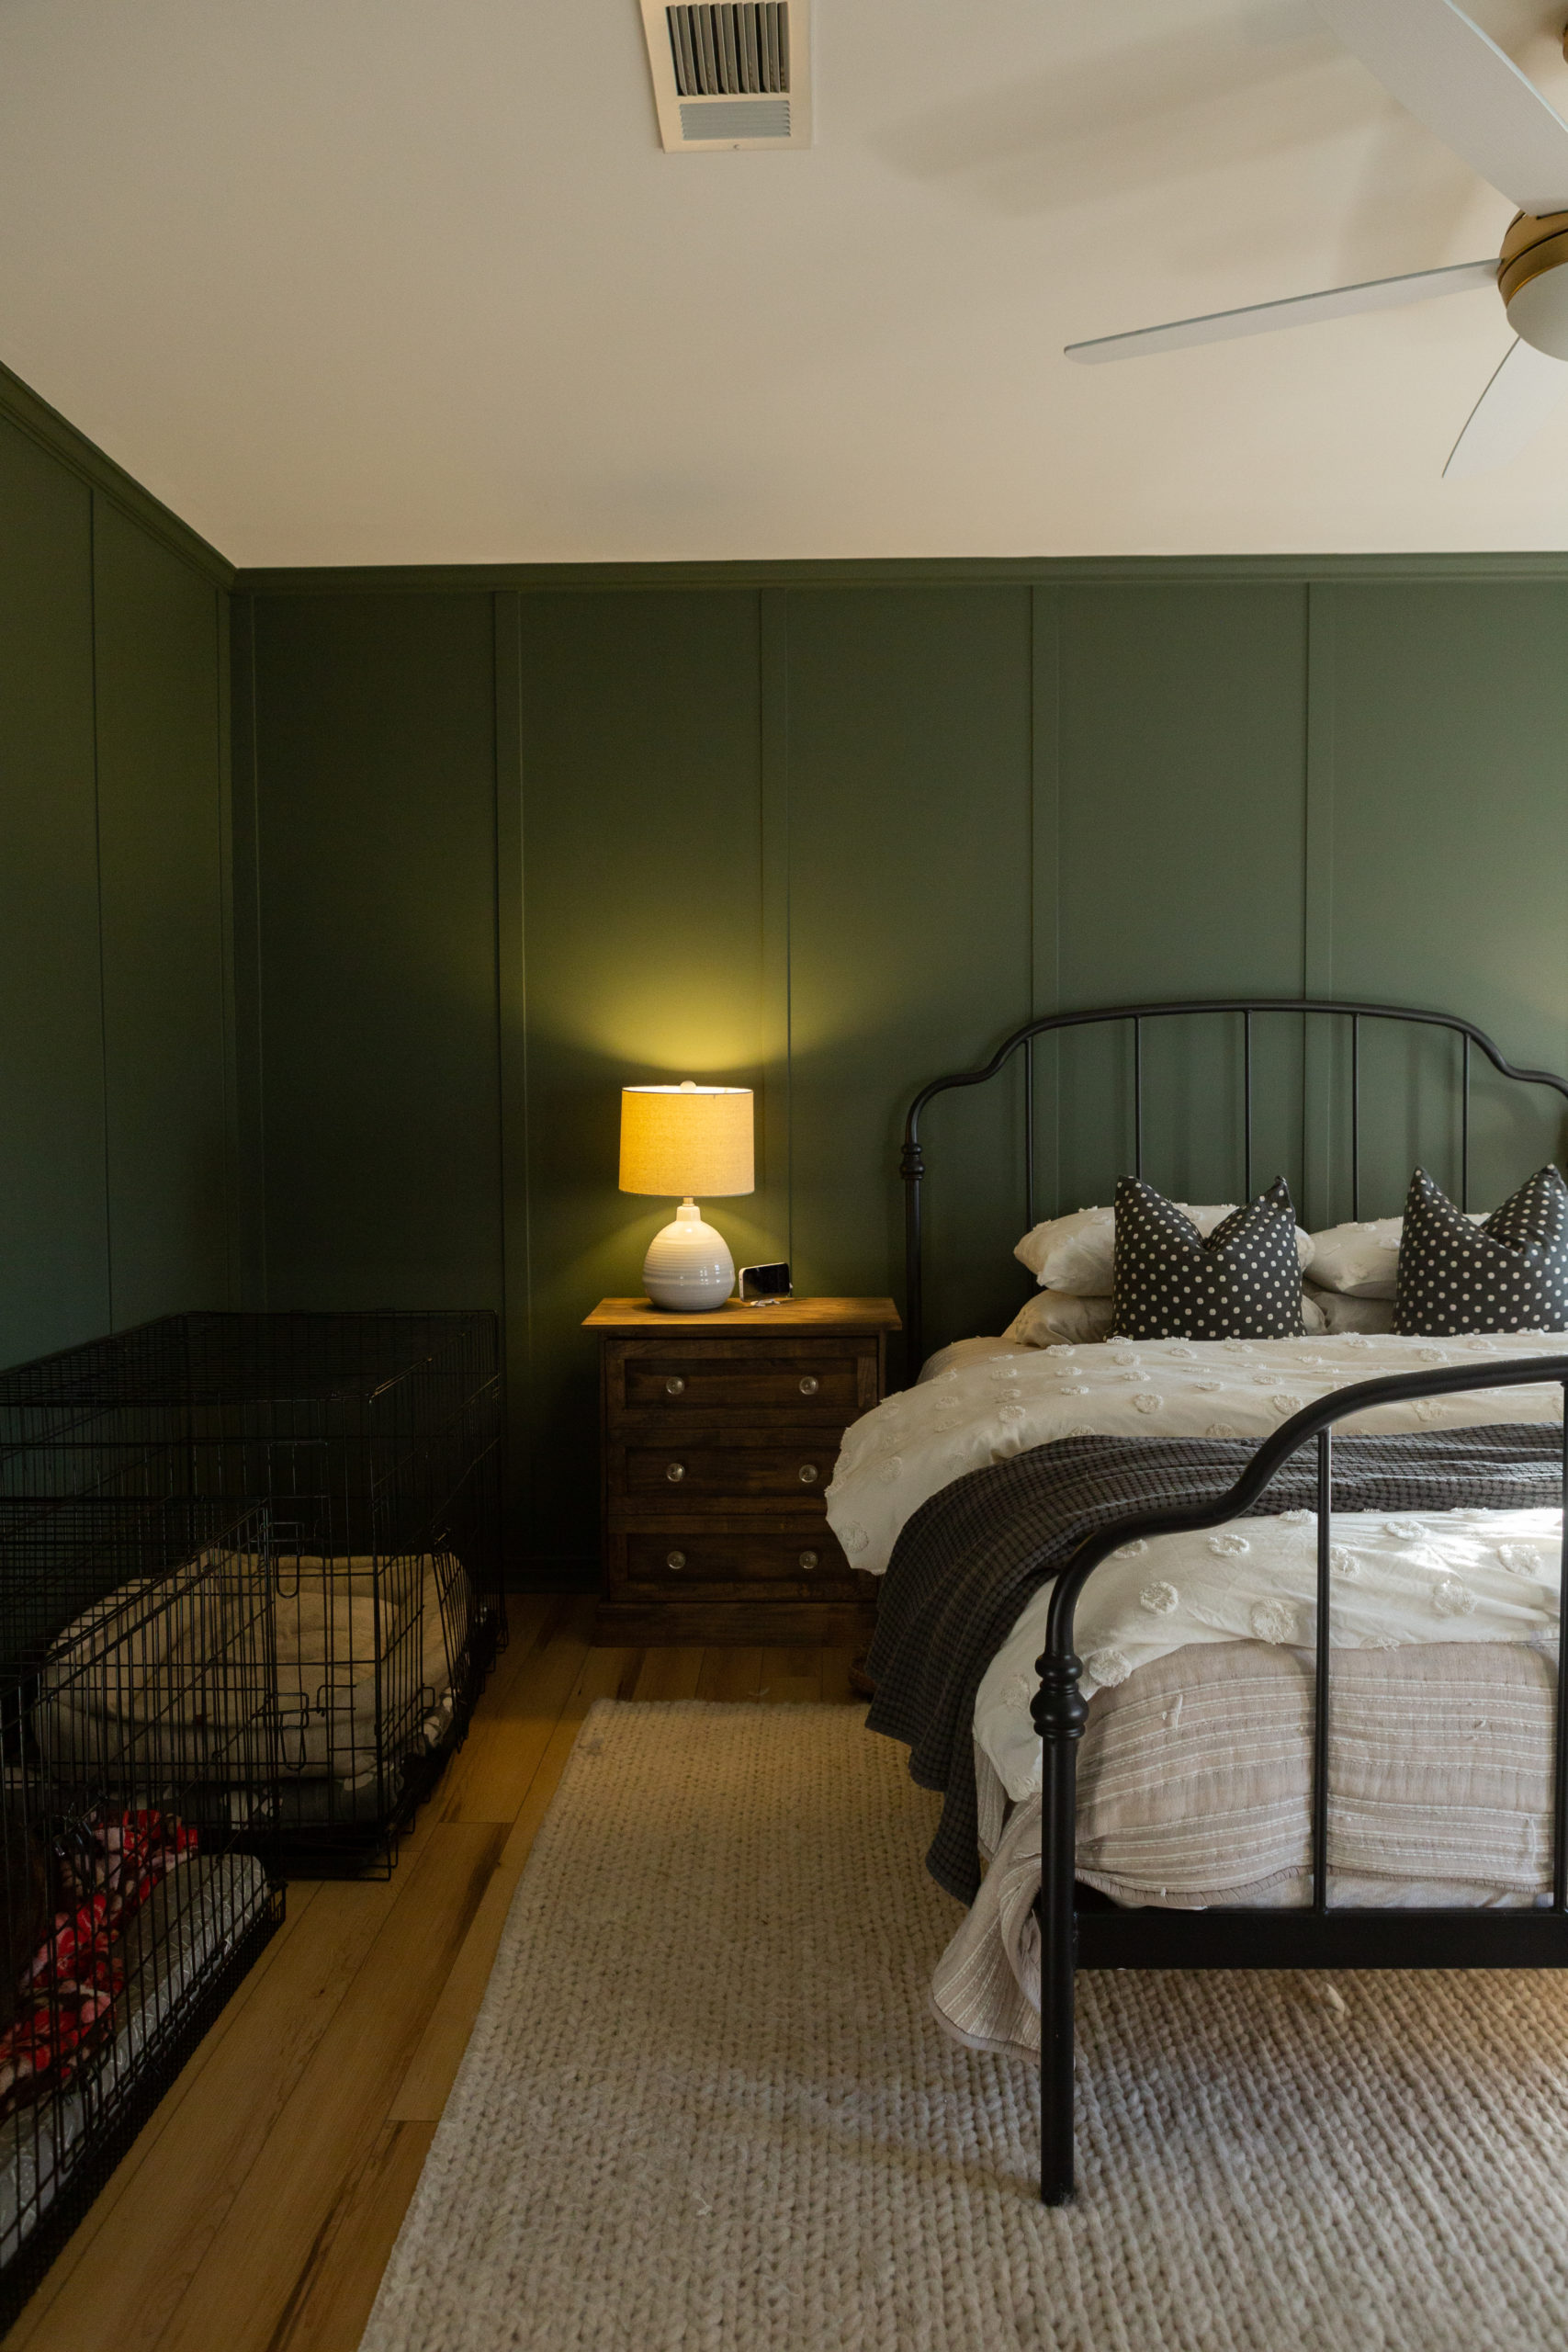
Once the board and batten was installed, caulked, and the nail holes were filled and sanded down, we painted the walls Benjamin Moore Vintage Vogue in a matte finish. We. Love. It. It’s a really rich beautiful green that doesn’t have any blue undertones. It is so pretty with the sunlight pouring in in the afternoon and also just as stunning at night with the glow from our bedside lamps. We painted the baseboards and the crown molding Vintage Vogue as well but painted the window trim, door trim, and ceiling SW Chantilly Lace like the rest of the house. Some of you suggested that we paint the entire room green from top to bottom and while I think that can be really cool in some spaces, our bedroom has a tendency to be way too dark and shaded so I think it would’ve felt too muddy for our liking. We think painting the baseboards and molding while keeping the other trim white ended up being the perfect balance.
At this point we were rushing against the clock because we were hosting a large gathering for our squadron and needed to get all of the furniture back into our room so we ripped up the carpet and the two of us worked our tails off to get the new LVP flooring installed. We finished in the nick of time and couldn’t believe how impactful a fresh ceiling, floor, and coat of paint looked in here! It felt so new and OURS! Here’s a photo we quickly snapped with a Jerry-rigged camera setup to commemorate us finishing in time.

We didn’t end up buying really anything new for the space except the fan and our bed, which we purchased because we sold our former headboard with our SC house. We found our current bed before we moved at a store in Elgin, SC called Cost Cutters Liquidation. If you’re in the area, it’s an amazing store that sells things with damaged packaging for extremely discounted prices. We got this bed for a steal and love it so much (unfortunately I haven’t been able to find it on Target’s website in well over a year). It’ll definitely be going with us to the next house! Everything else that you see in our bedroom we have owned for years.
Speaking about that, I want to take a second to highlight something really fun – if you look at the photos of our bedroom in our last house, the only difference in what fills each room is our bed and yet the feel between the two is completely different, right? How cool is that?! I’m sure some of you love our current bedroom while some prefer our former one and some might not like either! I love that we can all lean towards such different vibes. It’s so fun to settle into our own style, isn’t it? I sure think so.
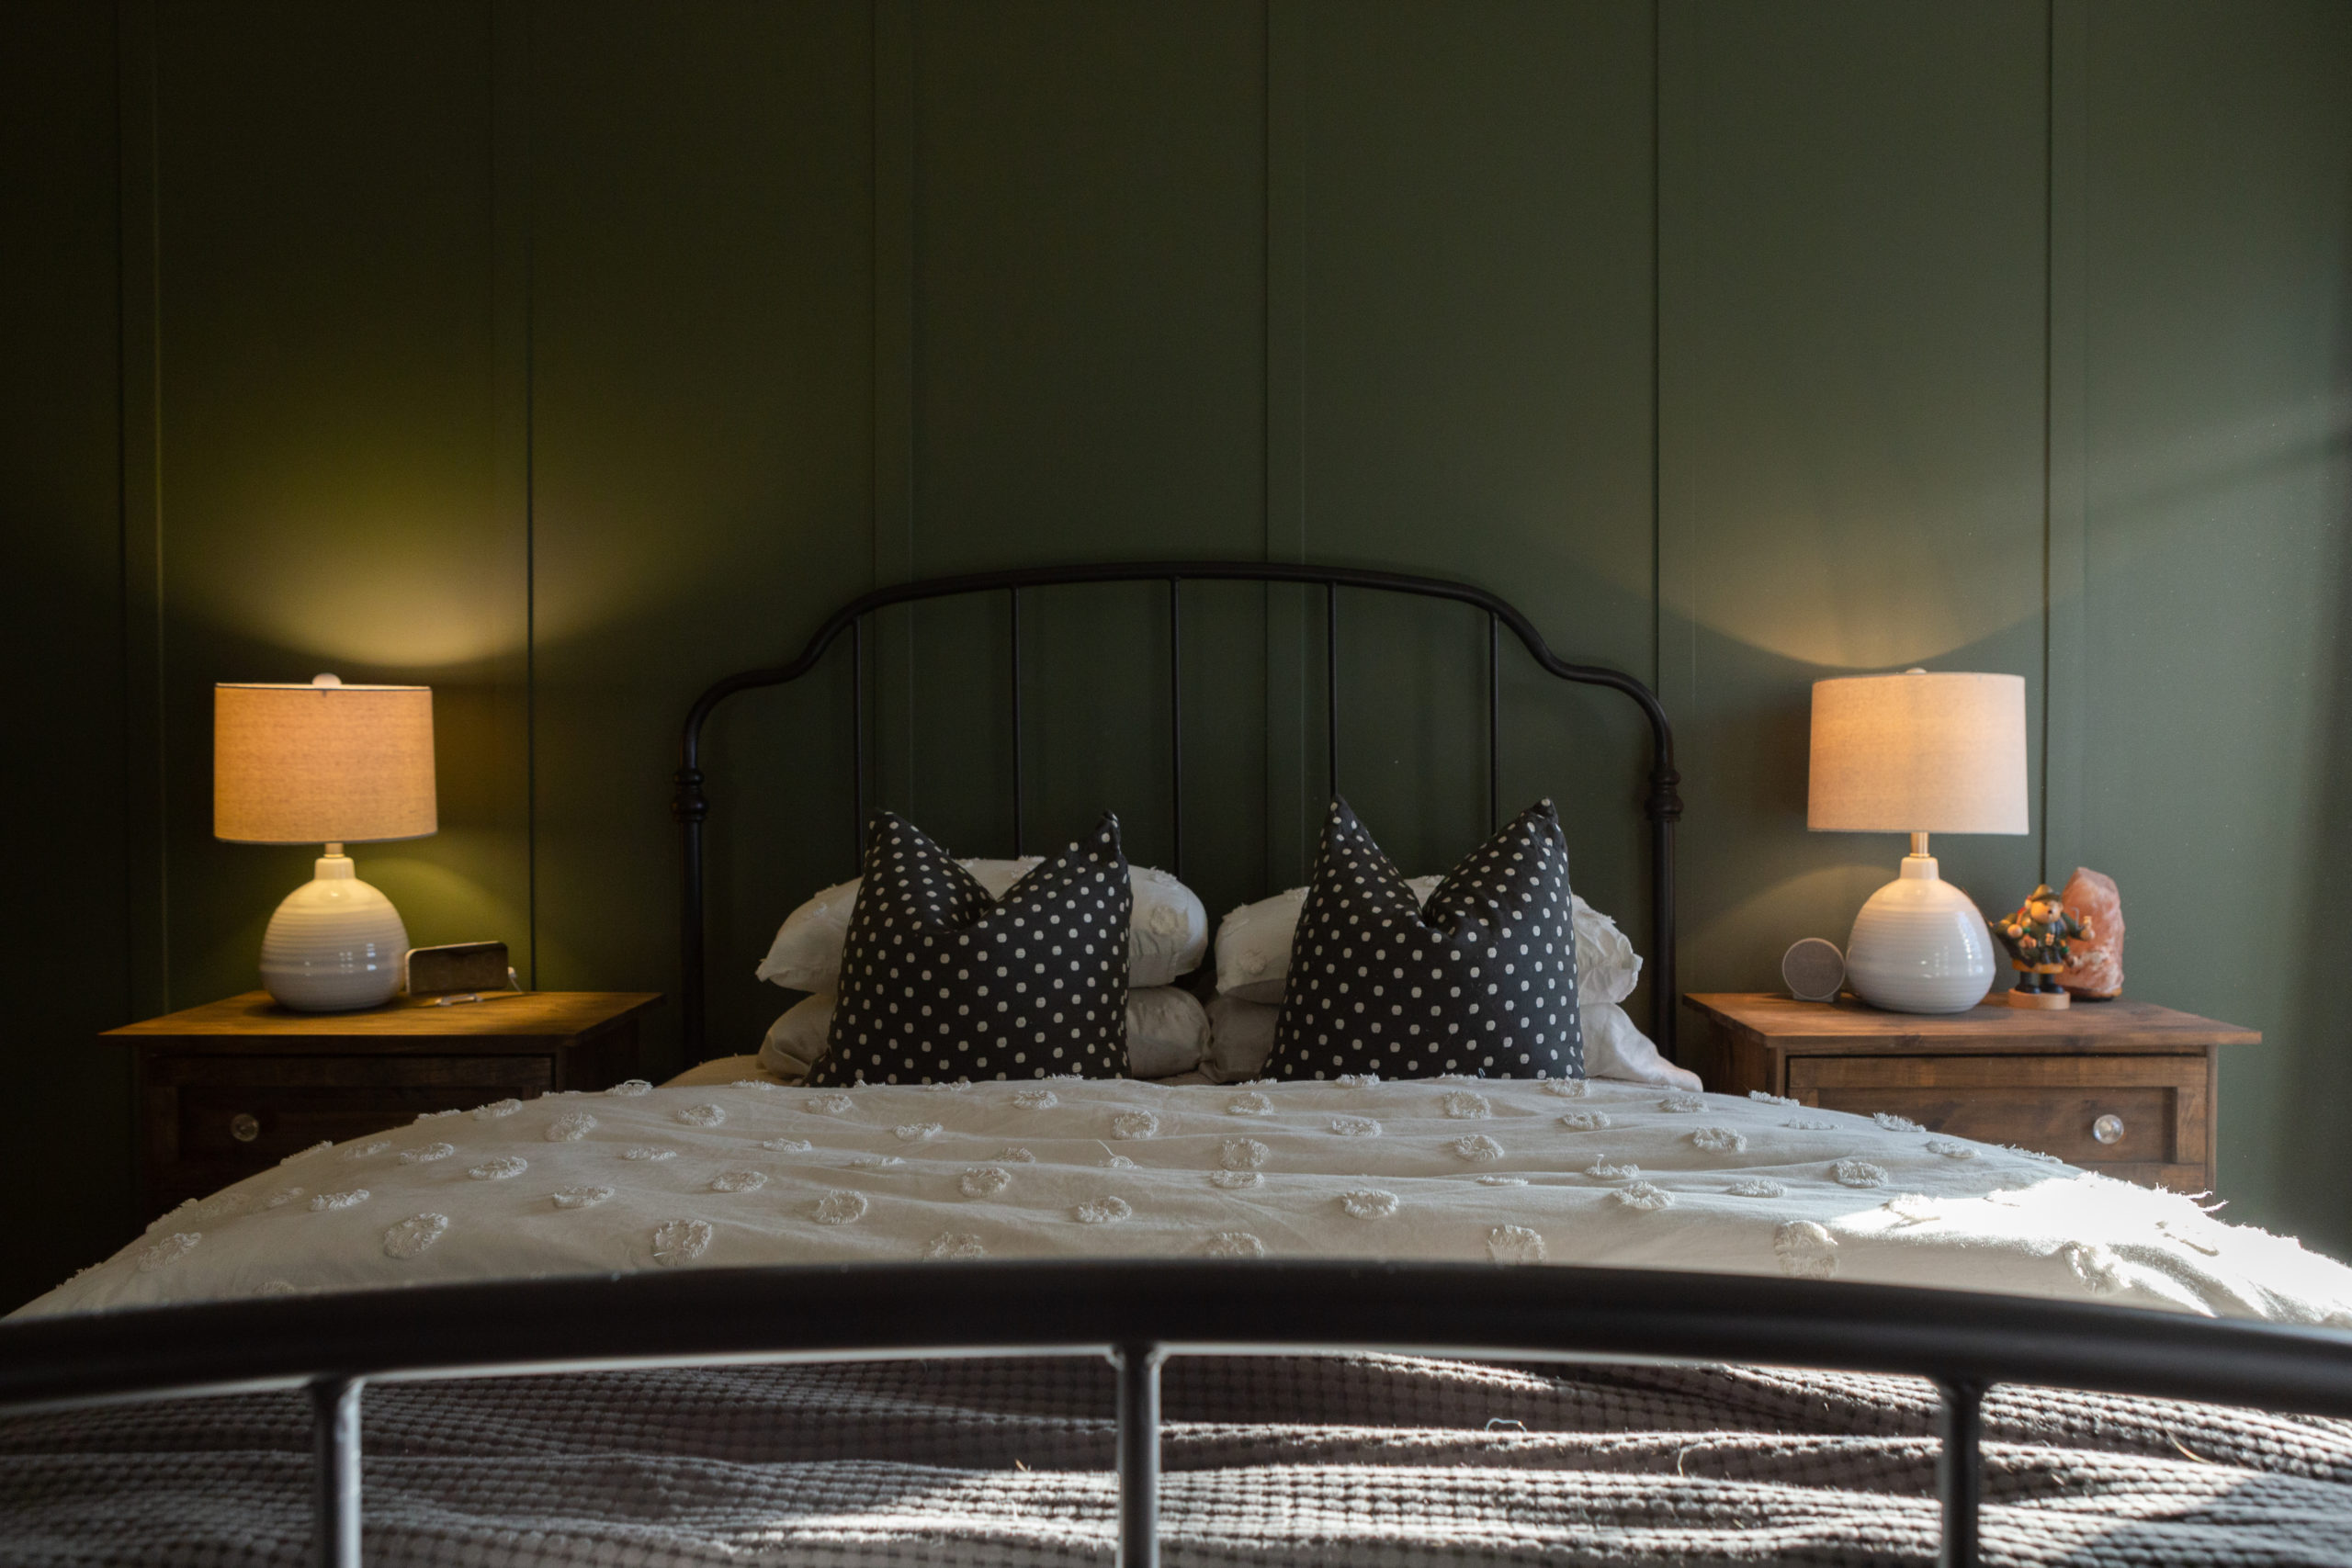
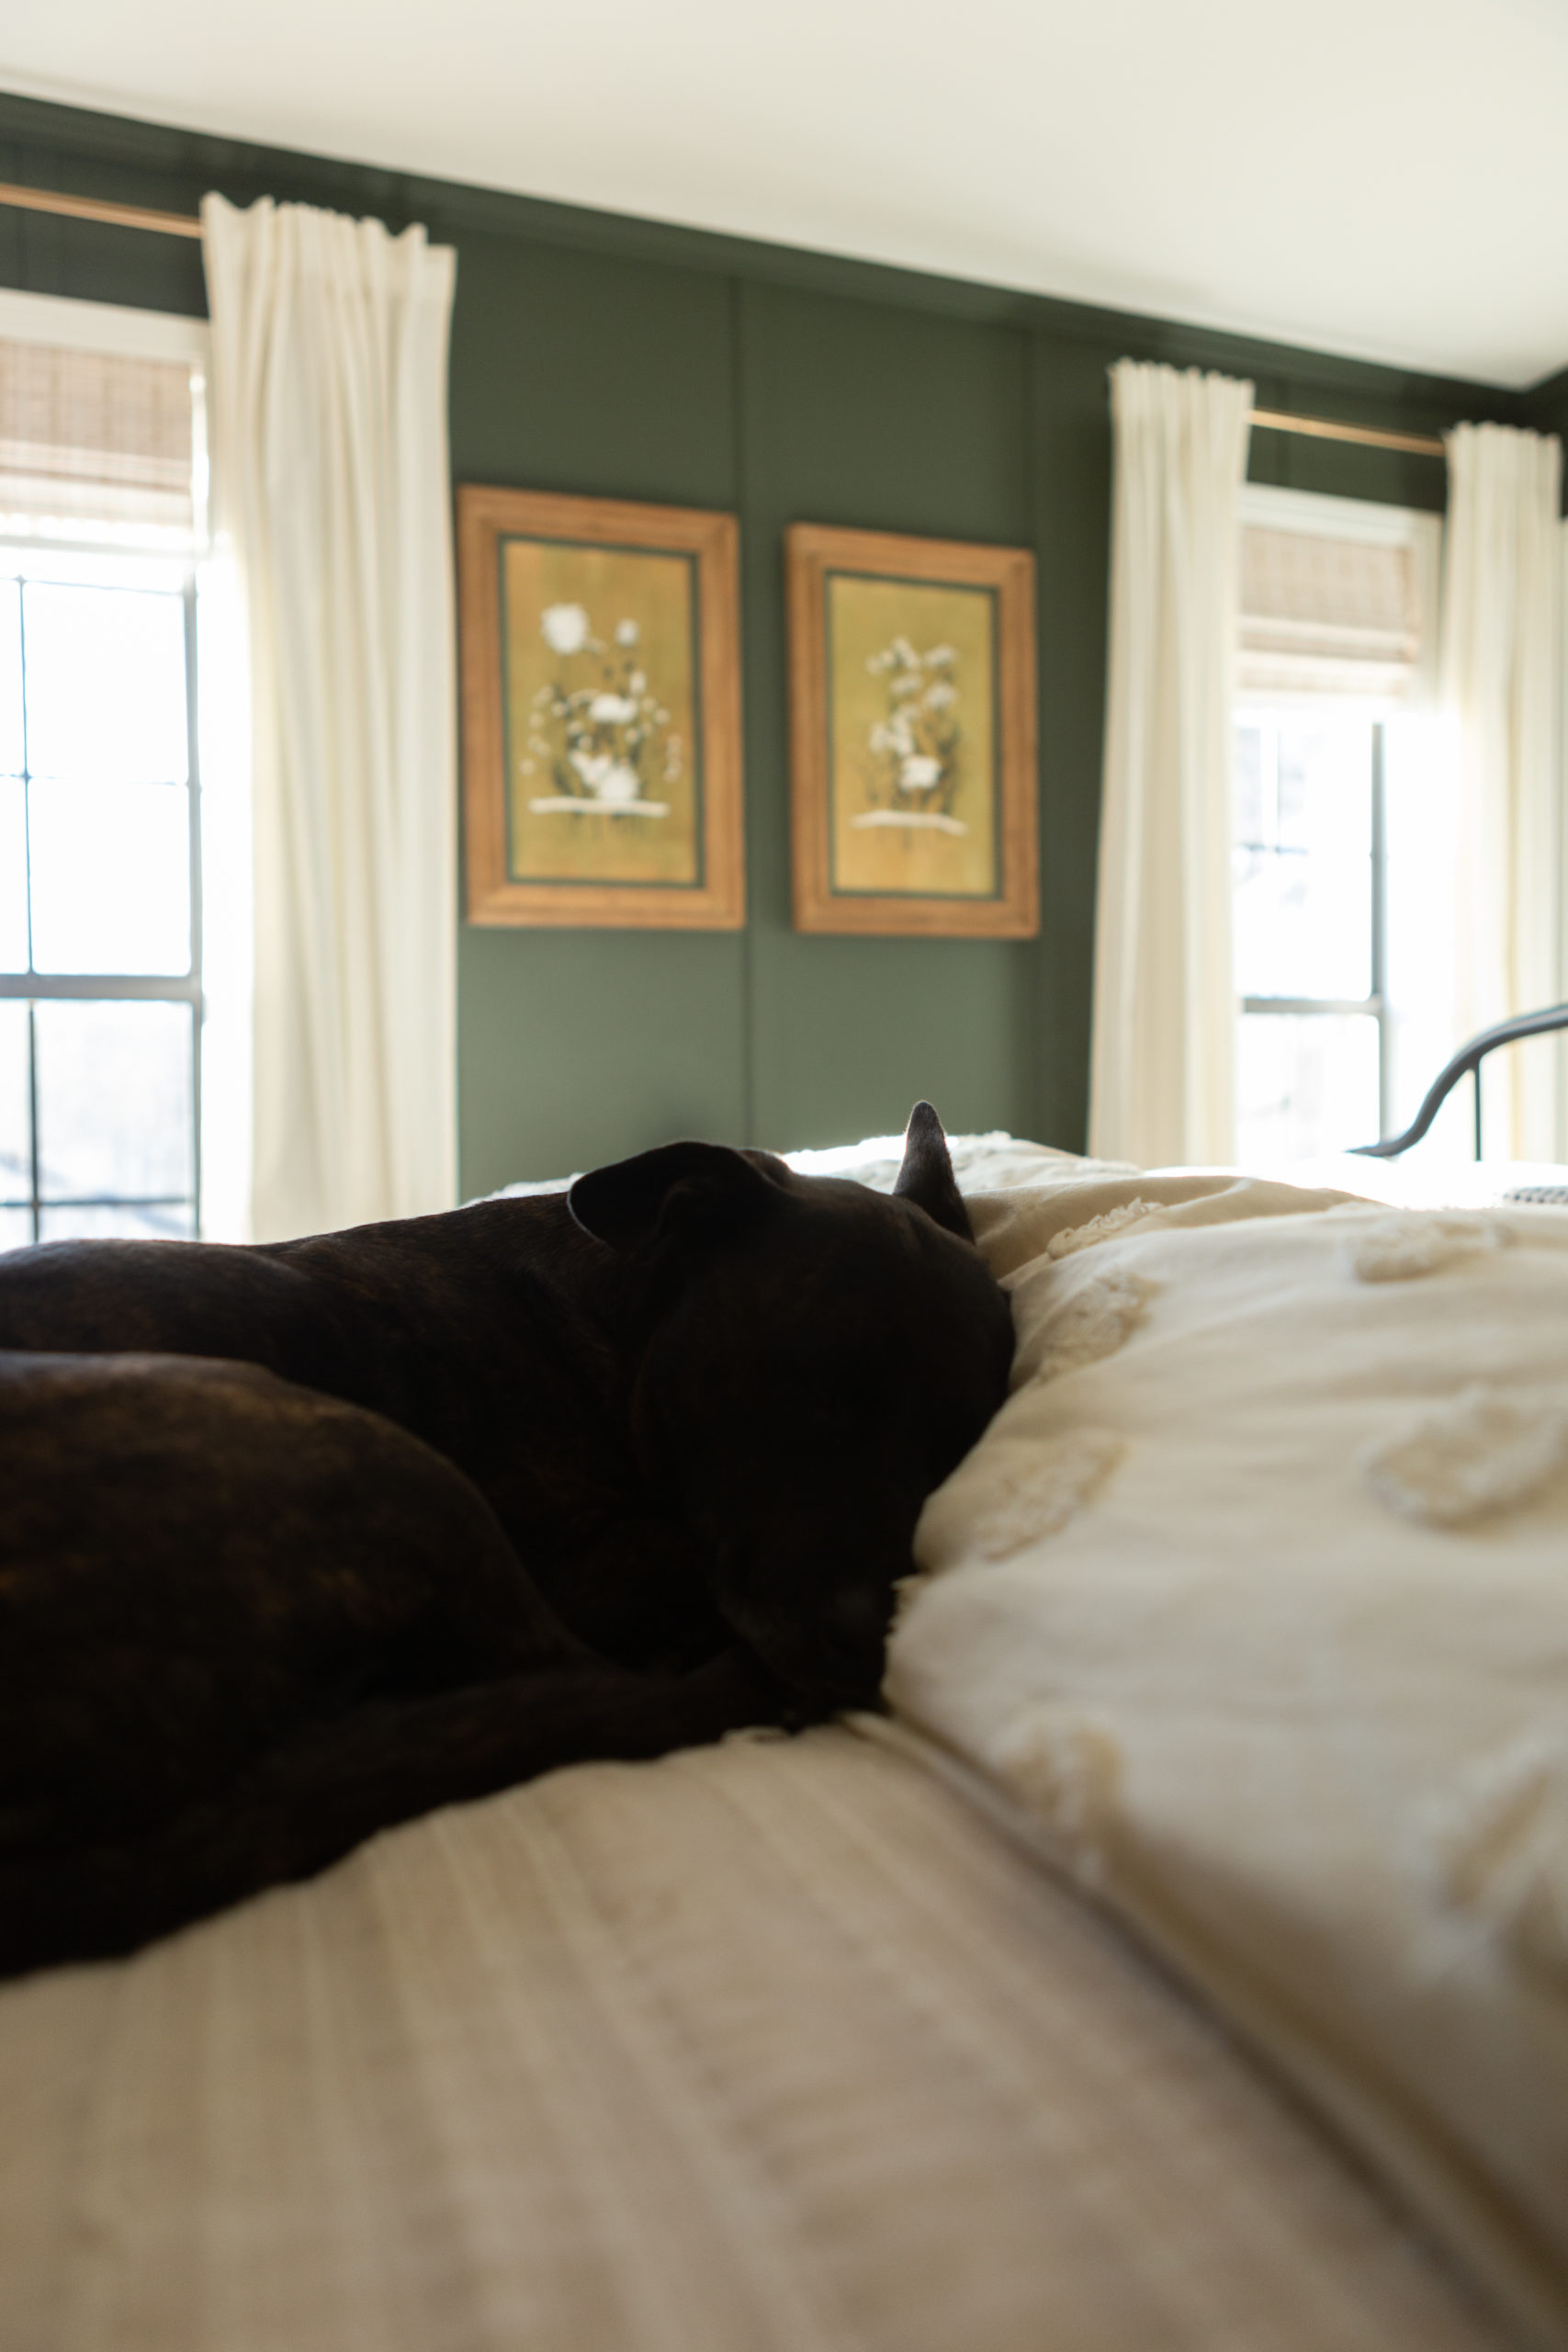
For our bedding, we layer a quilt on top of our sheets (if you haven’t purchased sheets from Costco… They’re awesome!), a duvet filled with a down comforter on top of that, and a throw blanket. We use all of them during the winter! In the summer we’ll typically keep the duvet at the end of the bed while we sleep. We also tend to open up the dark throw blanket to put over the duvet during the day to protect it from the dogs.
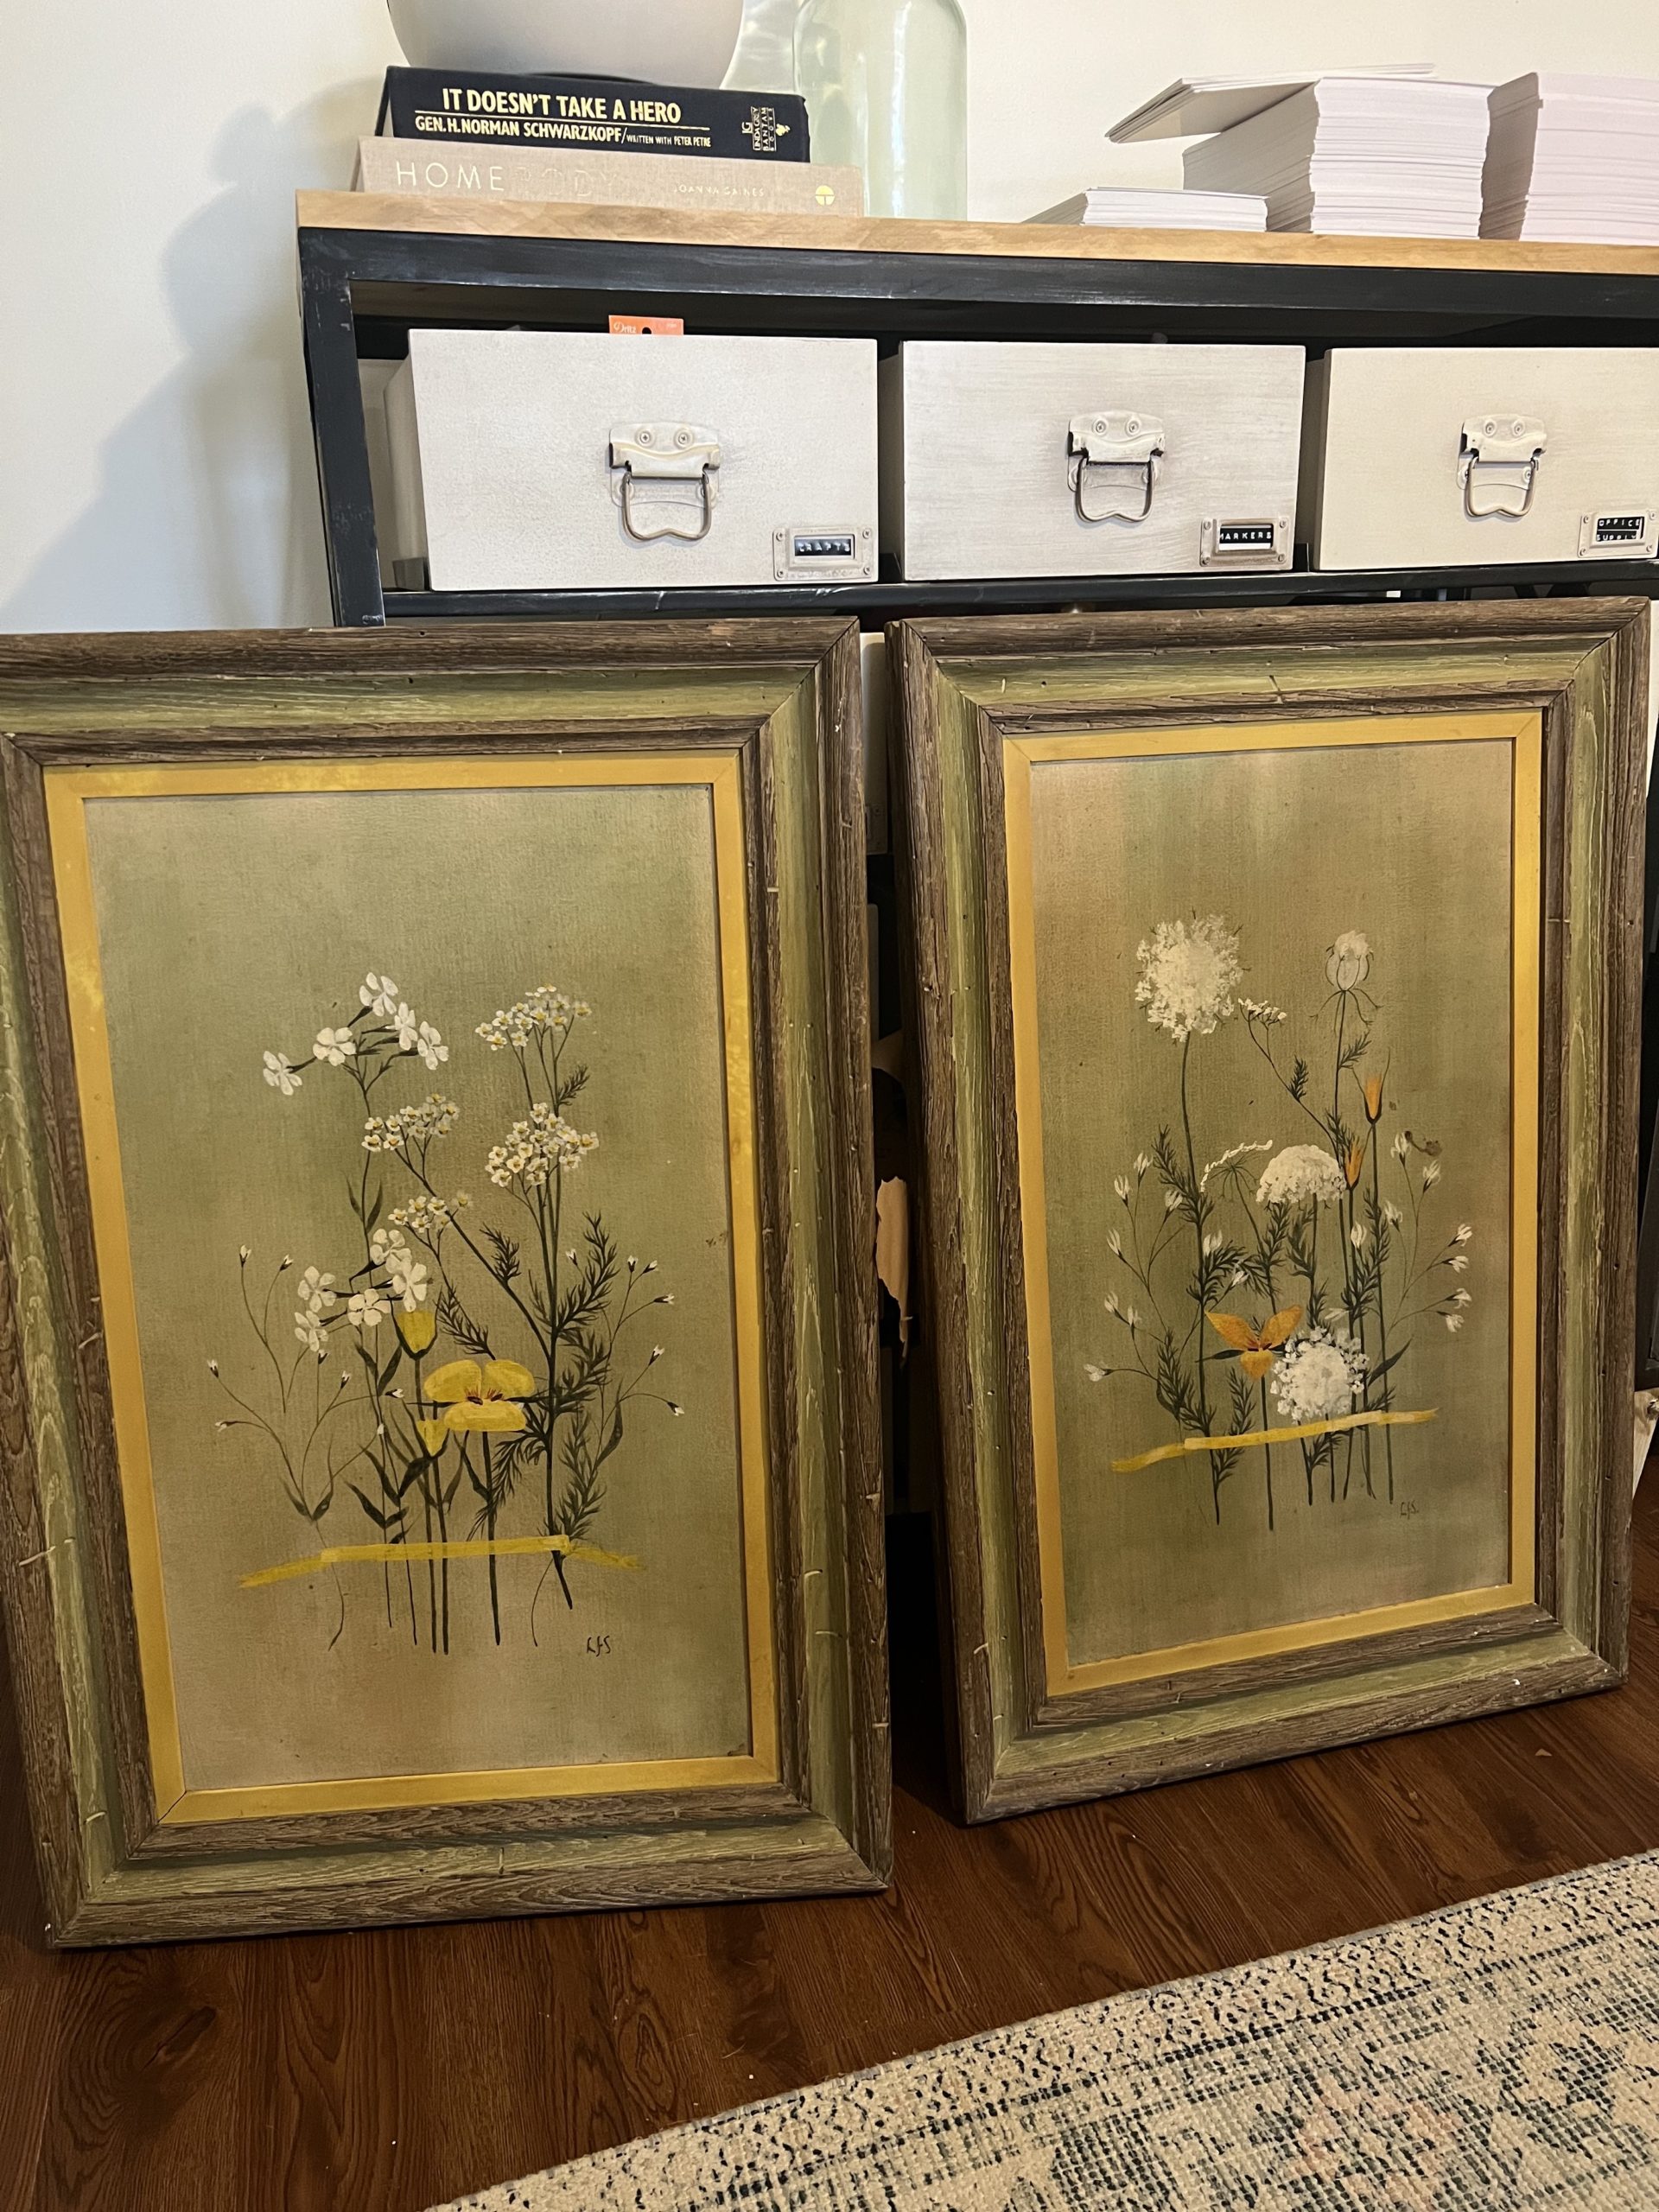
I found a pair of artwork at a local vintage shop because I loved the set. However, once I got them in the room something just wasn’t sitting right so I decided to work with each one until I loved them in there. I’m sure some people might gasp at the thought of tainting with a vintage piece but I’m team fill your home with what you love and so that’s what I did. I removed all of the stain and color of the frame to expose the natural wood color, painted the yellow border, and repainted the flowers so that they contrasted more against the background.
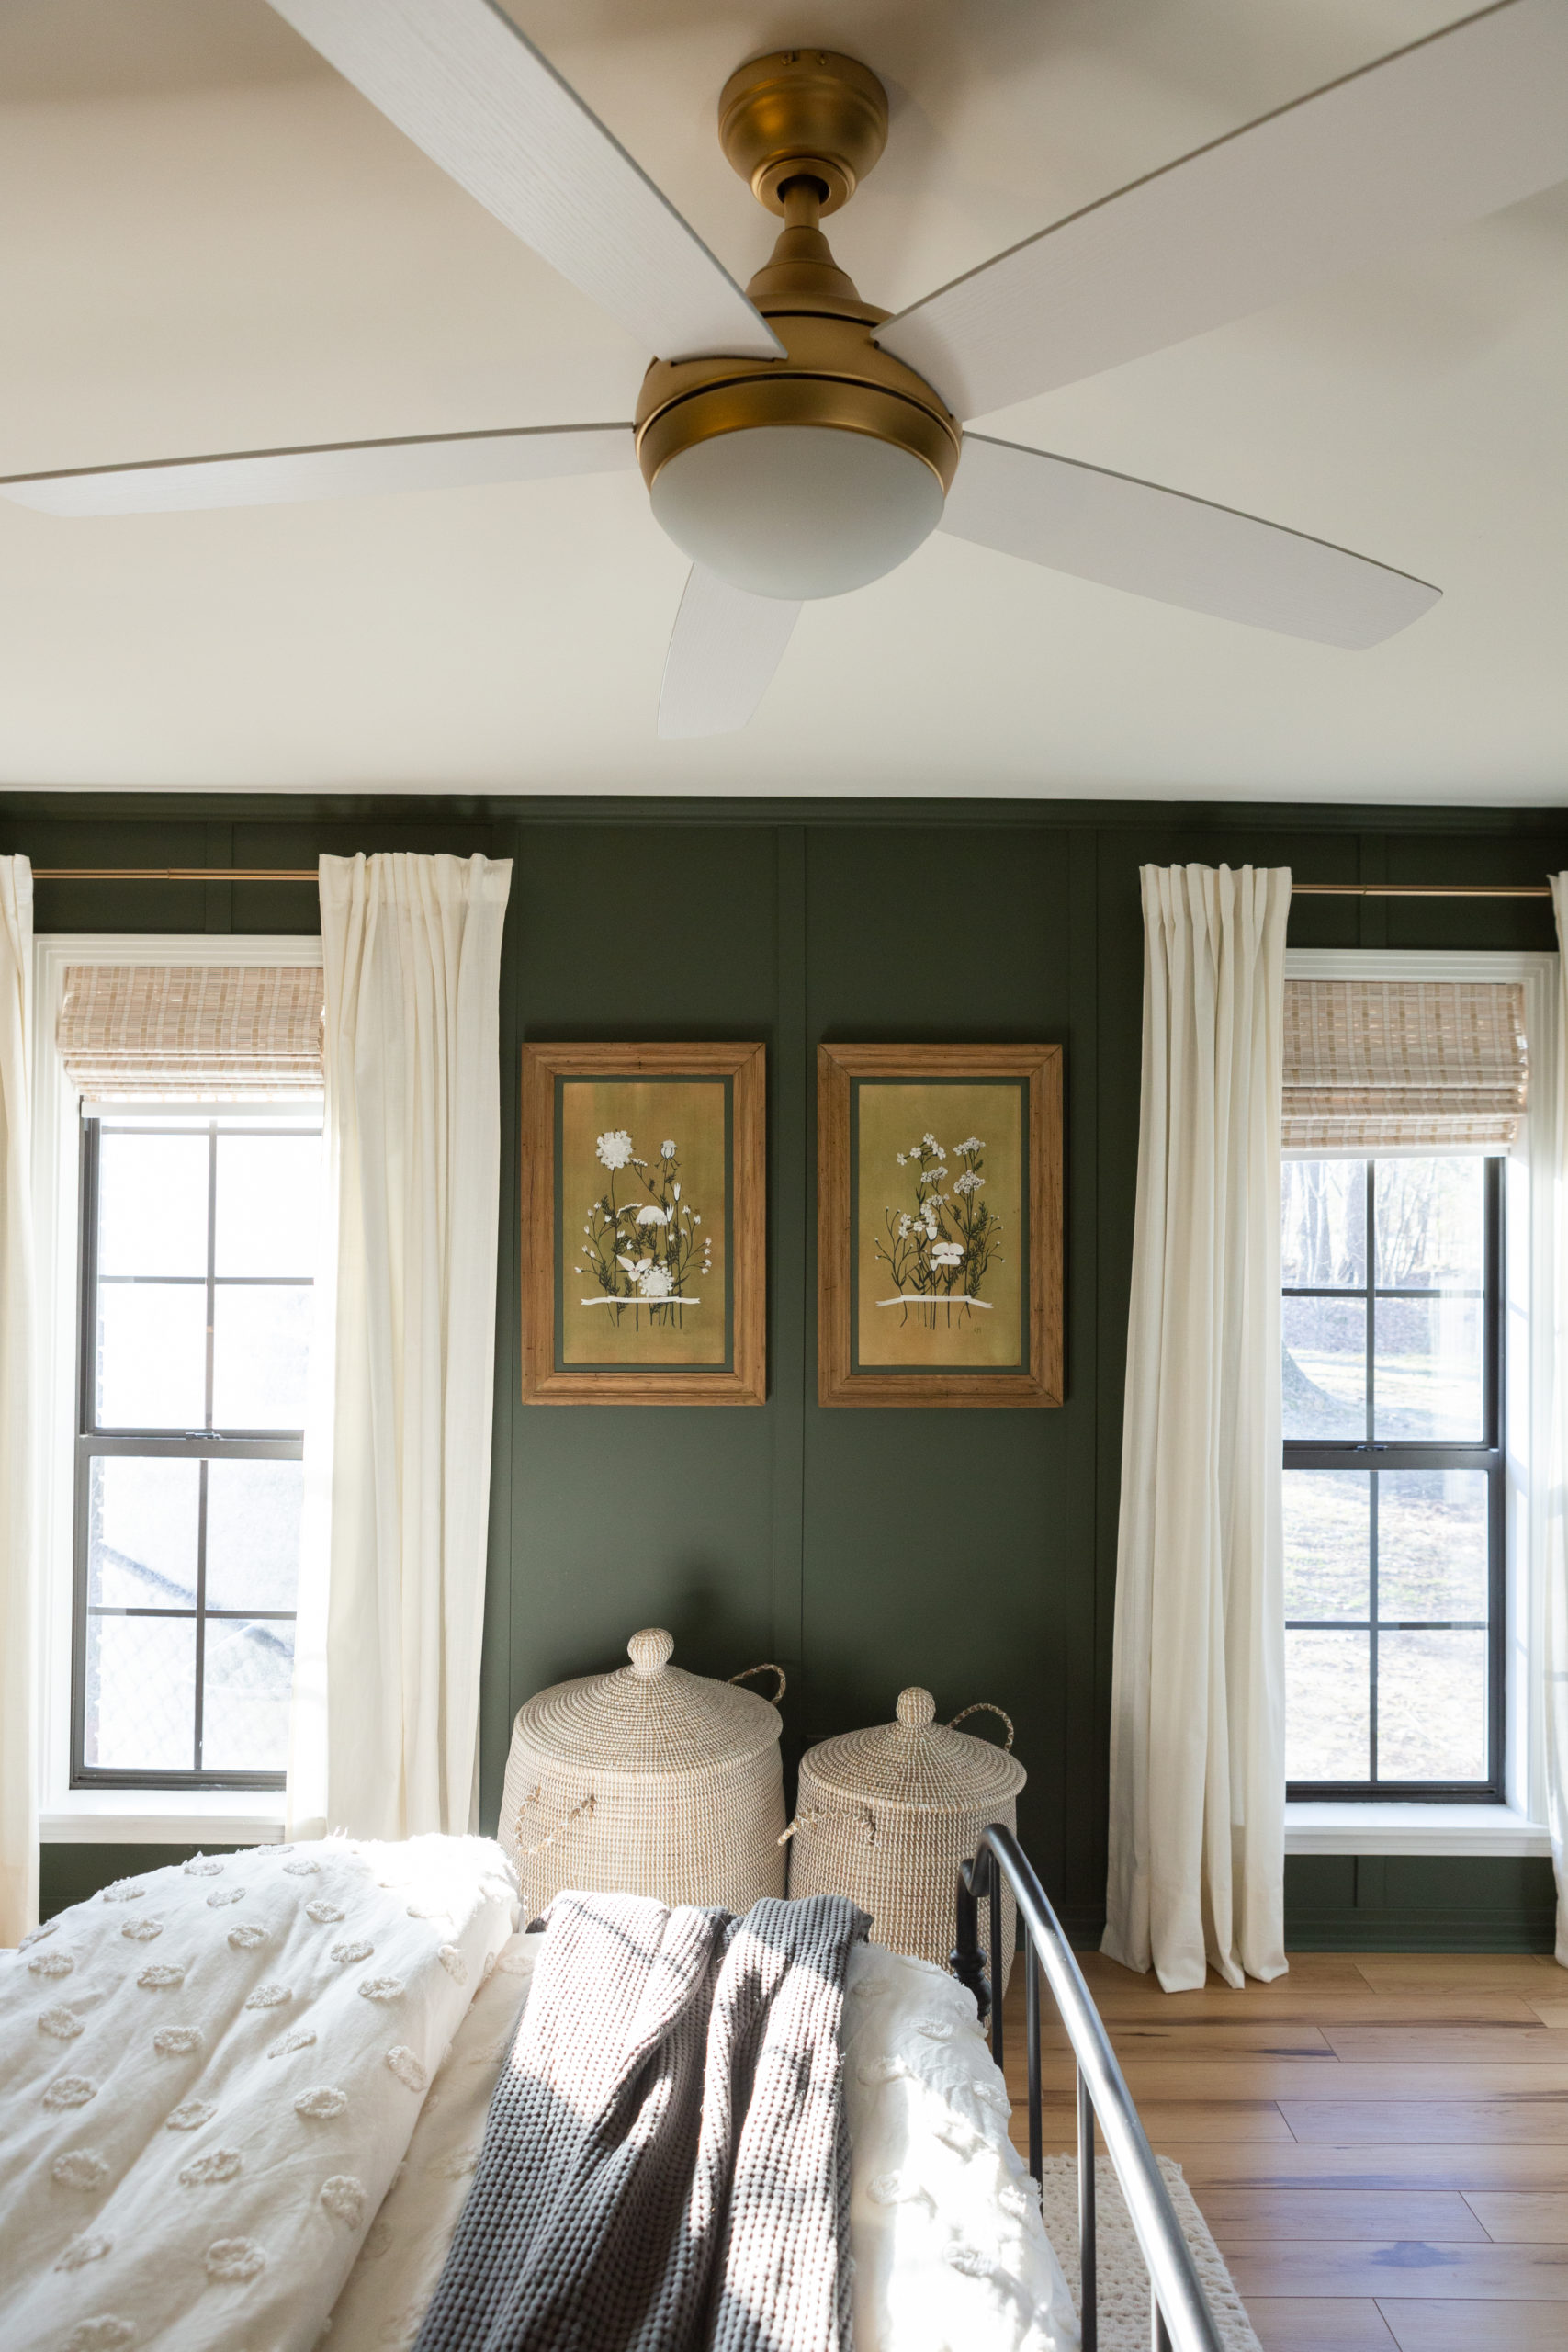
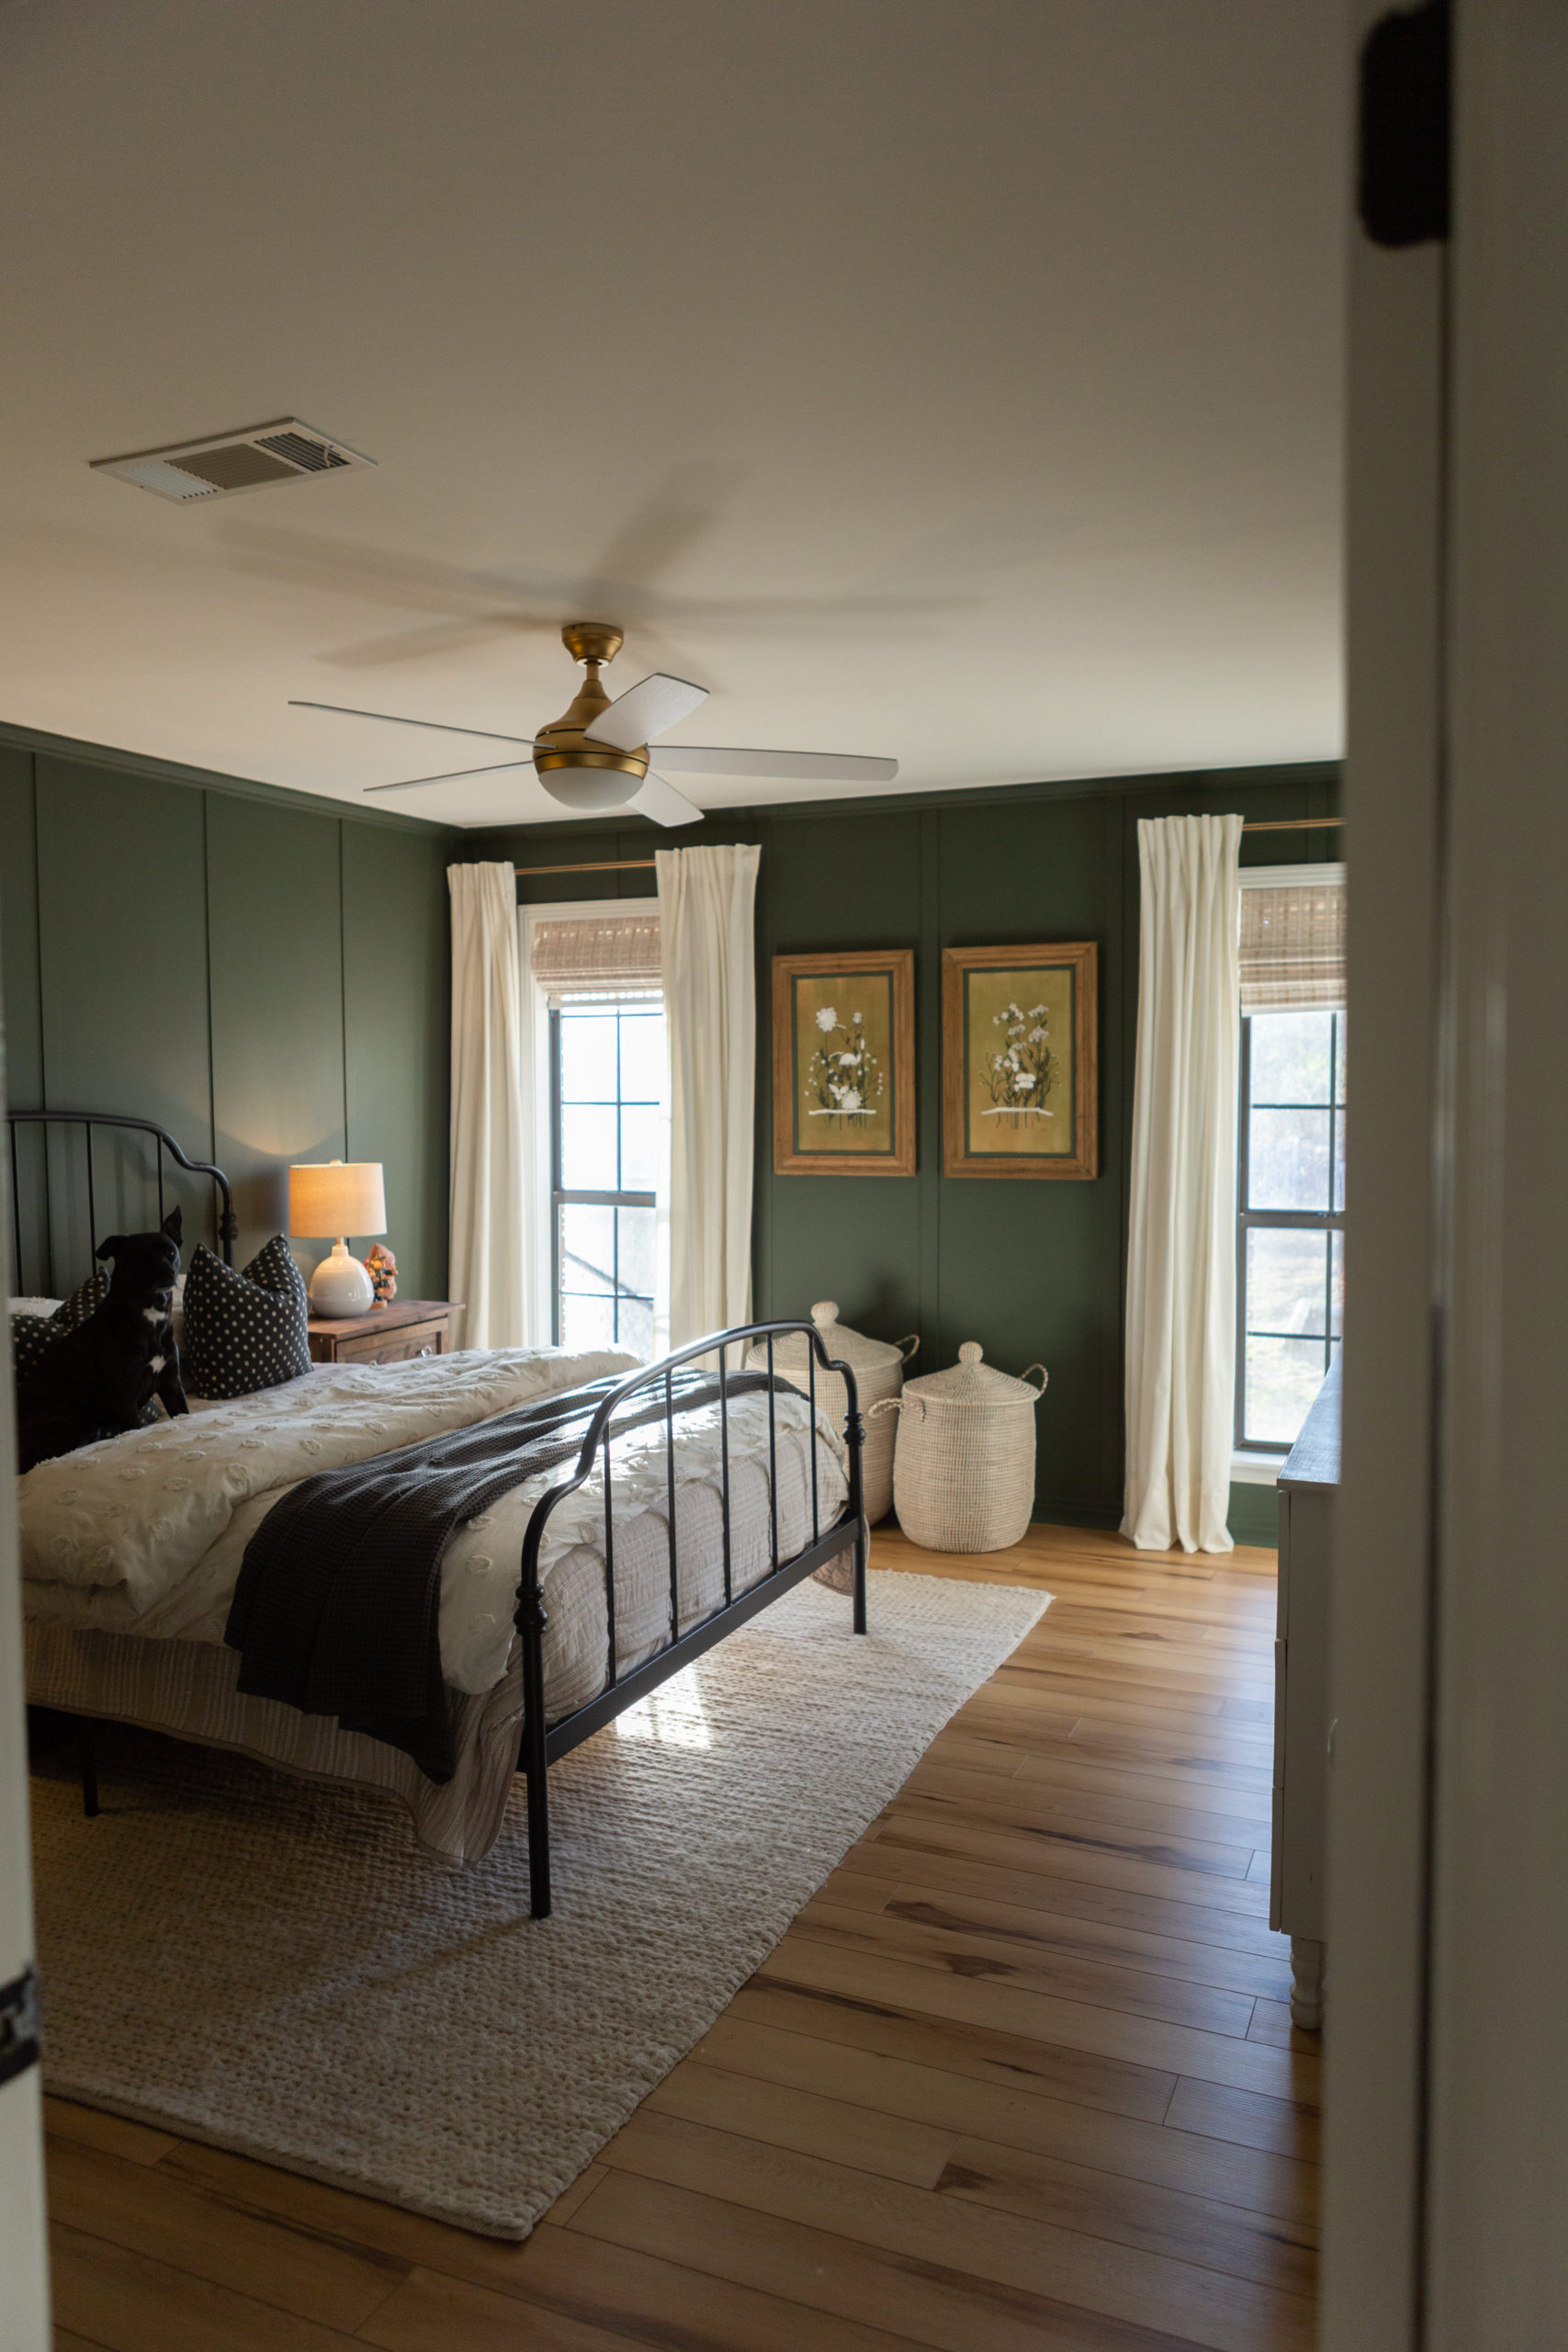
As for the little details – I painted the outlet covers and screws the same color as the walls so they didn’t stick out like sore thumbs. I did this by first sanding them down to give them some grit then wiped them off and sprayed on this primer. I let them dry, sanded them lightly with a fine grit sanding block, and then gave them two coats of the wall paint, letting them dry completely and sanding lightly between coats. It made such a big difference in here. I also spray painted this fan with this spray paint that we had on hand prior to installing it. In the photos it doesn’t look like there is a big difference in gold shades between the fan and the curtain rods but there is. The fan is more yellow in color. While I love that spray paint and think it results in a beautiful satin gold, I’d recommend using this one (Champagne Bronze) like I used on the entryway hooks if you want a closer match to the curtain rods I linked.

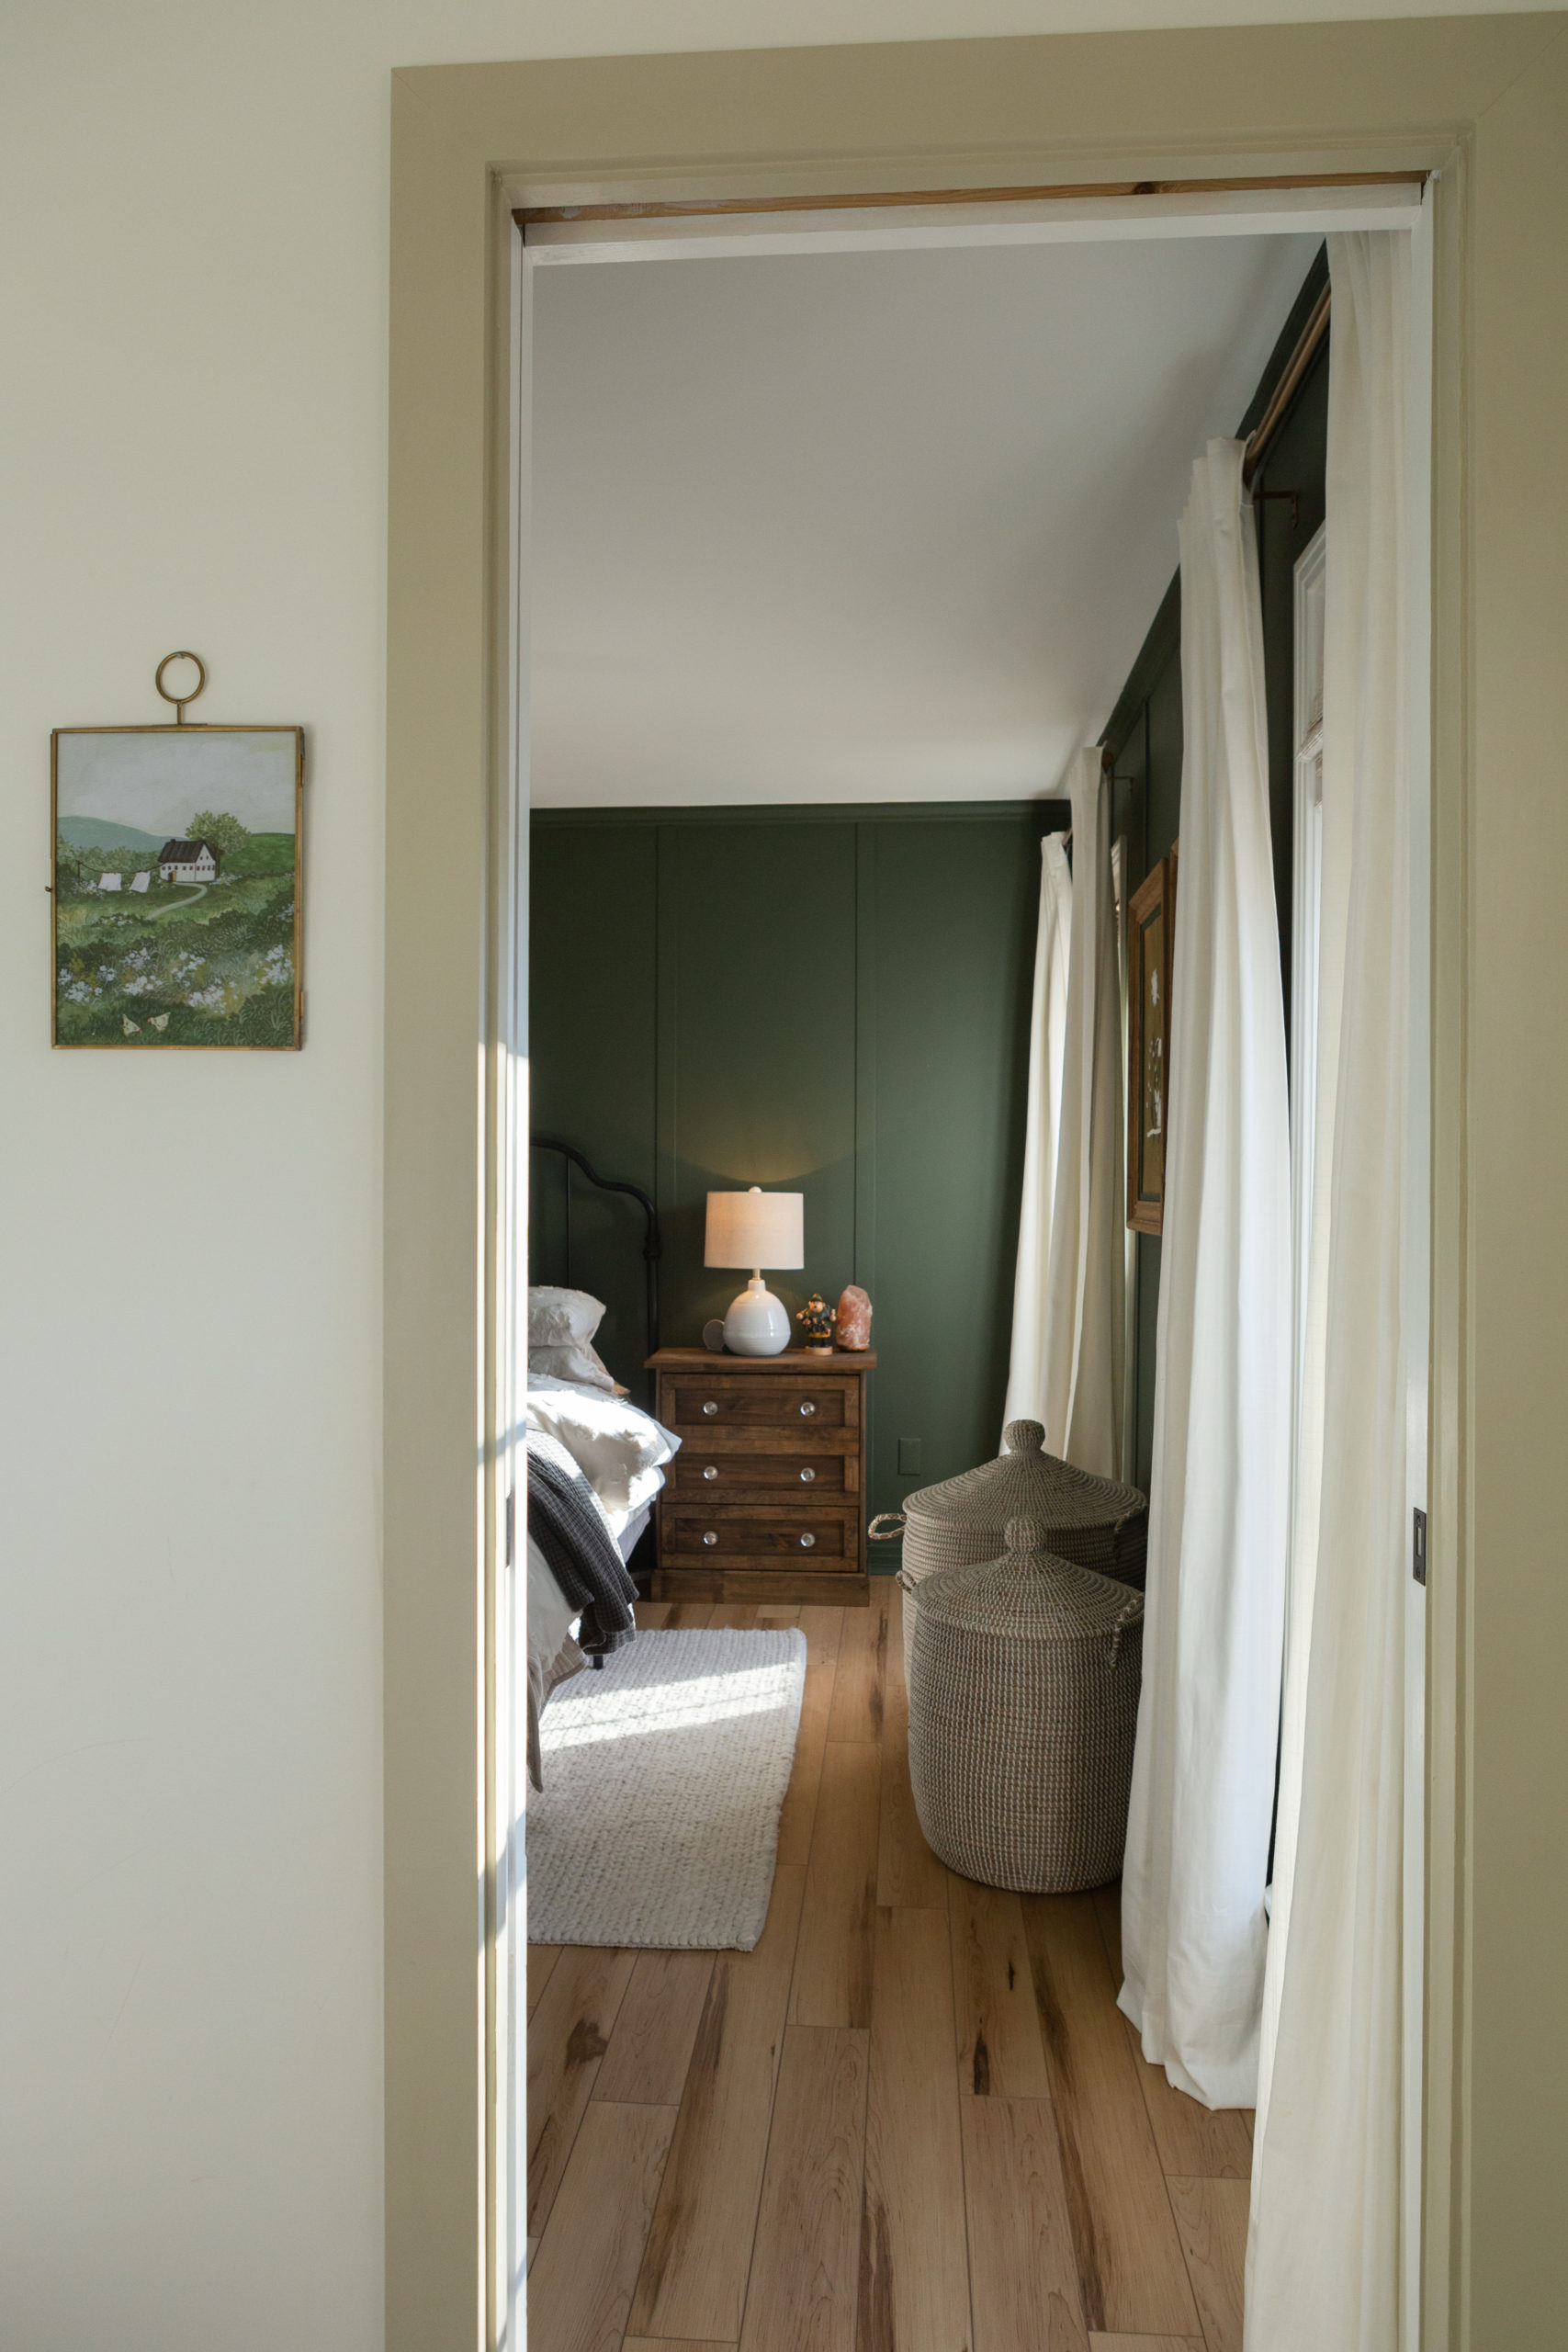
This is the view I see from our bathroom every evening when I prepare to sleep and it’s my favorite. I just love how the rooms work together, especially because of the painting we have in our bathroom.
The two hampers serve a purpose (a very smart one, in my opinion), by the way! The large one is for clothes and the smaller one is for undergarments. Since that is how I do our laundry, it cuts out the sorting process, making laundry much more efficient for me. I highly recommend. The curtains are some of my absolute favorites from Ikea (I ordered them here because they were hard for me to get in MS) that I “hemmed” using this hem tape to make them look more custom.
Lastly, do not be fooled. This is the other wall in our bedroom. The pups have to sleep somewhere and this is where we have the space for them. Brooke thinks she has a better idea in mind though…
Thank you so much for being here today! I hope this inspires you in your own home in some way. If you’ve been thinking about stepping out of your comfort zone and trying something new with the design in your bedroom…. I say DO IT!
Sources:
- Paint color – BM Vintage Vogue in matte
- Trim color – SW Chantilly Lace in semi gloss
- Ceiling color – SW Chantilly Lace in matte
- Flooring
- Curtains
- Curtain Rod
- Bamboo shades
- Rug
- Dresser – Ikea hack
- Nightstands – Ikea hack
- Lamps
- Fan
- Hampers (large & medium)
- Bed
- Duvet cover – similar
- Quilt
- Throw blanket
- Sheets – similar
- Throw pillows – old but I like this option
- Paintings – vintage
- Alarm clock
I sincerely appreciate you all shopping through my affiliate links like the ones included in this post. I make a small commission when you purchase through these links at no extra cost to you. These funds help support my family and allow for us to produce better content for you all. I can’t thank you enough for supporting all that we do!
jordan jean
Leave a Reply


This looks incredible! What kind of texture is on your walls? Is it smooth? I have orange peel and am worried about how it would look with putting batten strips over it.
Our walls were smooth. I think even if you have orange peel walls the battens would work well as long as you caulk well! 🙂
This is beautiful and I’m so glad it popped up in my pinterest search. I’ve been wanting to paint my master bedroom green. Your room layout is identical to mine, including placement of all windows and doors. the entire thing is already chantilly lace (different sheens), I have that white dot bedding and those ikea curtains are hanging in my living room so I’d just need to move them to the bedroom. This shows me exactly how it would look in my room!
Sheri I’m so glad this post was helpful for you! I’m sure your room will be stunning! I hope you love it.
Absolutely gorgeous!! That green is beautiful!
I’m trying to find similar bamboo shades in Canada, what colour are these?
The color is called “whitewash”!
[…] PRIMARY BEDROOM REVEAL | PRIMARY BATHROOM REVEAL […]
Hi, this room and paint look stunning. Can you please share in what direccion does you room windows face? I have light coming from SE and SW so I’m trying to get a moody green like this one. Thank you.
Our windows are in the west!
[…] not Ohio) is an ordeal. There is a local airport but since it’s the size of our primary bedroom, prices are insanely high. Every other airport is a hefty hike away. This past trip we were flying […]
Love the room! You fan looks more gold/brass but I don’t see that option on the link? Do you know your fan finish? Thanks!
If you read the post I have an entire section about the fan info 🙂
How wide are your board and batten strips?
The exact products we used are linked here in this post! https://jordanjean.com/easy-budget-friendly-black-board-and-batten-tutorial/
Do you have a link for the ceiling fan? I love it! The room looks beautiful!
Yes! It’s linked in the post.
Stop it. This is gorgeous!!! I’ve been redoing our master and have finished everything but curtains. I want something bold and colorful and the green on your walls makes me think I might need moody deep green velvet curtains!! Thanks for the inspiration. I always, looooove everything you do!!!
Crystal you are so kind! Thank you so so much. If you have an Ikea near you, these are dreeeeaaaamy. https://www.ikea.com/us/en/p/sanela-room-darkening-curtains-1-pair-gray-green-30512952/
Oops! Wrong comment. Haha! Those are great! We do have an IKEA and at that price point, it might be worth a trip. Thank you!!!
I need to know more about the nightstand Ikea hack! They look nothing like the Ikea listing 😲
I actually just realized I wrote this post about the first part of the hack! https://jordanjean.com/ikea-rast-hack-diy-nightstand/
A few years after we did that, we decided to make them more sturdy by adding a board at the bottom which we covered with trim and then added a board on top and stained it to match. I’ll write a part 2 post of the hack so that it’s more clear! 🙂
Those are great! We do have an IKEA and at that price point, it might be worth a trip. Thank you!!