October 4, 2016
1 trip to Ikea, 2 pizzas, 3 trips to Home Depot, 1 trip to Lowes, 2 new power tools, and many (many) hours later and we have ourselves some fine looking nightstands!
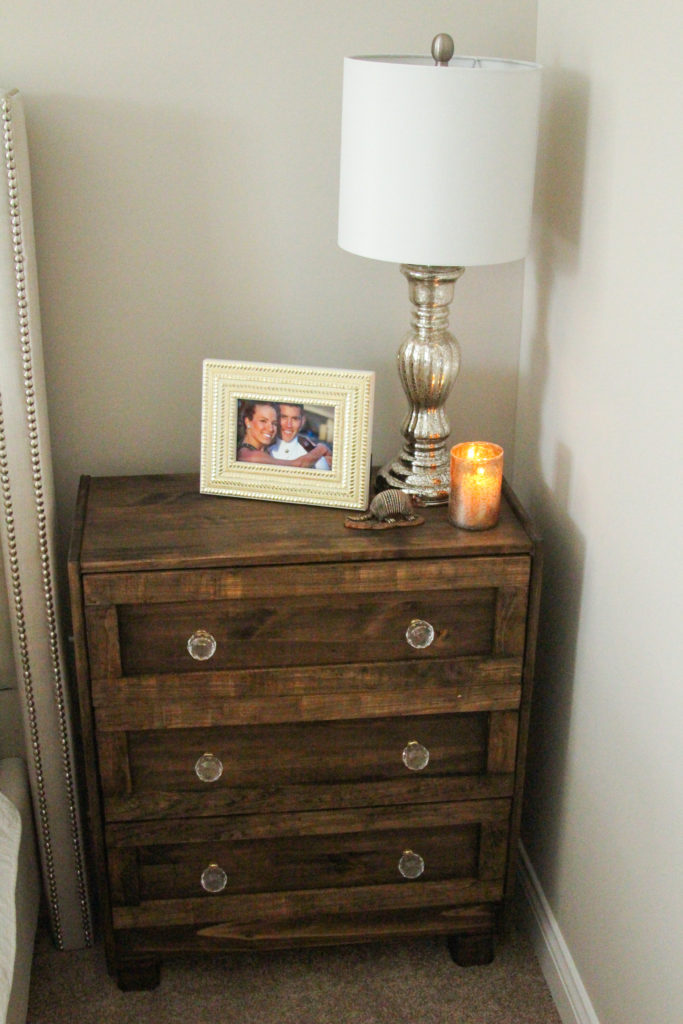
Before I graduated and left Virginia Tech, my parents suggested that I sell all of my furniture because we were going to have to store everything at their house for a couple of months before the three of us hauled everything to Kentucky. I was reluctant because I had worked so. darn. hard. on those once crappy, thrift store finds but agreed to sell everything except for my beloved Craigslist couch. I ended up purchasing my big girl bed (I will make sure to show you all someday! 😉 ) but needed to either purchase other things such as nightstands, a coffee table, TV stand, stools, dresser, etc. Since I had yet to start my job and don’t like buying anything full price anyway, I decided to purchase the Ikea Rast and make it into our own. I didn’t know exactly what I was planning on doing with them but I knew I wanted them to be a blend of my style- rustic yet elegant. Fortunately, there are endless possibilities with the Ikea Rast and I finally decided to add a little bit of dimension to the drawers and go with a rich wood color to contrast our bright, neutral colored bed.
The first weekend I was living in Kentucky all alone and had so much to do before my apartment felt like a home. Stephen came up to visit me so we worked all weekend to complete these nightstands along with a dresser. I think it’s safe to say we’re pretty darn proud of the pieces we completed. We not only put a lot of work into them but we laughed the entire weekend and talked about how eventually this furniture will be in our house. Crazy, isn’t it?! Oh, and I must say… There’s nothing wrong with watching your man use a power tool. 😉
Like I mentioned earlier, we took many trips to Home Depot and Lowes and eventually, we ended up purchasing a new set of power tools to complete this project. Luckily, we know that they will all be put to use for many, many years down the road. If you already have them then you don’t need to purchase them of course, but considering we have always just borrowed our father’s tools and are now “on our own” we decided to invest. P.S. If you have questions about power tools be prepared to get your ear talked off by the Lowes/Home Depot guy for quite some time…
Things you’ll need:
- Ikea Rast (we purchased 2 so that we could have one on each side of the bed)
- Knobs
- Washers for knobs
- Wood Stain (we used color dark walnut)
- Staining cloth
- Clamps (at least 8)
- Wood glue
- Bun Feet (I can’t find the exact ones we used… It took us about 3 tries until we found ones we liked)
- Plates to screw bun feet into. They have usually multiple options but we learned the hard way- Do not get the angled ones or you’ll be heading back to Home Depot… Again.
- Polycrylic Finish
- Wood pieces for the front of drawers (for 1 drawer we used 2-4.25″ long pieces and 2-23″ pieces; we decided on 1.625″ wide for the wood but you can use whatever width you want)
- Wood pieces for bottom of dresser (2 per dresser; we used some scrap wood and cut it to fit)
- Screws/nails to attach to the bottom of the dresser

So let’s get to the fun stuff!
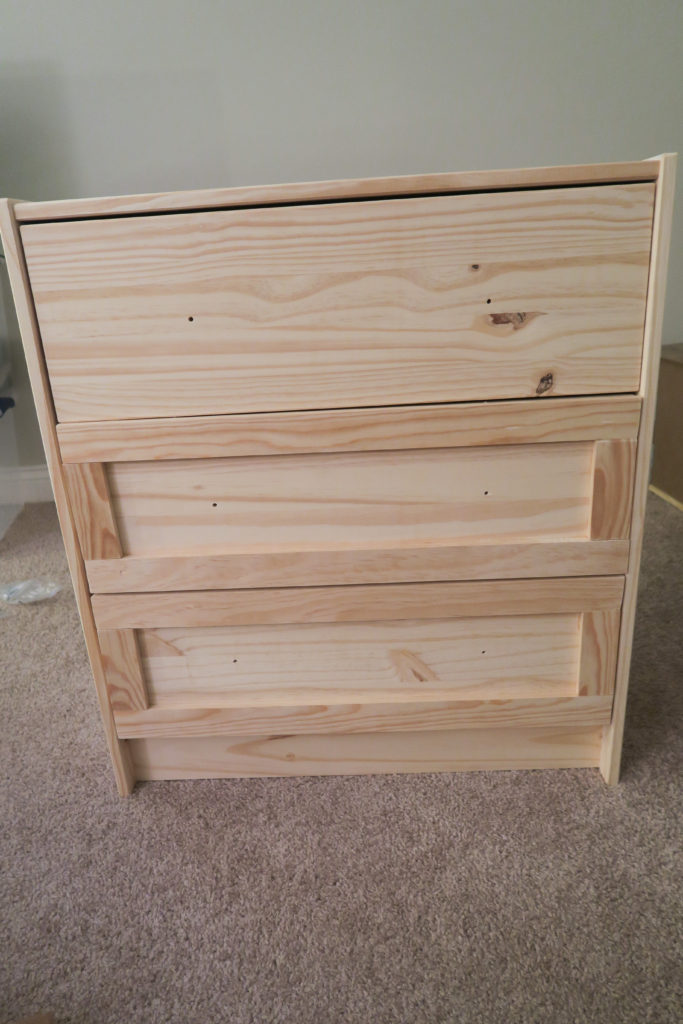
Step 1: Assemble the Rast. Woof, this took a little bit of time…
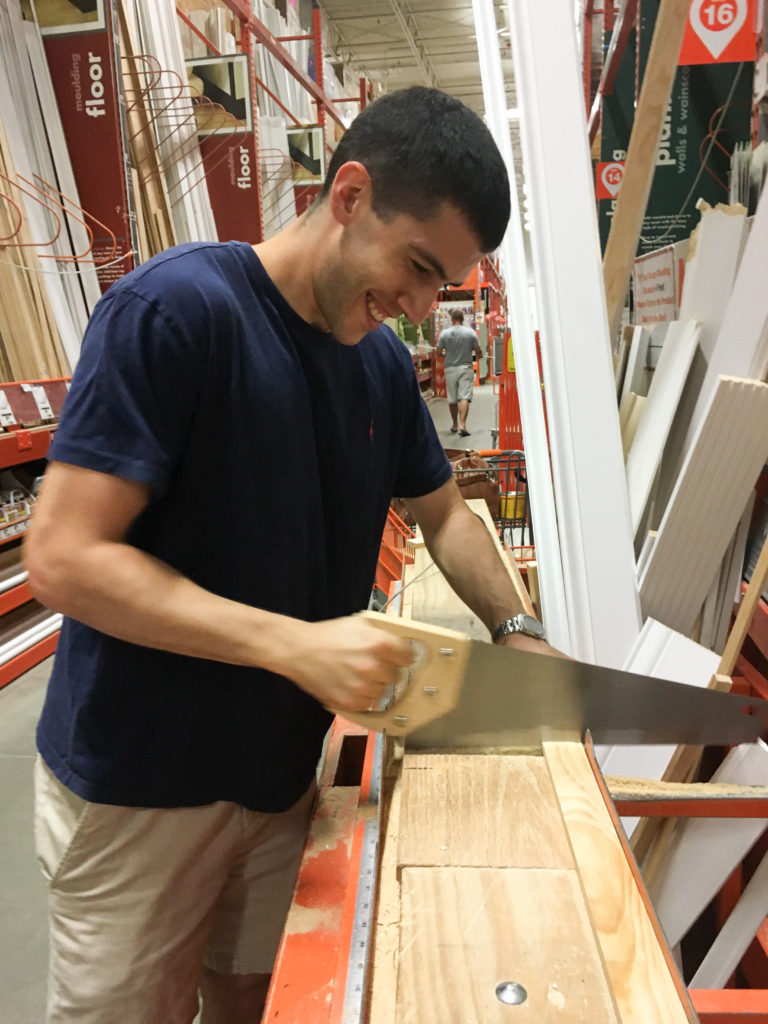
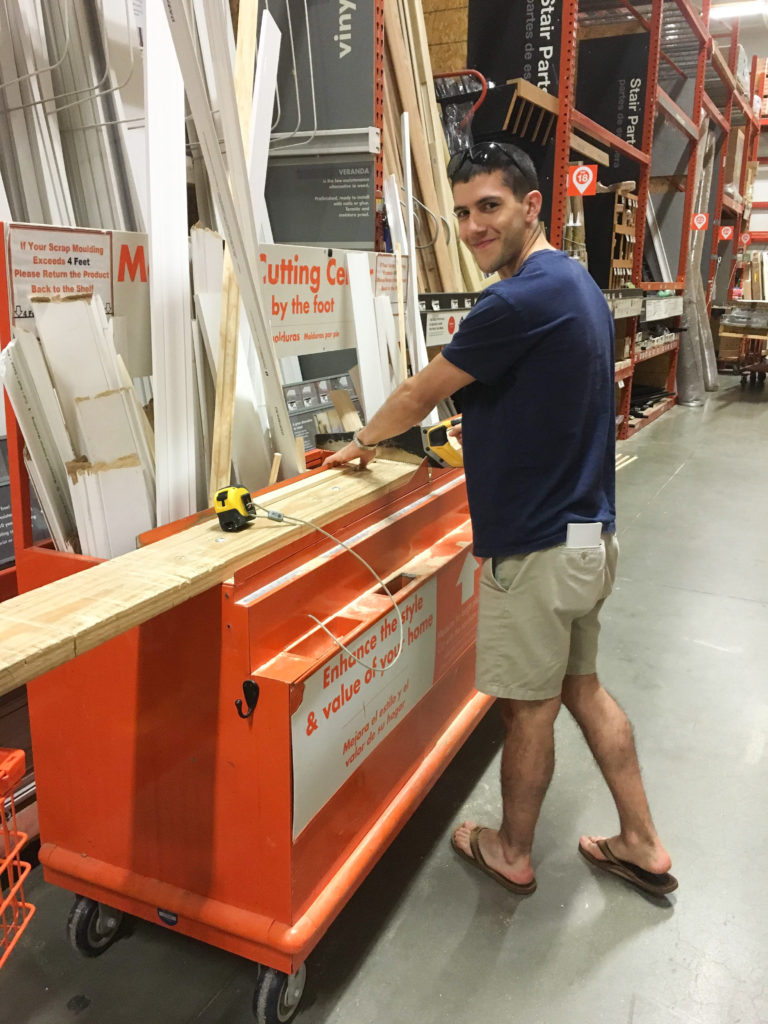
Step 2: Once you’ve finally assembled the dressers without chopping each other’s heads off, measure and cut the wood so that it is 23″ long for the horizontal pieces and 4.25″ long for the vertical pieces. Stephen did this in Home Depot so that we could get exactly what we needed and because we didn’t feel like purchasing a saw. Just look at that face *heart eyes*!
Step 3: Sand the edges of the cut pieces so that they aren’t any splinters hanging loose.
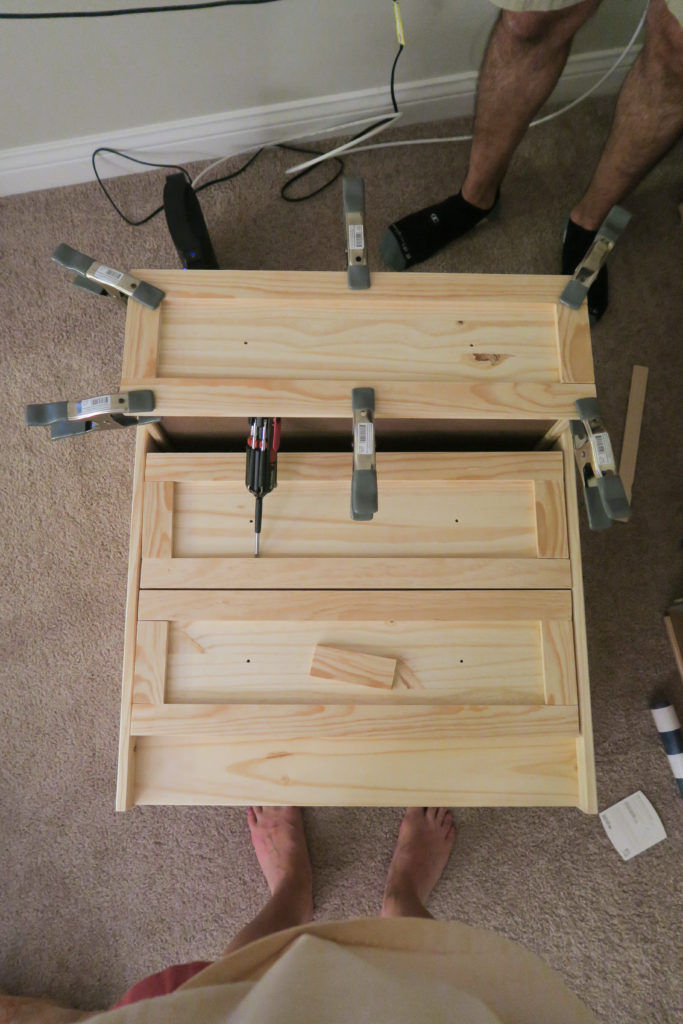
Step 4: This step took us a while until we came up with a system but once you get it, it’s not so bad! Lay the Rast flat, remove the drawers or prop them open like we did with the screw driver below, and arrange the small wood pieces until you have them the way you want them. Then, put the wood glue on the back of the wood pieces one by one and clamp the pieces down. They will probably slip so it definitely required both of us to working with it together to make sure the wood hadn’t slipped out of place and was going to dry in the wrong spot. Once we had the pieces where we wanted them, we let each drawer dry for about 1 hour- 1.5 hour before removing the clamps and moving onto the next one.
Step 5: Once the drawers were all complete and dry, it was time to stain. Before you start this process I would suggest attaching the wood to the bottom and bun feet to the dresser. However, we went back and forth and back and forth on which ones we liked so the dresser was completely stained by the time we figured that out. When staining: Dip the cloth into the stain so that a small amount is on the cloth. Stain in the same direction as the grain and make sure to get in the crevices that are formed between the Rast and the pieces of wood that you glued on! Make sure you rub everything in so that there aren’t any extra dark blotches.
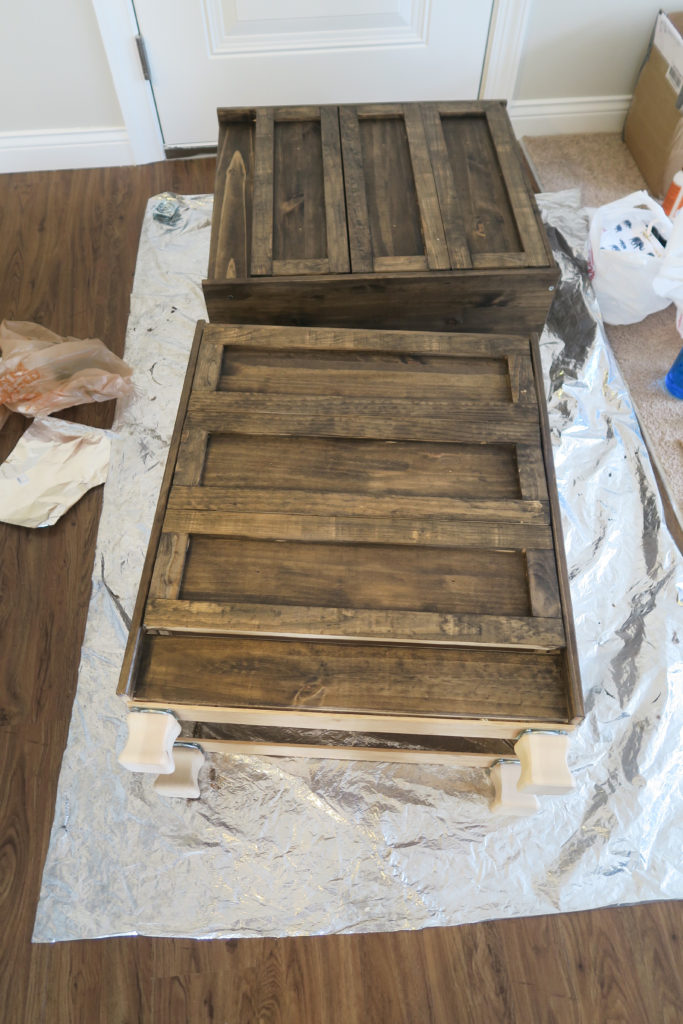
Step 6: If you haven’t done this already, using a couple of screws/nails on each side, attach two pieces of wood to the bottom of the dresser so that there is a place to screw in the bun feet plates. Since no one will ever see it, we used some scrap wood that we had left over and cut it to the width of the dresser.
Step 7: Attach the bun feet plates to the wood and screw in the bun feet.
Step 8: Stain the bun feet if you have not done so already.
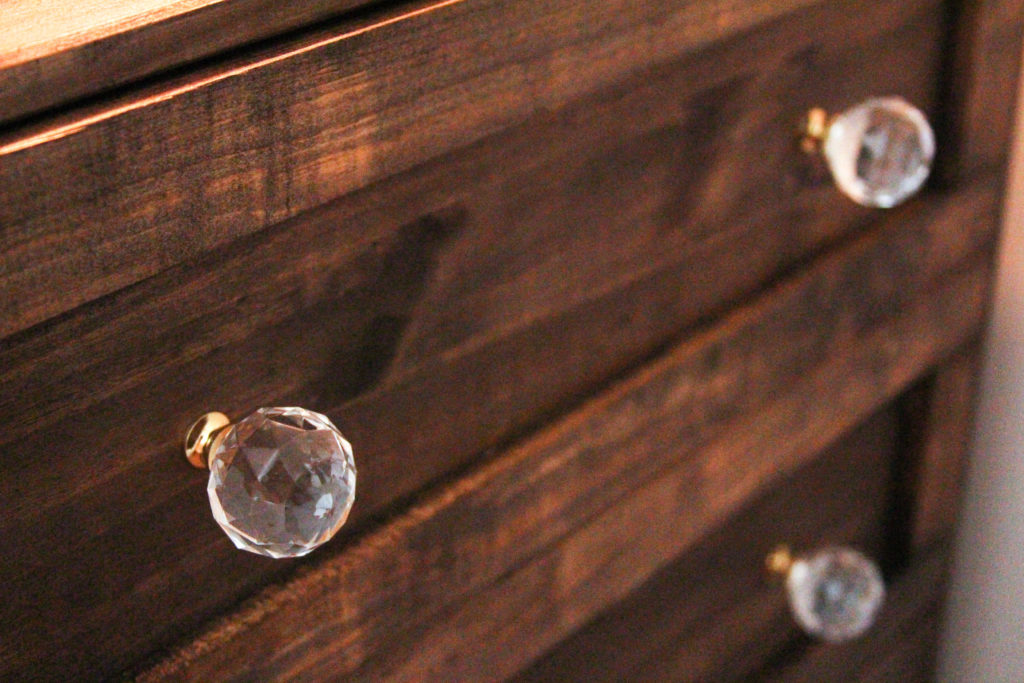
Step 9: Screw in knobs. I had to use washers with these because the screws were too long. I looked at many different knob options but decided to go with these gold and acrylic ones. I really love the combination of the fancy knobs paired with the dark wood! *Patting myself on the back*
TA DA!!!! I hope you all like these! Please feel free to comment below with any questions that you have! I might not show a complete bedroom reveal until after we get married and move in together but I promise it will happen eventually! 🙂
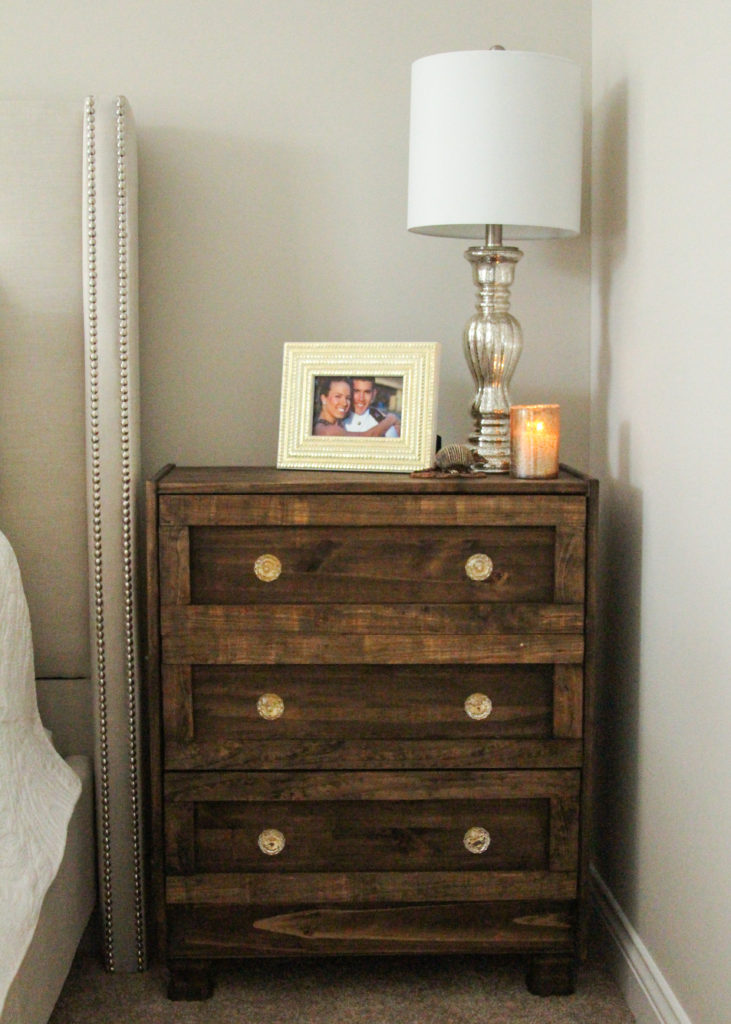
Frame: TJ Maxx | Lamp: (one like it) Hobby Lobby | Candle Holder | Mr. Armadillo
jordan jean
Leave a Reply


SHARE