March 8, 2021
Even before we bought our 1980’s home in Mississippi, we talked about and researched how we could remove the textured ceilings, or more specifically stomped ceilings. There is nothing wrong with textured ceilings, we just love the look of flat ceilings and thought it would make the home feel refreshed. It’s totally a personal preference!
I did research on people in the Columbus, MS area to remove the ceilings for us because we really didn’t want to do it ourselves but it was really difficult to find someone. I called five different companies and none of them would answer their phones! When I did finally reach someone, they quoted me a minimum of $8000 for our 1600 sq ft house (I think it would’ve been closer to the $10000 range with our vaulted ceilings in the living room). I get it, it’s a pain in the rear kind of job, takes a good chunk of time and creates a huge mess but $8000 to remove textured ceilings was absolutely not going to happen for us. Our money is better spent elsewhere. We decided that if the textured ceilings were going to go bye-bye, we’d be the ones removing them.
I did a bunch of research on how we would go about this and came across a few methods that we tried out. Our ceilings are even more difficult than the typical popcorn ceilings because they have been painted probably 4-5 times on top of the texture. That makes it way more difficult to remove. If your ceilings aren’t painted with multiple coats, you could most likely get away with following this method!
We tried this and it didn’t work as beautifully because of the paint (isn’t it so satisfying to watch?!). We ended up taking over two weeks to do the first room we started this on. There were so many gouges in the ceiling we had to go back and patch and our hands were so tired. We tried the same method on the entryway hoping that we could get it removed quicker and easier with a better putty knife and spray, but we had the same result as before. For Ellie’s nursery we knew that we had to try a different method or else we would have gone insane (or more likely would have just given up and decided to keep the rest of the ceiling the way they were). We tested a few new methods until we found one that was quick and relatively easy, albeit messy, and finished the rest of the ceiling. We feel like now that we’ve got it locked down, we’re able to share with you how you can do it too! With this method we are able to remove the textured ceilings in one room in about 4 hours.
** If you are doing this in an older home, I’d recommend first testing it for asbestos using a kit like THIS.
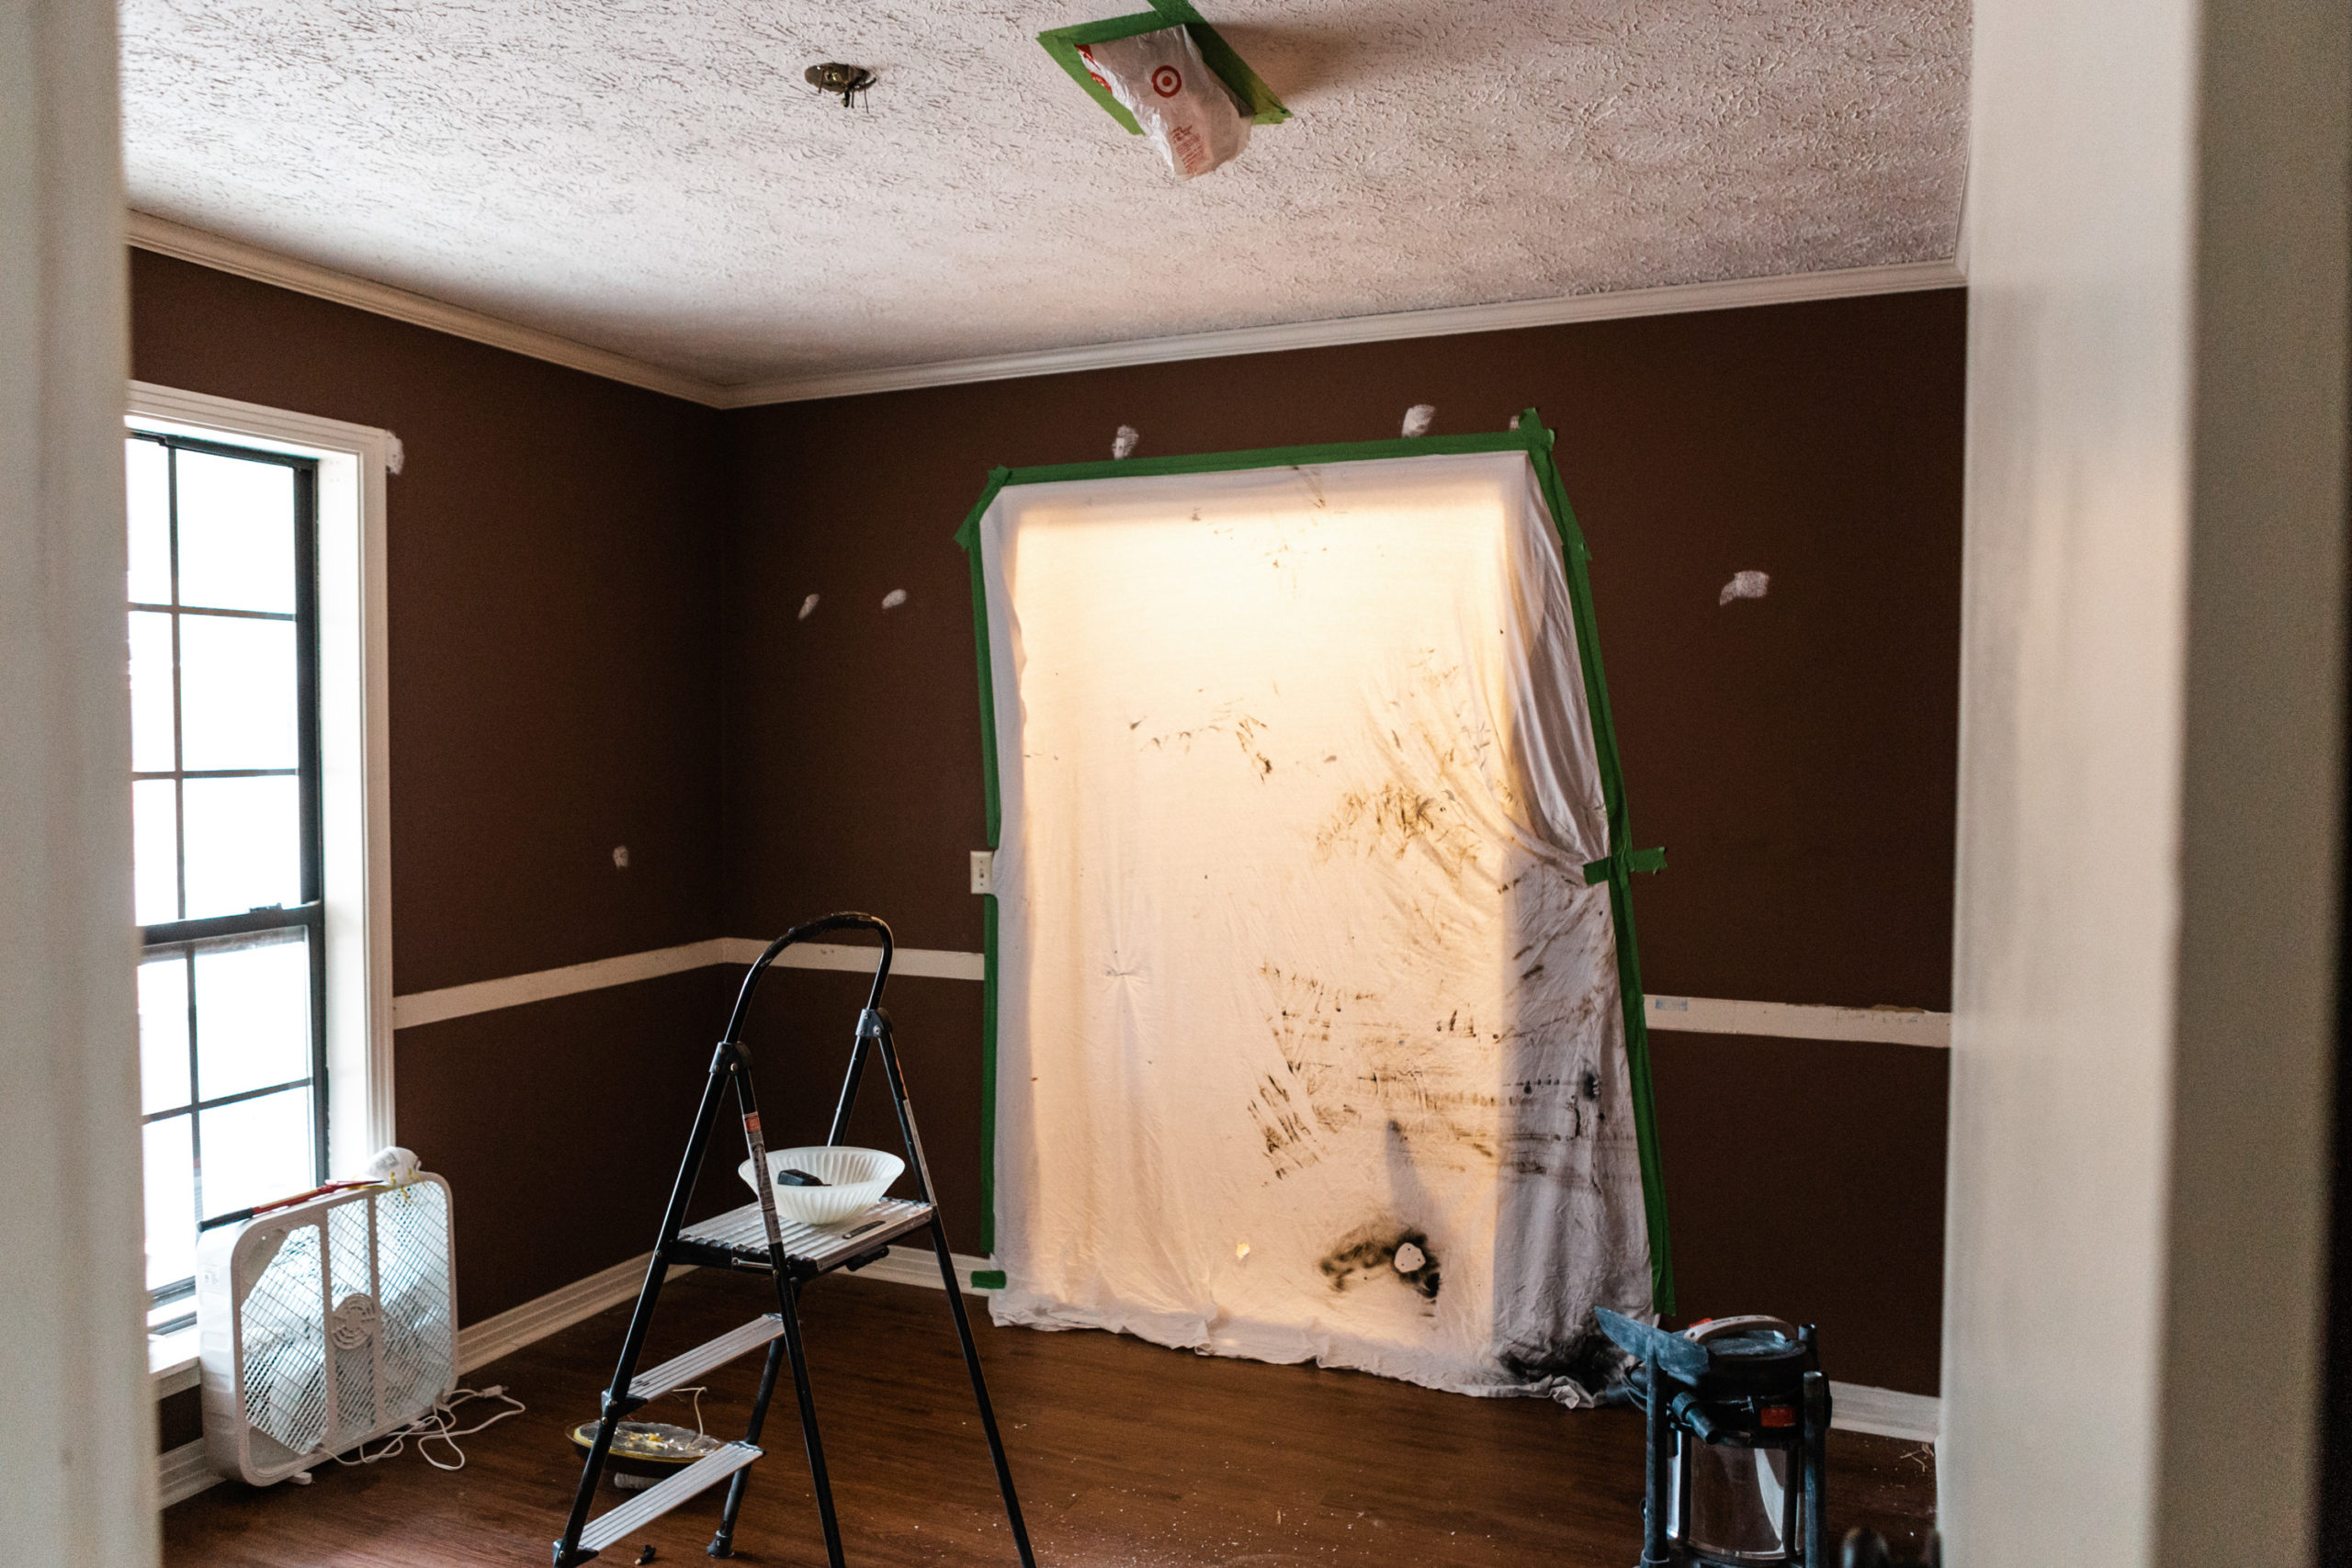
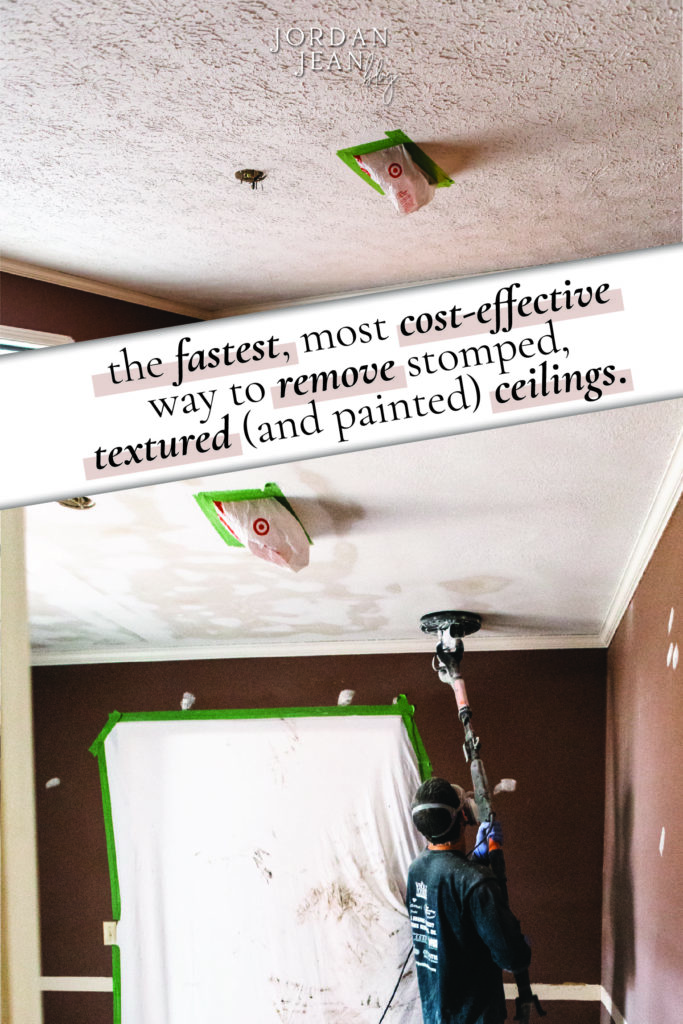
This is what we started with:
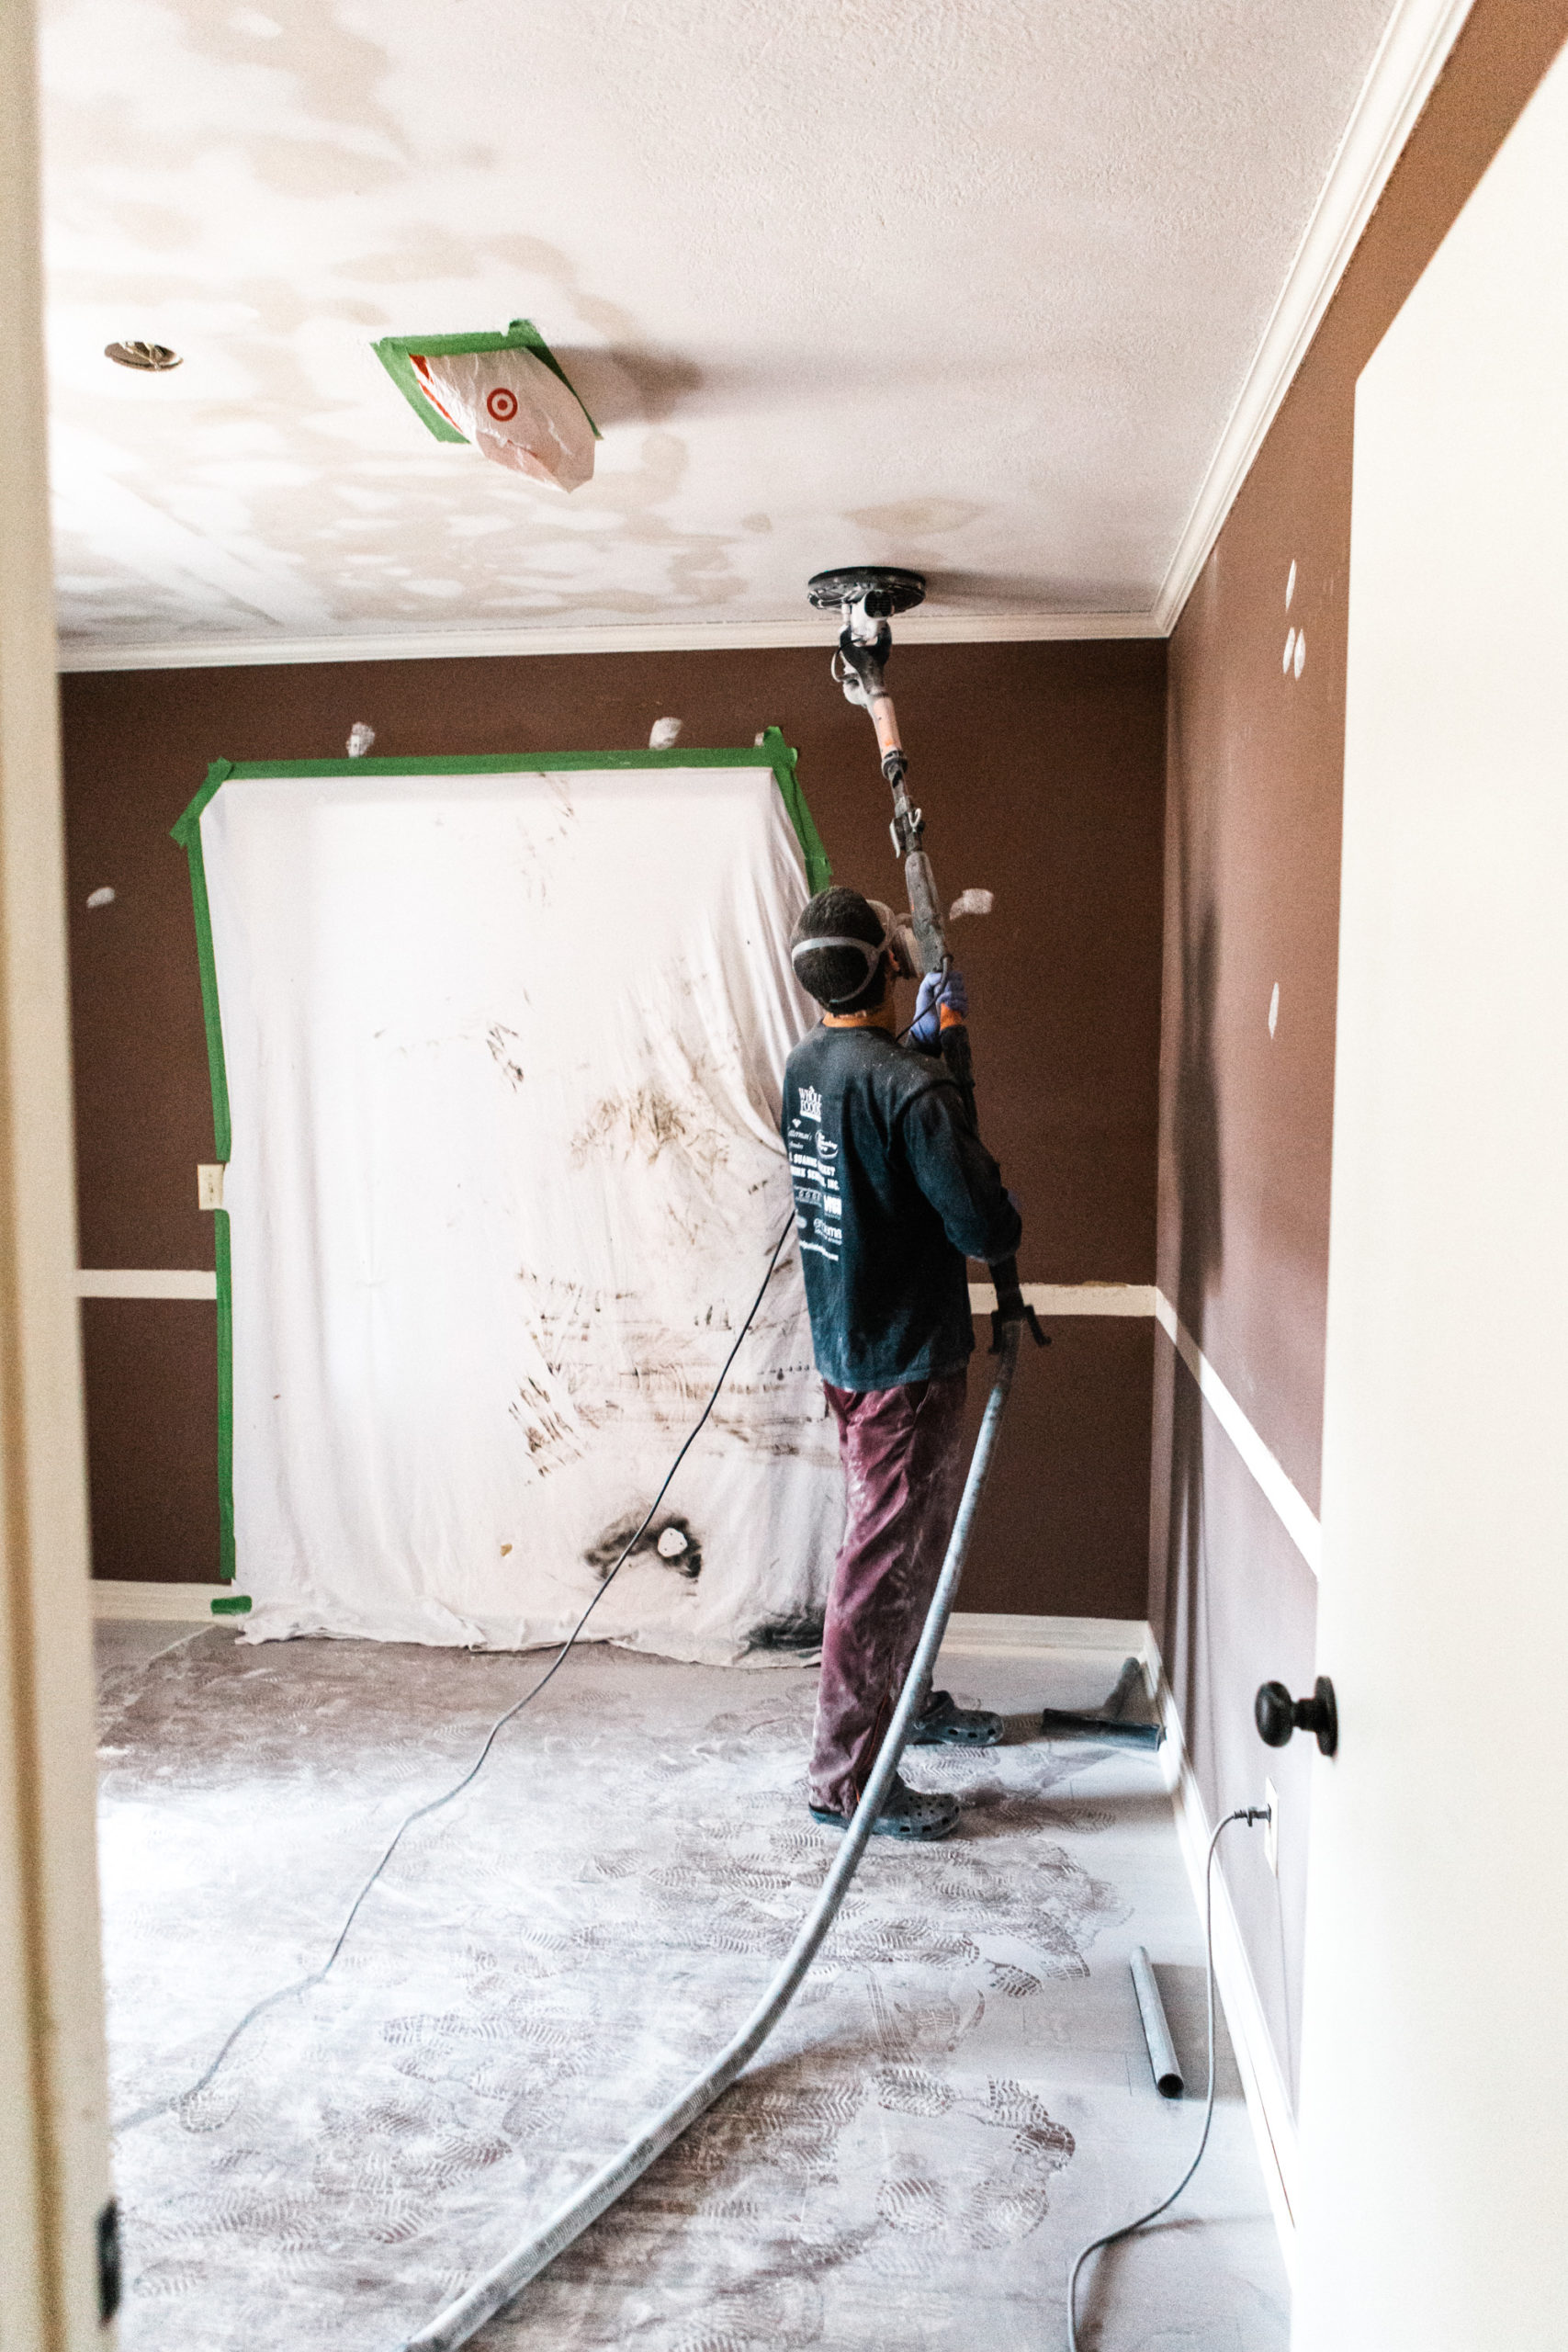
And this is what we finished with:
What we use:
- Drywall sander
- Course (60-grit) sanding discs
- Finer (80-120) grit sanding discs
- 16 oz bottle filled with Thieves + vinegar + water
- Floor scraper
- Ladder
- Plastic sheeting
- Safety glasses
- Mask
- Gloves
- Clothes you can get messy
- Joint compound
- Putty knife
What to do:
- Start by prepping the room. This takes a good bit of time but it’s worth it, trust me. If you have carpet, cover it with plastic and any openings that you don’t want dust to escape from, remove the light fixture, air vents, blinds, etc. and cover those openings as well. We didn’t cover the floors in this room because it’s easier for us to just vacuum it up and these floors will be replaced in the upcoming months so we weren’t worried about them! A good tip I got from quite a few readers – if you plan on replacing the floors at the same time, don’t even worry about covering them. Remove the texture from the ceiling and then roll up the carpet with the mess on it and haul it out. The mess is cleaned up AND the floors are ready for their replacement! Yay for efficiency.
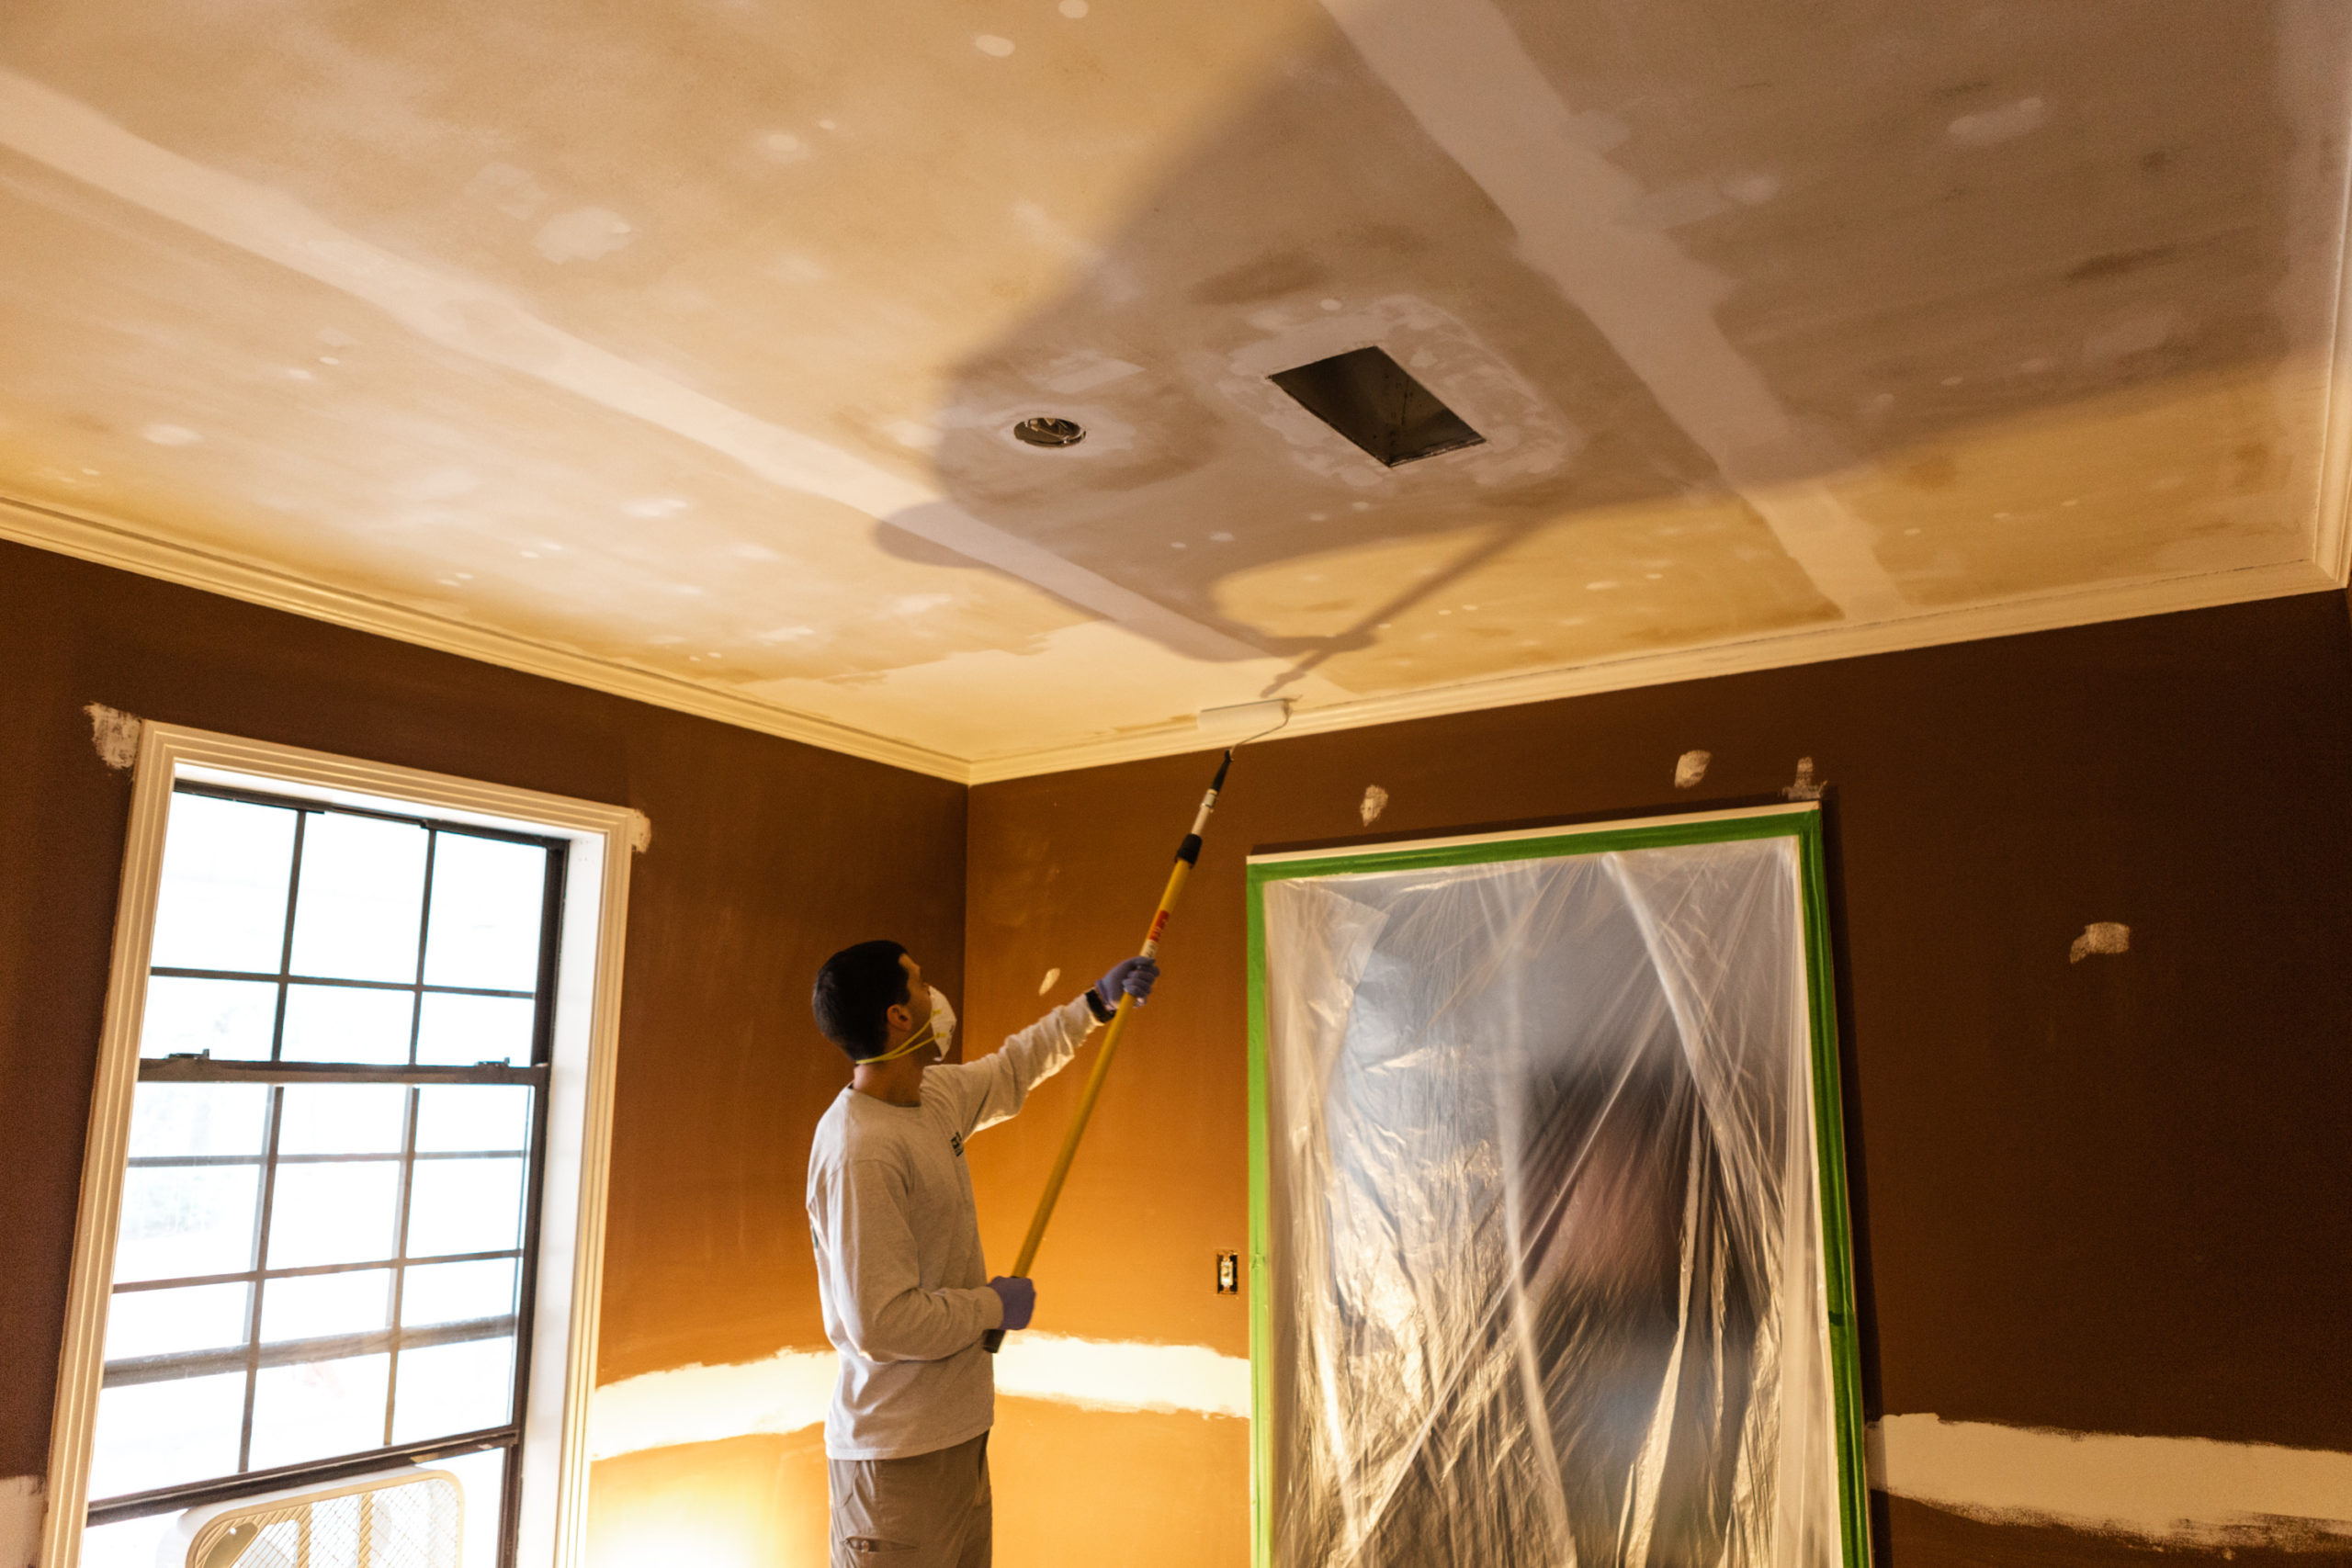
- Scrape the big peaks off using the floor scraper. You might be able to get away with using a putty knife for this but in our case to cut through all of the paint, the sharper blade was necessary. Don’t dig too hard into the compound/paint. You aren’t trying to remove all of it with this step, just the peaks! If you accidentally create a gouge with the knife, don’t worry, we’ll fix that below (but the less gouges, the less amount of time it’ll take!). The reason for this step is to prevent the sharp peaks from shredding the sandpaper in the next step.


- Using the drywall sander and the course grit sandpaper, sand away the remaining compound/paint working in small sections. Swap out a fresh sheet of sandpaper when you notice the current one becoming less effective. As soon as the drywall begins to appear under the joint compound, stop and move to the next section. The coarser grit sandpaper can easily tear up the paper layer of the drywall if you aren’t careful. Notice in the picture below how there are a lot of spots with just a very very thin layer of compound left.
- Once you have completed the entire ceiling, go back over all of it with the fine grit sandpaper, removing any remaining joint compound. No need to completely remove the compound along the seams where the drywall pieces meet, or where they filled in the holes of any nails/screws. It should be pretty obvious where these are since there will be a long line of compound that is flush with the drywall (see photo below).
- We then had to scrape about 1/2″ of the entire edge of the ceiling next to the crown moulding by hand using a spray bottle and putty knife because our sander couldn’t reach there.
- Using a putty knife, fill in any gouges or nicks with joint compound. Let it dry completely.
- Sand down the areas you filled in with joint compound using a sanding block.
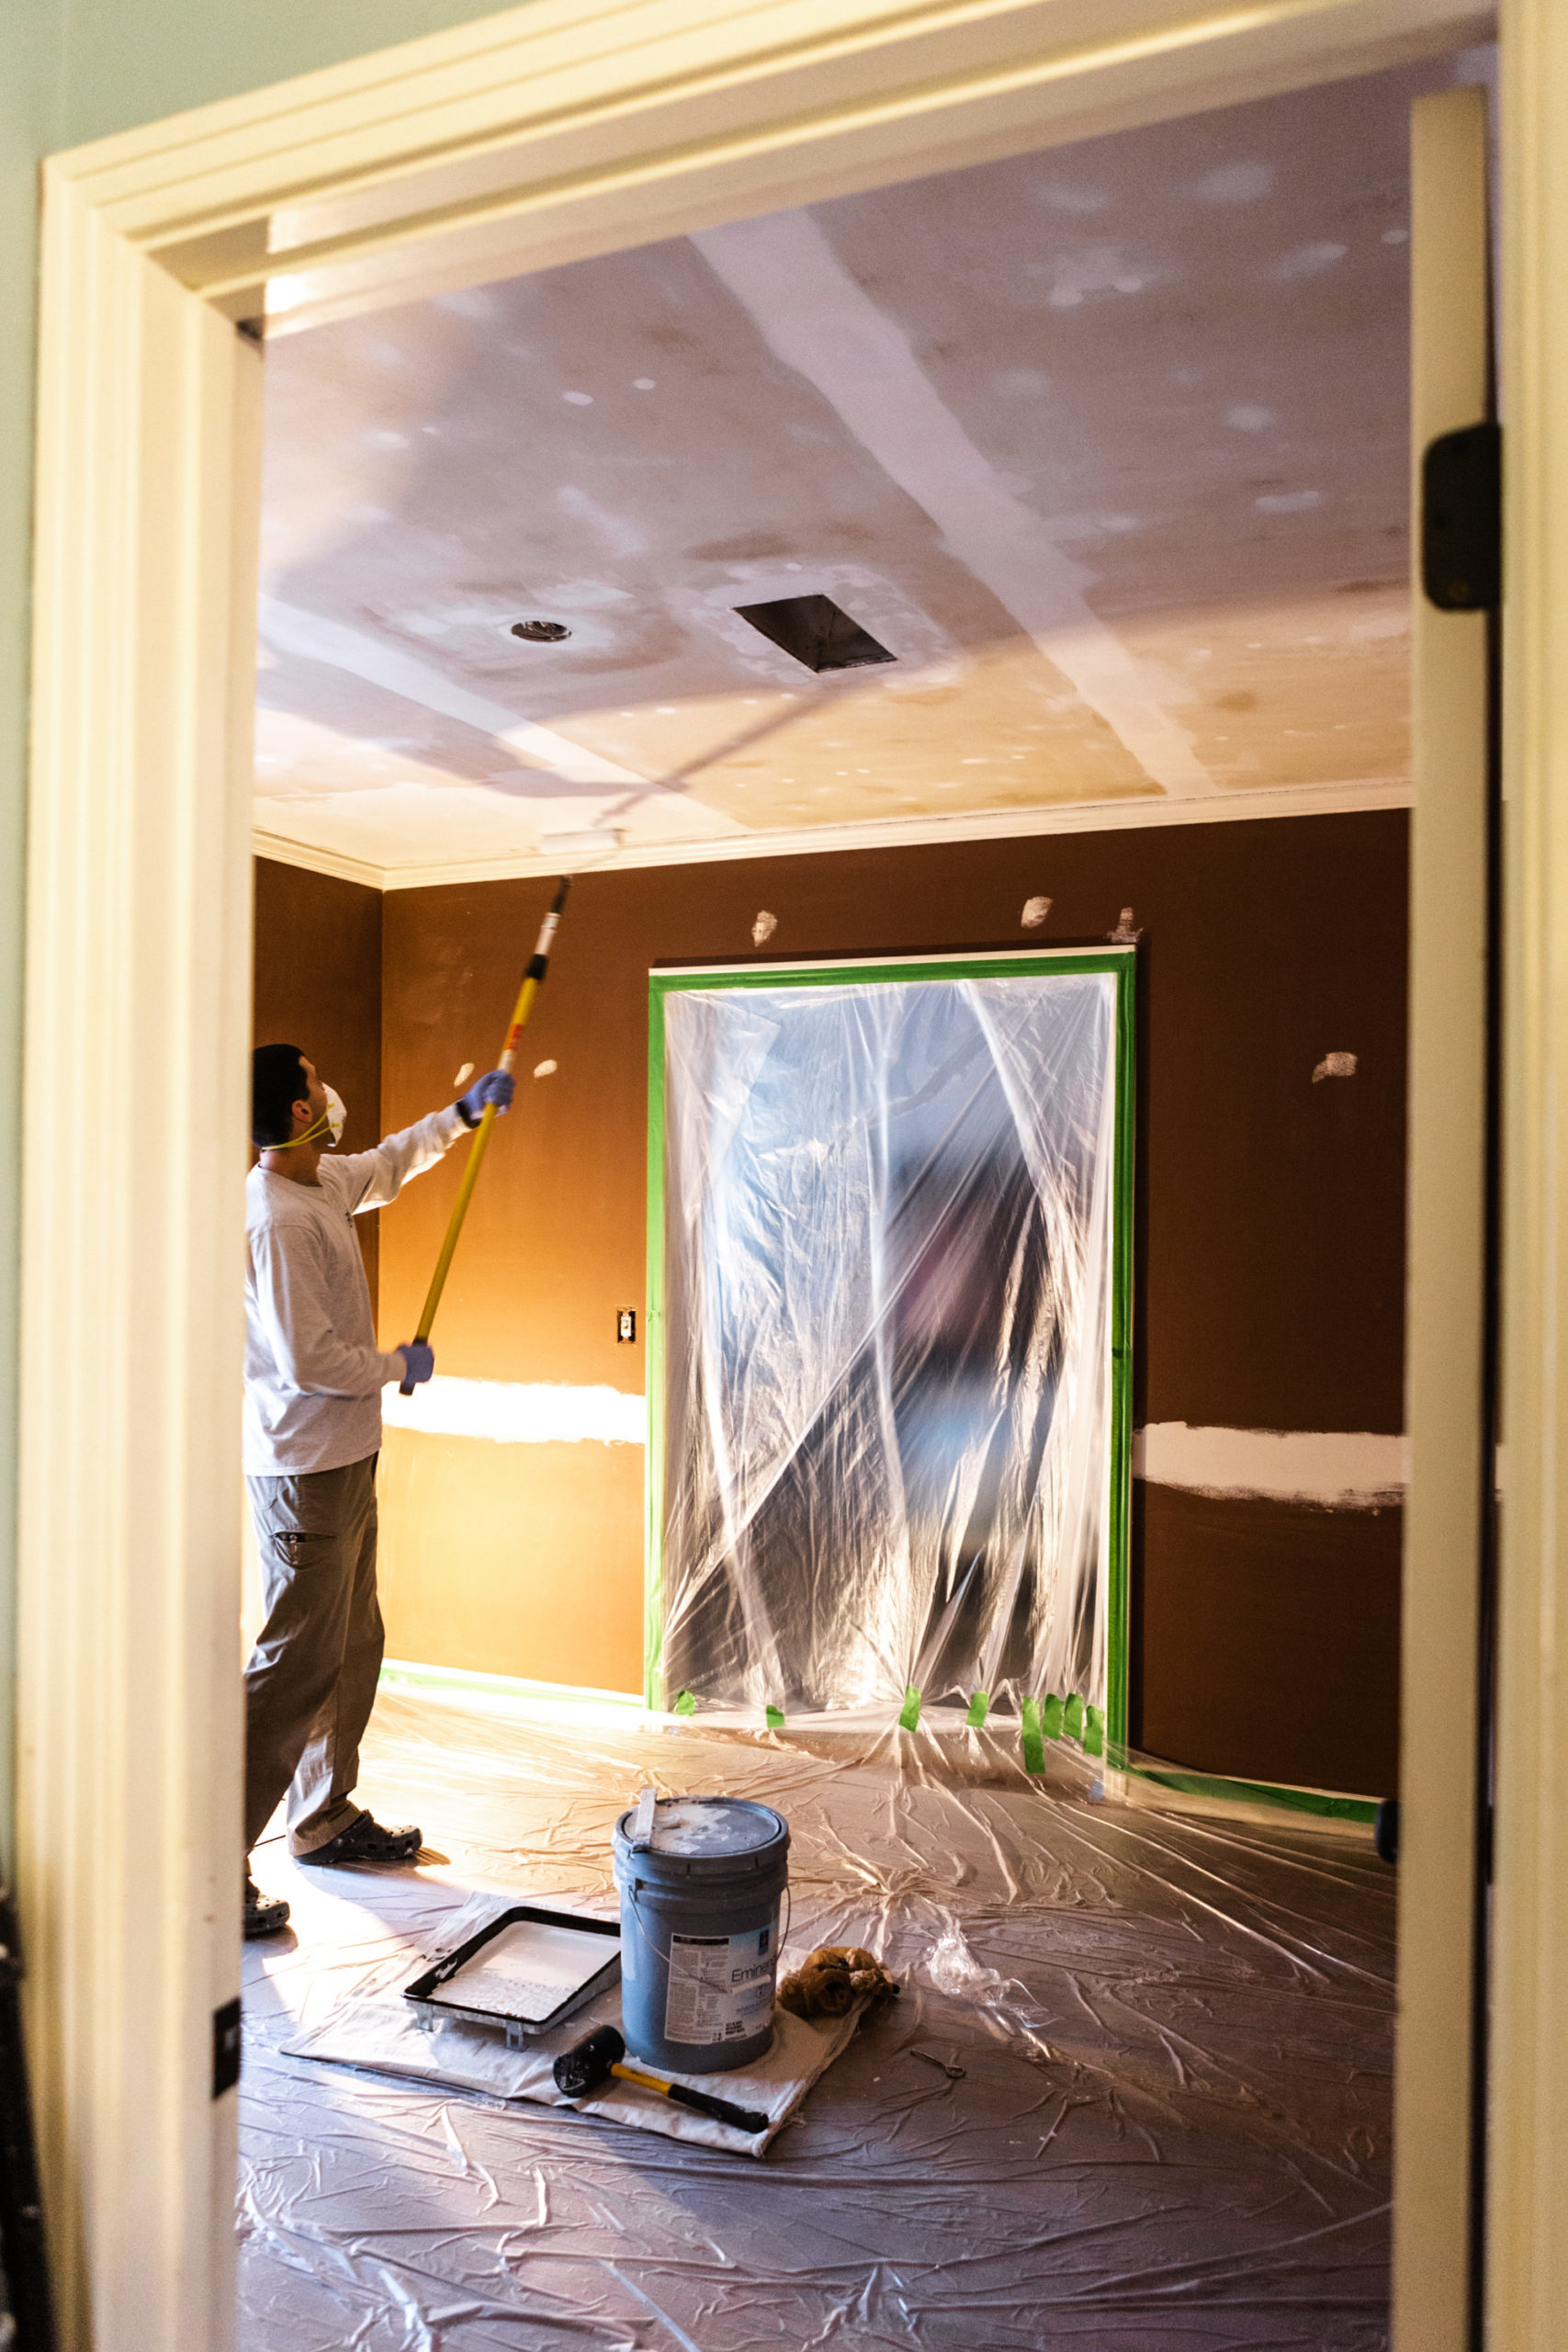
- Wipe down the ceiling with a damp cloth to remove any dust, and clean up your mess, it’s time to paint! We have painted all of our ceilings after removing the texture with this paint in a flat finish. It takes us two coats without priming to get good coverage. You can find our plans for the rest of this room HERE!
I really really hope you guys find this helpful and that is helps you achieve the feel you’re going for in your home. Until next time!

I sincerely appreciate you all shopping through my affiliate links like the ones included in this post. I make a small commission when you purchase through these links at no extra cost to you. These funds help support my family and allow for us to produce better content for you all. I can’t thank you enough for supporting all that we do!
Pin this image to save the post for later:
jordan jean
Leave a Reply


I am 93 years old. Please E Mail me. I have Texture in Ceiling 10 Ft X 10 built in 1991. It was dropping from Ceiling White Dots. A Contractor Painted the Ceiling with KILZ Water Primer & Stain-Blocking Ceiling Paint & Primer, I bought 2 gallons, and charged me $500 for Ceiling on 4-3-26 I still see White Dots. Shall I ask Contractor to Scrape Texture and let him do it ?
If it’s texture that you’re seeing and you don’t want it there then I’d recommend a contractor remove it!
how long does it take a contractor to complete this process. we don’t have popcorn ceilings but textured ones our contractor recently added more textured in rows like clouds for continiuit. How long and what would be the cost to smooth and flat?
I have no idea! We did all of the work ourselves. Sorry I’m not more help.
Thank you for all this information!! I am going to start sanding next weekend, using a rented Giraffe Flex Drywall Sander with Hepa Vacuum.
[…] Quote from the source: … […]
What size jar are you using to mix the products in water or quantity of water used? Is the water hot? Is there any substitute for Thieves, my husband gets sick from smelling cloves?
If I understood accroding to your article, the ceiling was sprayed with the liquid then scrapped. How long after spraying before you started scraping. The mud layer I am dealing with is rather thick woth one/two coats paint.
It was a 16 oz. bottle. I eyeballed the mixture. I’d say mostly water with a few splashes of cleaner. The water doesn’t have to be hot! It might help if it is. I’d experiment with it. I’d use whatever all purpose cleaner you use in your home. As for timing, that’ll require more experimentation for the amount of mud AND PAINT you’re working against. Ultimately our goal was to get as much as we possibly could with the sander first. After doing so many rooms, we’ve been able to get close to the molding so we don’t have to scrape as much at all but when we were scraping more at the beginning I’d say we sprayed and let it sit for maybe 10 minutes or so before going back and scraping it. If you can get it with the sander to avoid scraping, I would! I hope that helps.
Thank you for this informative blog. Sequence question, did you spray the water-thieves-vinegar solution prior to scraping the painted textured ceiling with the floor scraper? If so, how long did you let it penetrate before scraping off? Thanks so much.
Nice work!
Can you please tell me how hard was it to scrape the ceiling before sanding? what is the brand and model # of the drywall sander which you used? was it easy and light to use? I am 65 years old, the room which I want to get rid of ceiling texture is over 700 square feet, I want to get a feeling of if I can do it or not.
Thank you so much
Hi Hamid! Scraping the ceiling prior to sanding is easy. The sander itself is not very light. My husband’s back is usually sore after finishing up a room. It might be best to do it in small sections. It took a bit for him to get the hang of it but once he did he was able to master it. The exact one is linked here as well as in the blog post! I hope
it works well for you like it does for us! https://rstyle.me/+6-FsF6IuNuZx56y0un9lrQ
[…] the texture from the ceiling which will make it feel like new. You can read about how we do that in this post. Once the ceilings are removed, the batten is installed, and the walls are painted, we are going to […]
Thank you so much for sharing this! My husband and I just bought a house and this texture is in every room! 1880 square feet of it! We have scraped using hot water pretty much all of the texture off and are left with little tiny patches that we can use the fine grit paper on thanks to your suggestion! We weren’t sure what steps to take next and this post gave us hope. Thank you thank you!
Oh my goodness you’re SO WELCOME! I’m so glad it helped!!
What was your ratio of thieves, vinegar and water and when did you use it?
We did about 1/4 of the jar vinegar, a capful fo Thieves, and 8-10 drops lemon essential oil and fill the rest of the jar with water. We used it after the “peaks” were scraped off and before scraping off the compound around the edges of the room where the sander couldn’t reach well enough.
[…] a lot of dust throughout the demo process, especially when removing tile and when Stephen removed the textured ceilings. We decided to invest in this air purifier to help with the dust and the lingering mold […]
[…] ceiling is textured like the other rooms in the house. Womp womp. We talked about it quite a bit and decided that we […]