March 2, 2021
These Chocolate Walls have GOT TO GO! Office Plan + Before Photos
posted in:
Of all the rooms in the house, this is one of the ones we’re most excited to get our hands on (tied with the bathrooms) simply because of the wall color. We have some really big trees around our house which we love. An upside of that is that it creates a lot of shade so it keeps the house cool. A downside of that is that it creates a lot of shade so this house is very dark. The dark brown walls in this room don’t help with that at all. It’s time to brighten it up!!!
This room is right off of the entryway so it’s one of the first things you see, similar to the set up in the South Carolina house (you can see that office HERE). It’s kind of an awkward space and size. I believe the intent was for it to be a dining room but we knew that wasn’t going to be very functional for us especially because we already have a full sized table in the kitchen. We’d rather have a space that we’ll get a ton of use out of and we know that will be the case if it serves as an office. We need to make every inch in this 1600 sq ft house count!
Here’s what we’re starting with:
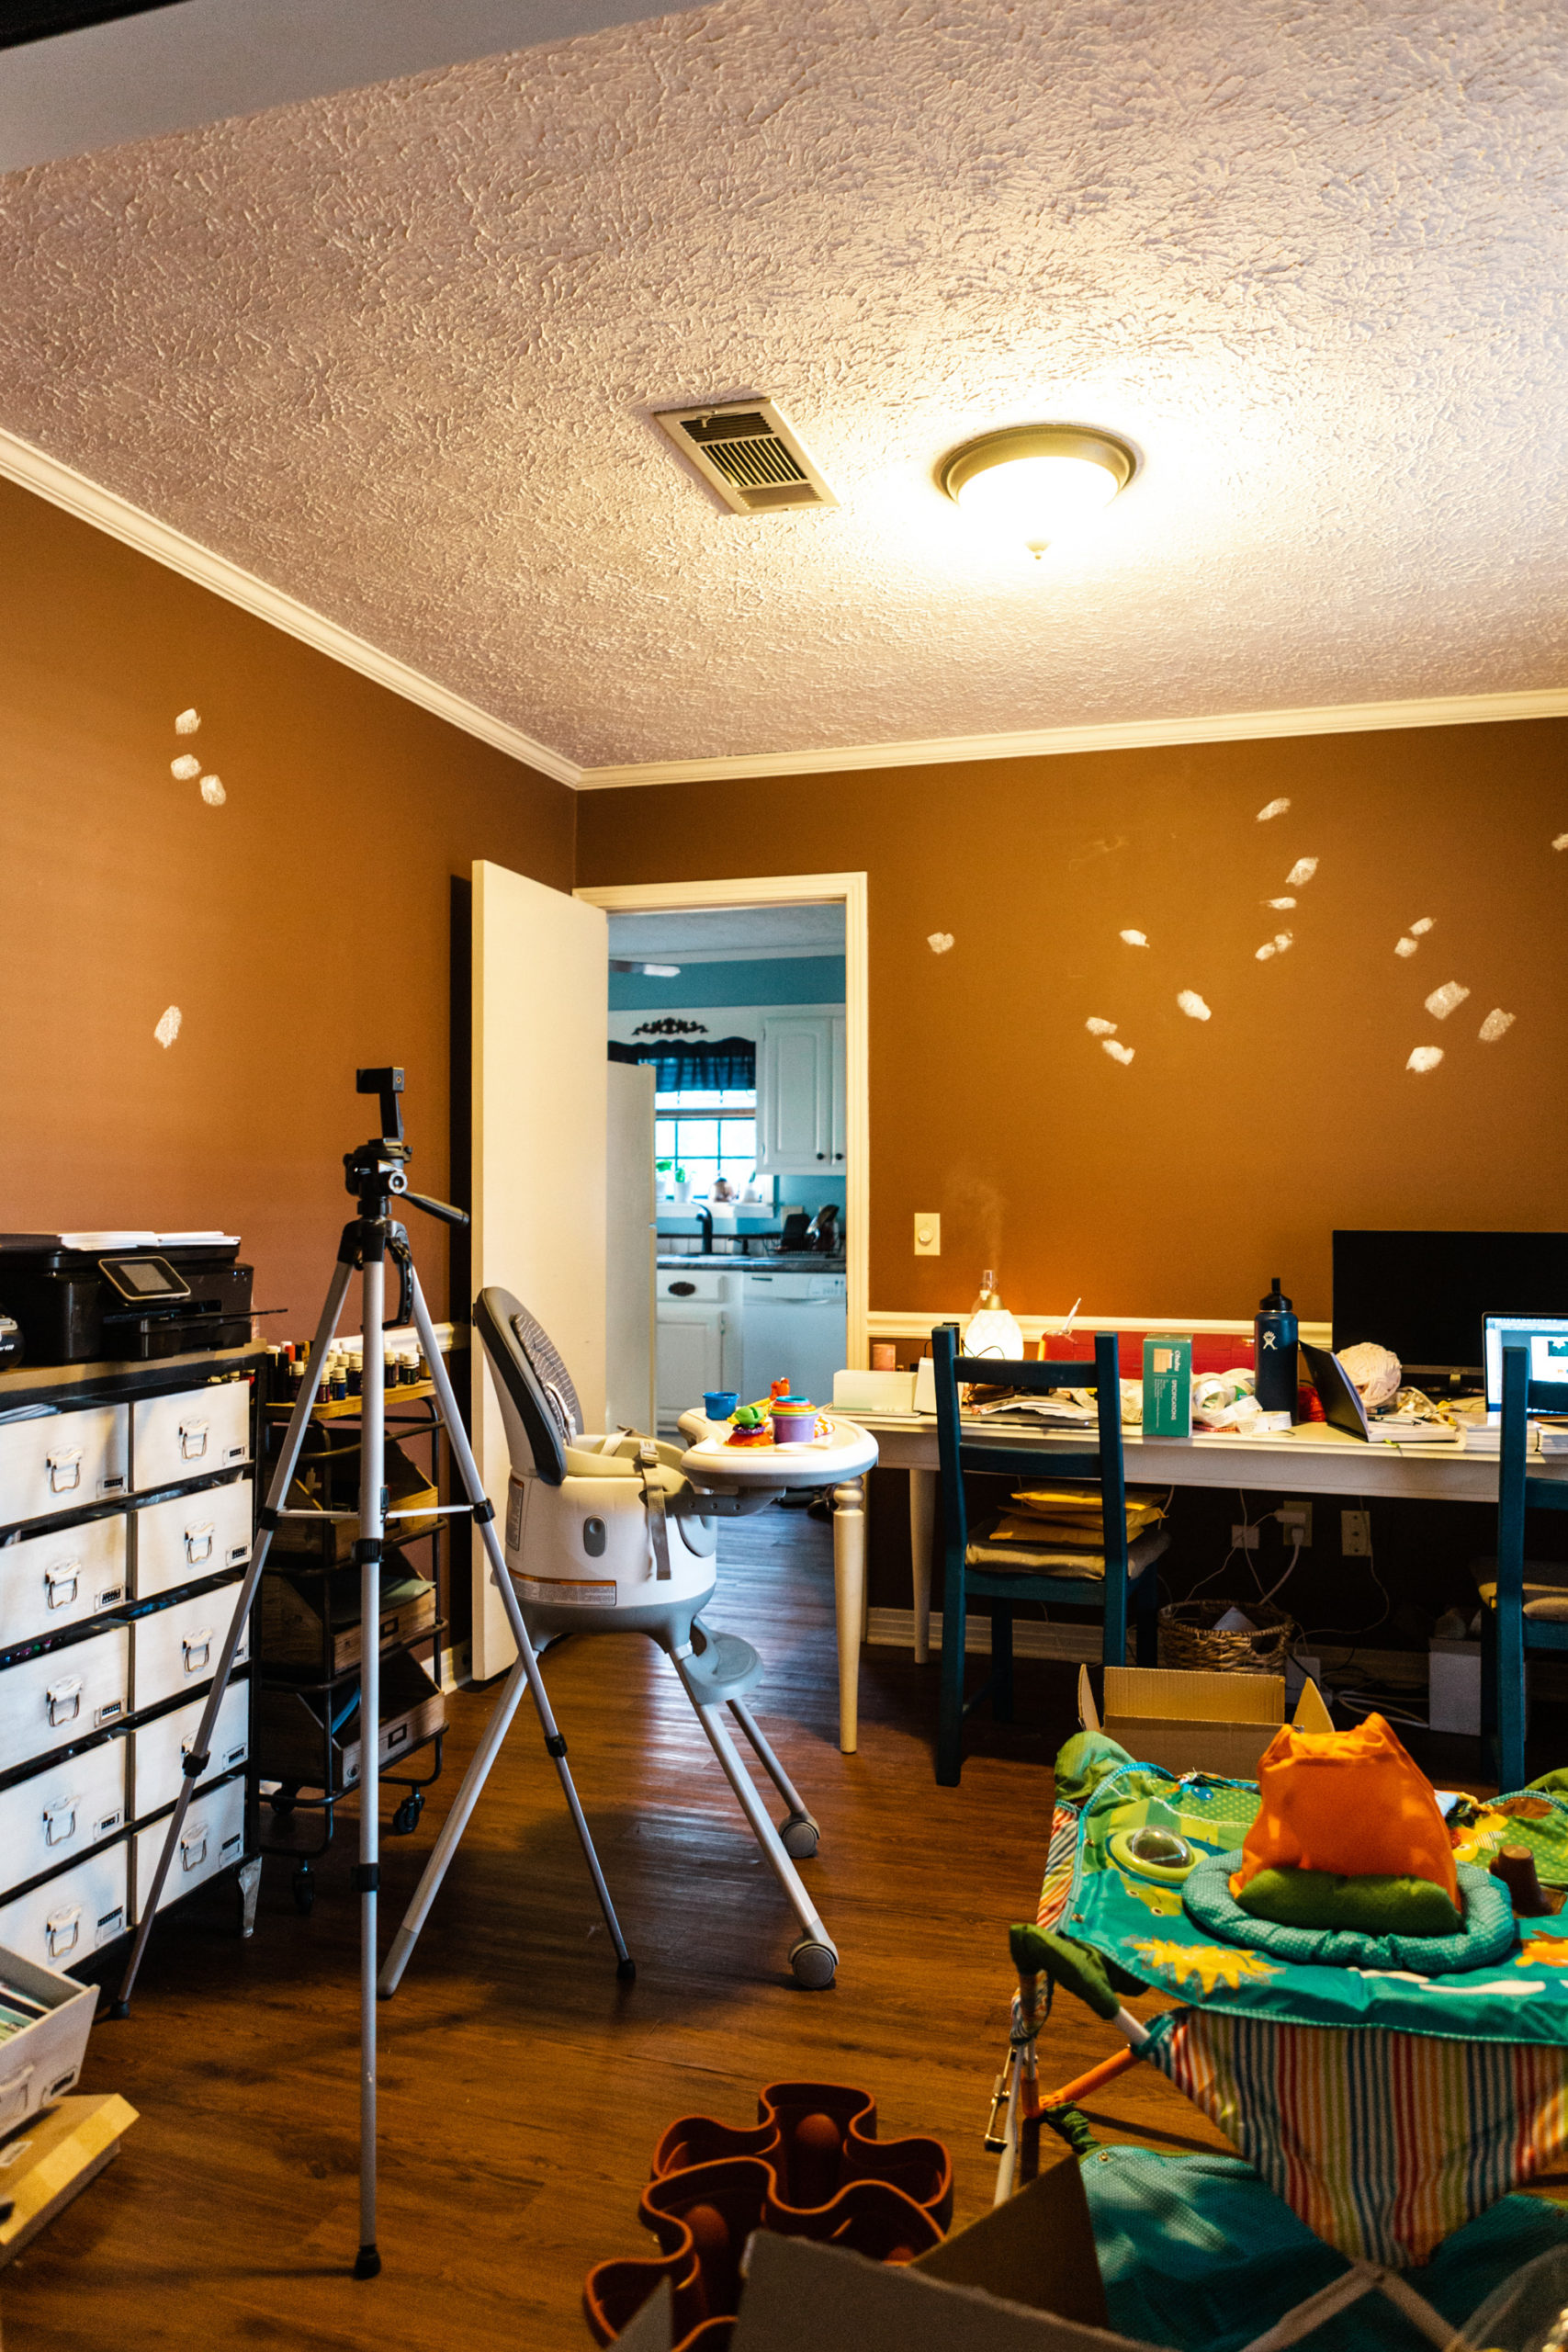
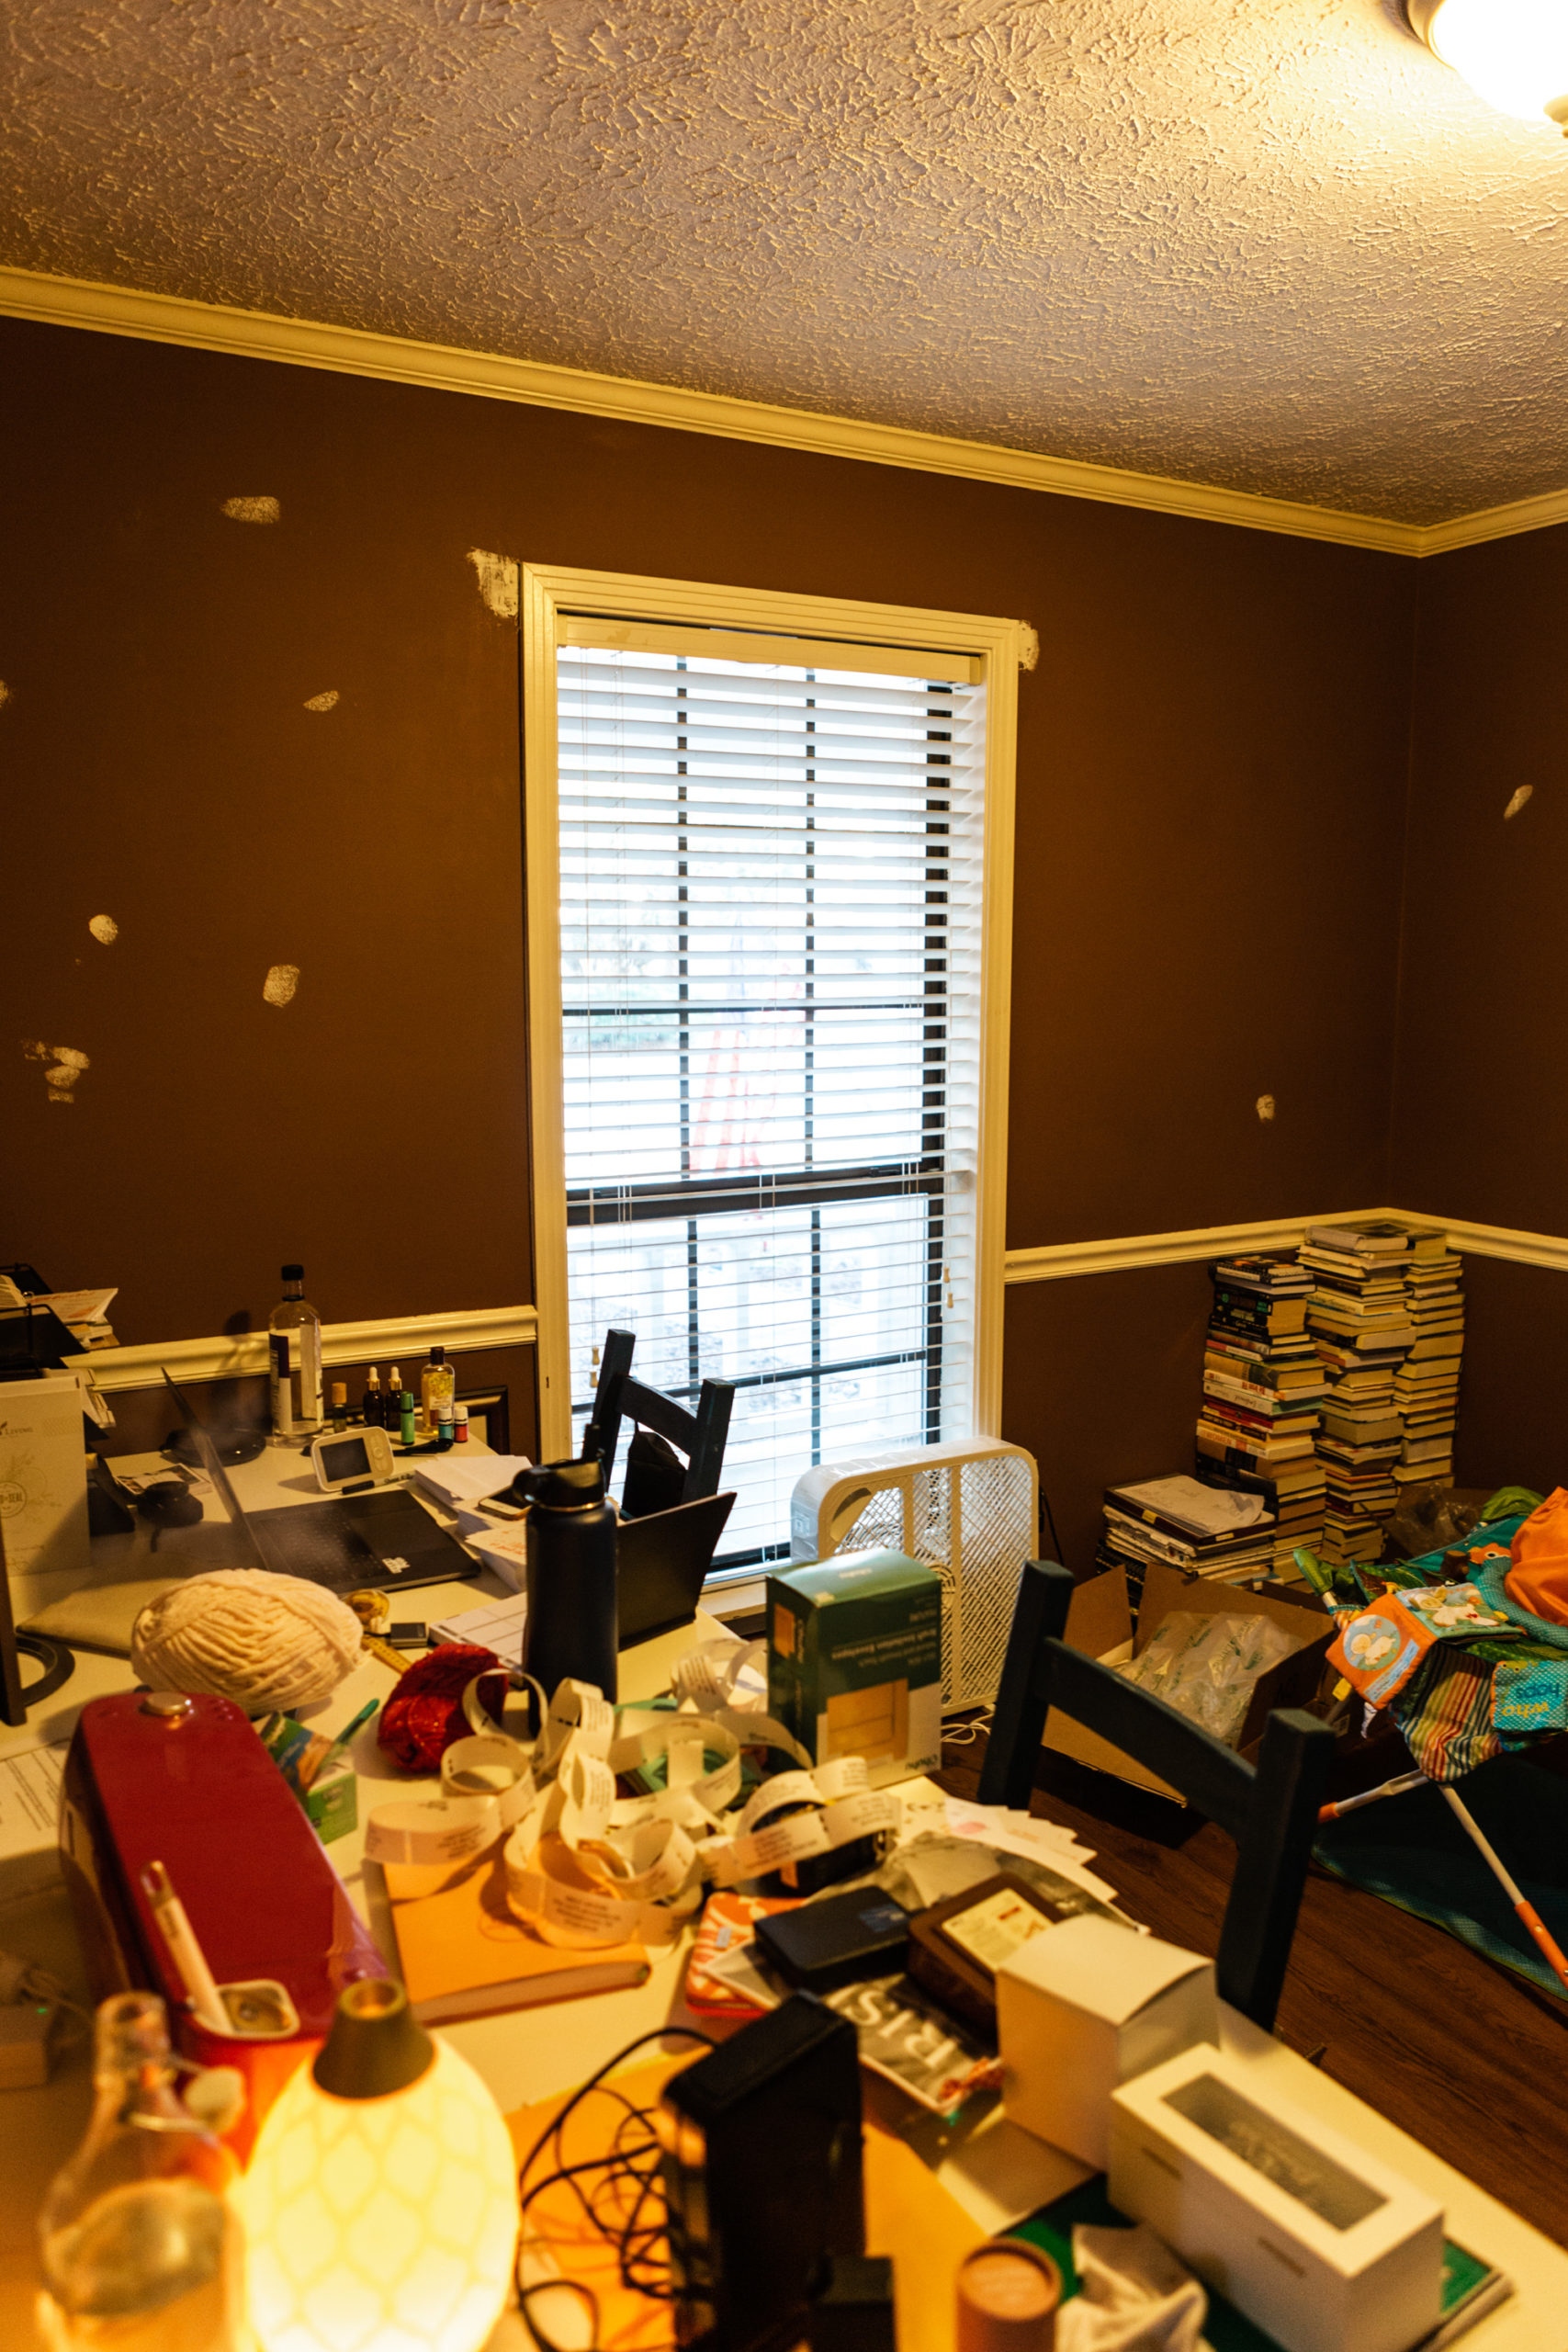
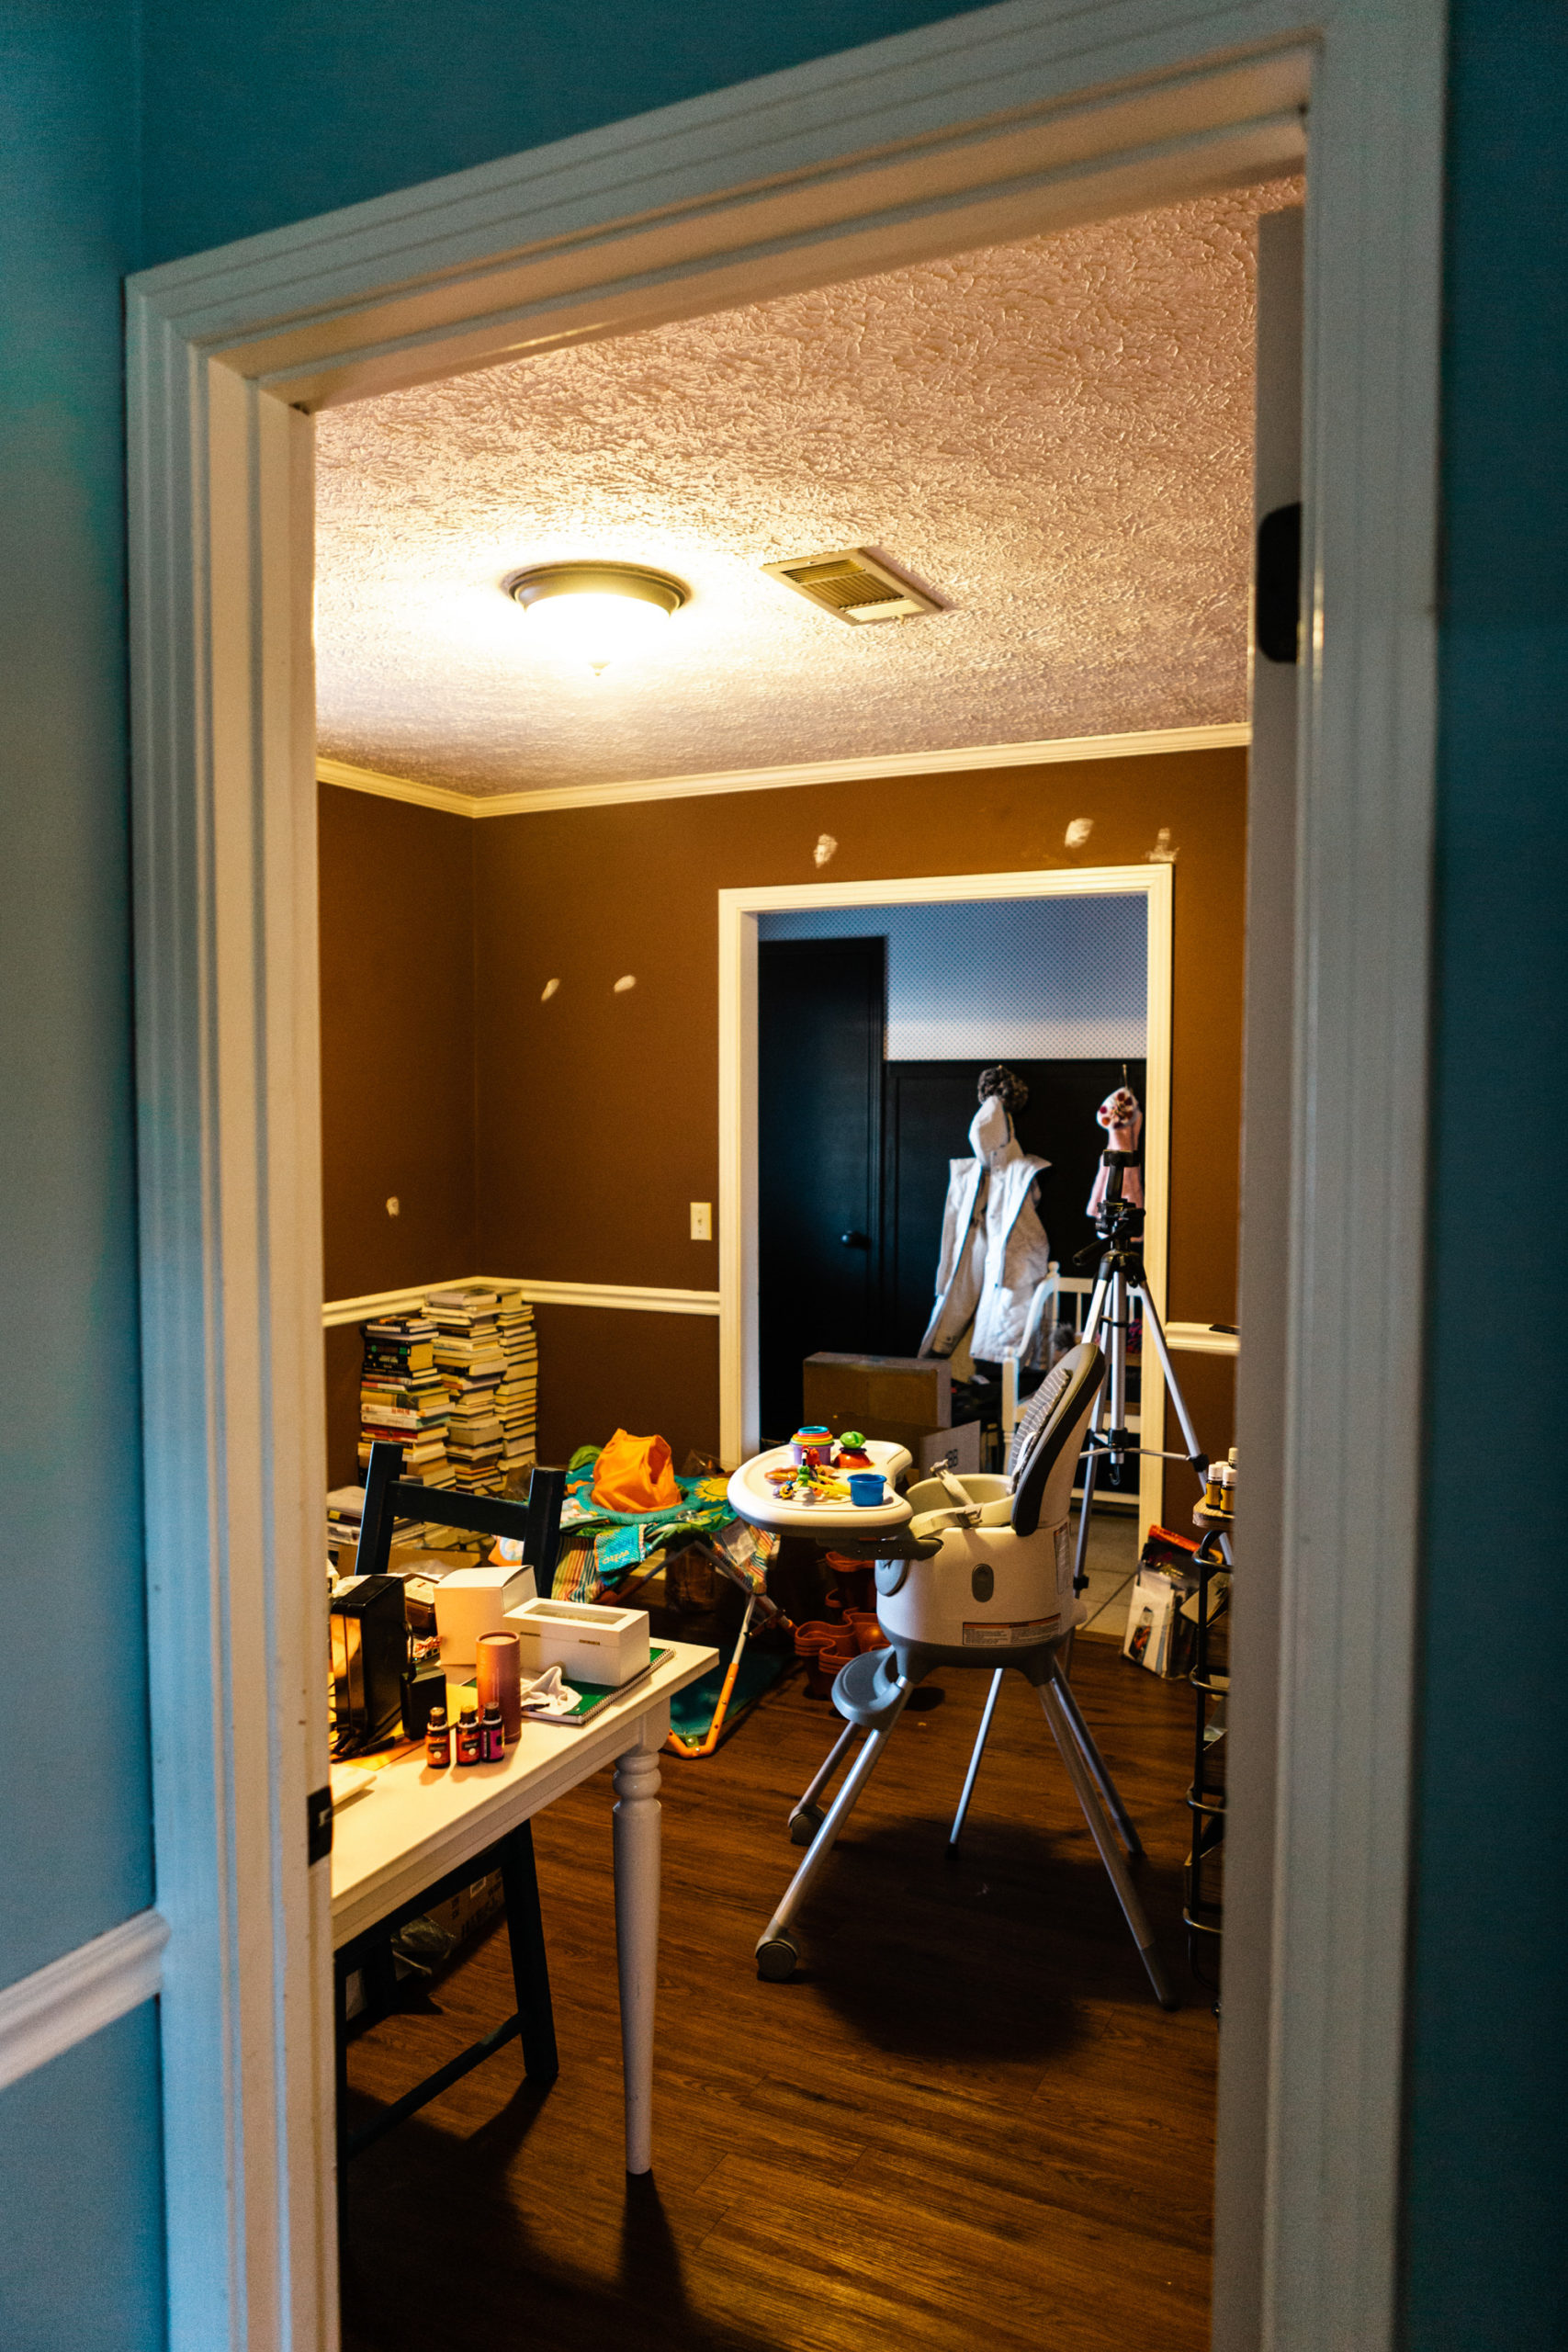
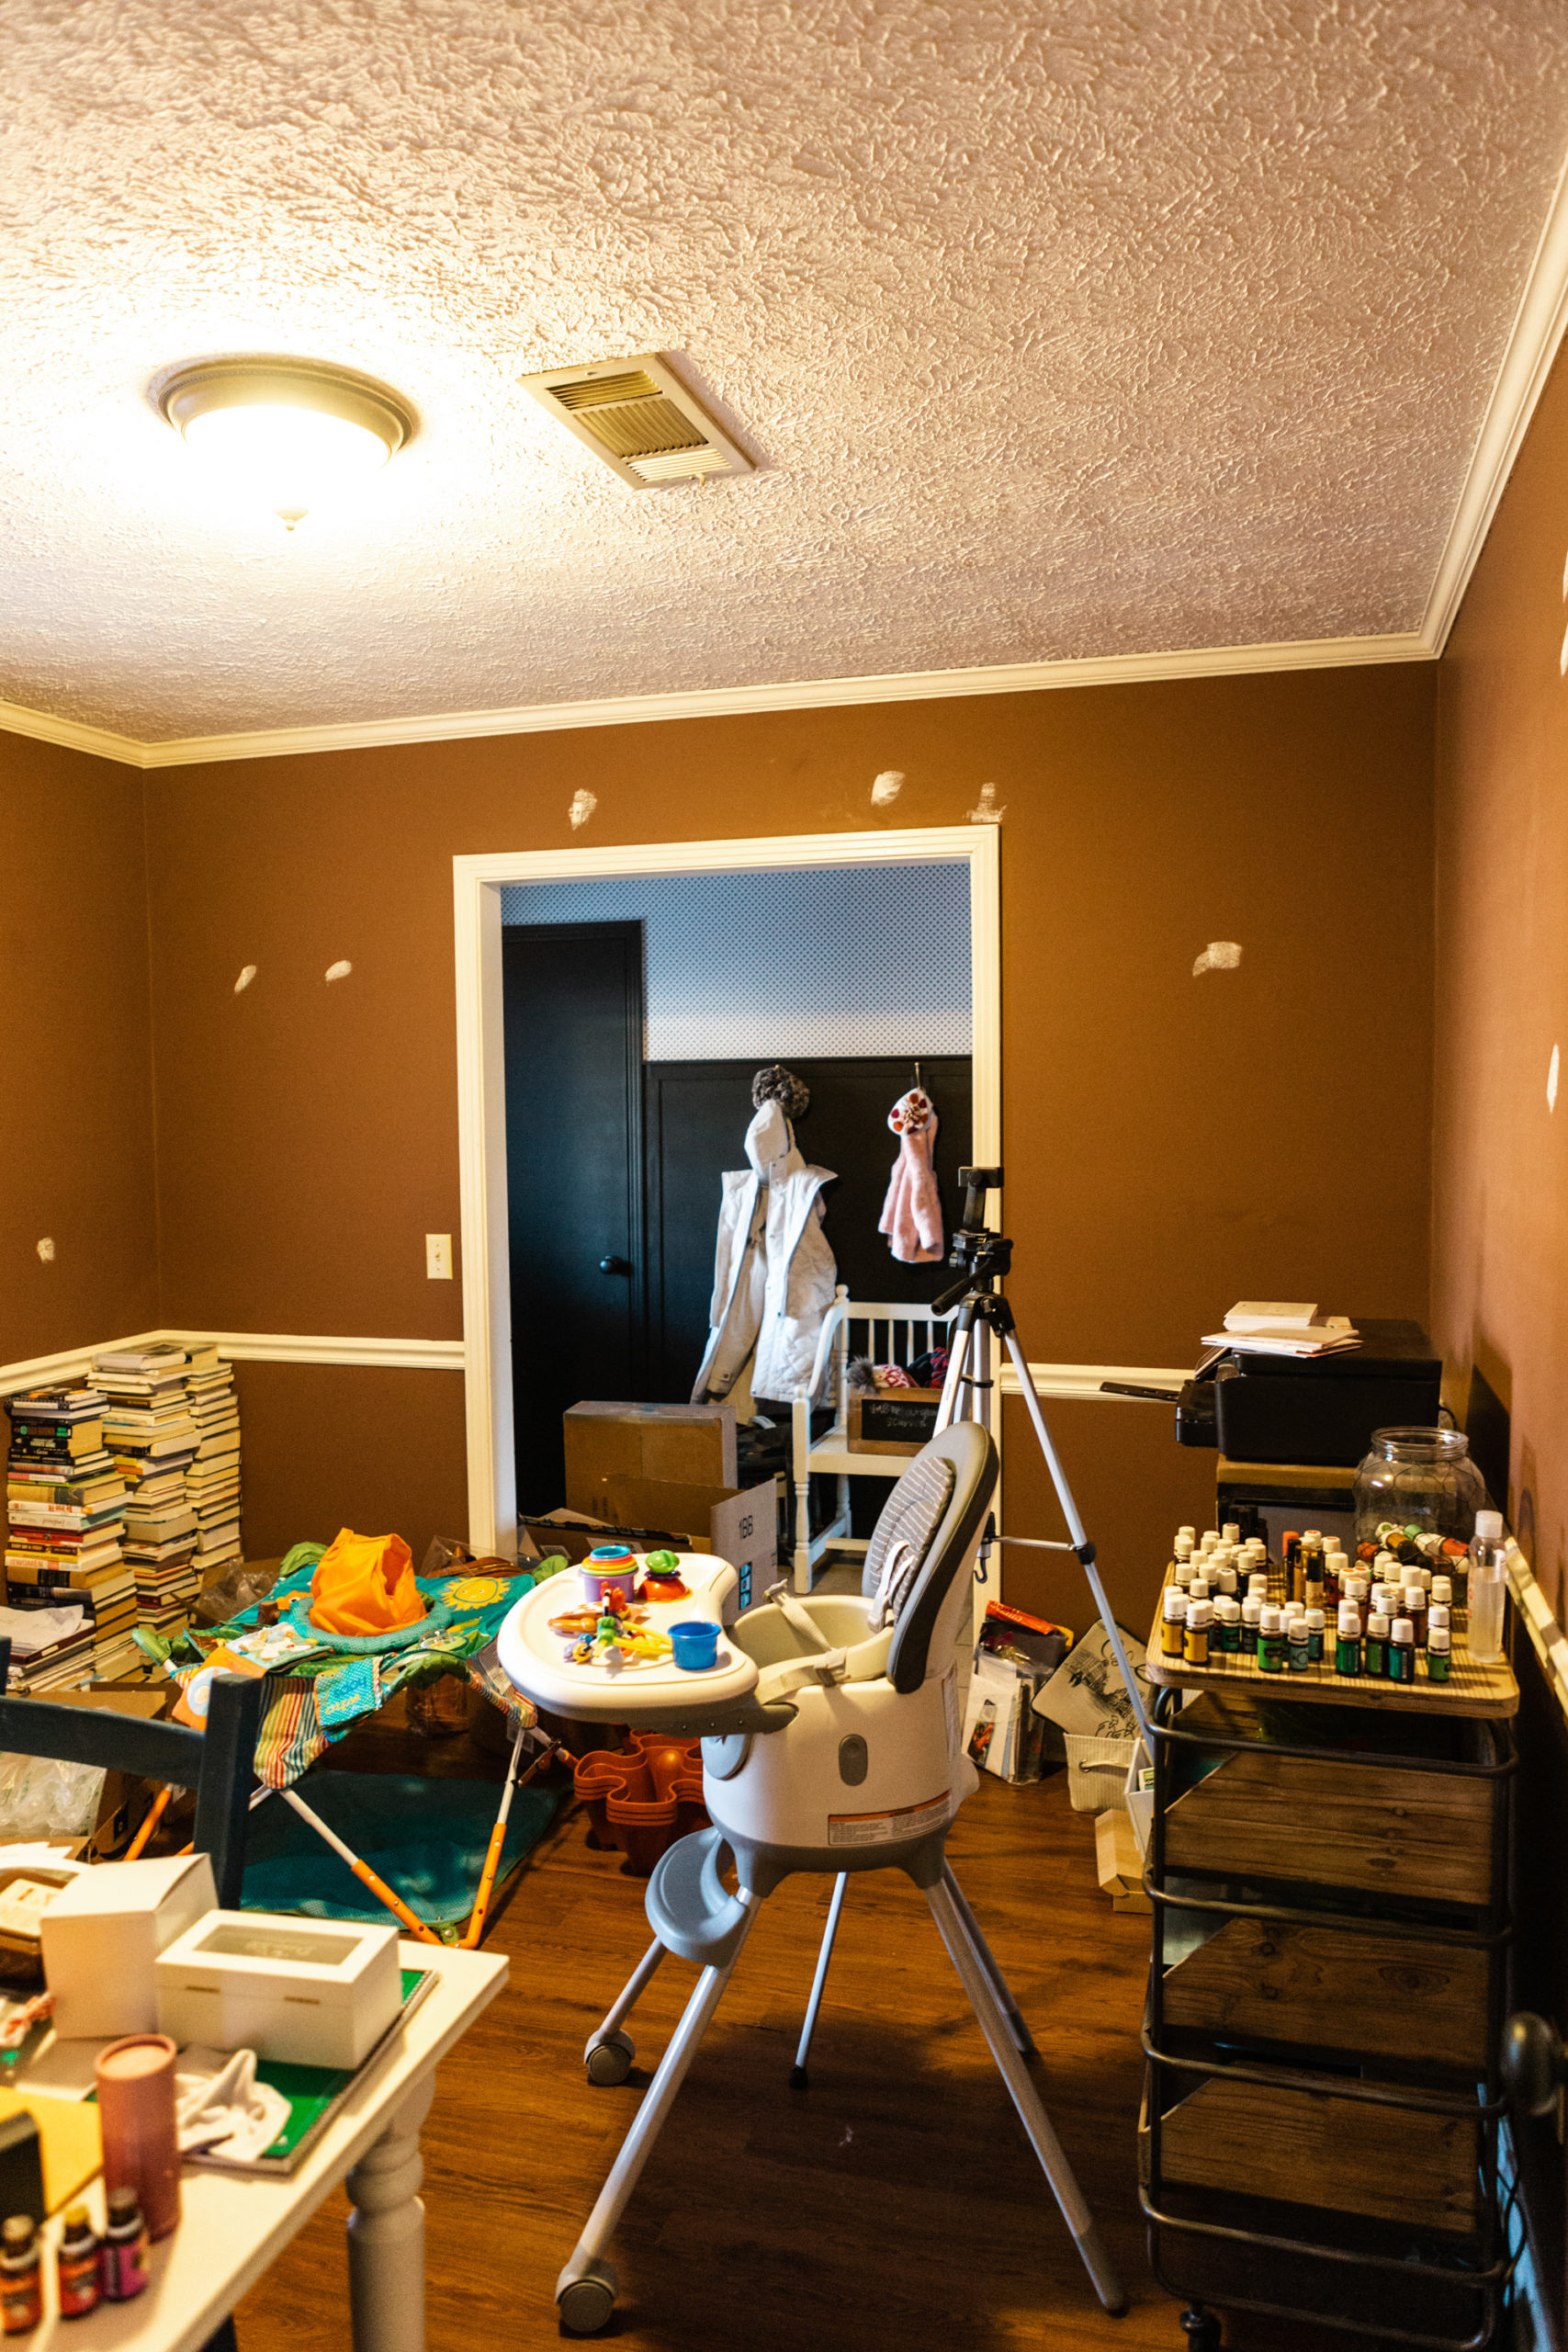
Fun, right? Also… Does the mess stress you out? Me too.
Before we start any room, I create a design board. It gets us both Stephen and I on the same page and saves us time and money in the long run. You can learn how to make one HERE! It doesn’t have to be anything fancy!
Here’s what I came up with for our office:
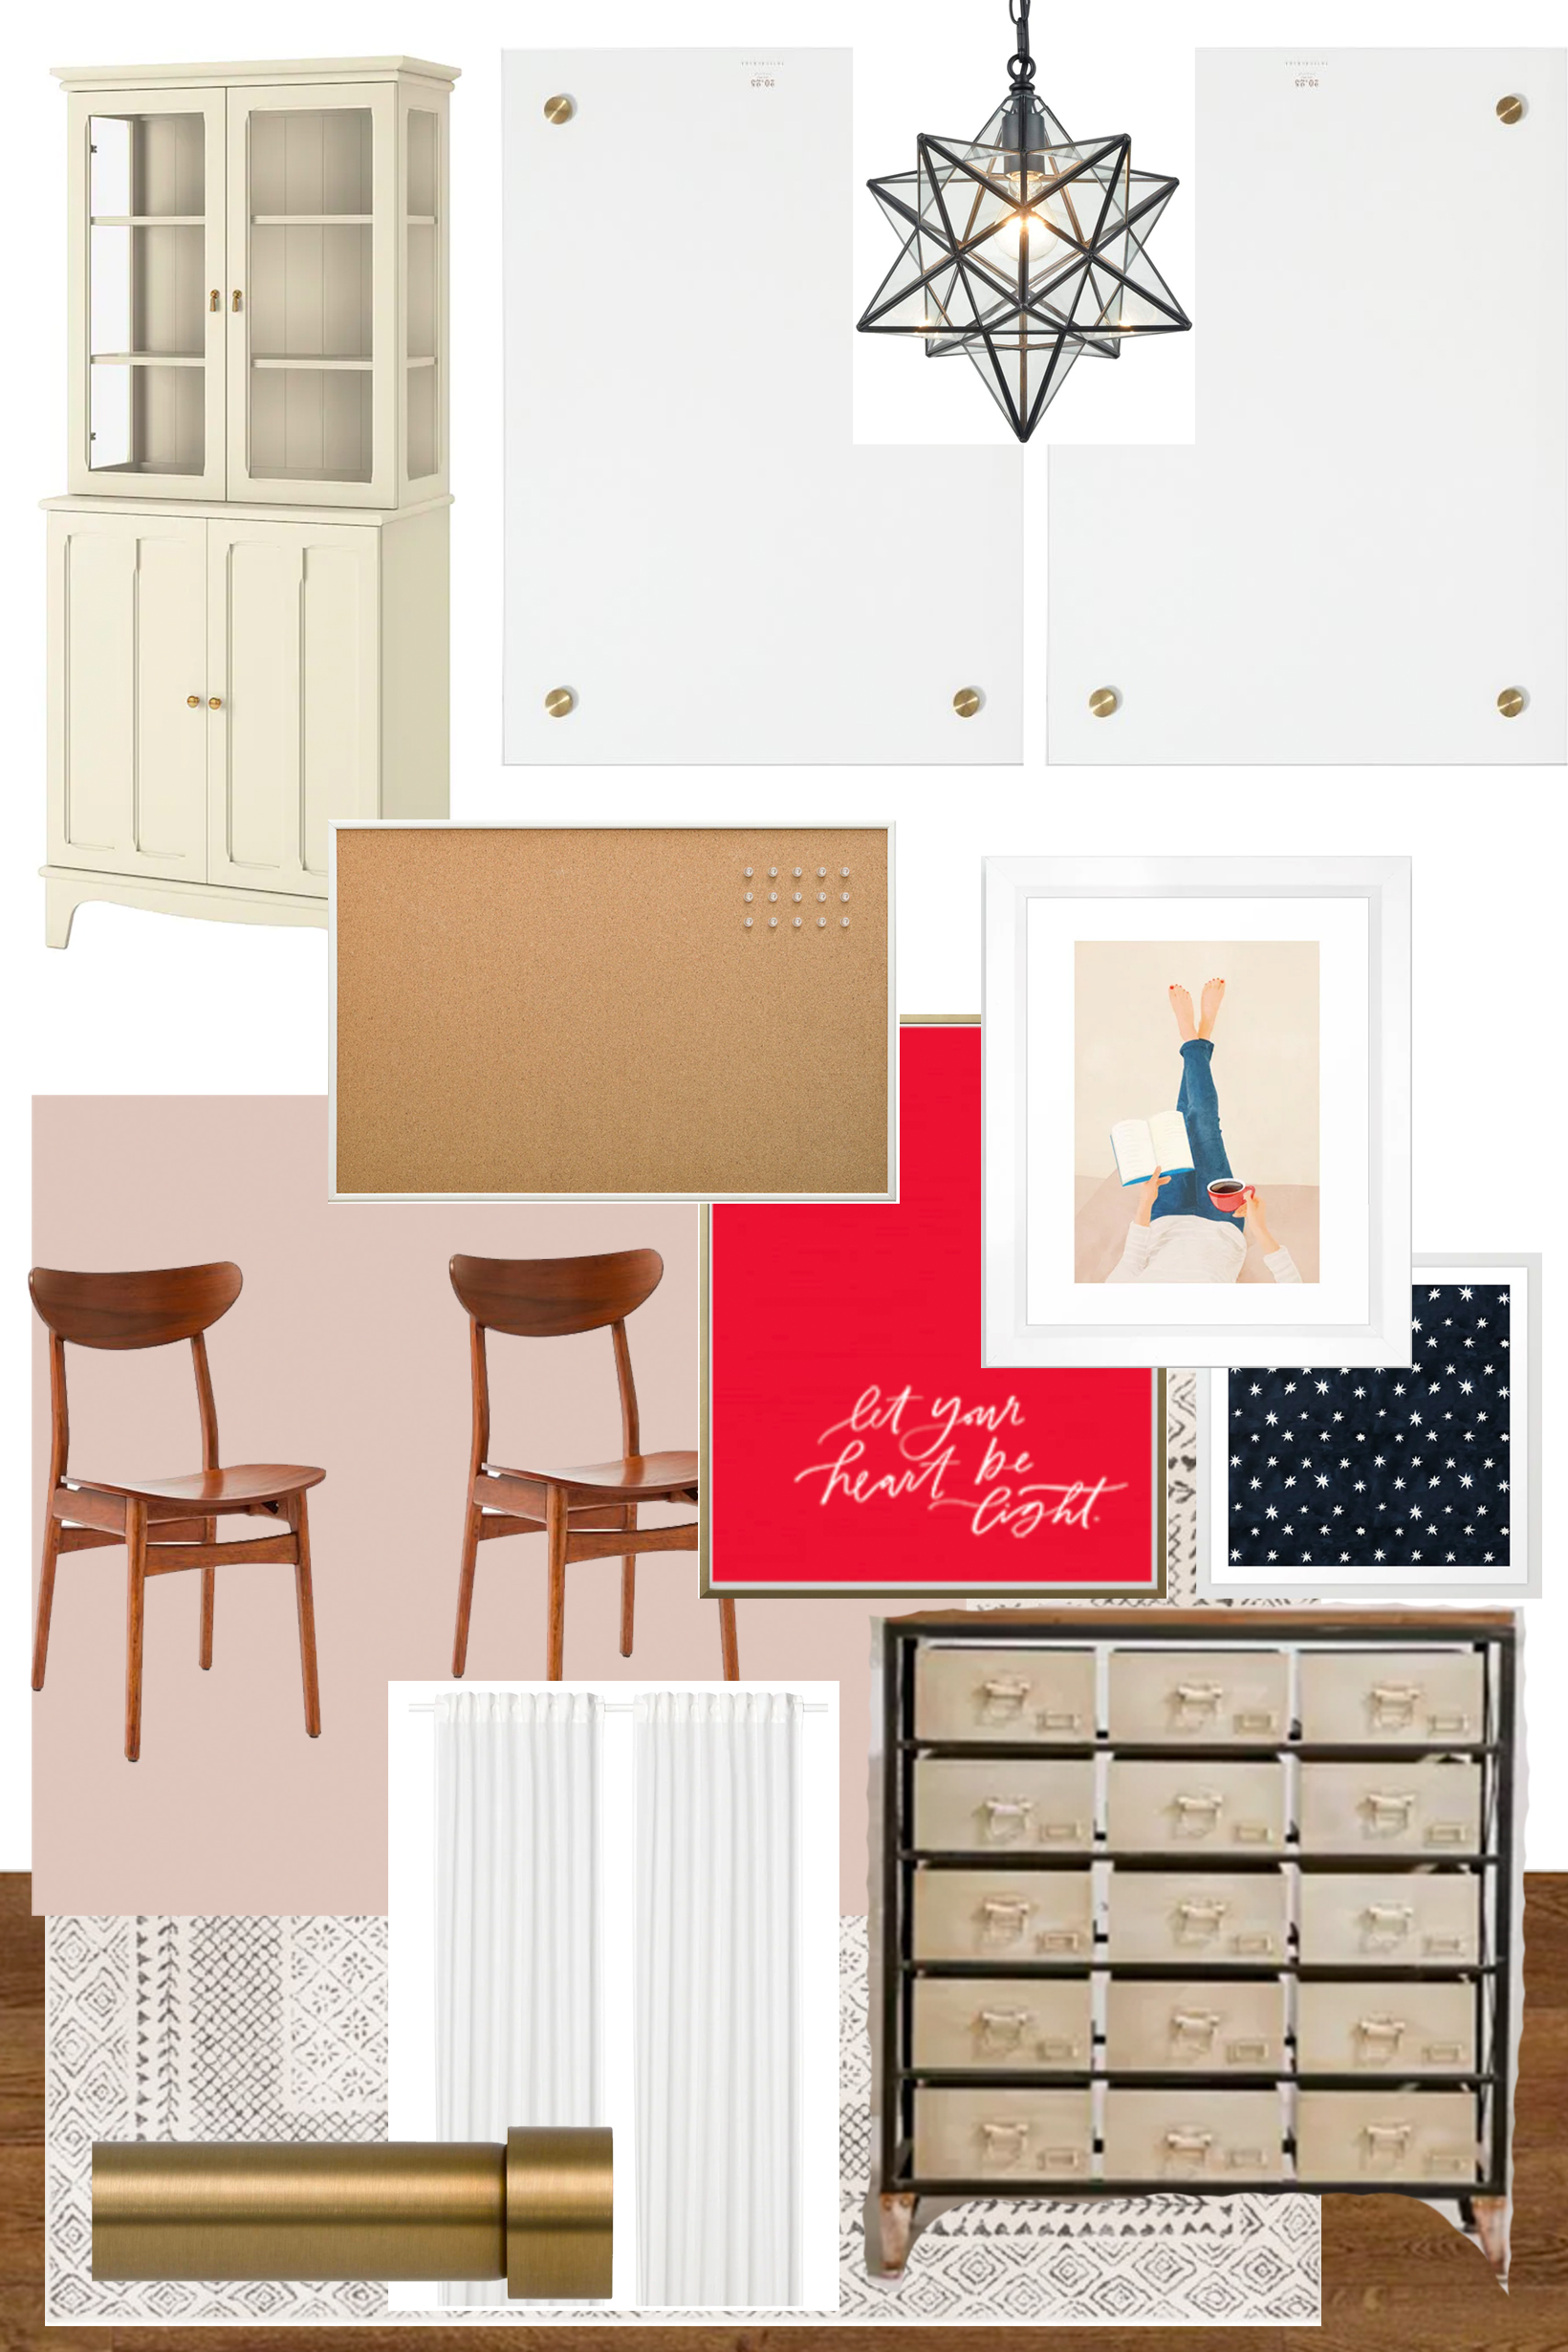
Creating storage is our priority in here since it is literally just four walls and I have a lot of supplies that I use often. A big “thing” of mine is that I need everything to have a place. More specifically, a place where it is hidden unless I don’t want it to be. We are going to keep the same 15 drawer unit we used in our last office in here and we ordered a second one as soon as it came back in stock because we love how functional it is. We’re going to put one on each side of the window.
To add more functionality, we’re going to DIY some acrylic dry erase boards. When I worked in the corporate world I had a whiteboard larger than myself behind my desk. All day long I’d write ideas, brainstorm, create efficiency maps, etc. on that board. I literally saved the company millions of dollars because of how I would sit and stare at that wall and then get to writing. I wanted to be able to do that here but don’t love the look of a whiteboard so I came up with this idea instead. We will share the full tutorial on how you can do it too once we figure it out!
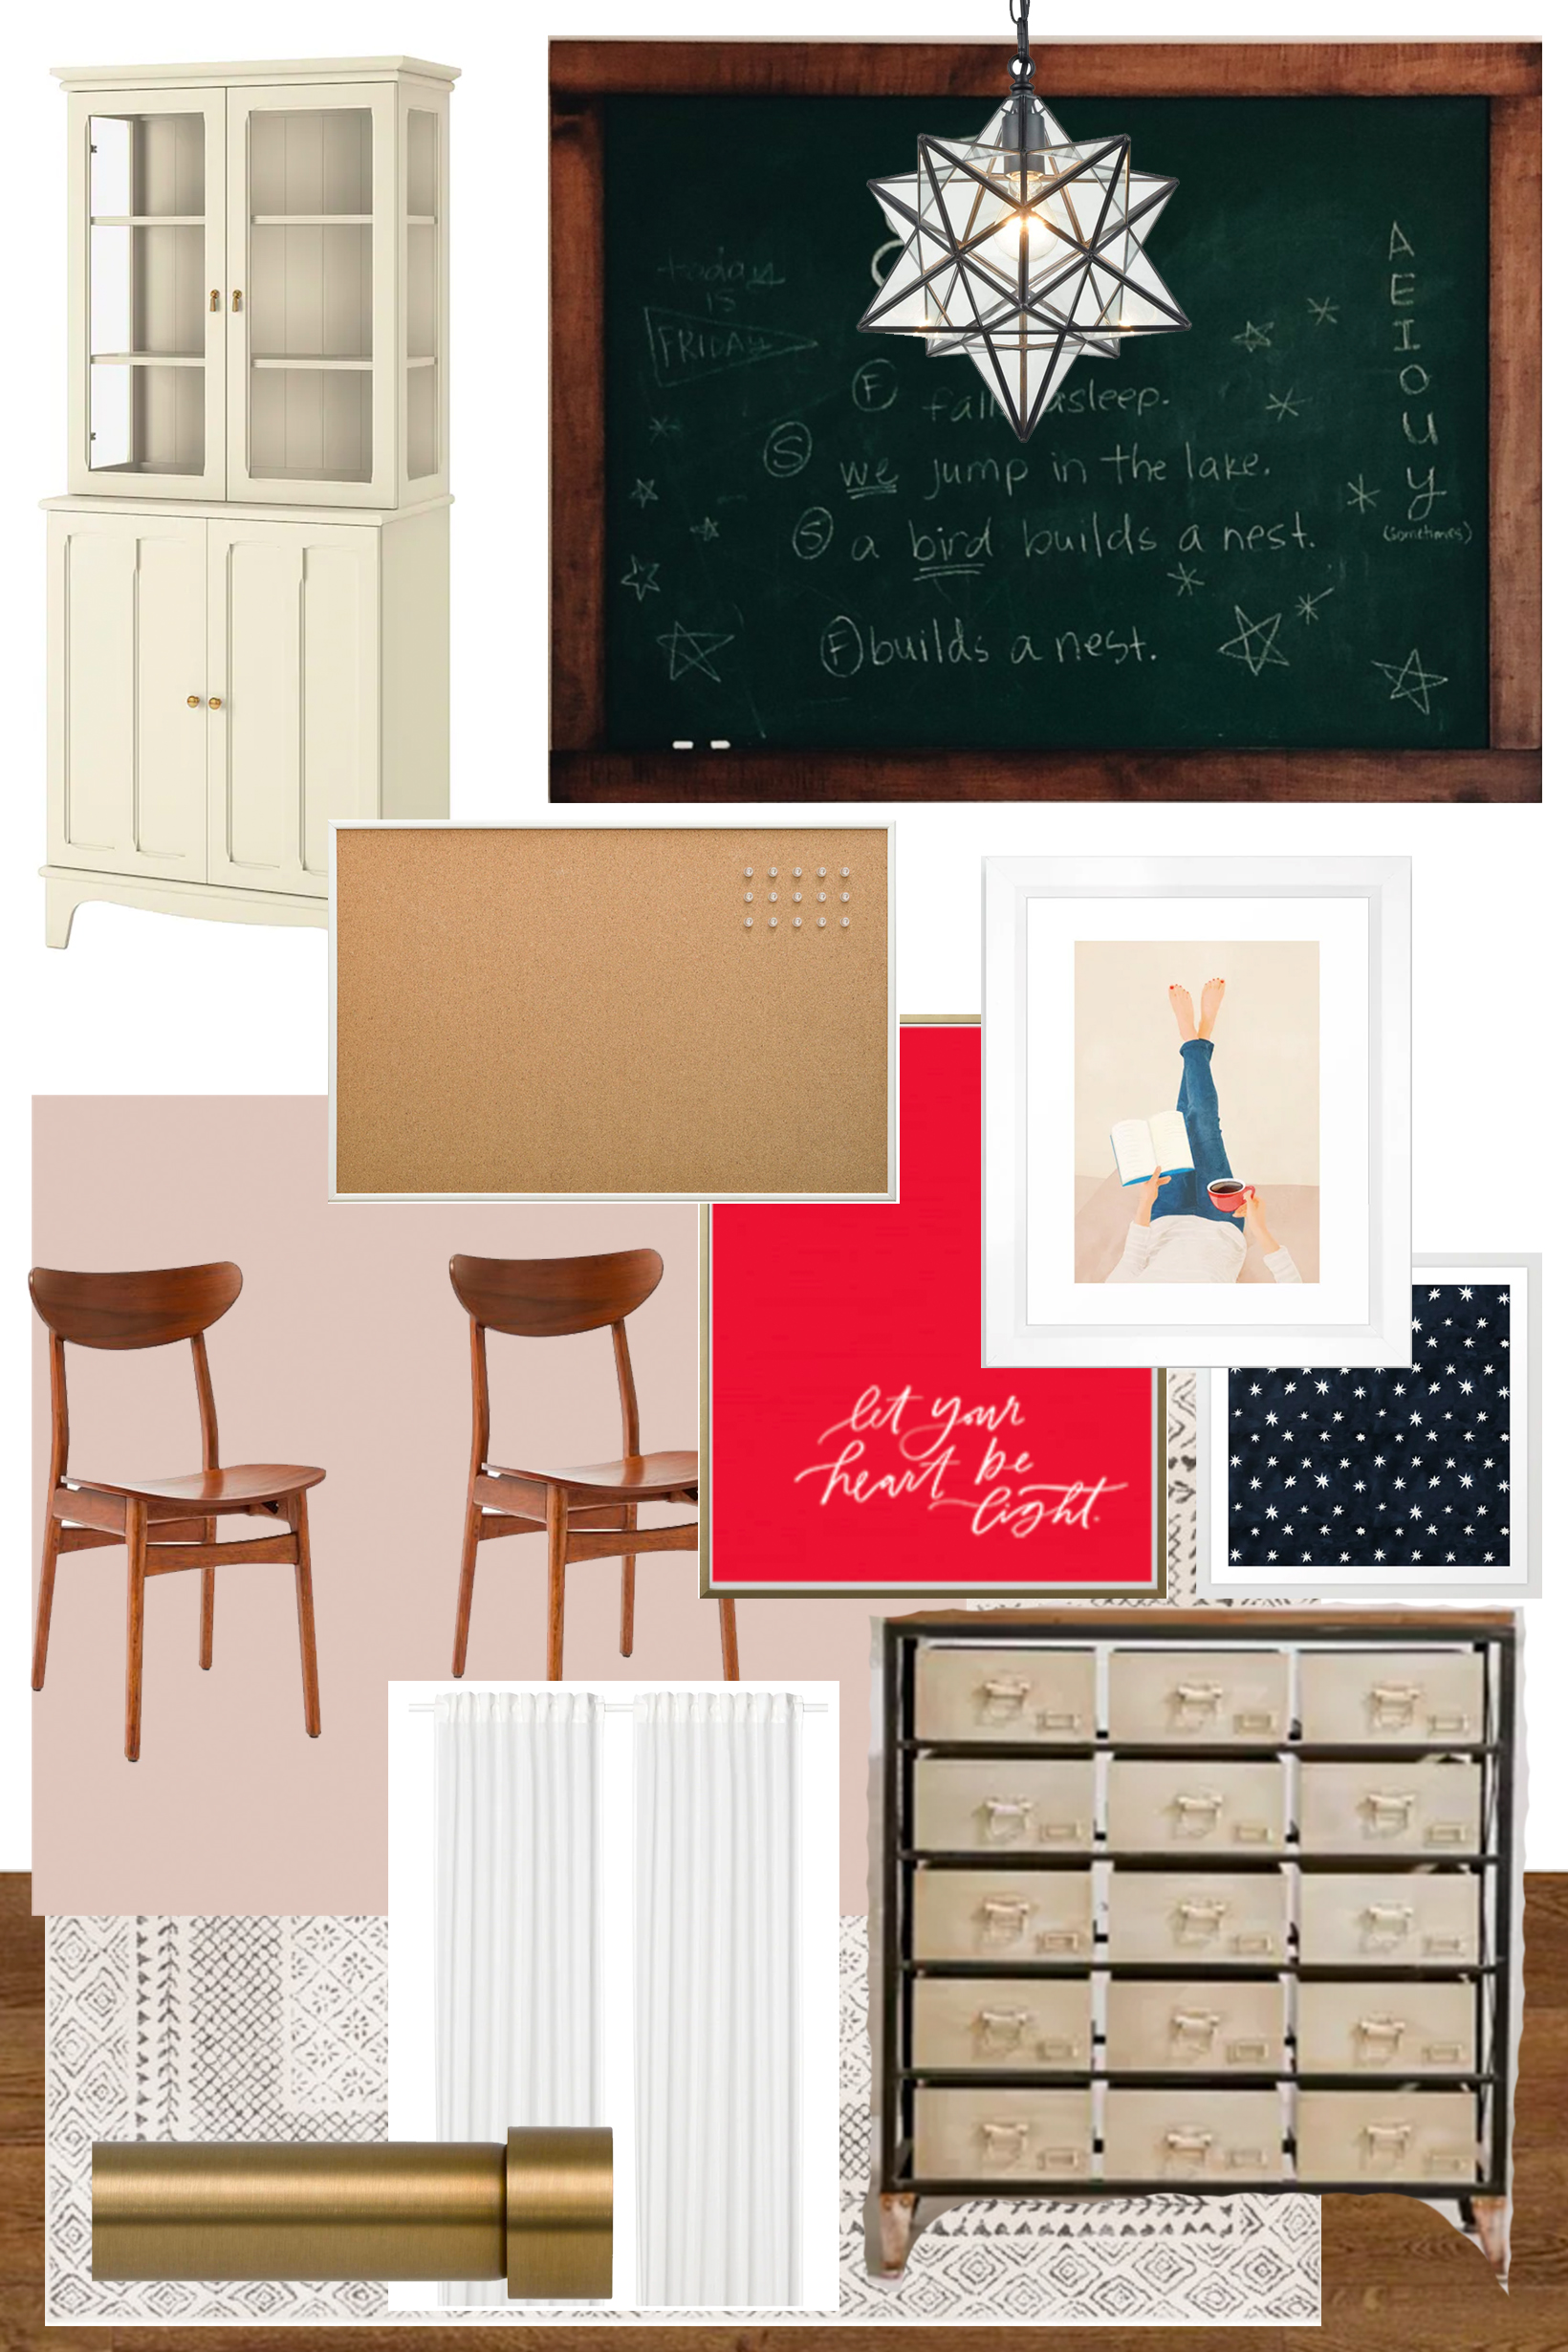
I love to have vintage touches in each room we do. It feels more homey and welcoming to me. My original plan was to DIY a green vintage looking chalkboard like I did HERE. We decided against that though because chalk is a mess and there’s just something about writing with a marker on the board. I go buck wild and my best ideas come out of that freedom and ease. With the acrylic dry erase boards the entire room tends to lean more modern than I typically prefer but their functionality beat design in this case. Here was my original plan:
Stephen and I have been planning on getting this bookcase for over six months now. We’ve been keeping our eye on it since it has been going out of stock. About a month ago the stock was getting low at the closest Ikea so we hopped in the car and drove the 2.5 hours in hope that we’d be able to snag it. Sure enough, the computer system was wrong and they were already sold out. It was a bummer but it all worked out because we picked up this one. It is definitely more expensive but ultimately is better for us because we are able to fit both the printer and Cricut in the bottom with no problem, which was very important to us!
Stephen found this table and 6 chairs on Craigslist in South Carolina right before we moved. He got the entire set for $100. It was a steal! We knew that we wanted a big area for us to both work and for me to be able to spread all my stuff out. I’m going to paint it the same color that we painted our front door. I think it’ll add some fun and charm! I searched for weeks to determine which chairs we would do in here. I didn’t want typical office chairs or to spend my life savings for that matter. Since the room was more modern like I mentioned above, I was on the hunt for something vintage feeling. I found THESE and we love them!
The one thing I’m not set on yet is the rug. We need a rug to be able to hide the cords but I don’t know if I’m absolutely in love with the one I put on the board so I haven’t pulled the trigger on anything yet. The way I see it- if you don’t really love something, don’t spend your money on it.
First up on the to-do list: REMOVE THE CHAIR MOLDING! And then…. It’s game on with the textured ceilings. We can’t way to share with you how we’ve cut down days with our new method! Stay tuned!
I sincerely appreciate you all shopping through my affiliate links like the ones included in this post. I make a small commission when you purchase through these links at no extra cost to you. These funds help support my family and allow for us to produce better content for you all. I can’t thank you enough for supporting all that we do!
jordan jean
Leave a Reply


[…] I really wanted to incorporate into the new office is a big writing space on the wall. I had a giant whiteboard in my office while working in the […]
[…] started in the office by removing the chair rail, patching it, and then removing the textured ceilings. I’m still […]