May 7, 2020
How to Create a Design Board for Free + My Process When Designing
posted in:
Are you excited for this one?! I know a lot of you have been anxiously waiting for this so today I’m so thrilled to be sharing with you all how to make a design board for free.
I’ve said it over and over and over again now the importance of creating a design/mood/inspiration board before starting a project. I’ve learned the hard way how much time and money they can save! My thoughts with design boards – it’s not considered finished until you absolutely love it. When I open boards that I love I think, “I CAN’T WAIT to see this come to life!!!” Once the board it’s complete, I suggest sticking to it as closely as you can. Granted, some things will happen and plans will need to be slightly changed but in most cases, having a design board prepared ahead of time prevents that from happening.
I create my design boards using Photoshop. It’s not free but I have it for my businesses so it makes sense for me to use that. However, there are multiple other tools to use to do this for free such as PowerPoint, Word, or Canva. PicMonkey is a popular editing tool to use but it is no longer free. Today we’re going to use Canva because I think it’s the easiest and most efficient way to get the job done!
The design board that I’ll be creating is for a friend of mine that wants her office to be more inspiring for her. Over time I’ve realized I have somewhat of a “formula” when creating design boards. Here’s a little peek into the way my brain works when going about this and how to do it for free using Canva:
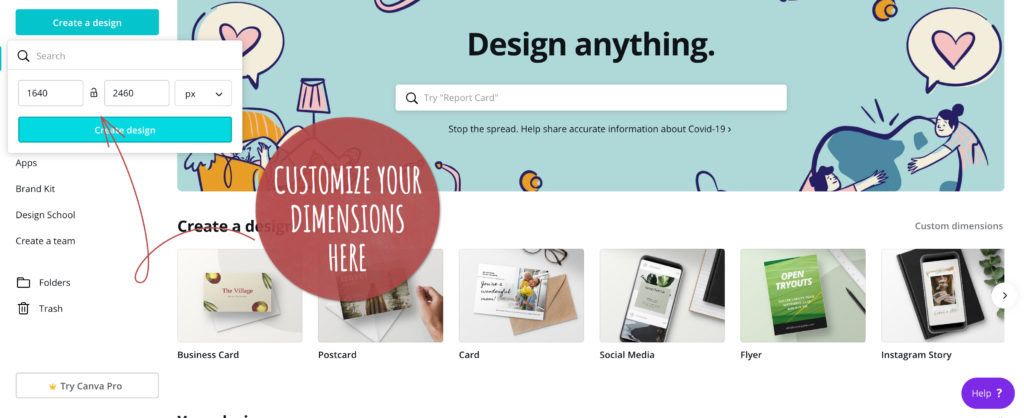
1. Start with a blank canvas. Since I’m usually creating these for my blog, I use the custom dimensions of 1640 x 2460. I also prefer for it to be vertical vs horizontal. You can really use whatever you want though!
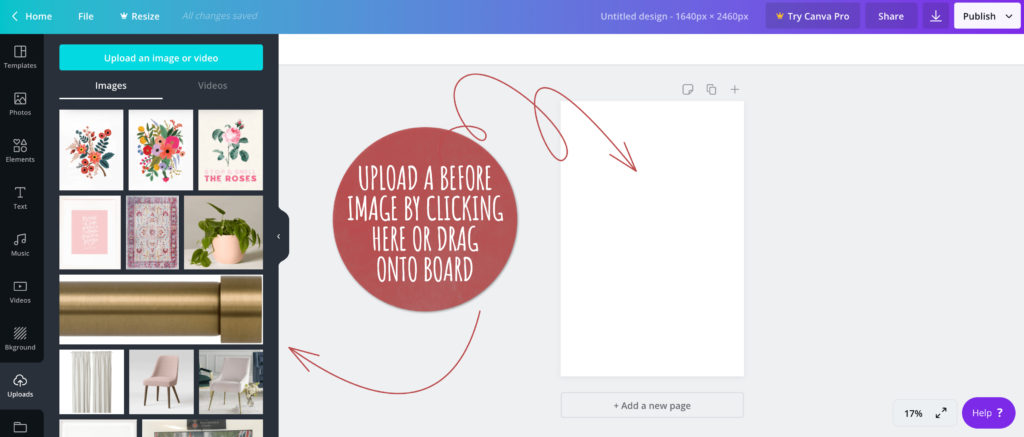
2. I like to add a before photo if I can so I don’t have to keep scrolling back and forth to look at one. You can click “upload” and add a photo from there or you can just drag it onto the Canva screen.
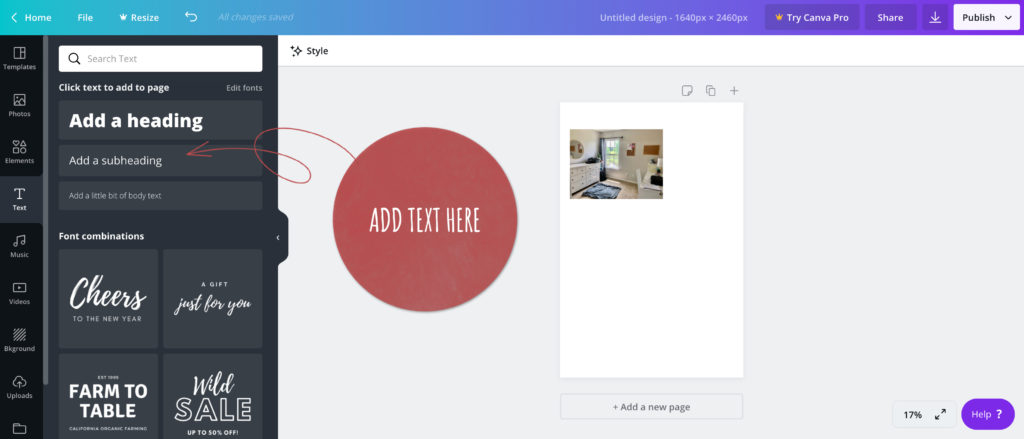
3. Click “Text” on the left side to add BEFORE text.
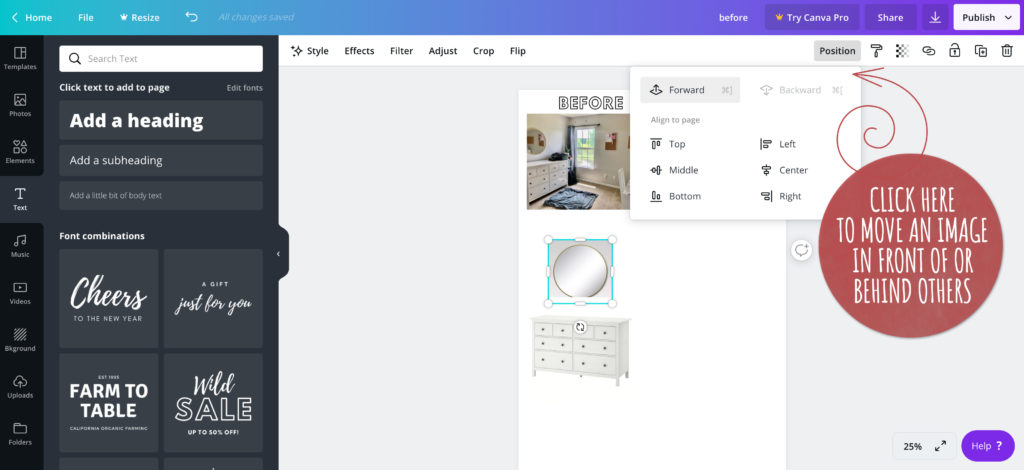
4. From there I add to the board items that I know will remain in the room. For example, Jessica wanted to keep the mirror, lamp, desk, photograph, and dresser in there. The easiest way to do this is by finding the item at a store and taking a screenshot of it on your computer and dragging it onto the Canva board. You can also click “copy image” on the item and then use your keyboard to paste it on the Canva board (on a Mac it’s command+v). If you need to move an item in front or behind another one, select the item and then click “position” and click “forward” or “backward”.
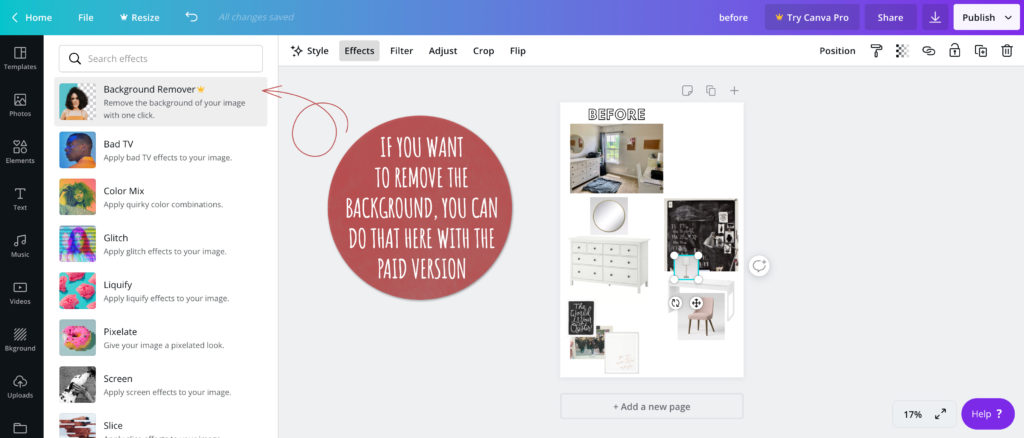
5. Next, I add any other new “wants”. Some examples of this would be a piece of artwork that you love or curtains that you adore, an accent wall, wallpaper, or in this case, Jessica wanted a giant chalkboard, a fun gallery wall, and a pink chair. To remove the background from an item, you will need the paid version of Canva. However, this entire board was created using the free version! The whole point is just to give you a vision for how the room comes together! It doesn’t need to be perfect. You can also crop extra edges on a photo by clicking on it and then clicking “crop”.
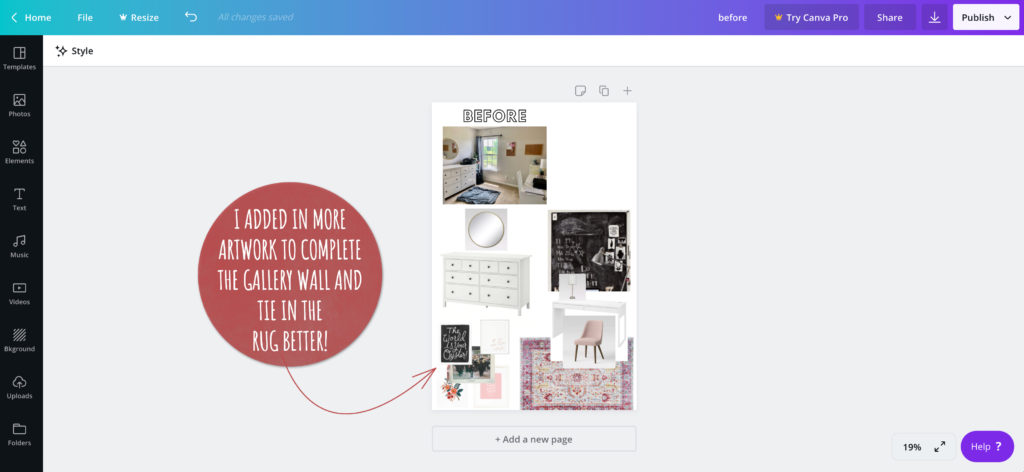
6. There are two ways I go from this point – I either find a rug to tie what is currently in the room together OR if they already have a rug they want to use, I find the bedding or artwork that myself (or the client) loves and wants to add to tie it all together.

7. From there, reverse roles. If you have a rug and no bedding or artwork, find some that spark the feeling you want for that space. If you have bedding/artwork and no rug, I like to find a rug that includes touches of everything in the room. It’s like wrapping it all up and adorning it with a pretty bow.
8. As for accessories, I keep it pretty simple and functional! Plants, books, and diffusers are my go-tos. I like to have at least one touch of black in every room!
Click the tags in the post to shop the products:


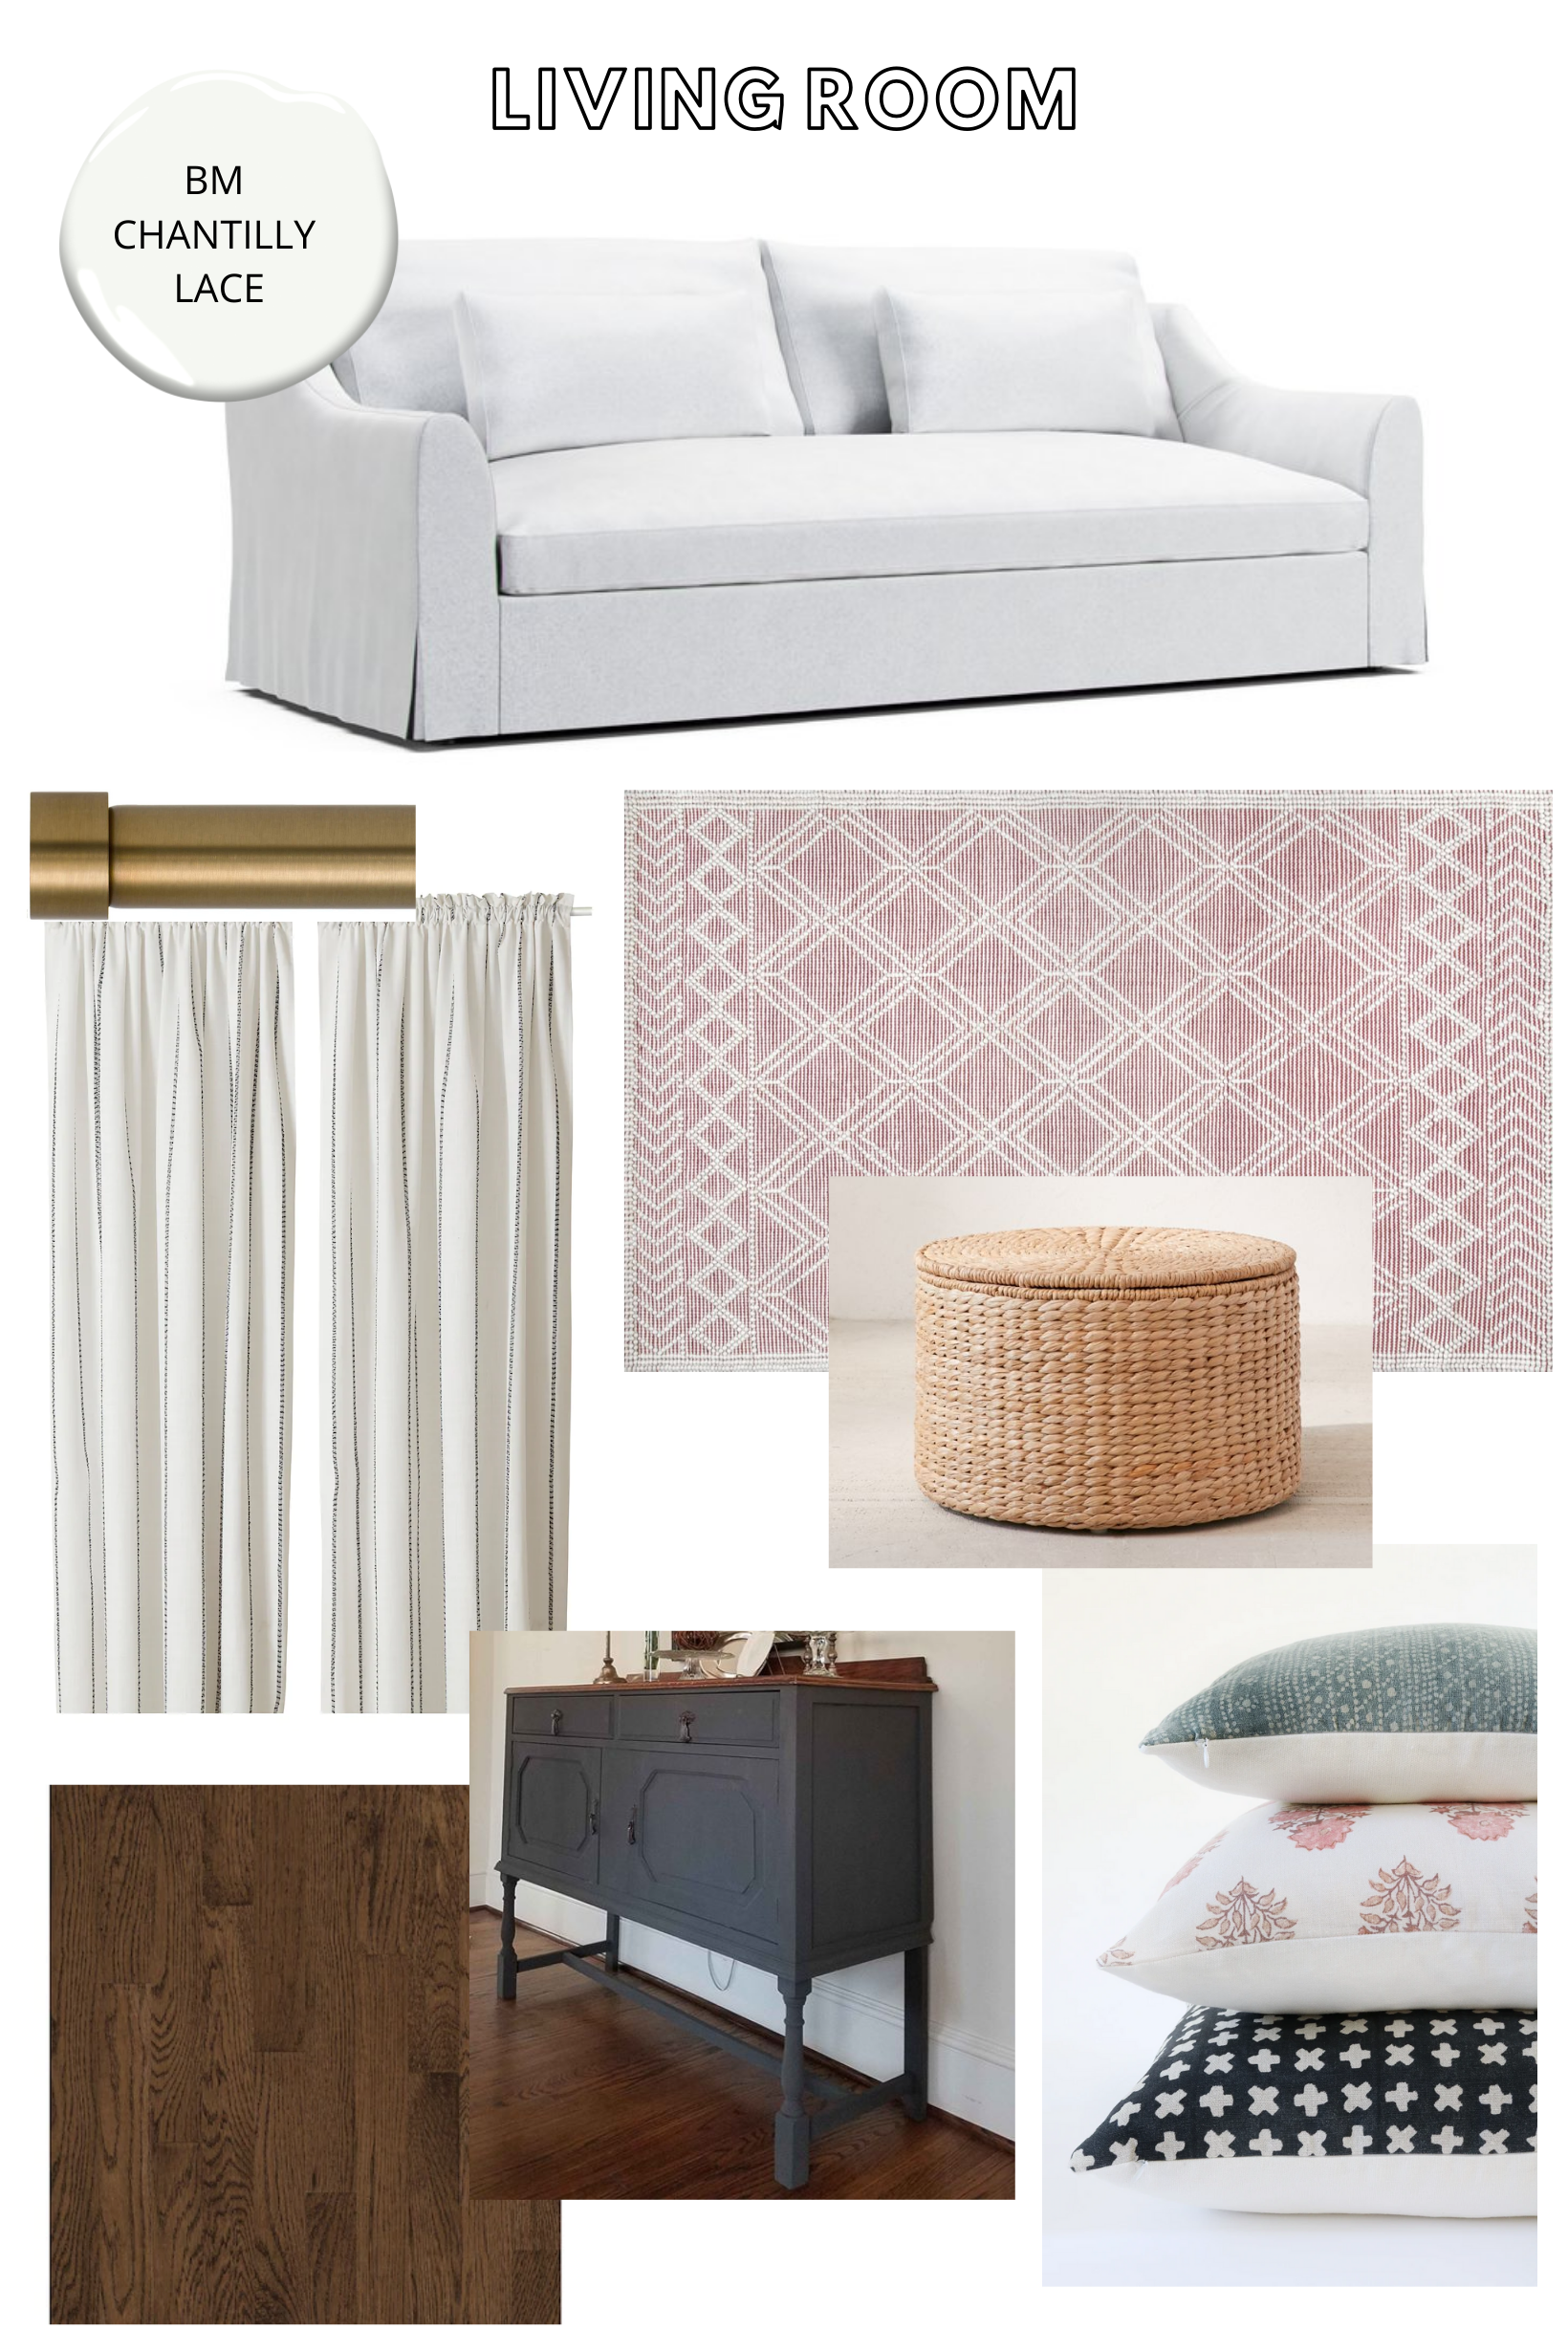
I went ahead and created a couple of other design boards using Canva. This is what I’m thinking so far for the living room in our next house. This is all hypothetical, of course! It’ll be more finalized when we know exactly which house we get (it can change based on the style of the home, what is there already, what we plan to change, etc.). I went off of one we’re looking at to create this design.
For the artwork, I’d like to add a black and white recently taken photo of our family. It’ll be more personal to us!
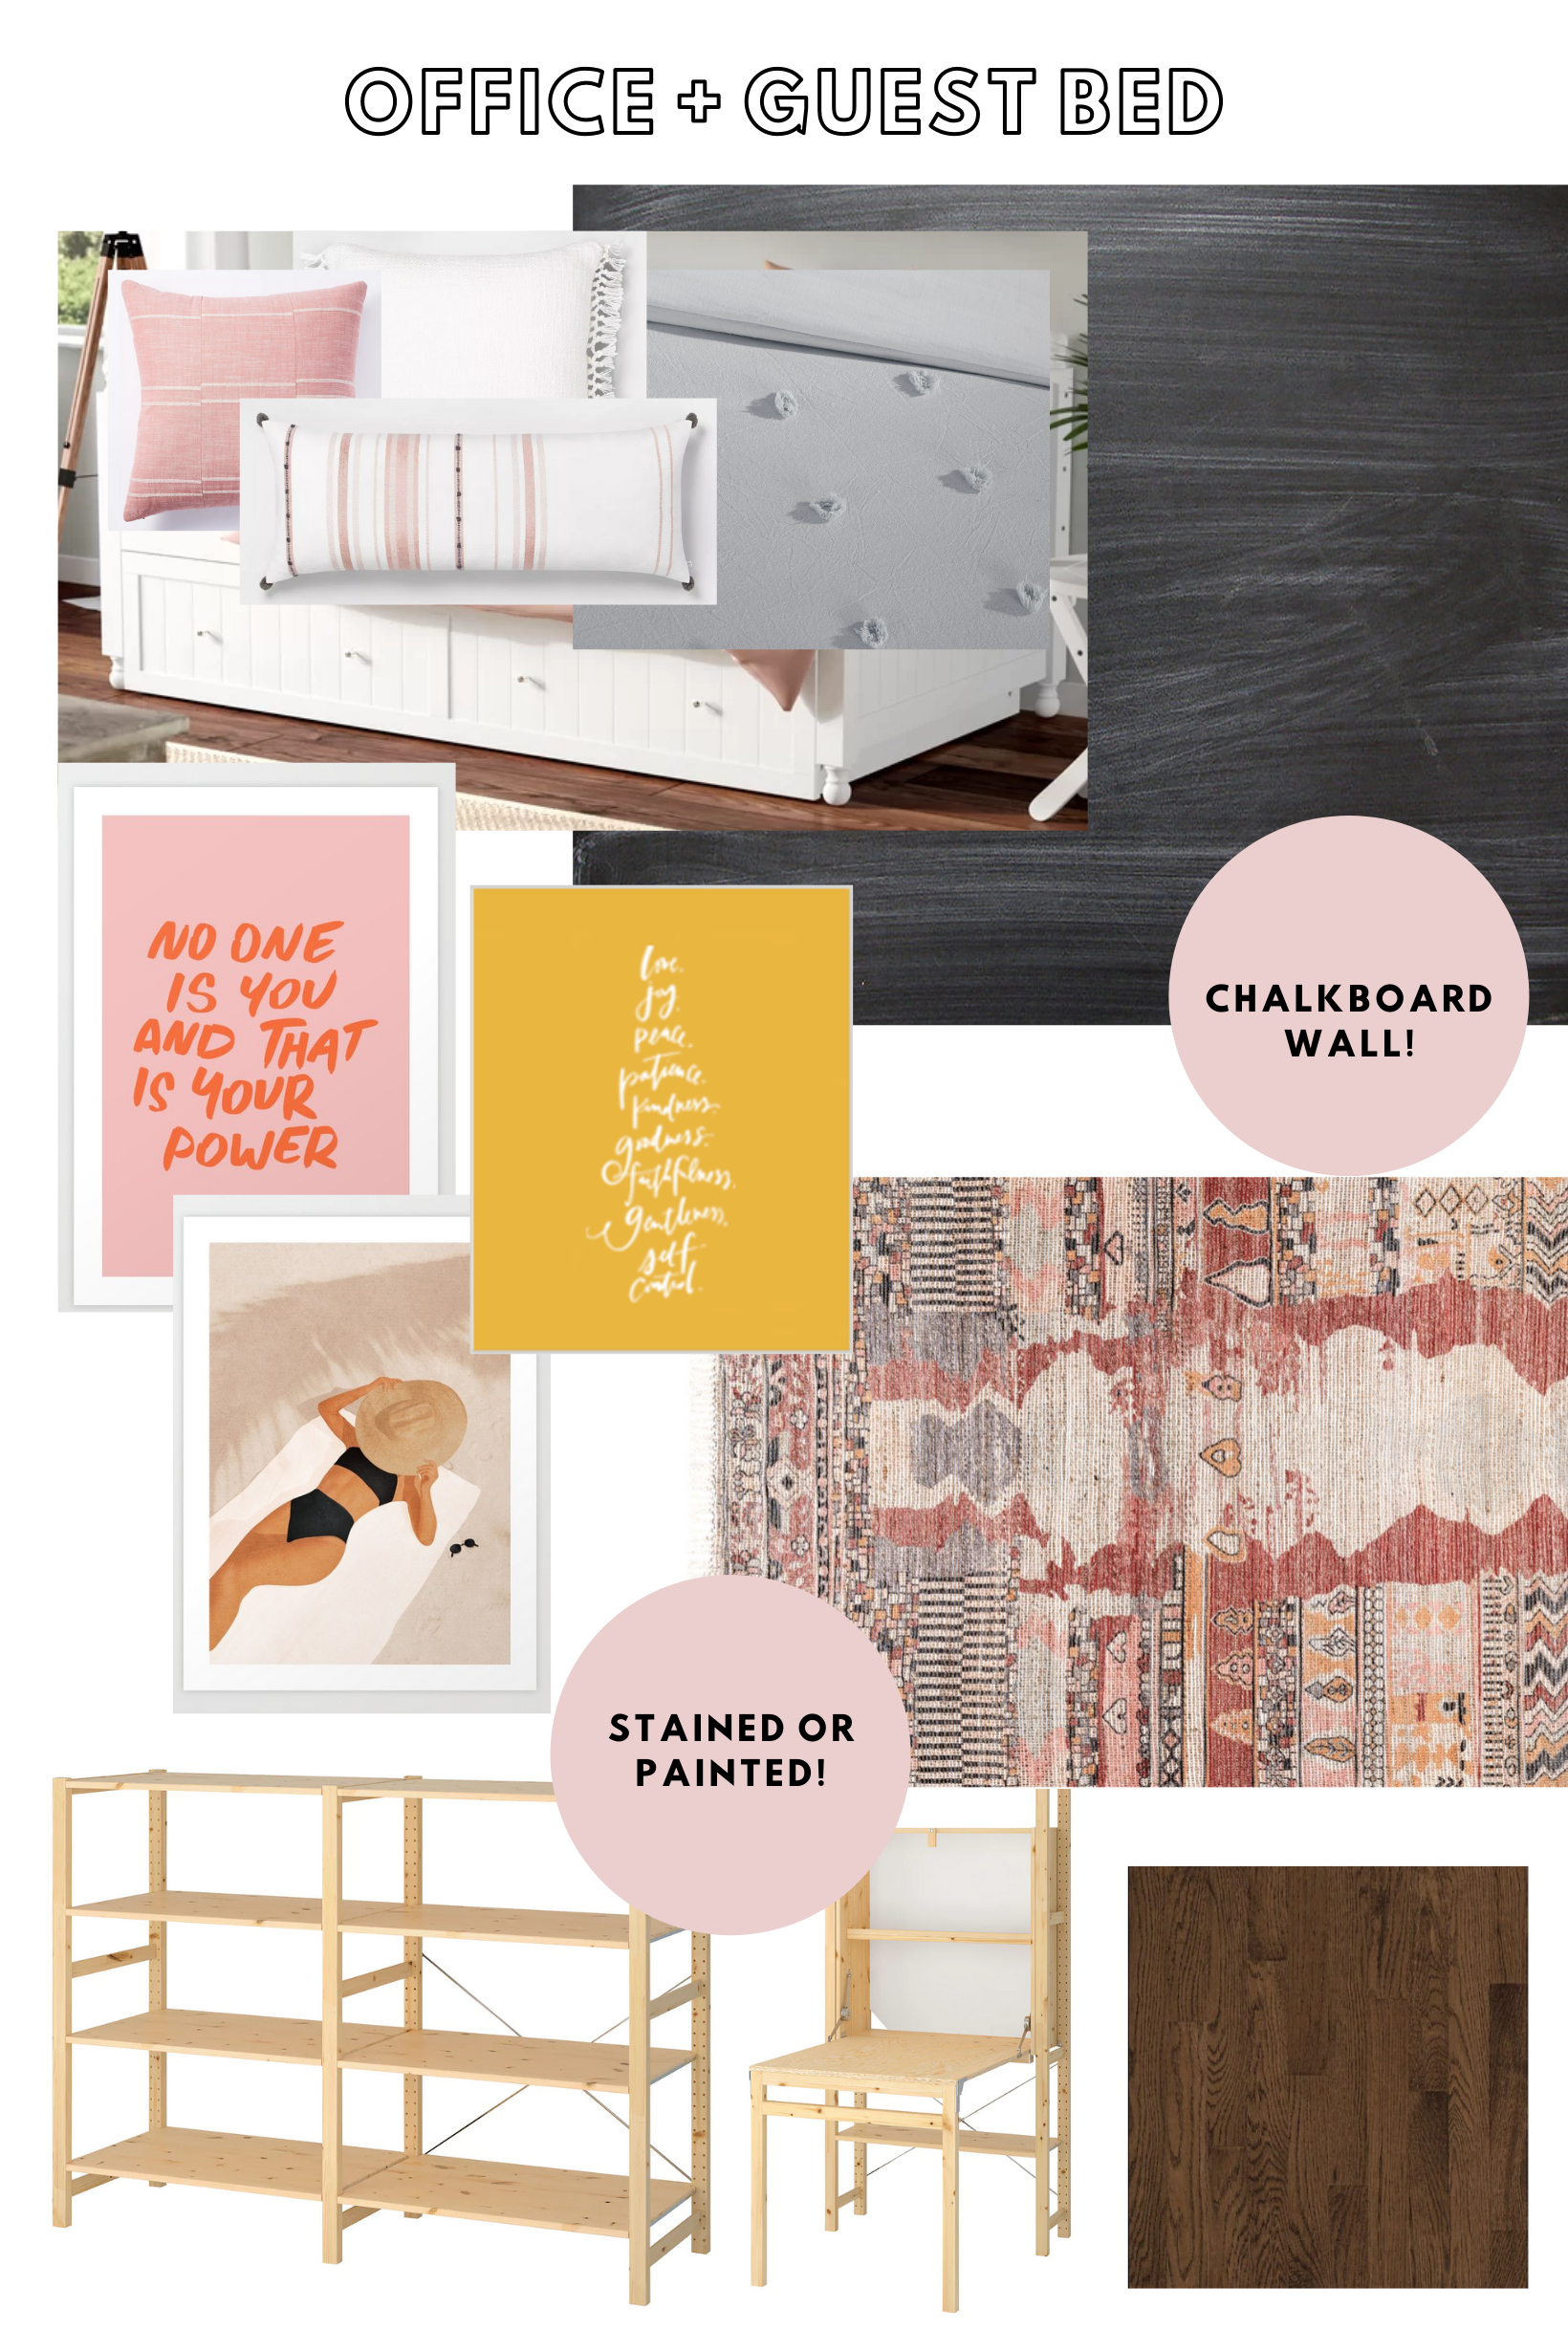
I also put together an office + bedroom combo. A lot of the houses that we’re looking at have (3) small bedrooms. One of them will be a nursery and the other one I’m thinking we’ll use primarily as an office but we also want to have a comfortable place for guests to stay so this could be an option for that. Again… It all just depends on the space. Maybe you have a similar scenario though and this will work great for you! This design board was also created using Canva.
Let me know if you have any questions! I hope you find this helpful. Stay well, friends.
I sincerely appreciate you all shopping through my affiliate links like the ones included in this post. I make a small commission when you purchase through these links at no extra cost to you. These funds help support my family and allow for us to produce better content for you all. I can’t thank you enough for supporting all that we do!
Pin this image to save the post for later:

jordan jean
Leave a Reply


[…] to look a bit trendy). After years of building a Pinterest board and throwing options in and out of a design board, these are the photos that inspired us the most (click on each photo to locate the […]
[…] myself working on the bedroom design at the same time. You can read how I make my design boards HERE. I knew what I needed to use (from what we already owned) and what I was going for in there so it […]
[…] We knew that we wanted to do another round in this house but with a little twist. Here’s the design board I put together before we started in here. I do this with every space we work on to save us time and […]