May 20, 2024
As soon as we saw photos of the Mississippi house we knew that if we purchased it, we could have a really fun kitchen renovation on our hands. I don’t say that sarcastically! We really believed it could be a fun challenge to potentially completely gut and then build a new kitchen from the ground up. We didn’t know at the time if we’d actually do that or not but it did eventually become the reality and we did indeed have quite a bit of fun doing it!

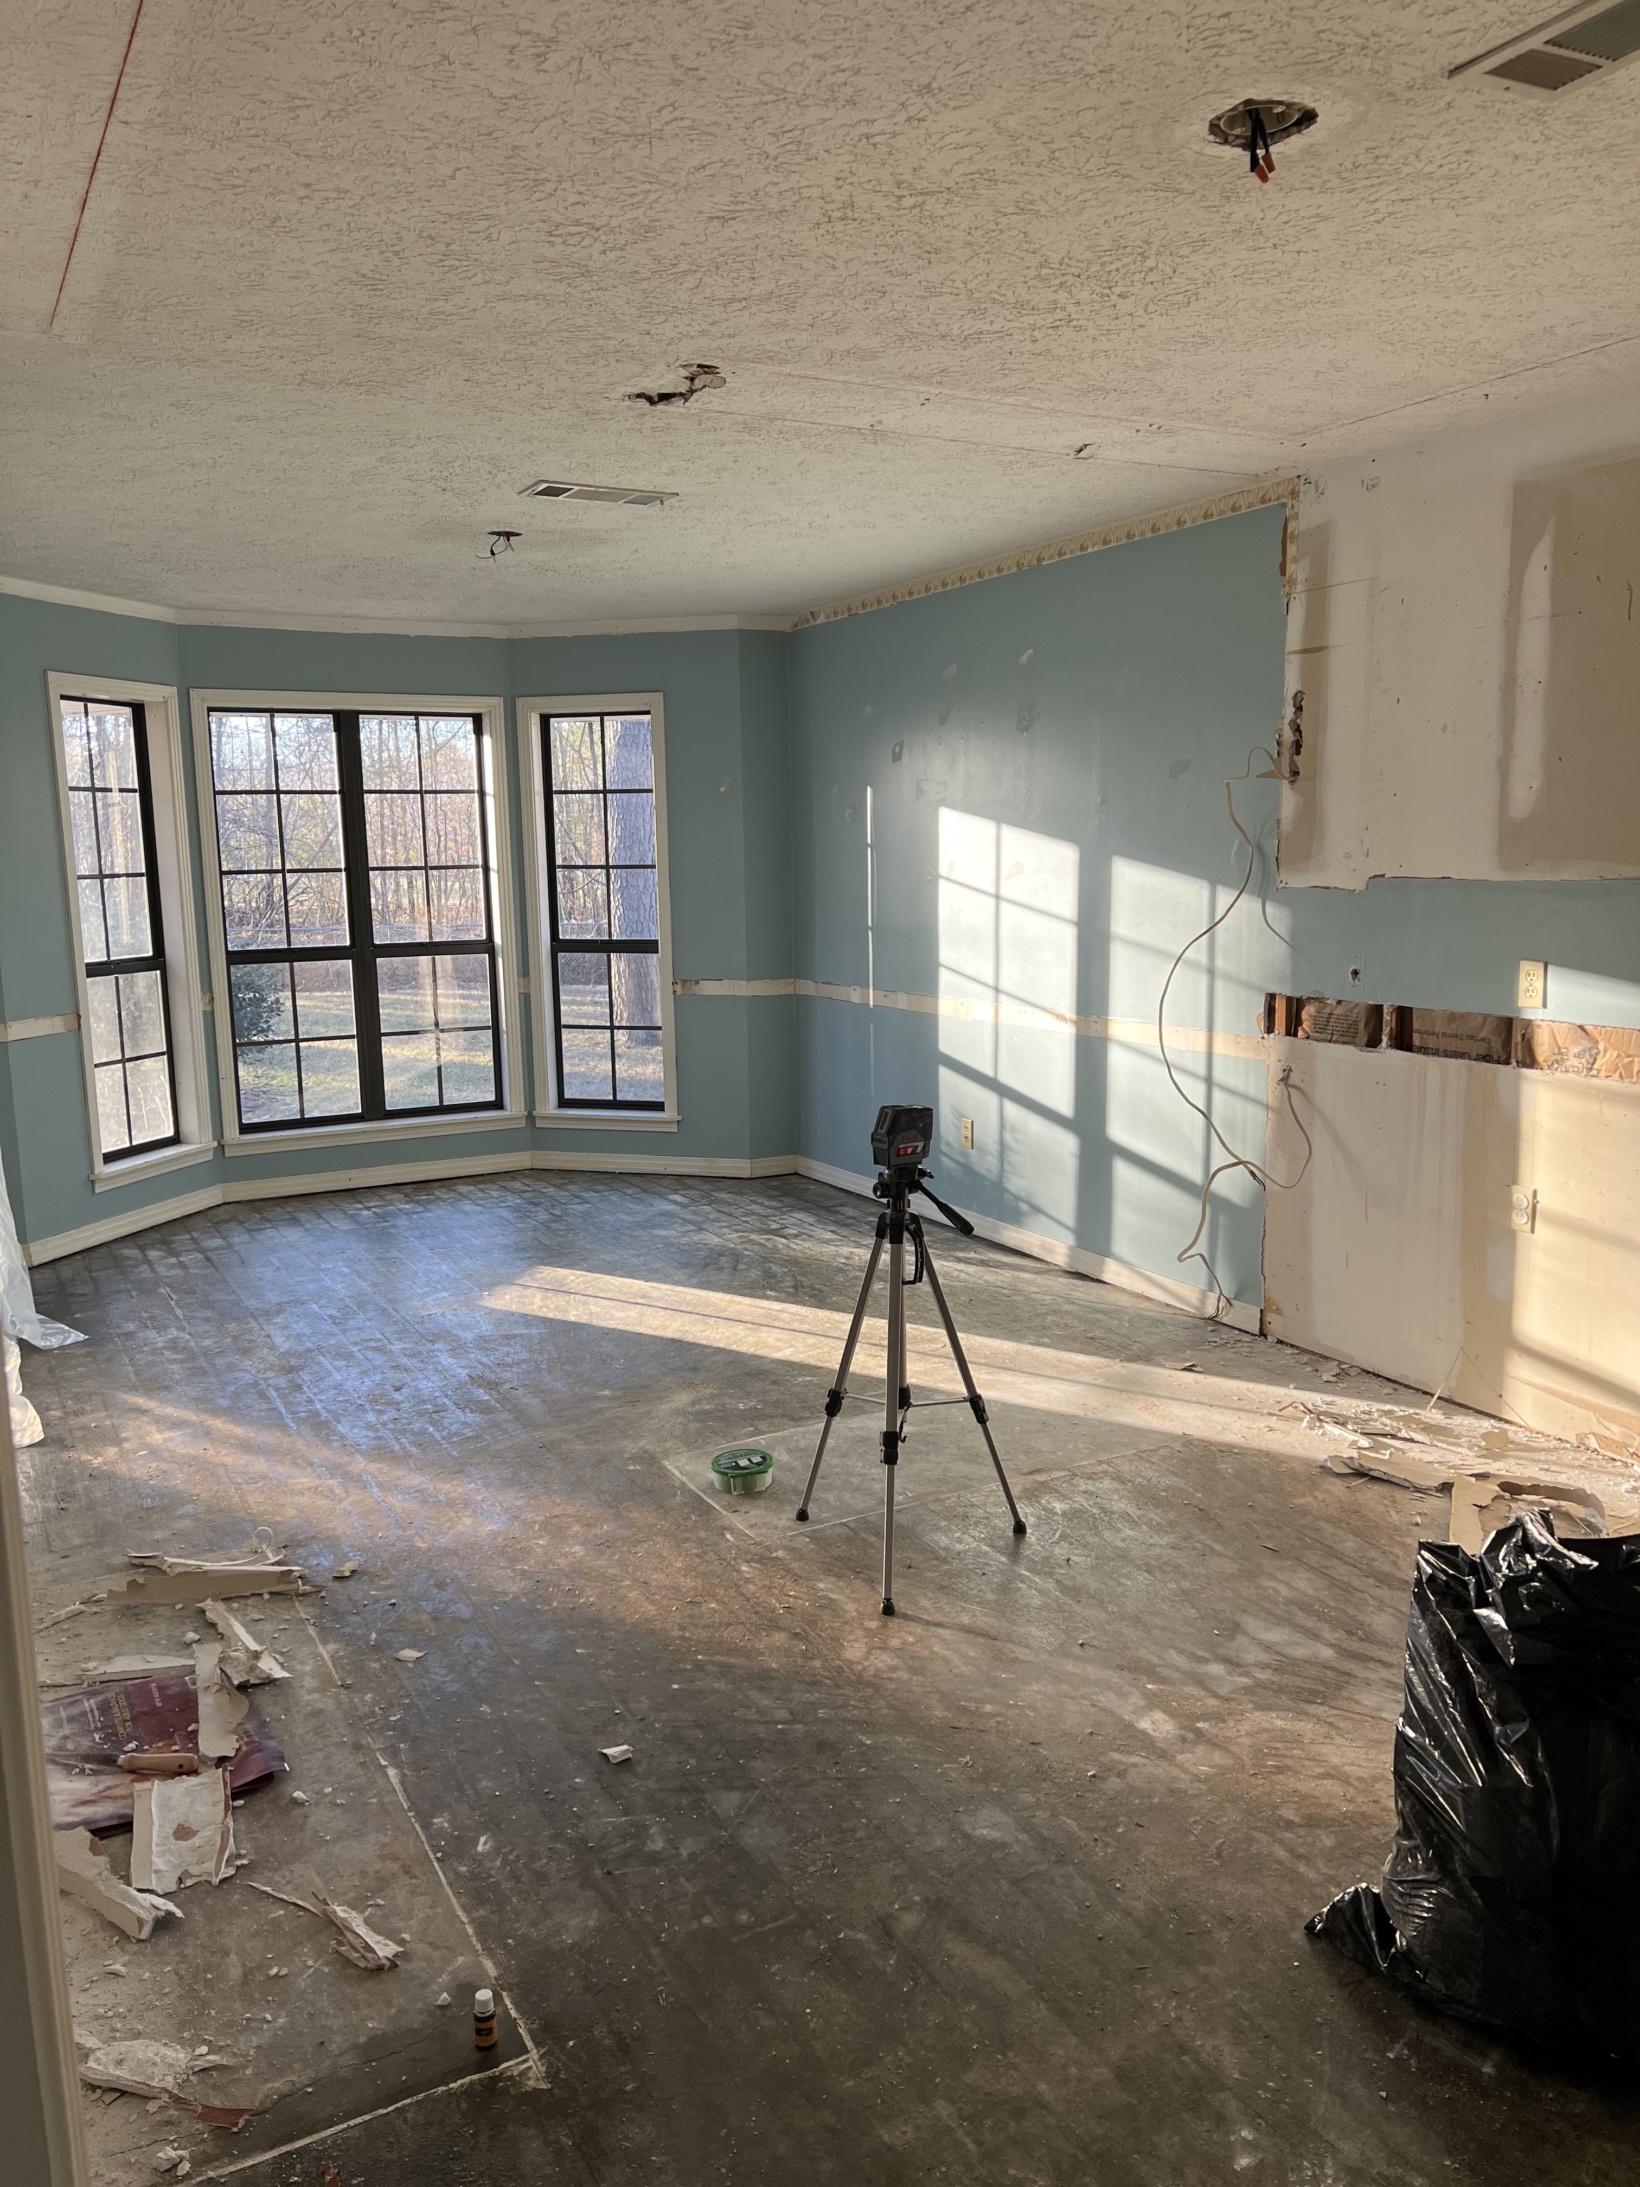
The root of the reasons why we wanted to update the kitchen all came down to the “L setup”. It blocked so much light and made the whole area feel so crammed. It was also quite unsafe with the potential for splatter/boiling over on the other side or little hands reaching up to the stove on the unoccupied side. We could’ve made some cosmetic changes that would’ve improved the look (and cost much less). However, after completing the primary bedroom and primary bathroom and painting every square inch of the rest of the house, we decided we were going to completely gut it. The goal was to make it (much) more functional, more spacious, more cohesive with the renovations we’d already completed, and hopefully add value to the home. I shared all of the before photos and our plans on this post HERE.
We started out by enlisting our amazing friends to gut the entire room. Unlike in the primary and guest bathrooms, we did keep the existing drywall because we didn’t have the issue with the moldy smell in there and we knew that we could easily repair it if needed. We ended up removing everything down to the cement floor which was SO sticky once the glued vinyl flooring was removed.
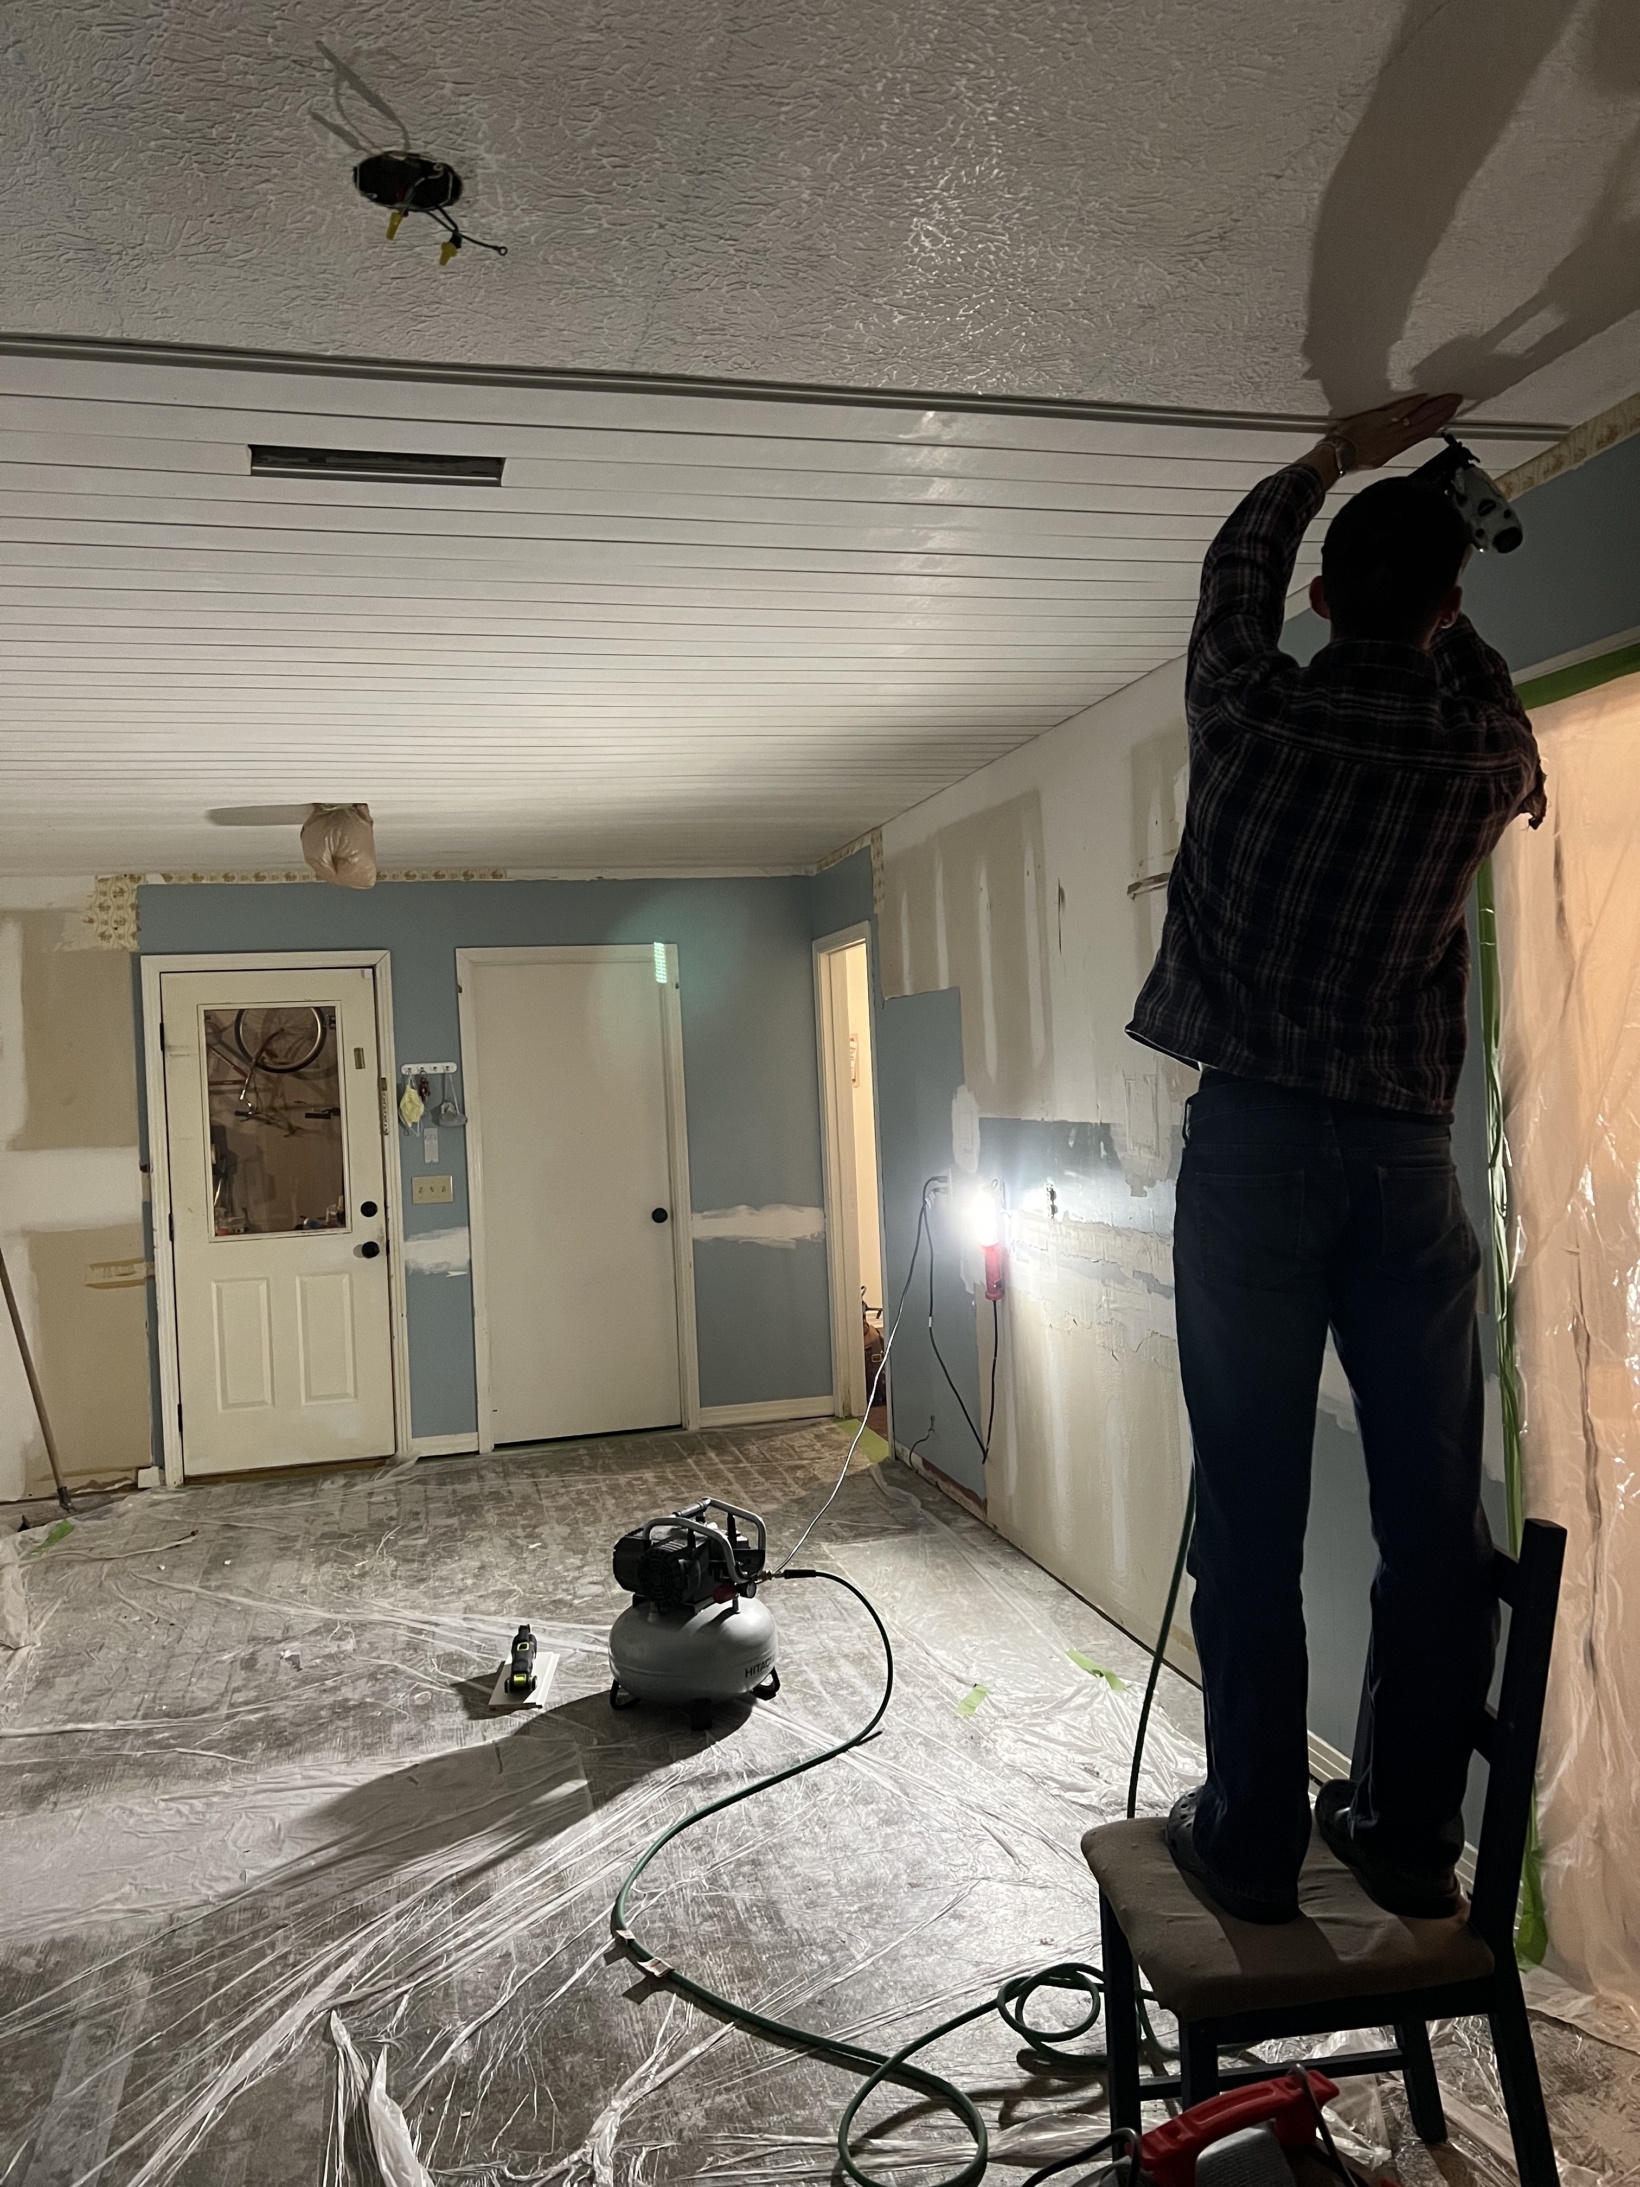
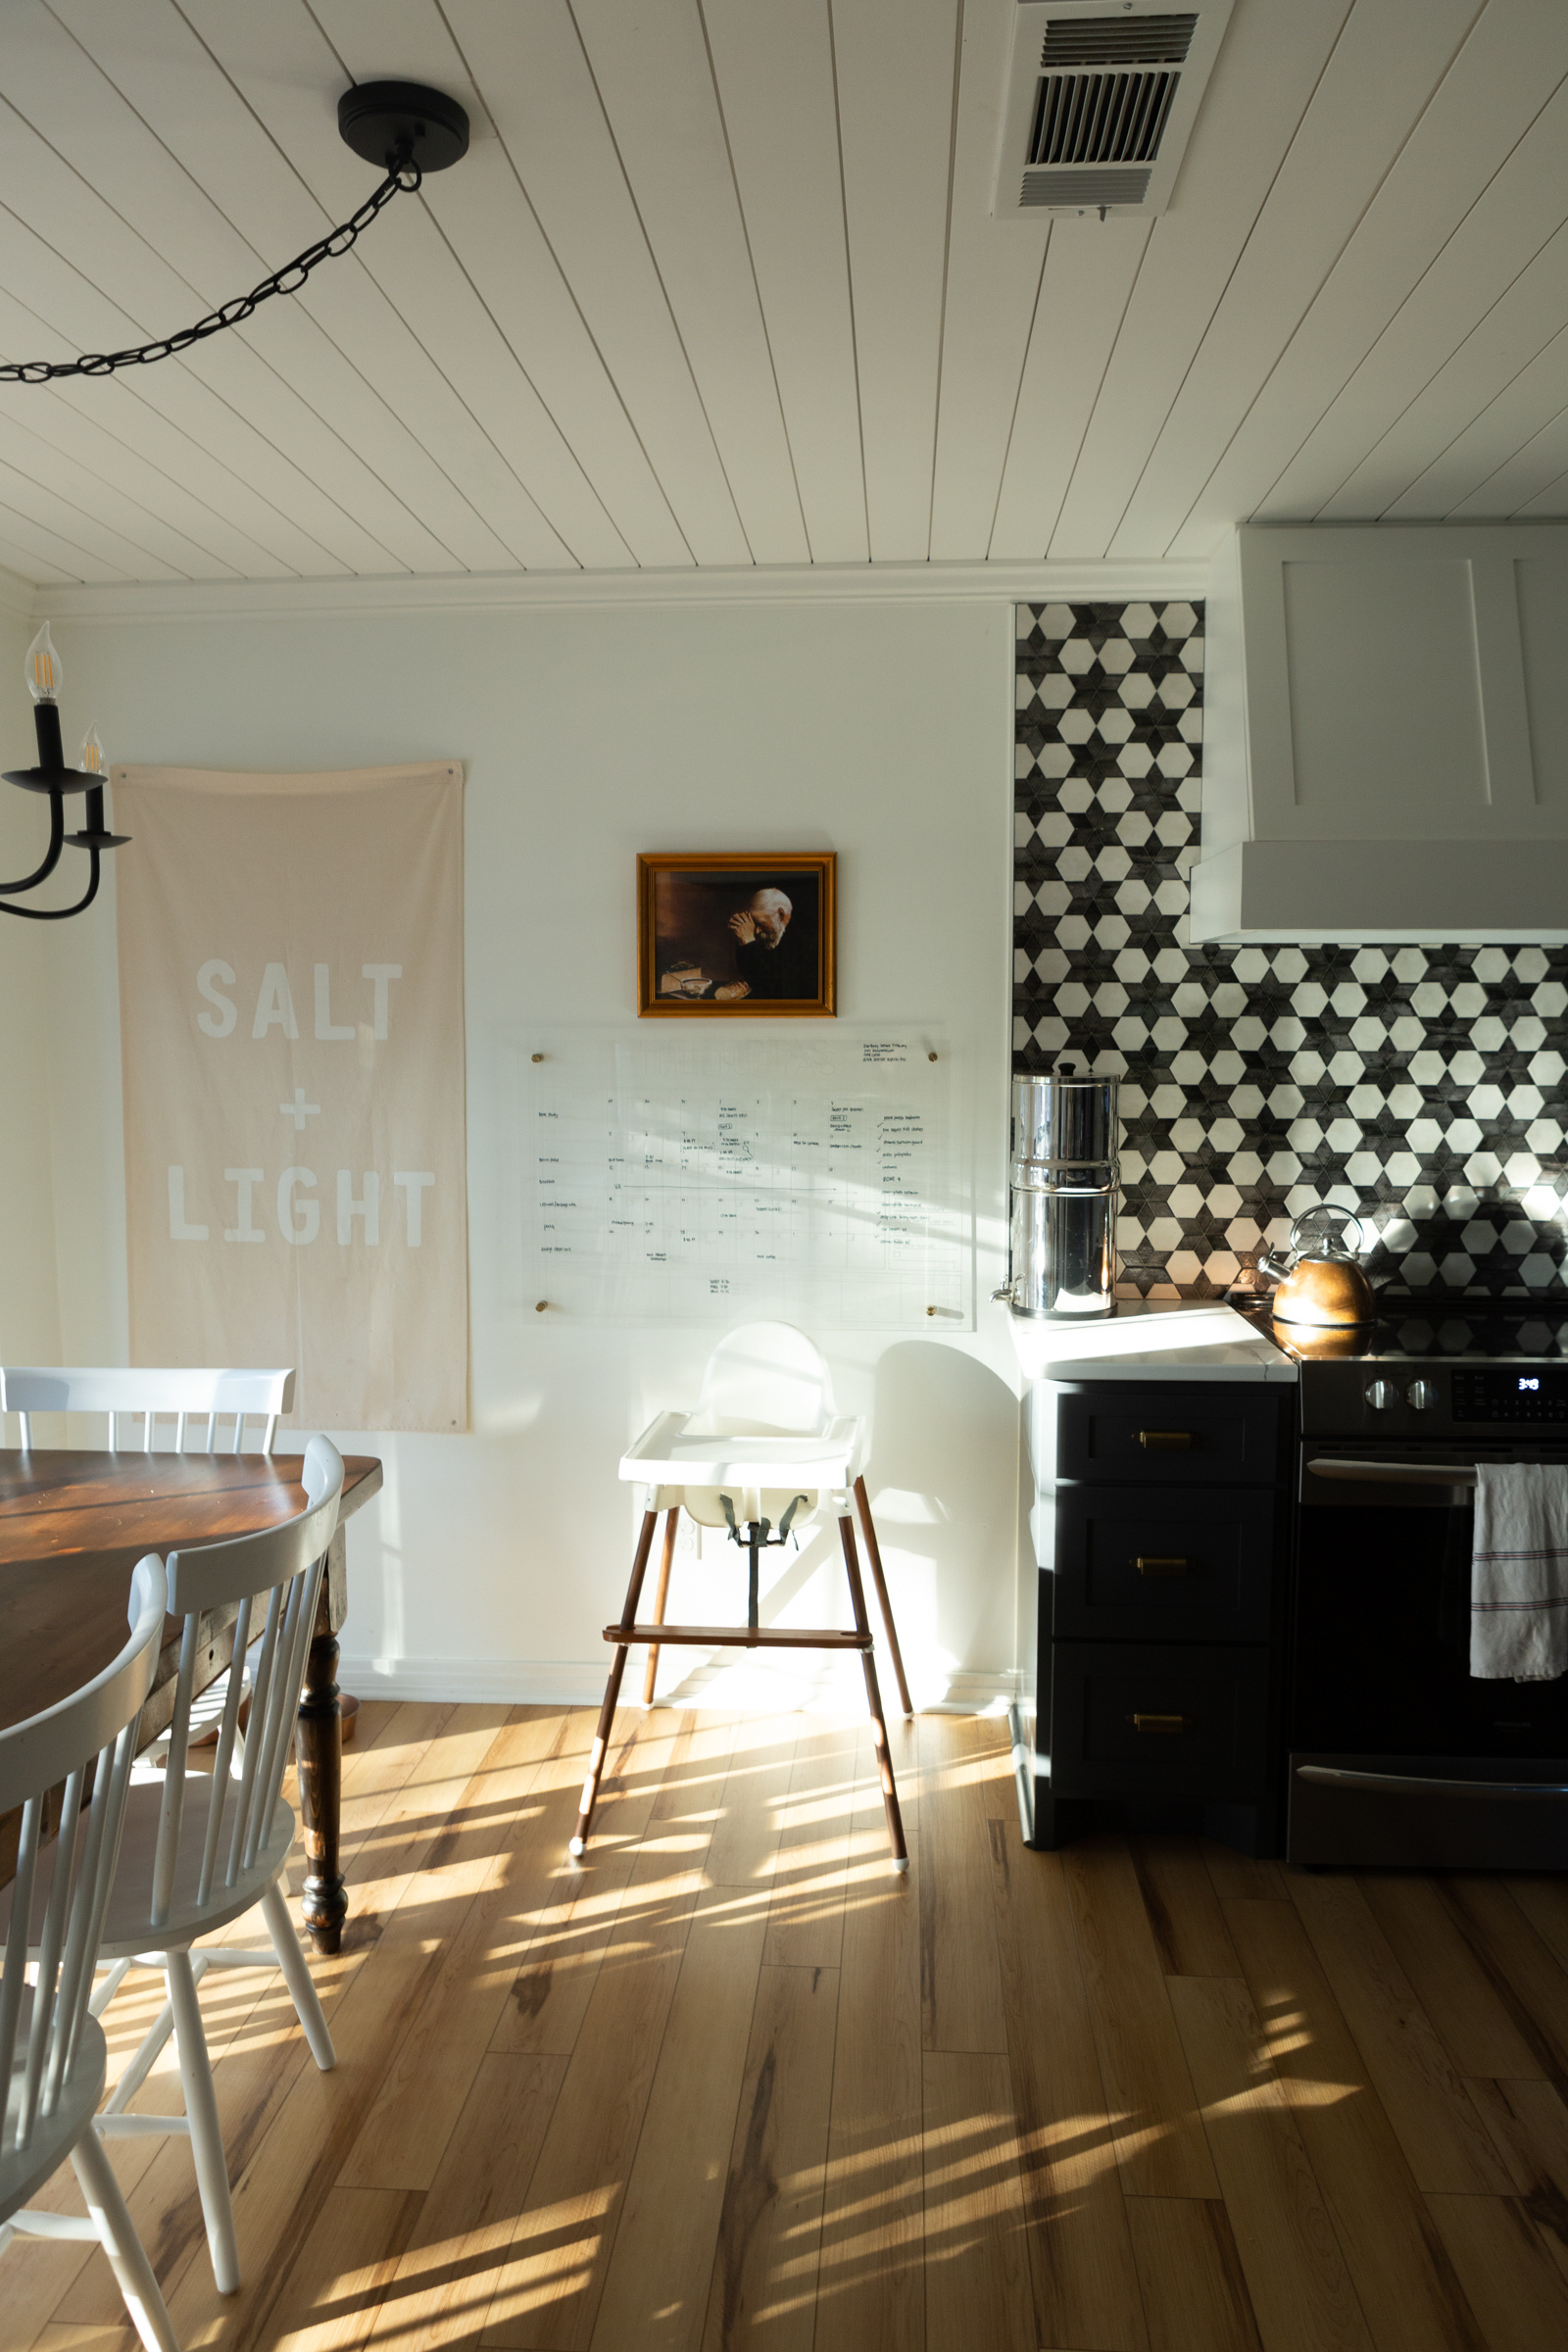
The first step once everything was taken out was to repair the drywall and add new drywall where the cabinets used to be. We decided to add a planked ceiling in this room because we love the way it looks, we wanted to add more texture and we ultimately thought it would be easier to add planks versus removing all of the texture like we did in the rest of the house. Looking back I don’t know if it’s necessarily “easier” (it’s certainly the more expensive option) but we are still glad we did it and we loved the finished product. It was such a fun element! We constantly received compliments on the ceiling. Before installing the floors we painted all of the walls and ceiling in Chantilly Lace by Benjamin Moore which is the white we used in the rest of the house.
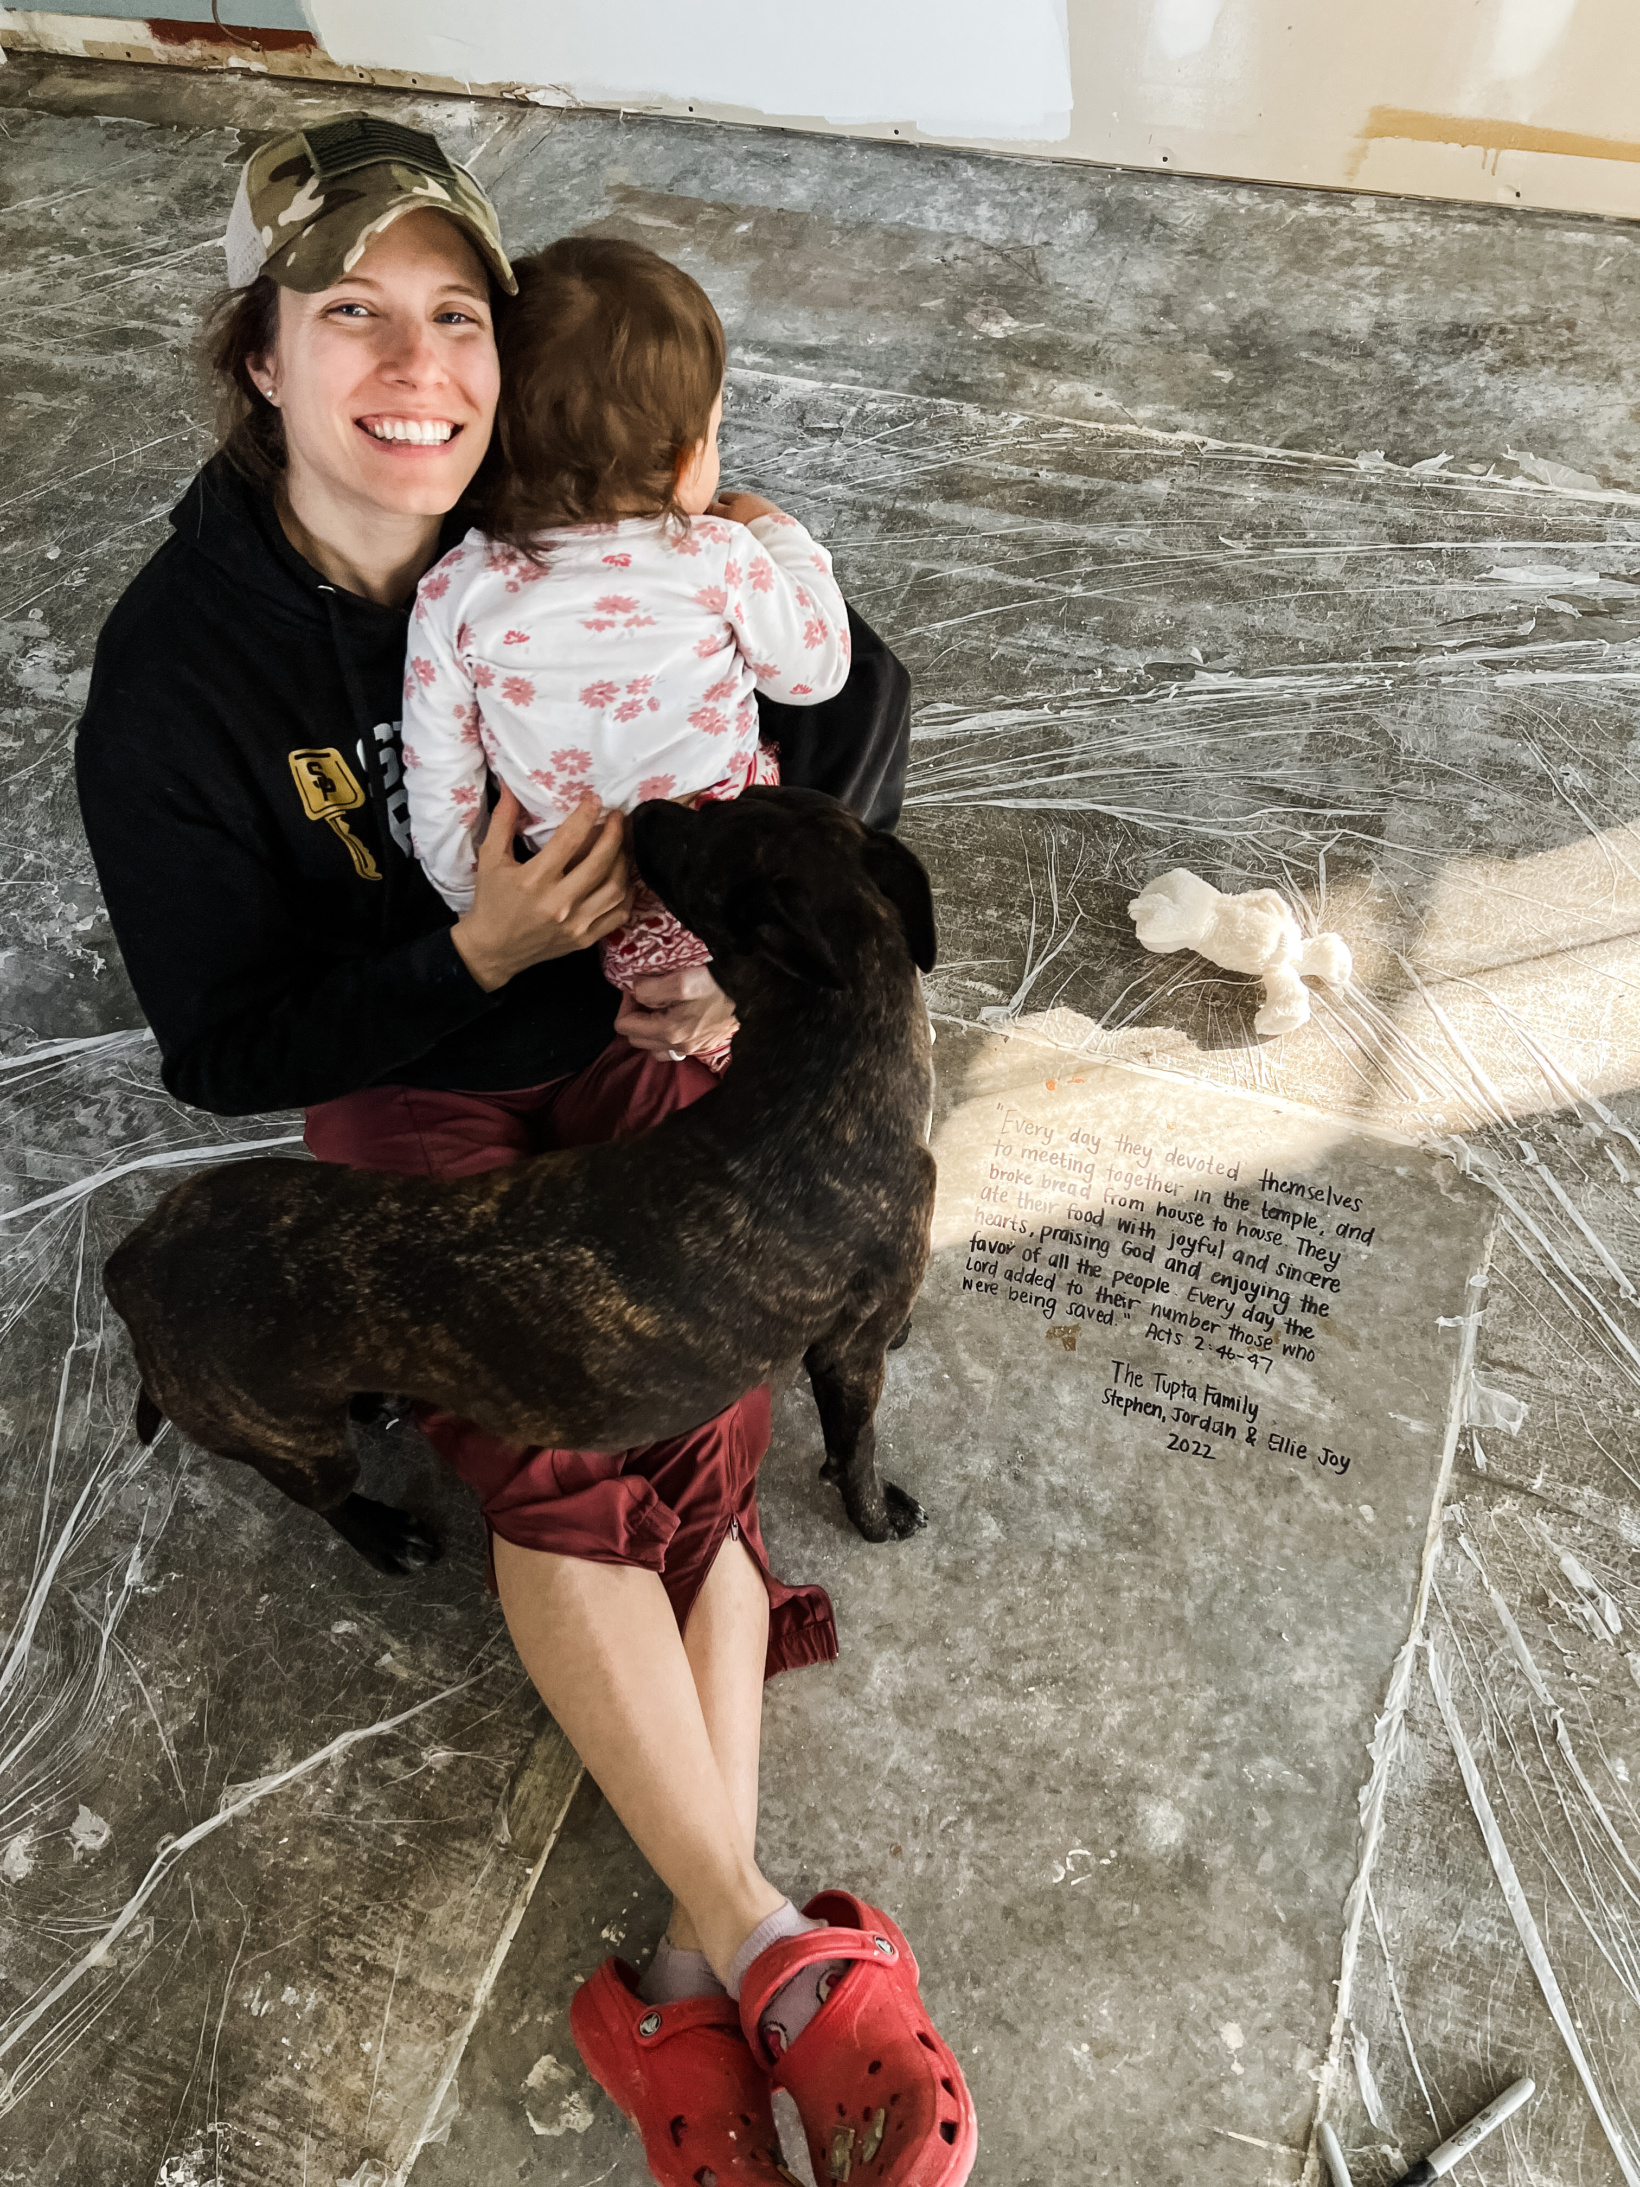
Since we installed new flooring in the whole house, we wrote a Bible verse on the concrete of each room as a way to pray over it. For the kitchen we chose Acts 2: 46-47 which says, “Every day they devoted themselves to meeting together in the temple, and broke bread from house to house. They ate their food with joyful and sincere hearts, praising God and enjoying the favor of all the people. Every day the Lord added to their number those who were being saved.” Goodness what a blessing it is to look back on the fellowship that has occurred in this kitchen (pre and post renovation!). Thank you Lord for providing the resources and opportunity.
Stephen added underlayment followed by the LVP that we used in the rest of the house. The room had turned into a bright, clean, and fresh blank slate. Next up was the best part… CABINETS! There were only two things that we contracted out in our house: the kitchen cabinets and countertops. We used a local cabinet maker – Godfrey’s Custom Cabinets and Chris was able to achieve exactly what we wanted, even down to the insides of the drawers, shelf corbels, and custom hood. He took my chicken scratch drawings and turned them into functional and/or beautiful additions. For the quartz countertops we used Triple J Stoneworks who is so reasonably priced and did a beautiful job (we also used them in our primary bathroom)!
If you read this post you know that we were deciding between two colors for the cabinets. Ultimately we went with Farrow & Call Off-Black. Although, I will mention that after using the same color in the Farrow & Ball formula in another space, it does matter that you get the true Farrow & Ball paint versus one that is color matched. Our cabinets ended up being a tad more blue in person than the true FB Off-Black is out of their can. Lesson learned on my part… I should’ve been way more specific about this. While we still loved the way they turned out, if I could go back and do anything differently, I think I would’ve done the cabinets in Sherwin Williams Iron Ore just so that it was the true color and had more charcoal undertones vs blue. We loved how Iron Ore looked in our backyard and I think it also would’ve been a great option in the kitchen in hindsight.

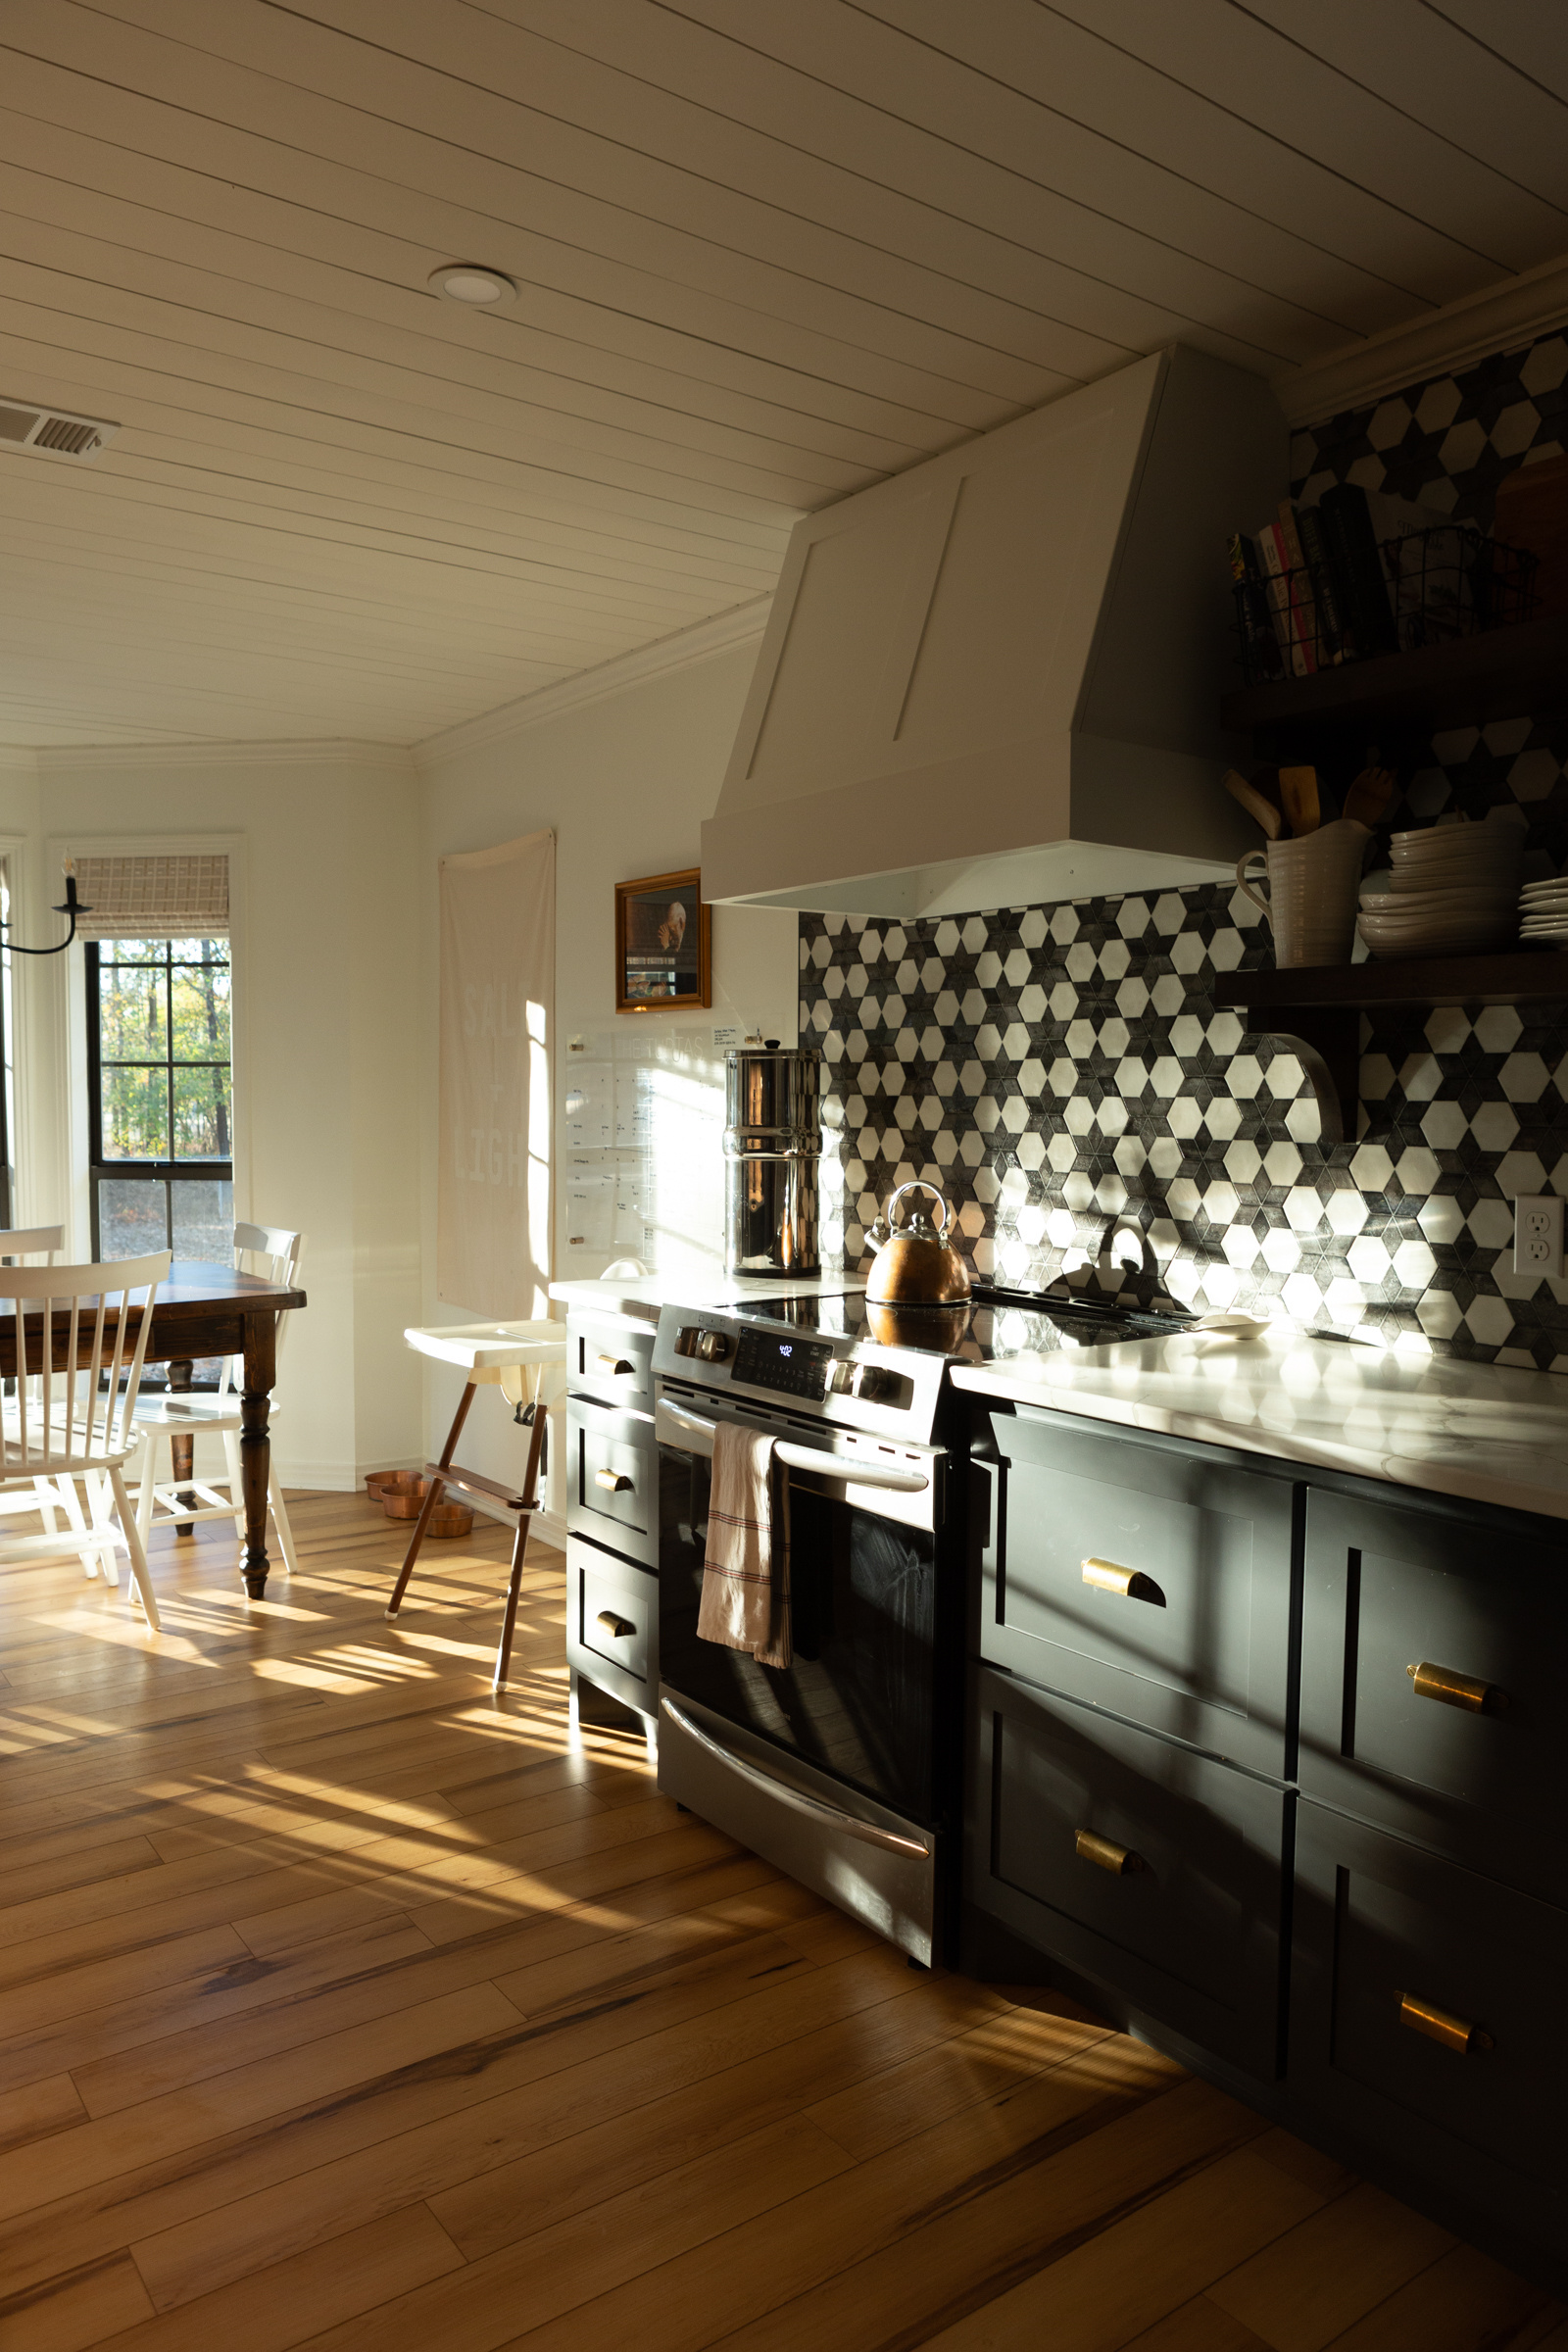
Just a warning if you’re considering going dark with your cabinets… Man it can be a HUGE pain in the butt. After having white cabinets in our South Carolina kitchen I will stand firm on the stance that it’s easier to keep white cabinets looking clean compared to dark cabinets. I still love the contrast they add and the way they tied in our star tile. I don’t regret our decision! But they did keep me cleaning.
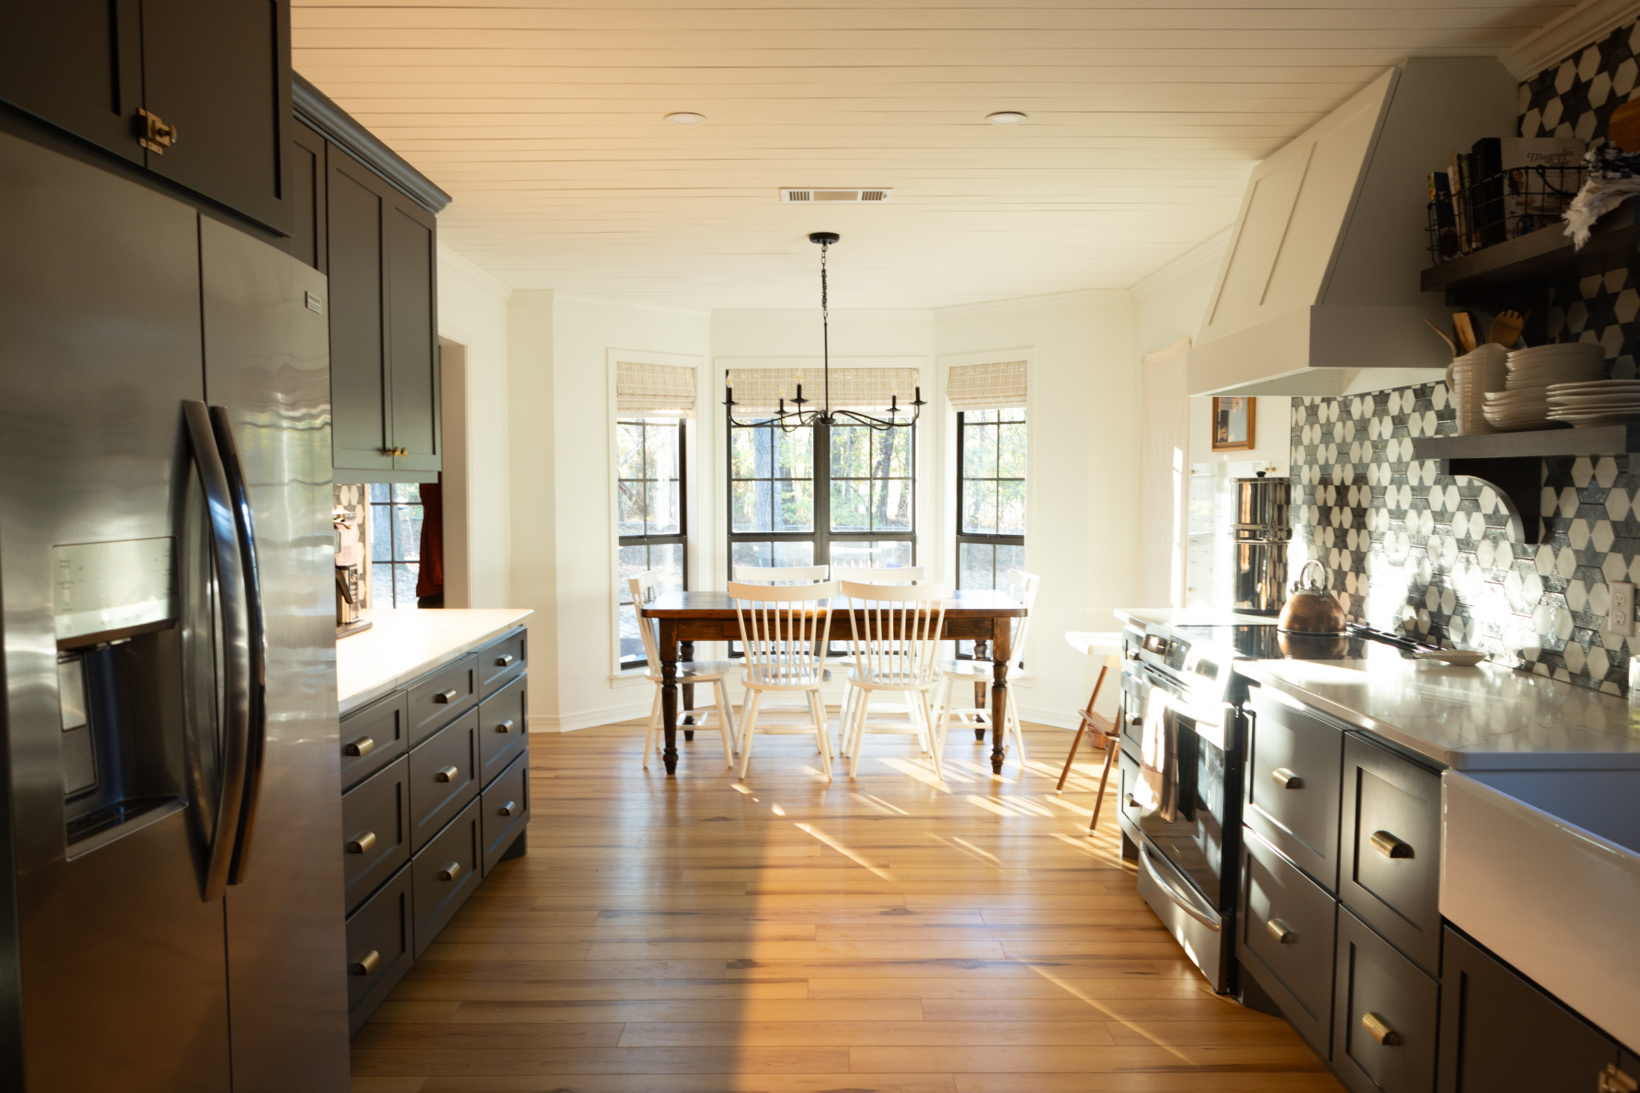
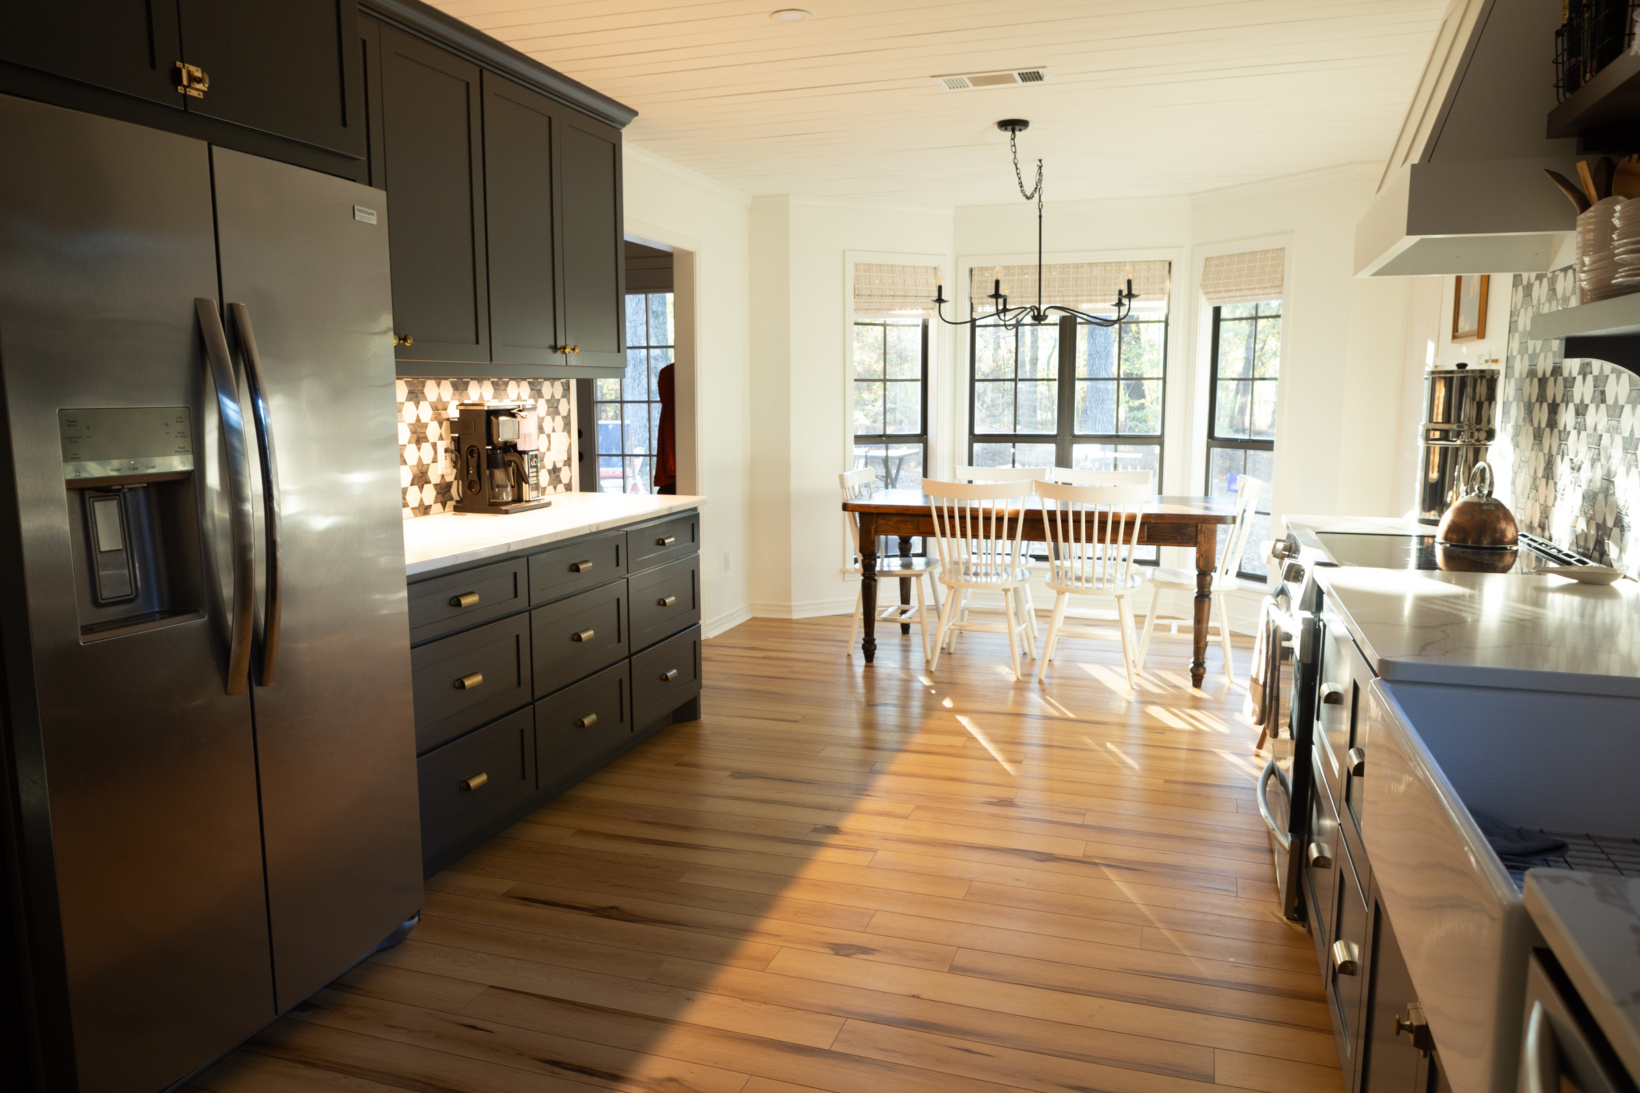
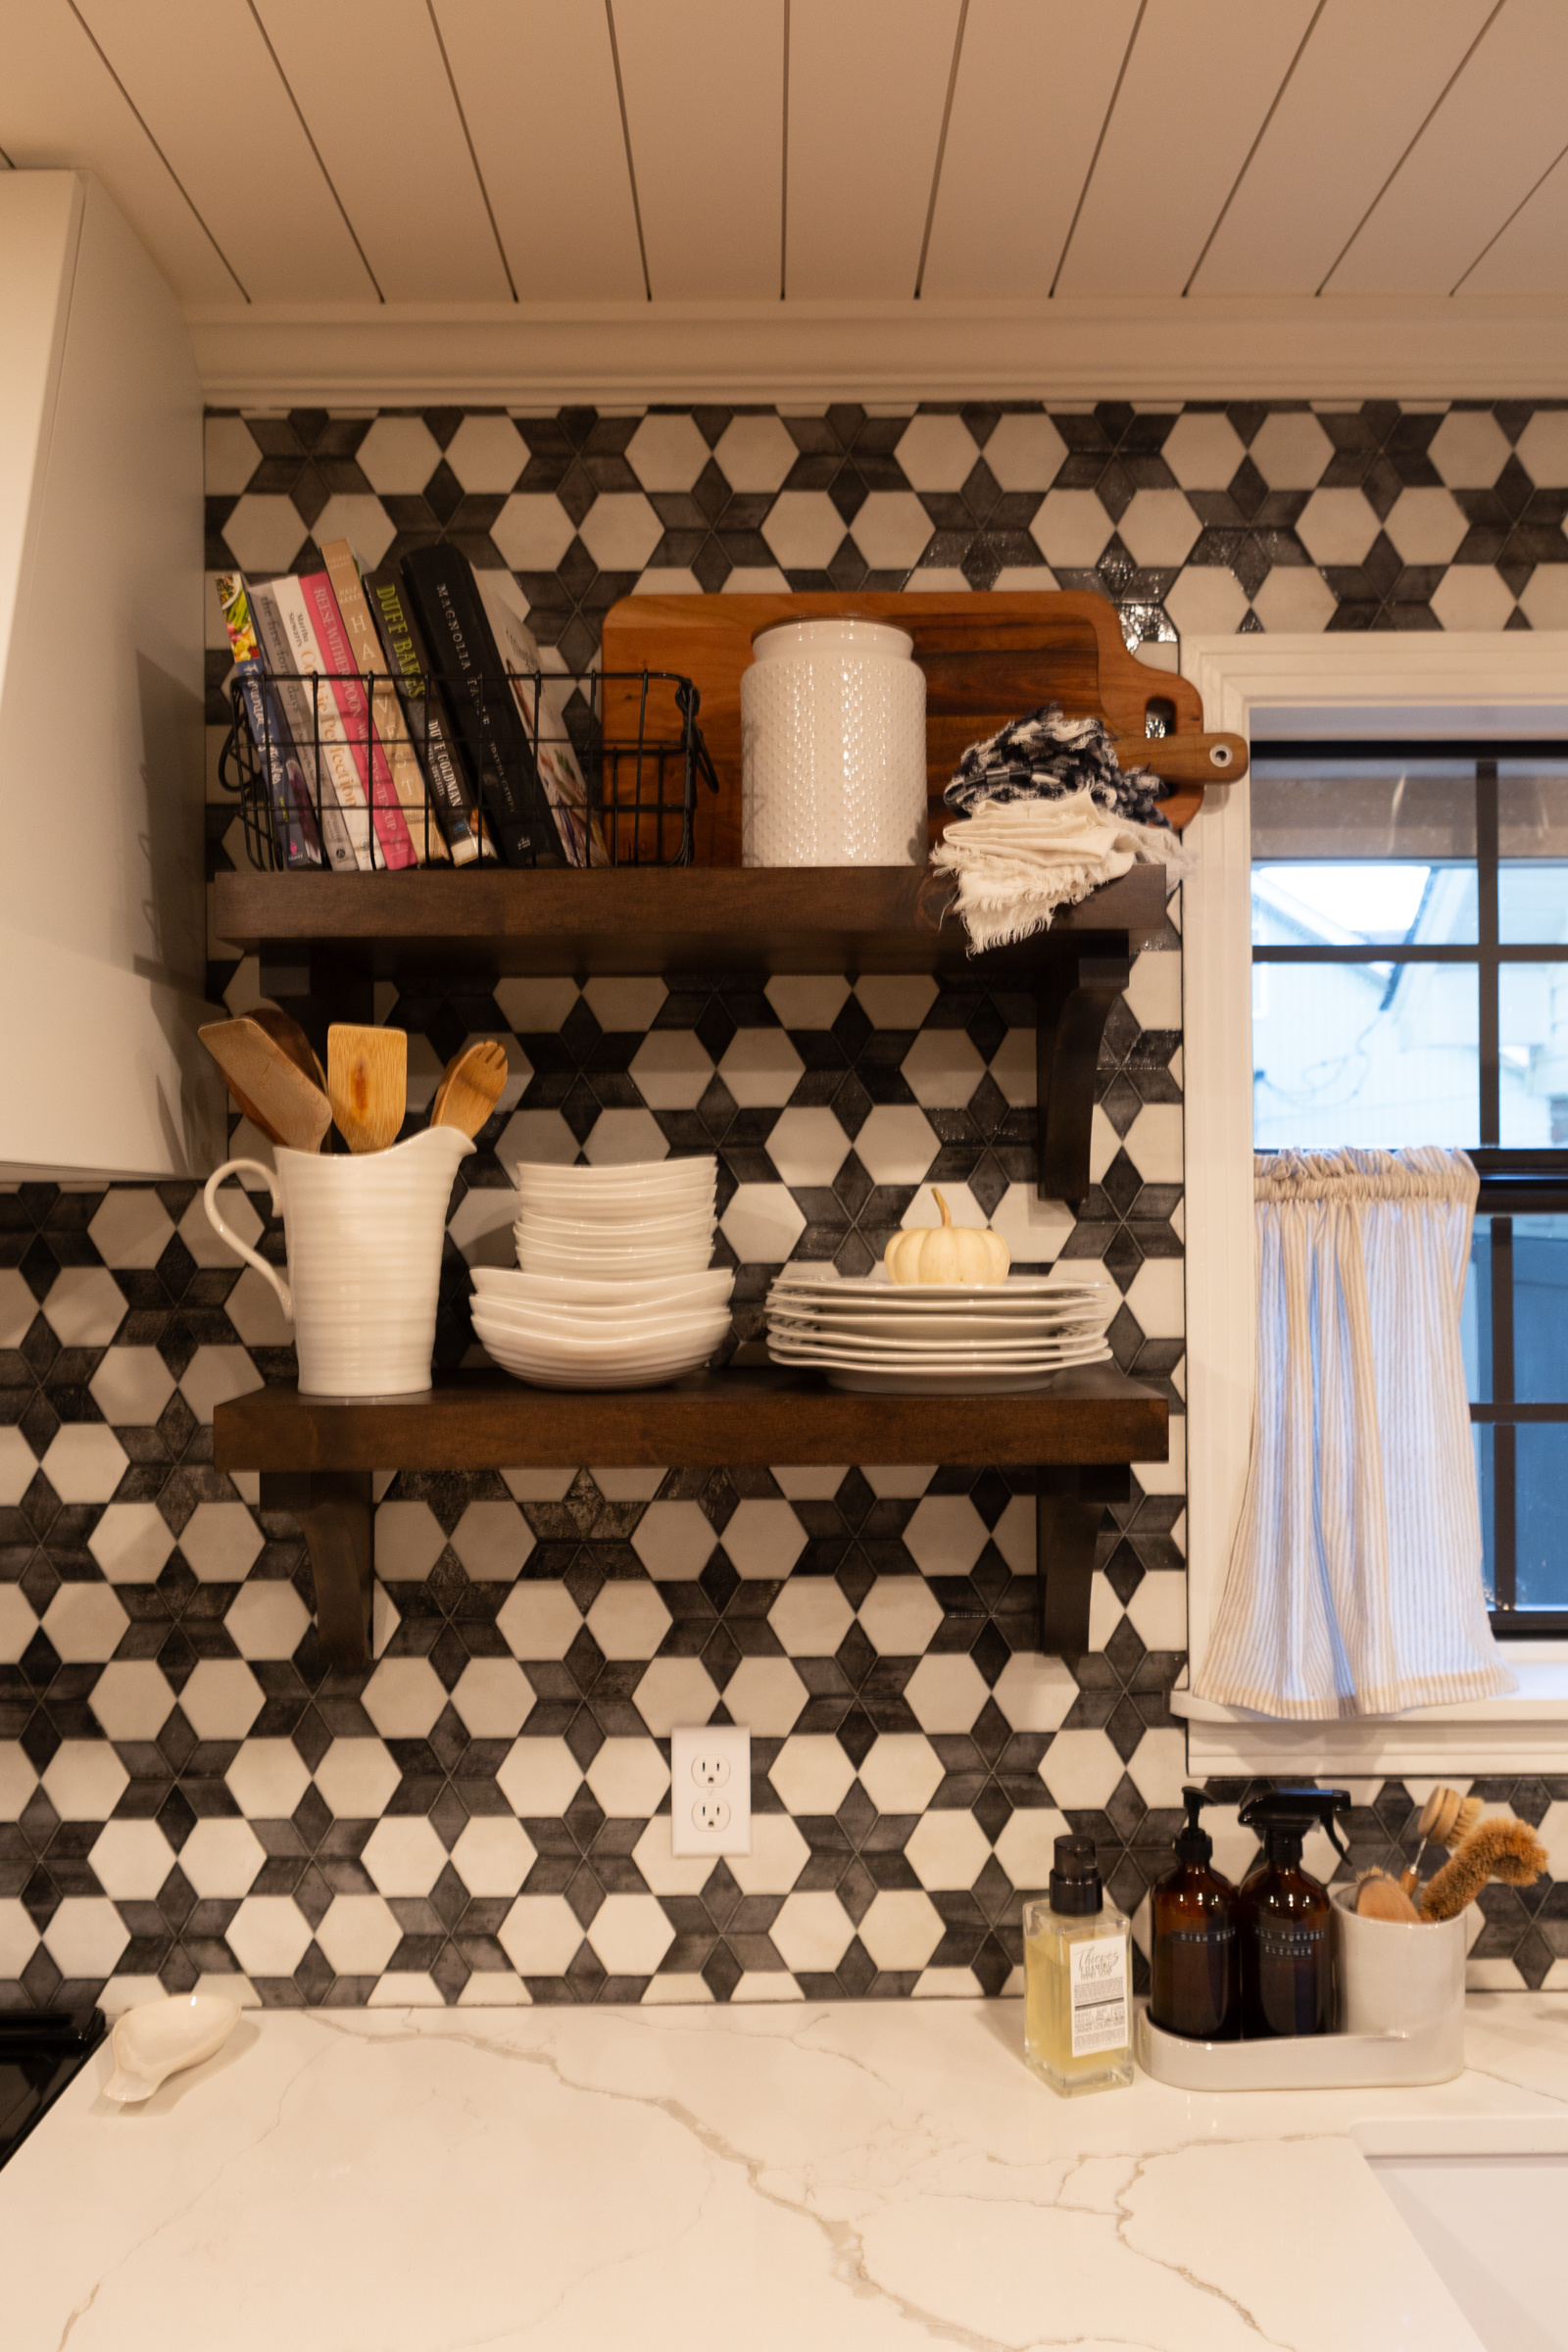
Speaking of the star tile… That is one of our favorite elements of the entire room. We decided to take it all the way up to the crown molding so that it made a big impact against the open shelving. A big shout out to Stephen for all of the tile work, especially around the shelves after they were installed (another communication mistake on my part) while I was newly postpartum with baby Sophie. We used the color Jet Black in the sanded Mapei grout. I’m looking at these photos and already thinking of ways we can use it in the Virginia house…
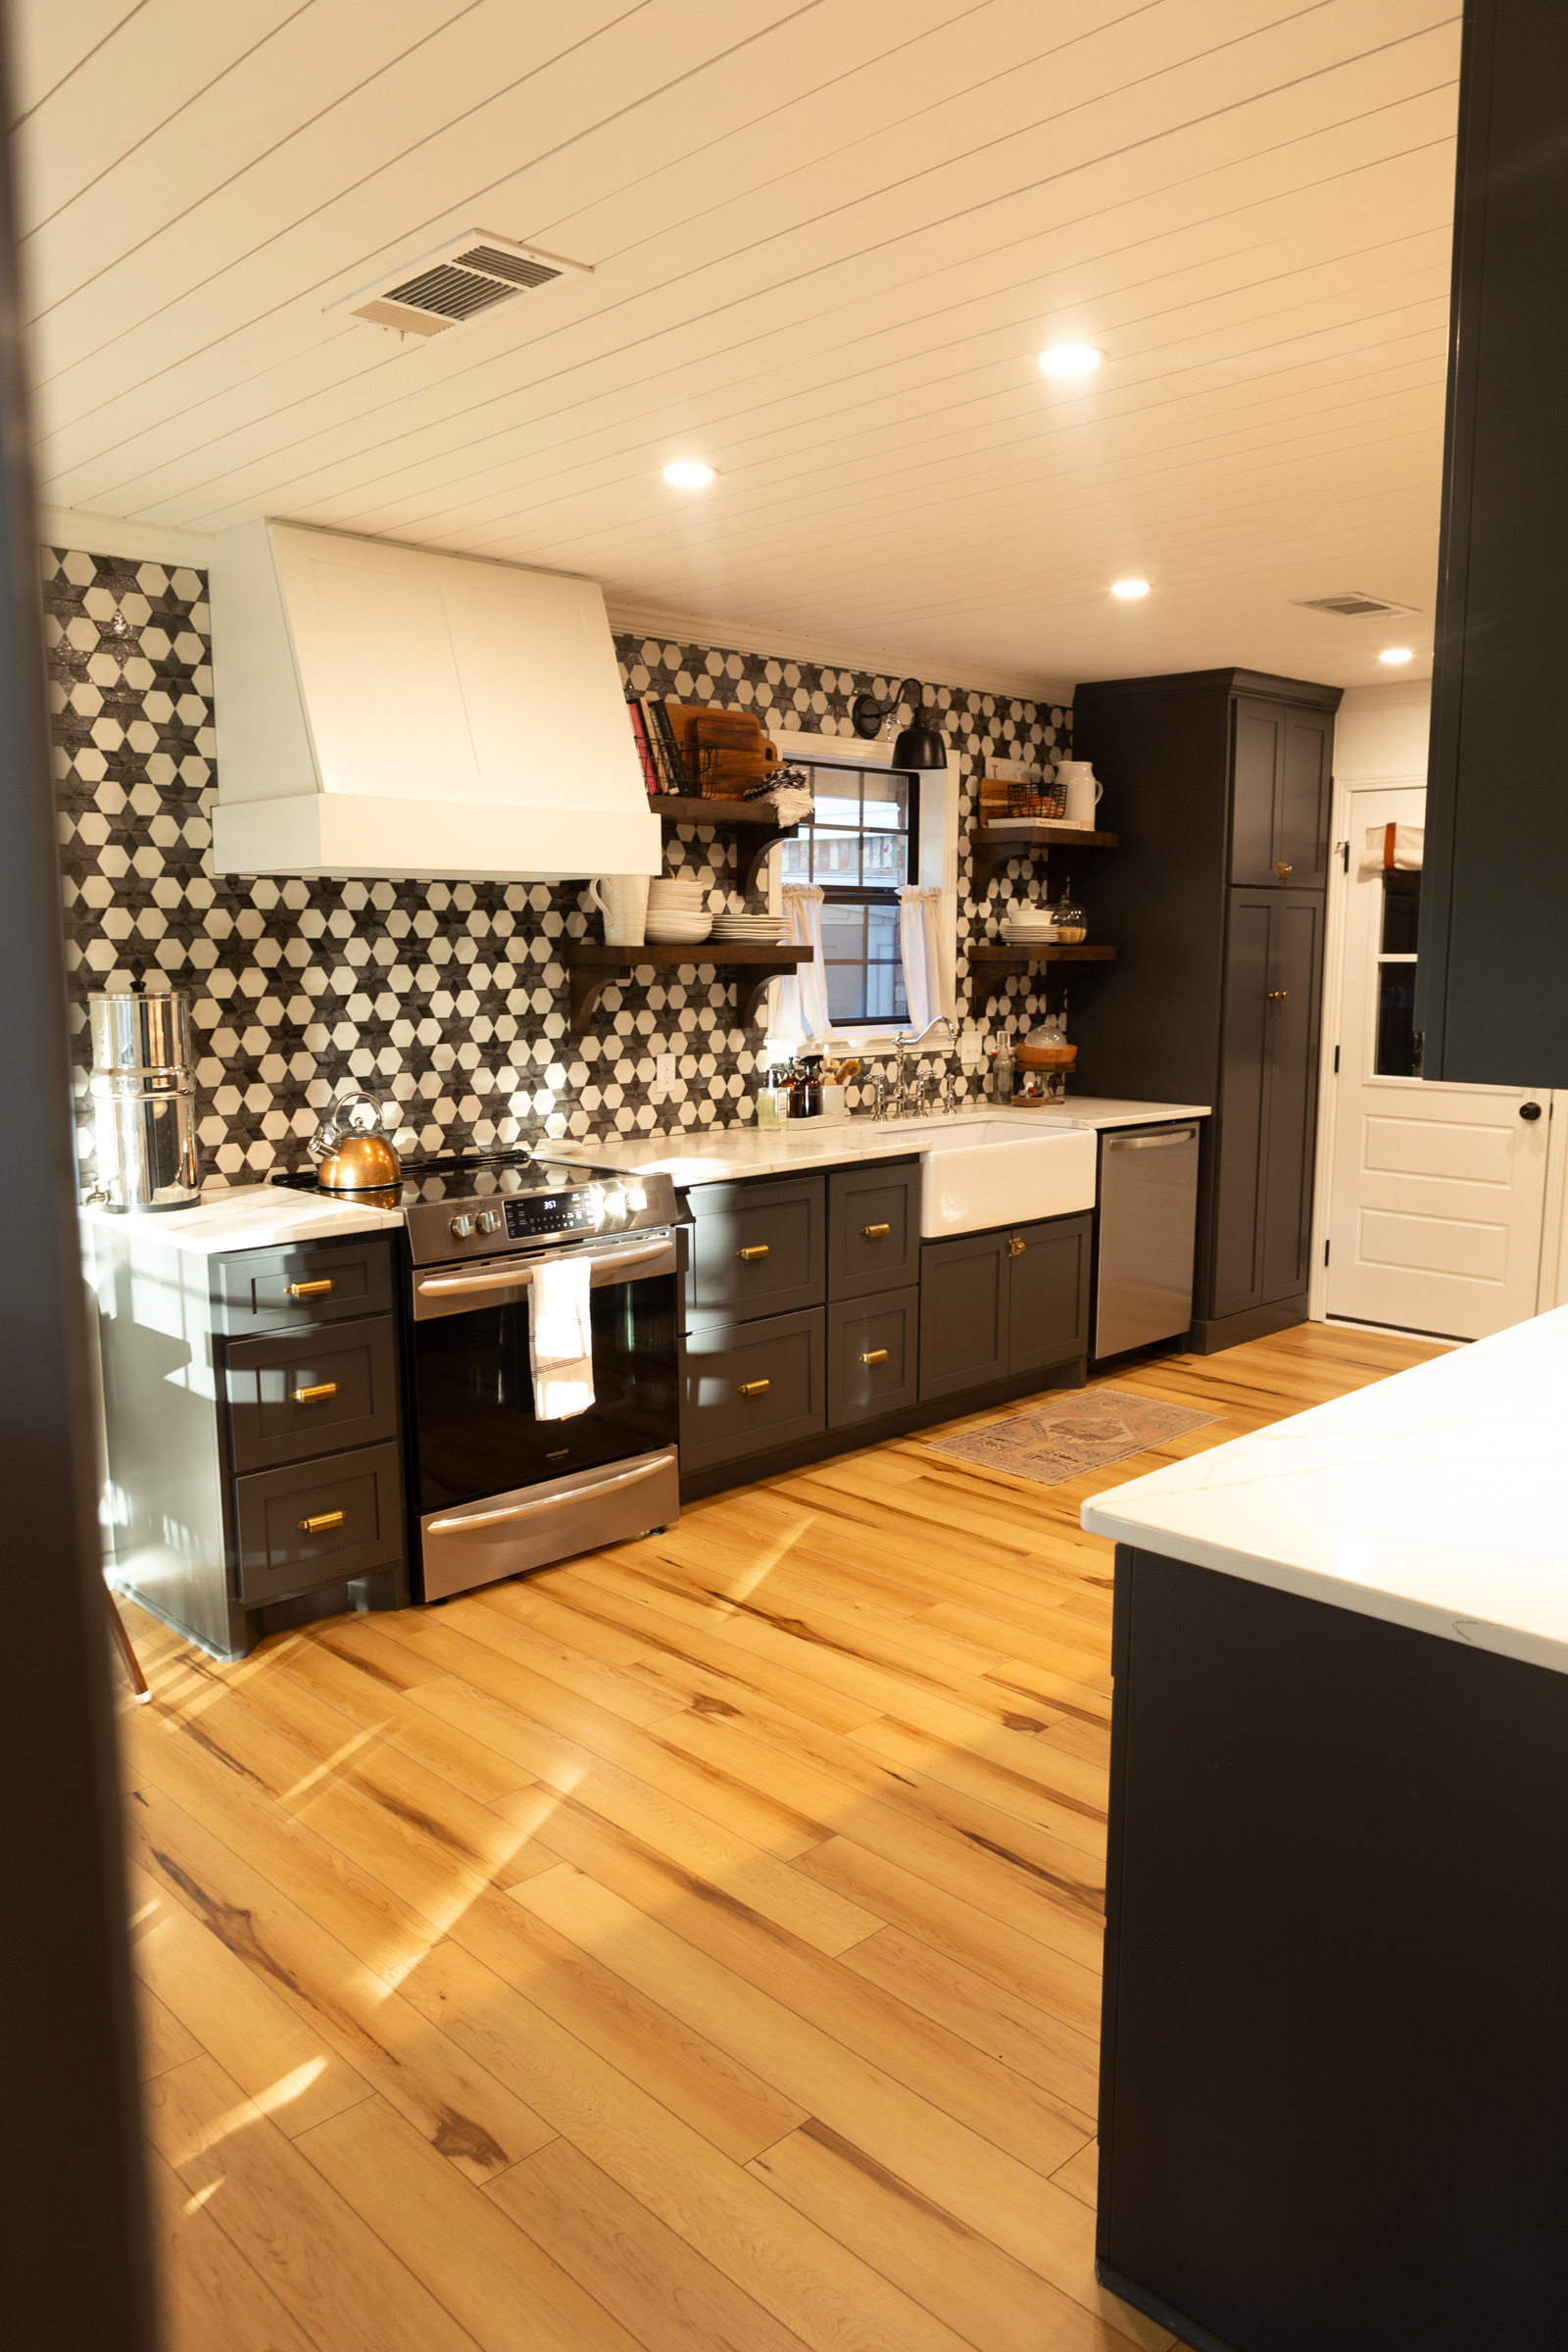
We decided to do shelves around the window instead of upper cabinets to let in as much sunlight as possible. The original kitchen felt so closed in and dark. This was a great solution to avoiding that. The shelves are also so functional! I know some are hesitant with open shelving because of the potential of dust but we use everything on the shelves and they are fun to style. We had them stained in Minwax Dark Walnut, the same color of our kitchen table. We love the warmth and natural element the wood adds.

Since we didn’t do upper cabinets, I especially hated the idea of adding a hood over the stove that didn’t have any storage. I designed one and asked if Chris could build it so that we could put things inside. It took him a bit to get the hinges figured out at the top but he got it! We keep the salt and pepper, olive oil, and some baking tools up here. We decided to paint it in the same color as the walls – BM Chantilly Lace. The actual vent hood underneath originally was gray in color. I hated the way it looked when sitting down at the kitchen table. It didn’t feel finished to me. I even asked Chris if that was how they typically were left just to make sure we didn’t forget something. I ended up painting it with this spray paint and it made a night and day difference on the finished look.


To give you some context on the sizing in here, the room is 23″x11.5″. We talked about adding an island, even something narrow. We scratched the idea because we didn’t want to cut off the walking path from the front of the house or garage and we thought it would feel too cramped. We are still both pleased with our decision. We have been able to have tons of dance parties and make a bunch of different obstacle courses and race tracks with this open space!
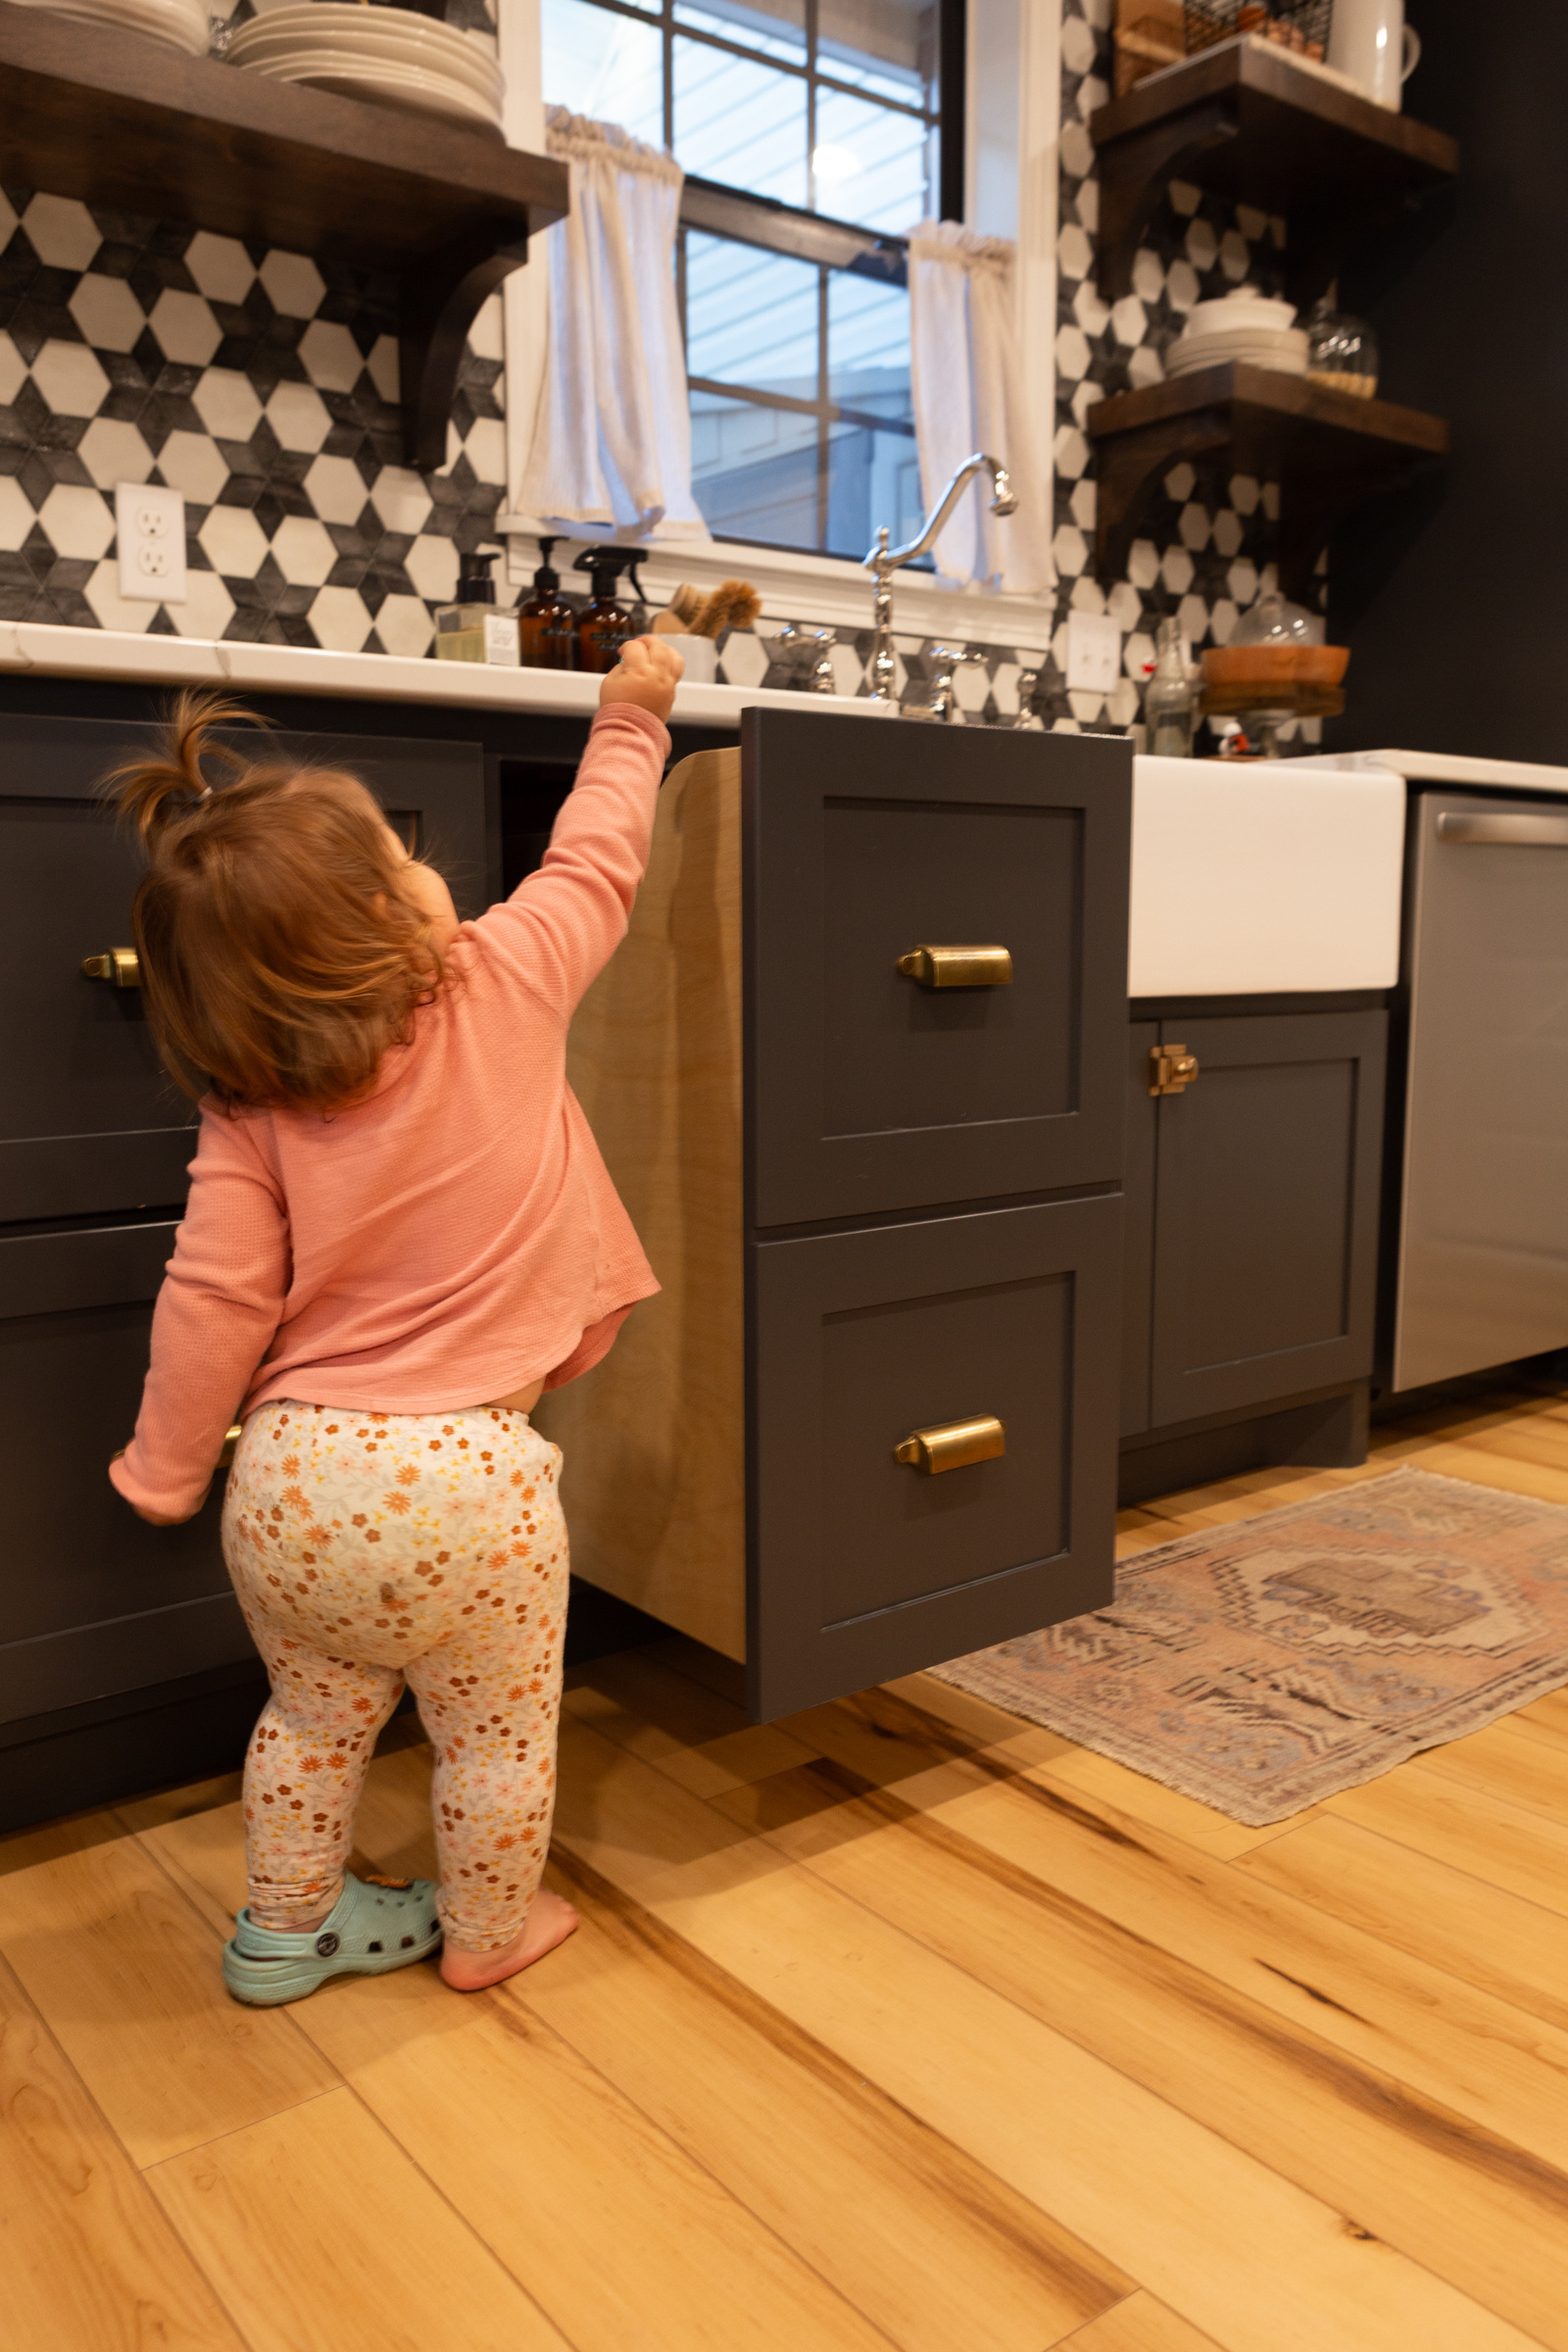
We had a large farmhouse sink in our South Carolina kitchen and it was something we missed a ton when we were using the two section sink in the OG Mississippi kitchen. It’s so nice to be able to put an entire baking sheet in the sink to wash, am I right? Or wash precious babies! We do a lot of that in here.

We decided to do a polished nickel faucet. There’s a “rule” that says when using mixed metals in a space that you should have the finish appear at least twice. For example, the cabinet hardware and the faucet could match or the light over the sink and the light over the table could match, etc. It makes it seem like items weren’t randomly chosen and makes the space feel more cohesive. Well guess what? I didn’t do that. I wanted it to feel fun and a bit eclectic and so I purposefully didn’t make the faucet match with anything else. I don’t regret that decision one bit. Here’s your reminder to do what makes you happy in your home. 😉 Oh and for the record, we LOVE this faucet! It was so well made, easy to clean, and added a beautiful vintage nod. We will definitely buy this one again. The hose did rip after I think a year but their customer service is phenomenal and they sent us out a new one that arrived in two days.
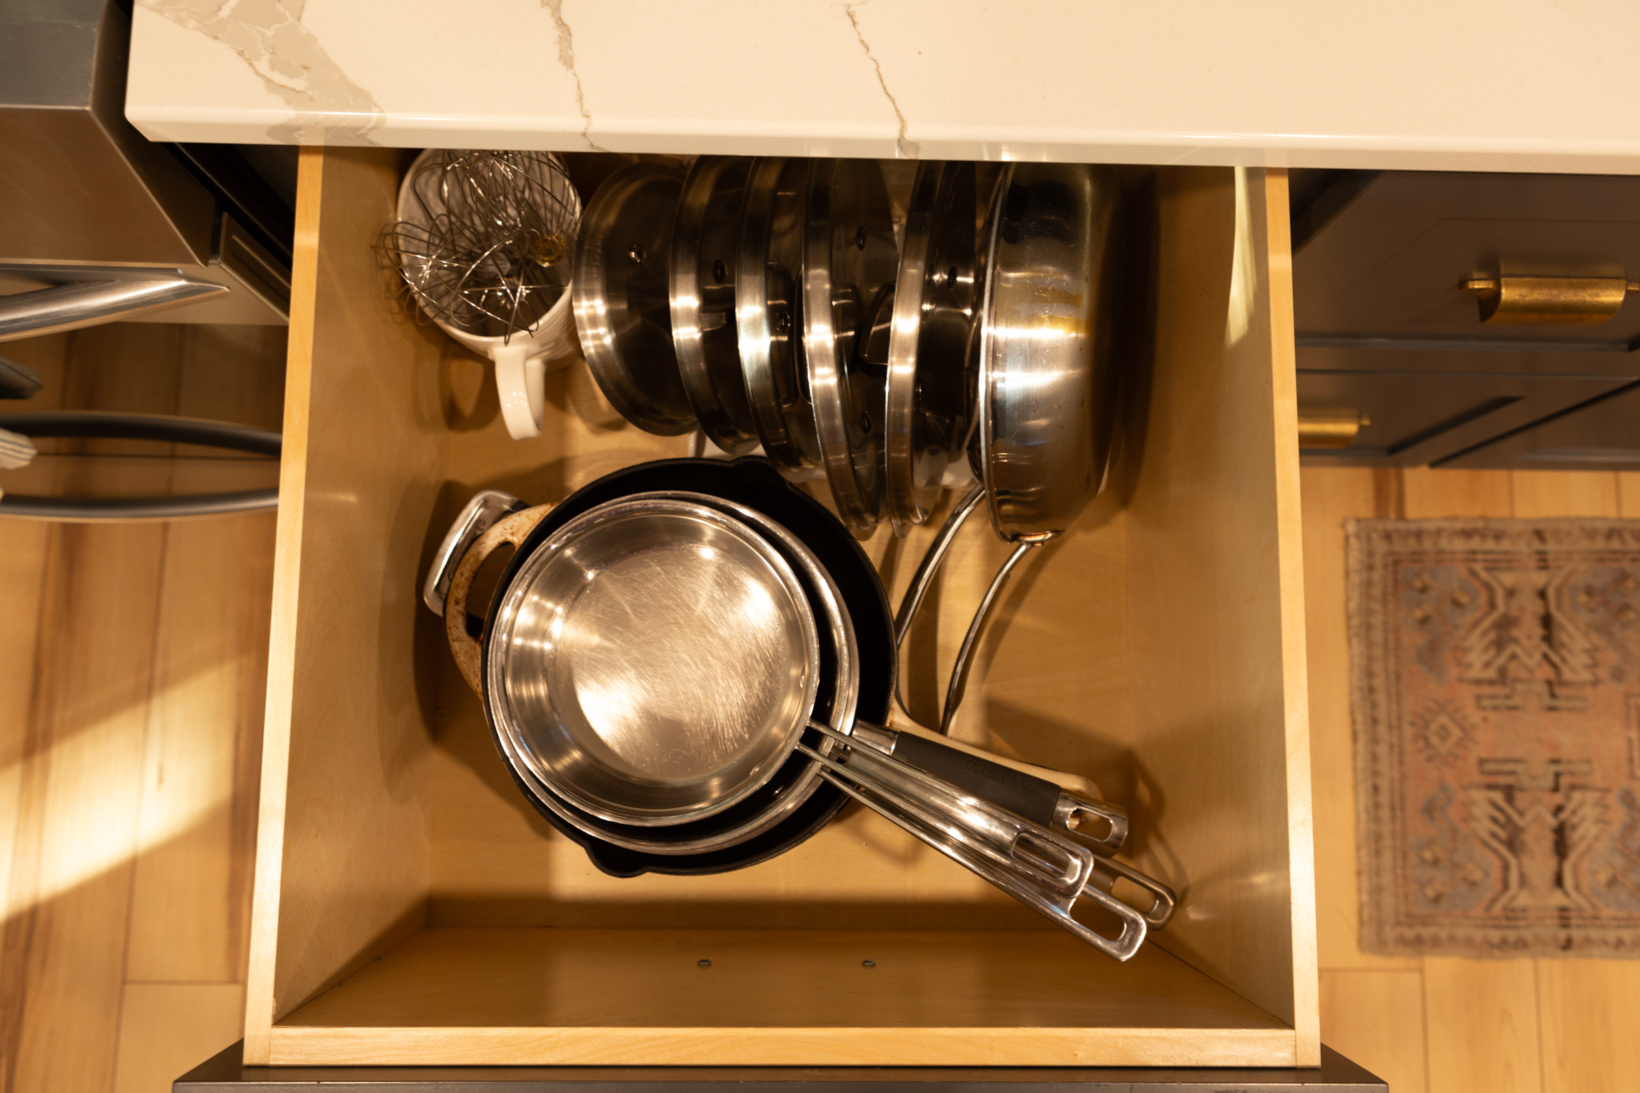
To optimize storage and functionality we opted for drawers as the lowers instead of cabinets with shelves.

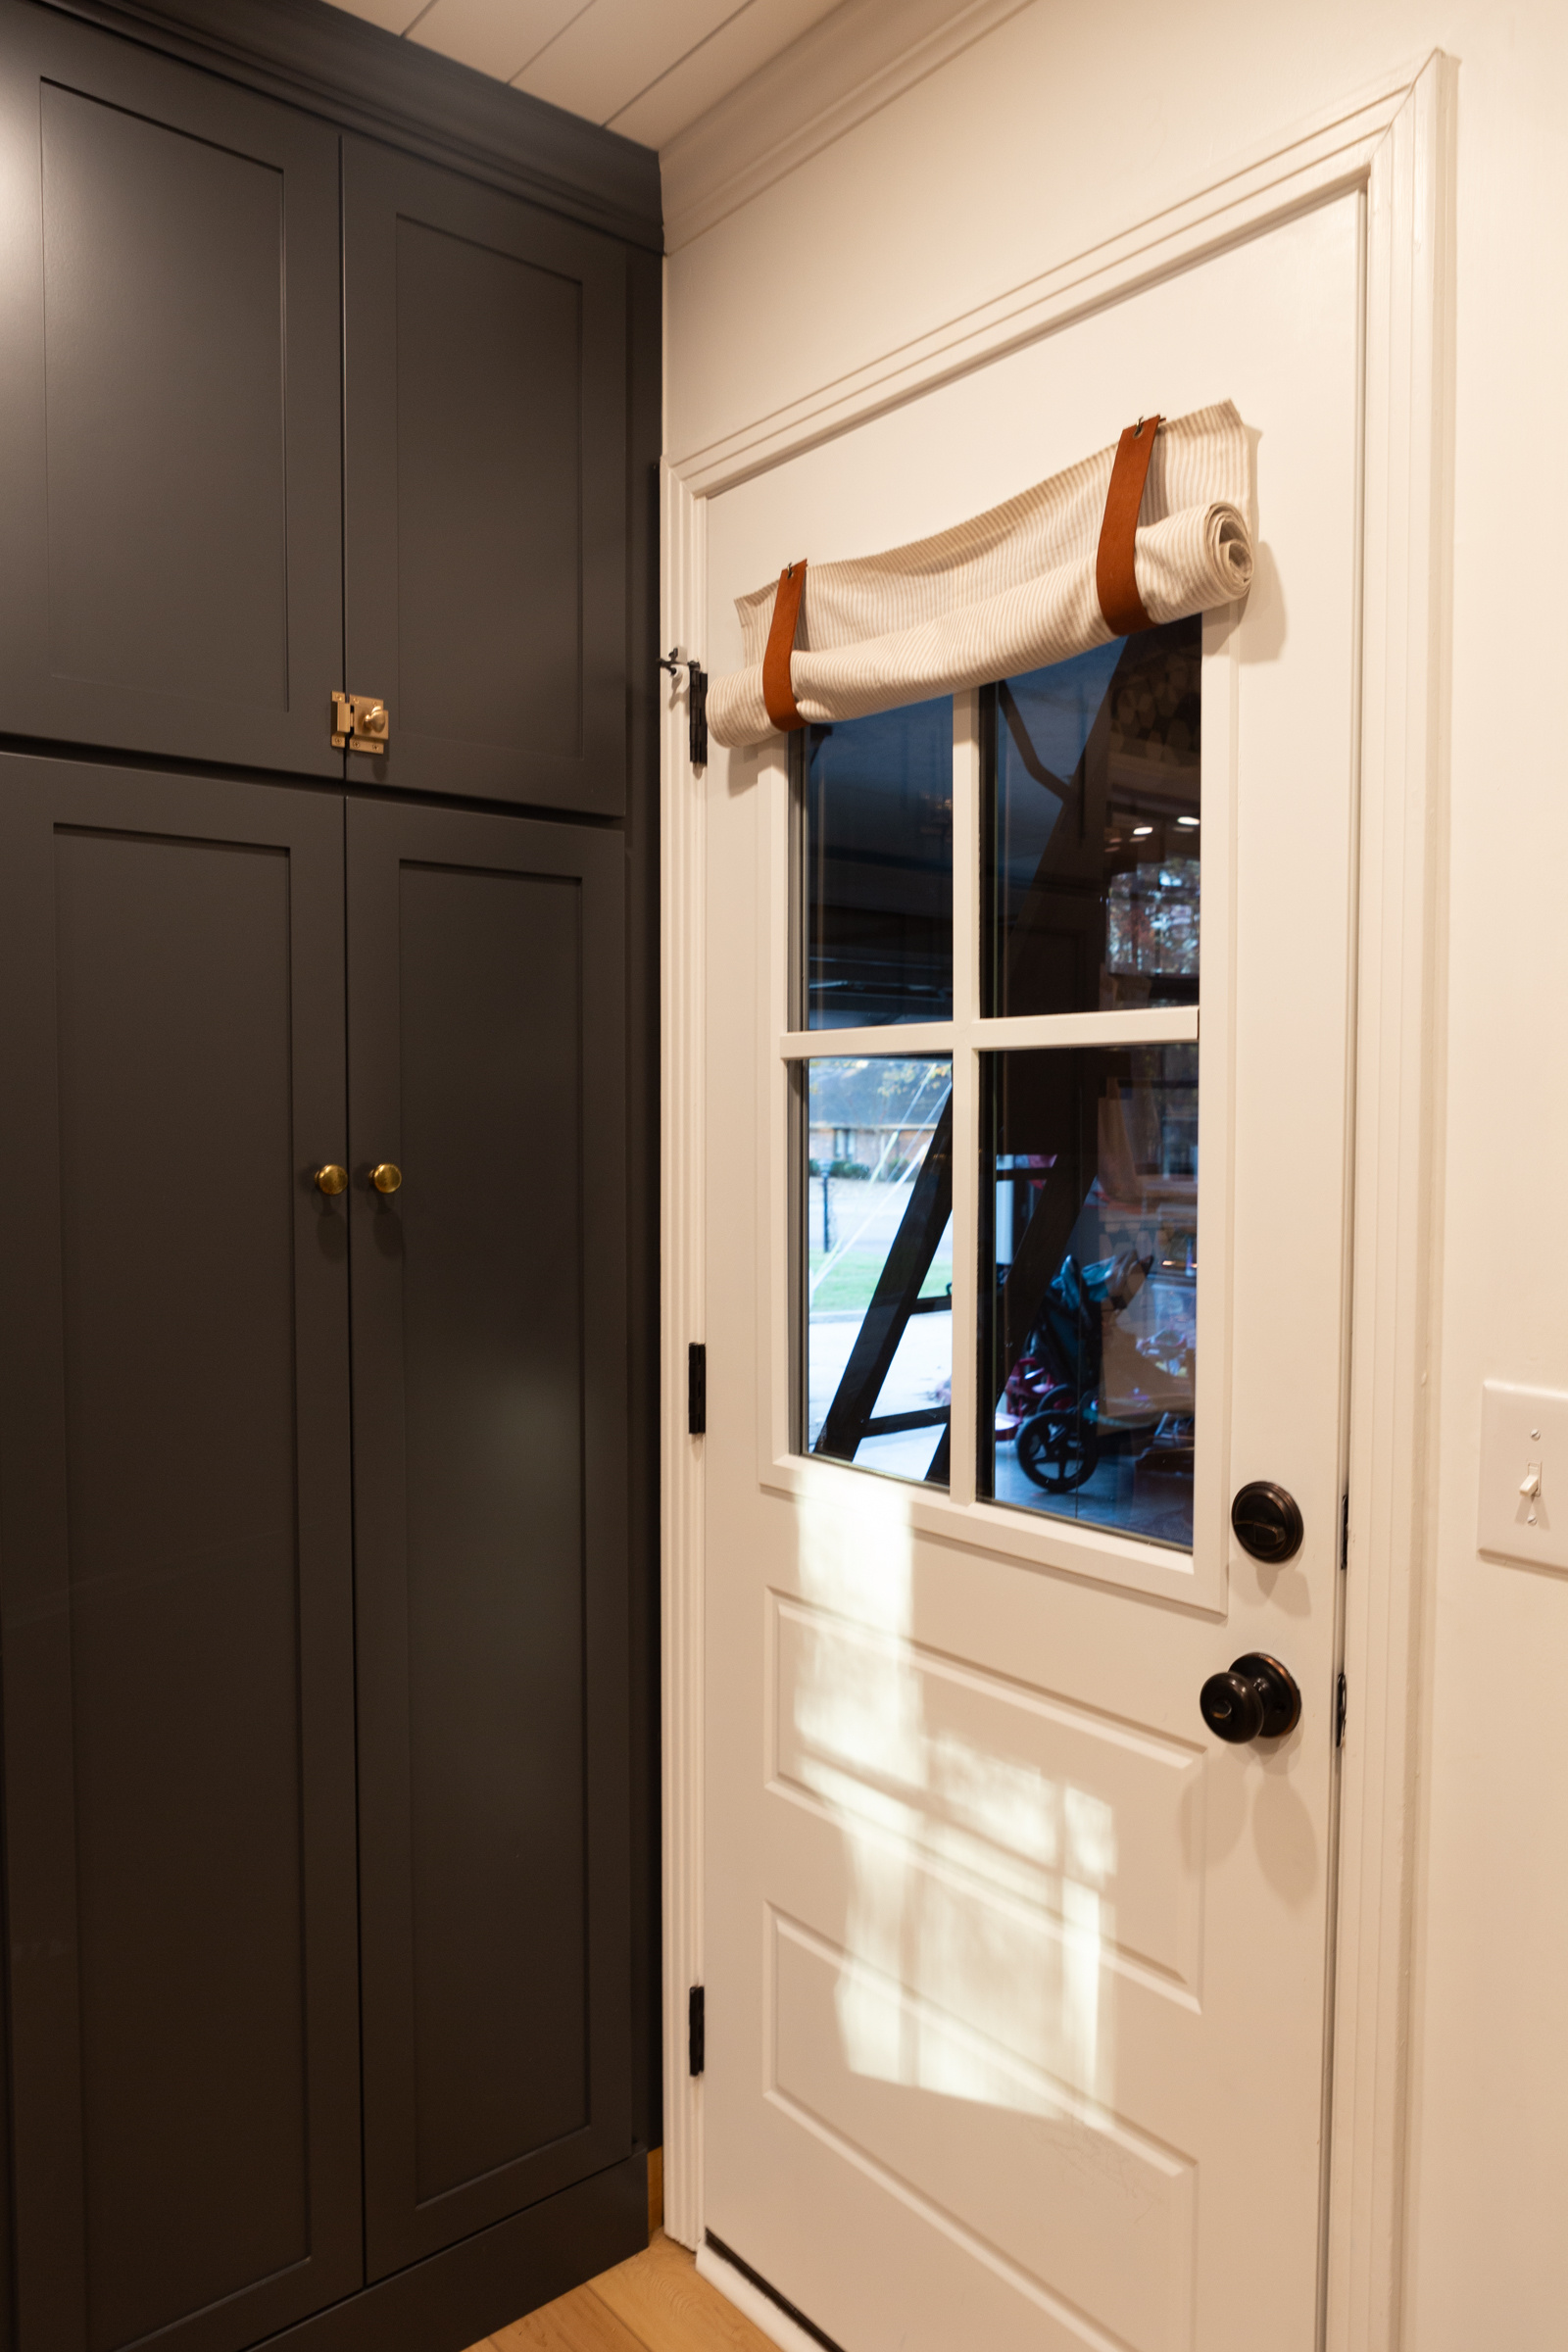
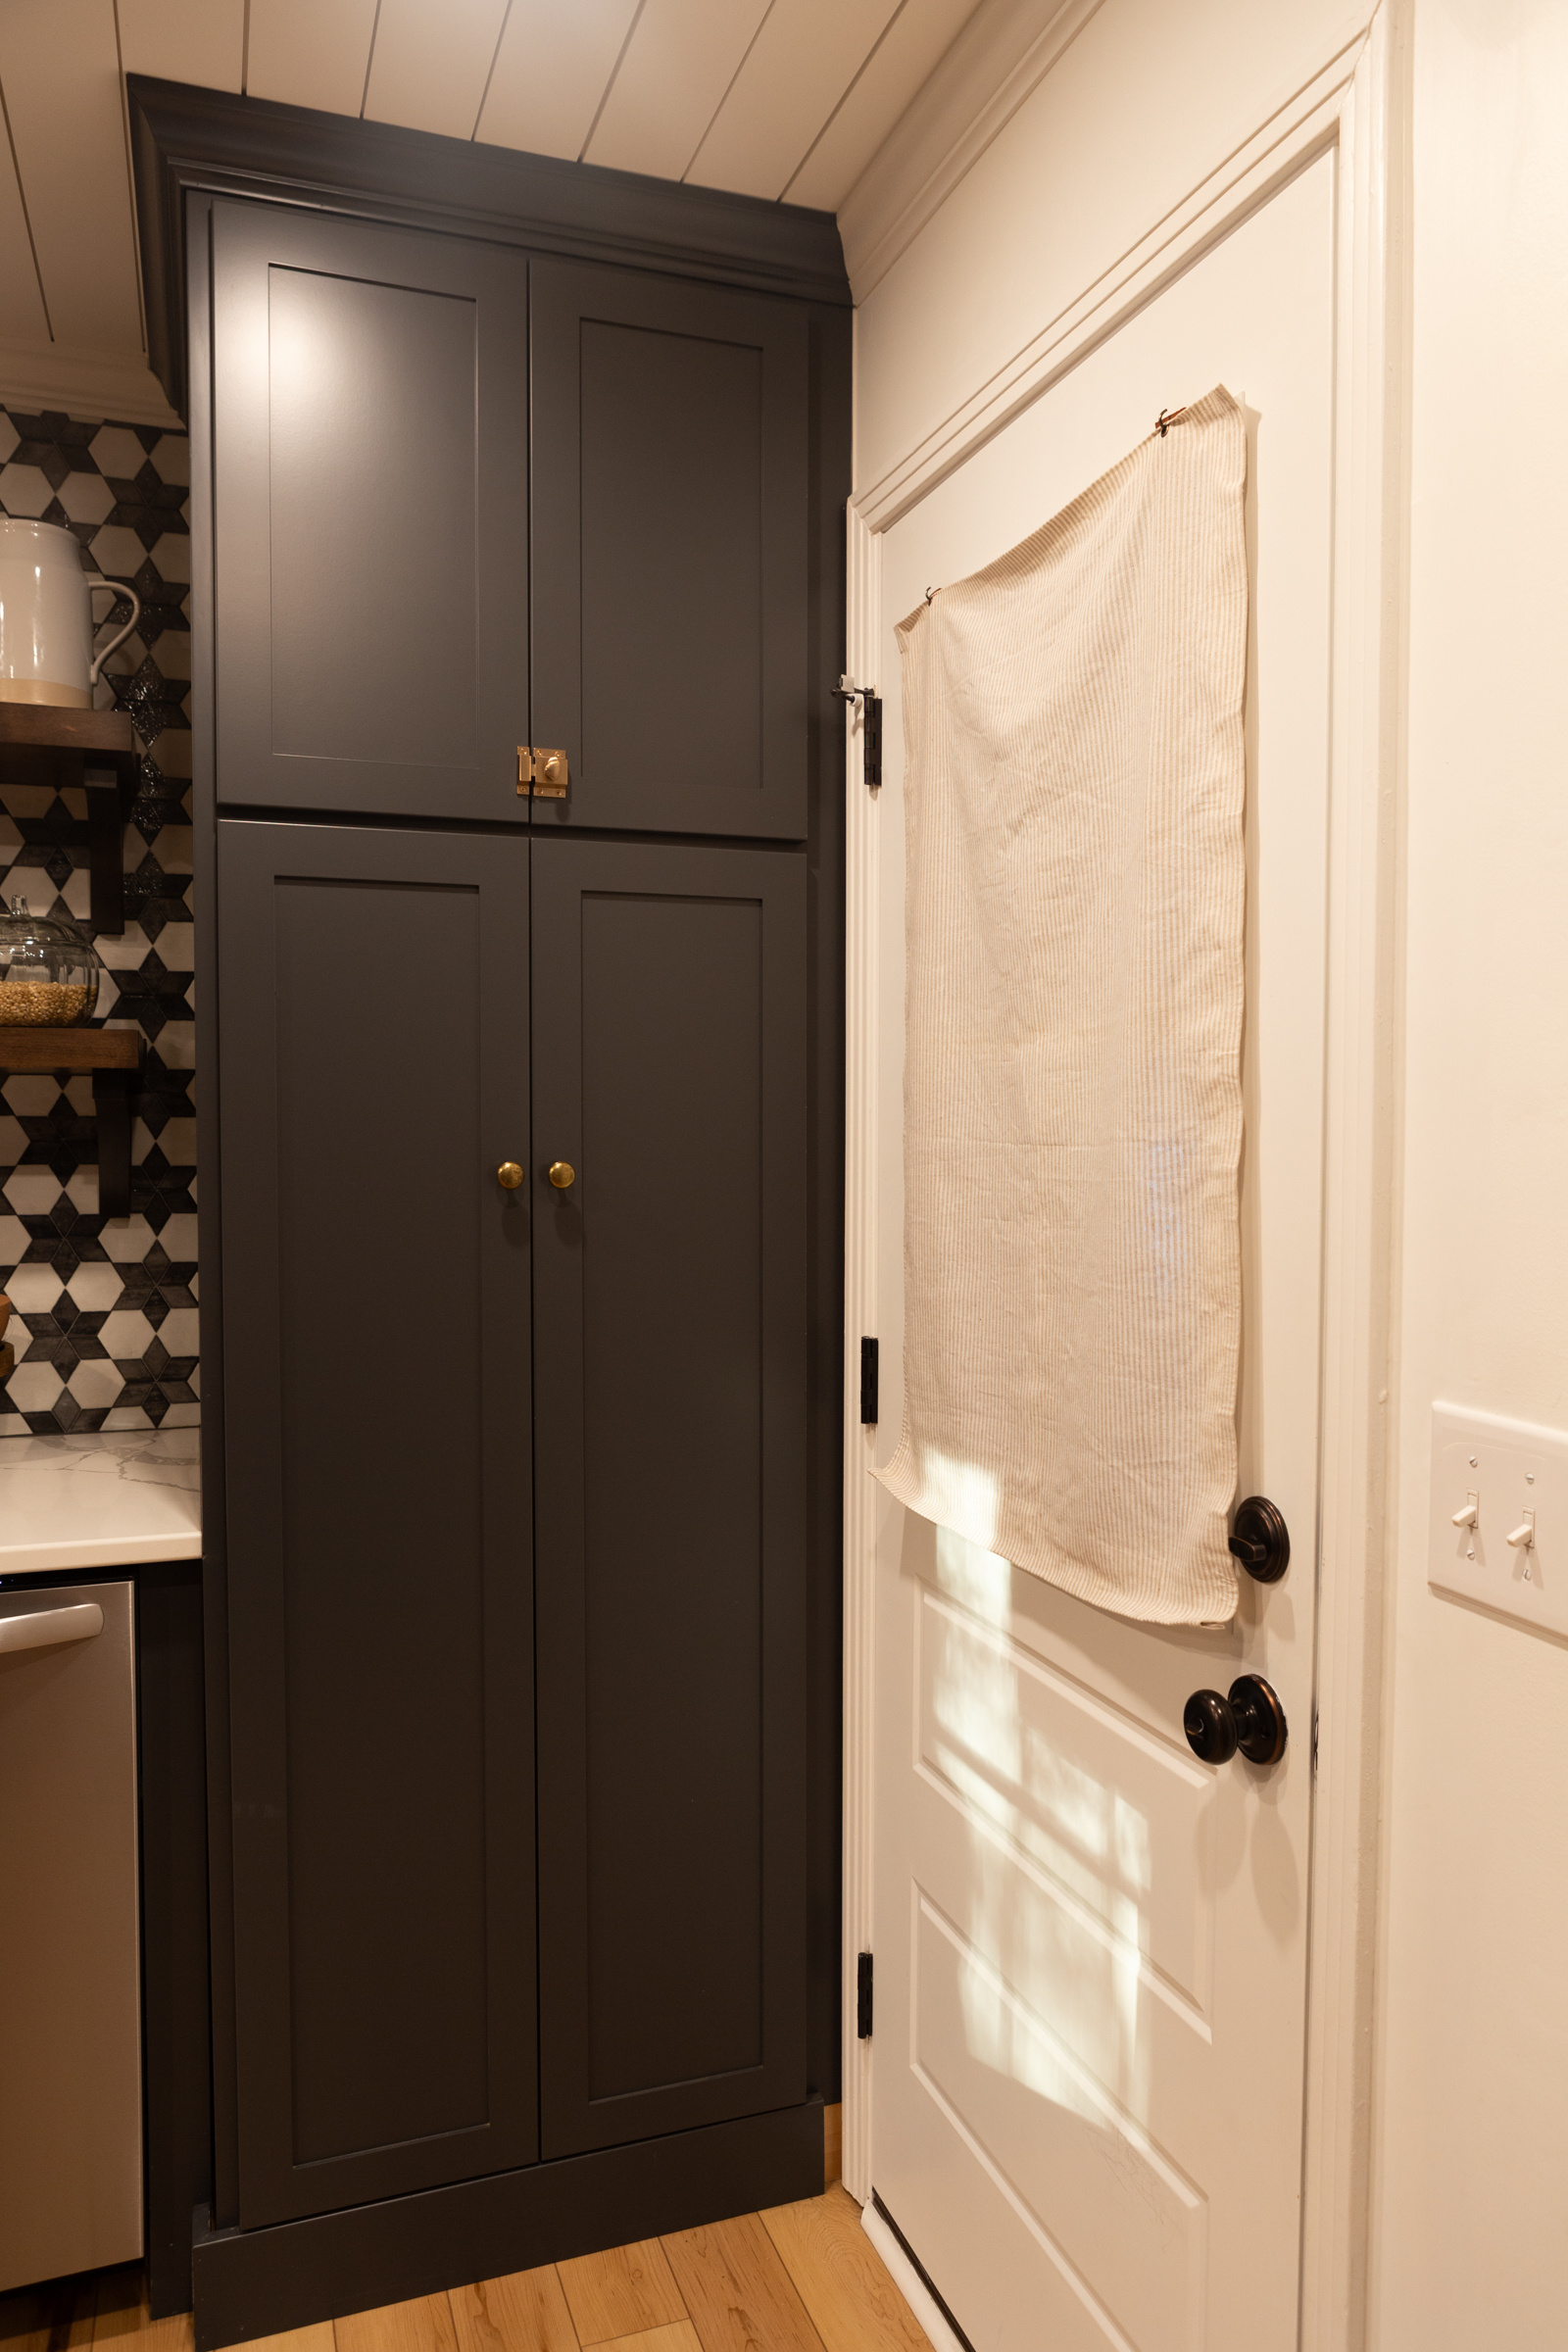
Another part of the update that we loved was adding this small appliance storage cabinet and a pull out pantry. Stephen installed new electric behind the cabinet and added outlets so that we could plug in the toaster oven, microwave, coffee grinder, etc. without having to move them to the counter.

The pull out pantry adds so much storage and held all of our non refrigerated items except for our baking dry goods which I keep in bulk in the laundry room/pantry.
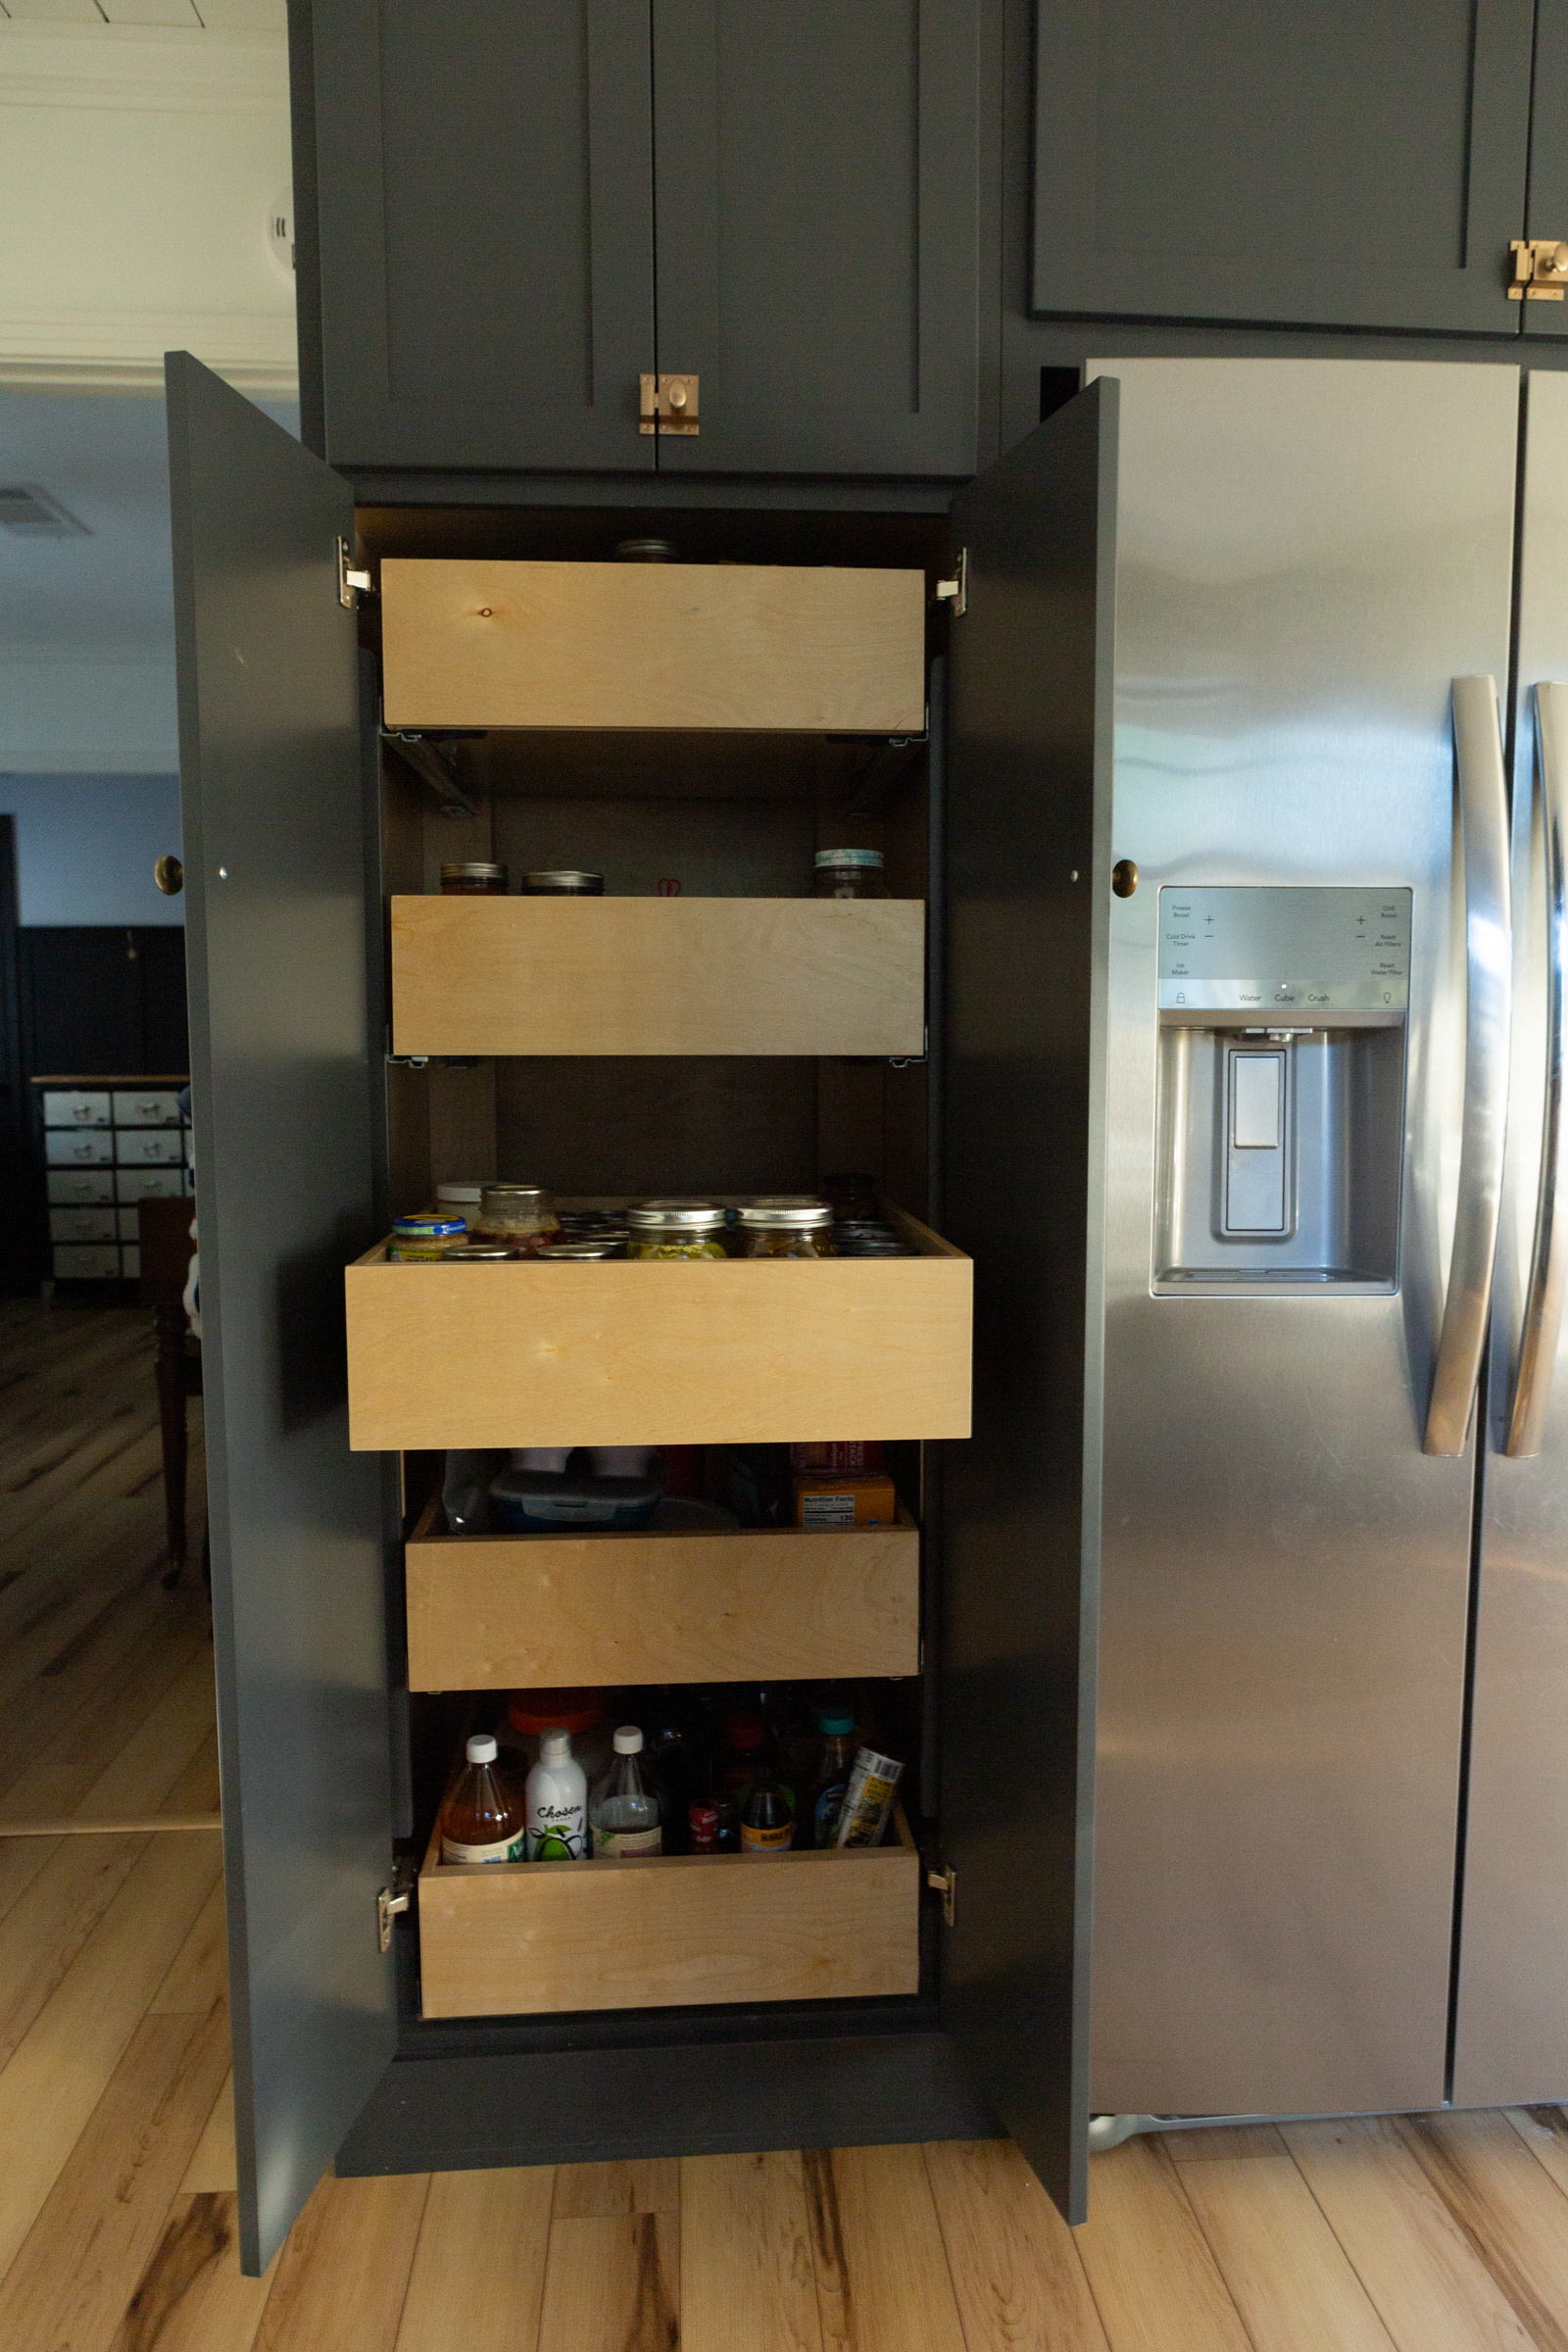
We purchased all Frigidaire appliances after Stephen did a TON of research. It has been two years of using them and we’re still very pleased with them! We use the air fryer option on the oven way more than we anticipated.
A look inside of our junk drawer! I didn’t even clean it for you. 😉 But seriously… Every time I see a “junk drawer” all pretty and matching I think, “Oh come on but where do you put your mismatched pens, chip clips, and chicken bands? Give me a break…” Chris made the drawer based on a drawing I did for him. It might not appear organized to you but because of the sections, we are able to keep this drawer quite organized and for the most part, we know where everything is. It is much better and way more functional compared to just throwing everything in one huge drawer!

We also asked Chris to make the utensil drawers and “larger utensils” drawer so that we didn’t have to buy inserts. We love how they turned out and how functional they are!


To give some time context, we started the kitchen demo in February of 2022. Sophie was born in April of that year and here she is throwing away trash in the camouflaged trash drawer. Admittedly this post could’ve been up (quite literally) years ago (HA!), but time is fleeting nonetheless.
Hardware is like jewelry for the home! I really really love little details but also didn’t want to spend thousands (pretty easy to do on house hardware actually!) on knobs and pulls. I’m so glad I found Battle Creek Hardware! We used this knob, this pull, and these latches (yay for pretty child proofing!). Something I have to add about them though- the finish on the latch doesn’t match the knob and pull even though they are both from the Portland line. It. Drove. Me. Nuts. I love the little details, remember? After using the knobs and pulls for months, they started to look more aged and less brassy and started to blend better with the latch but in case you are bothered by that type of thing, now you know!

The door going out into the garage was desperately needing to be replaced. Stephen installed a new one to match the rest of the new doors in the house. I made a fun curtain out of tan ticking stripe fabric I purchased from Hobby Lobby by cutting a piece a few inches wider and longer than the window. I folded all of the sides in a couple of times to create a clean edge and I “hemmed” it using hem tape. Super easy! I put two holes in the top using this kit (I also used it in here on the shower curtain) and then also added holes and in two straps of leather I purchased from Hobby Lobby. Stephen added two hooks on the door to hang the straps off of. Every morning when we wanted to let light come in from the garage, we’d roll up the curtain and hook the leather strap on the hook. At night we’d just let it down!
I made a little cafe curtain using the same fabric to go over the kitchen sink. I love the cottage feel it adds.
I think that’s everything I can think of! Oh what fun we had on this project. We feel blessed to have gotten to love on it and to spend so many hours of cherished fellowship with our family and friends within those walls. It taught us the great lesson that you really can host and make people feel cared for no matter the size of the room/home (trust me, we got really creative with the chair setup from time to time ha!). We’re really going to miss it. Let me know in the comments if you have any questions!
Kitchen sources:
- Cabinet color – Farrow & Ball Off-Black in satin
- Wall color – BM Chantilly Lace in eggshell
- Ceiling color – BM Chantilly Lace in flat
- Trim color – BM Chantilly Lace in semi gloss
- Fridge
- Oven/stove
- Tile
- Flooring
- Sink
- Faucet
- Sconce
- Chairs
- Chandelier
- Bamboo shades
- Knobs
- Pulls
- Latches
- Under cabinet lights
- Plates + bowls + pasta bowls
- Praying man painting
- Frame (similar)
- Calendar (DIY) – similar here
- Coffee maker
- Rug (similar)
- Kitchen Aid aka my fourth child
I sincerely appreciate you all shopping through my affiliate links like the ones included in this post. I make a small commission when you purchase through these links at no extra cost to you. These funds help support my family and allow for us to produce better content for you all. I can’t thank you enough for supporting all that we do!
jordan jean
Leave a Reply


This is so beautiful! I had no idea you made the curtain over the door- I love it and now want to do something like that for the windows on our front door!