December 30, 2023
Of all the rooms in our Mississippi home, the girl’s/guest bathroom needed the most love. Ironically, it was the only bathroom we used the entire first year we lived in this house before we completed the primary bathroom remodel because it made the most sense for us logistically. It was adorned with wood paneling and linoleum tiles in the bathroom/shower (yes, you read that right) and like the primary bathroom, it had a certain stink to it (no matter how clean it was!). Once our bathroom and kitchen were completed and we had gotten into a bit of a groove with Sophie, we put a date on the calendar for demo day and our crew of friends came over to help.
Here’s a reminder of what we started with:
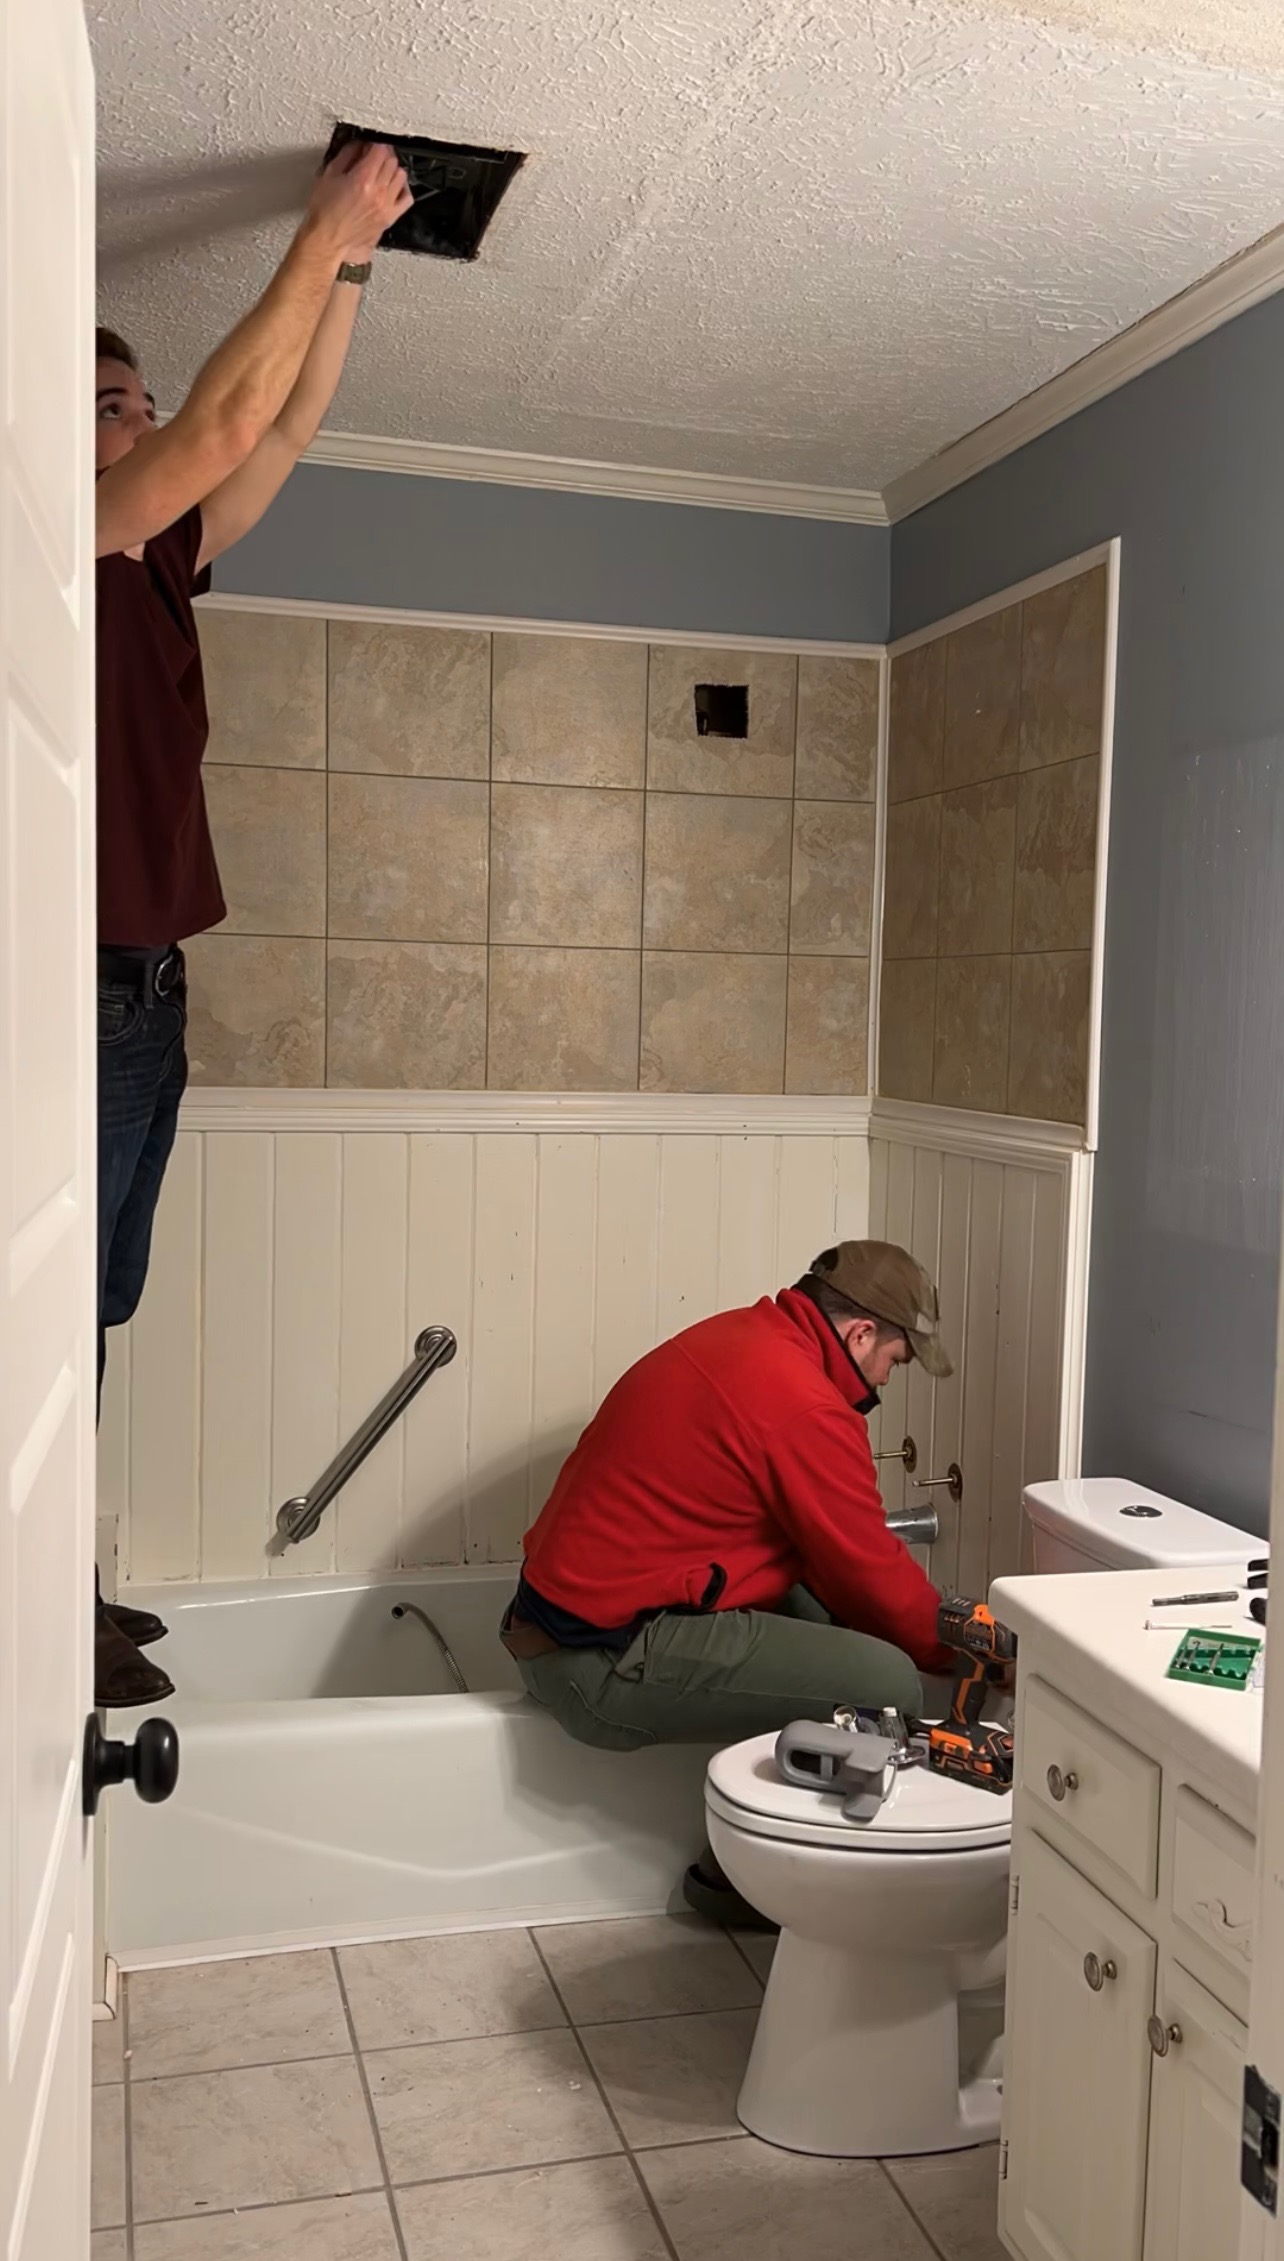
The guys ended up taking the entire room down to the studs. We knew the ceiling needed to be completely redone anyway and it was going to take us more time and effort to work around everything versus just starting fresh. It’s also the type of things for us with projects like this… “If we’re going to do this, we’re going to do it right.” So down to the studs we went and just like in the primary bathroom, as everything was removed, the stink went away too. Praise the Lord.
Just a side note that I can’t go without sharing… In our first bathroom demo we removed all of the tile with a good ol’ hammer. Don’t do that. Learn from our mistake and get one of these guys. It will literally cut your work time down by 90%. Make sure to wear proper PPE!!! Those precious eyes and ears deserve to the protected.
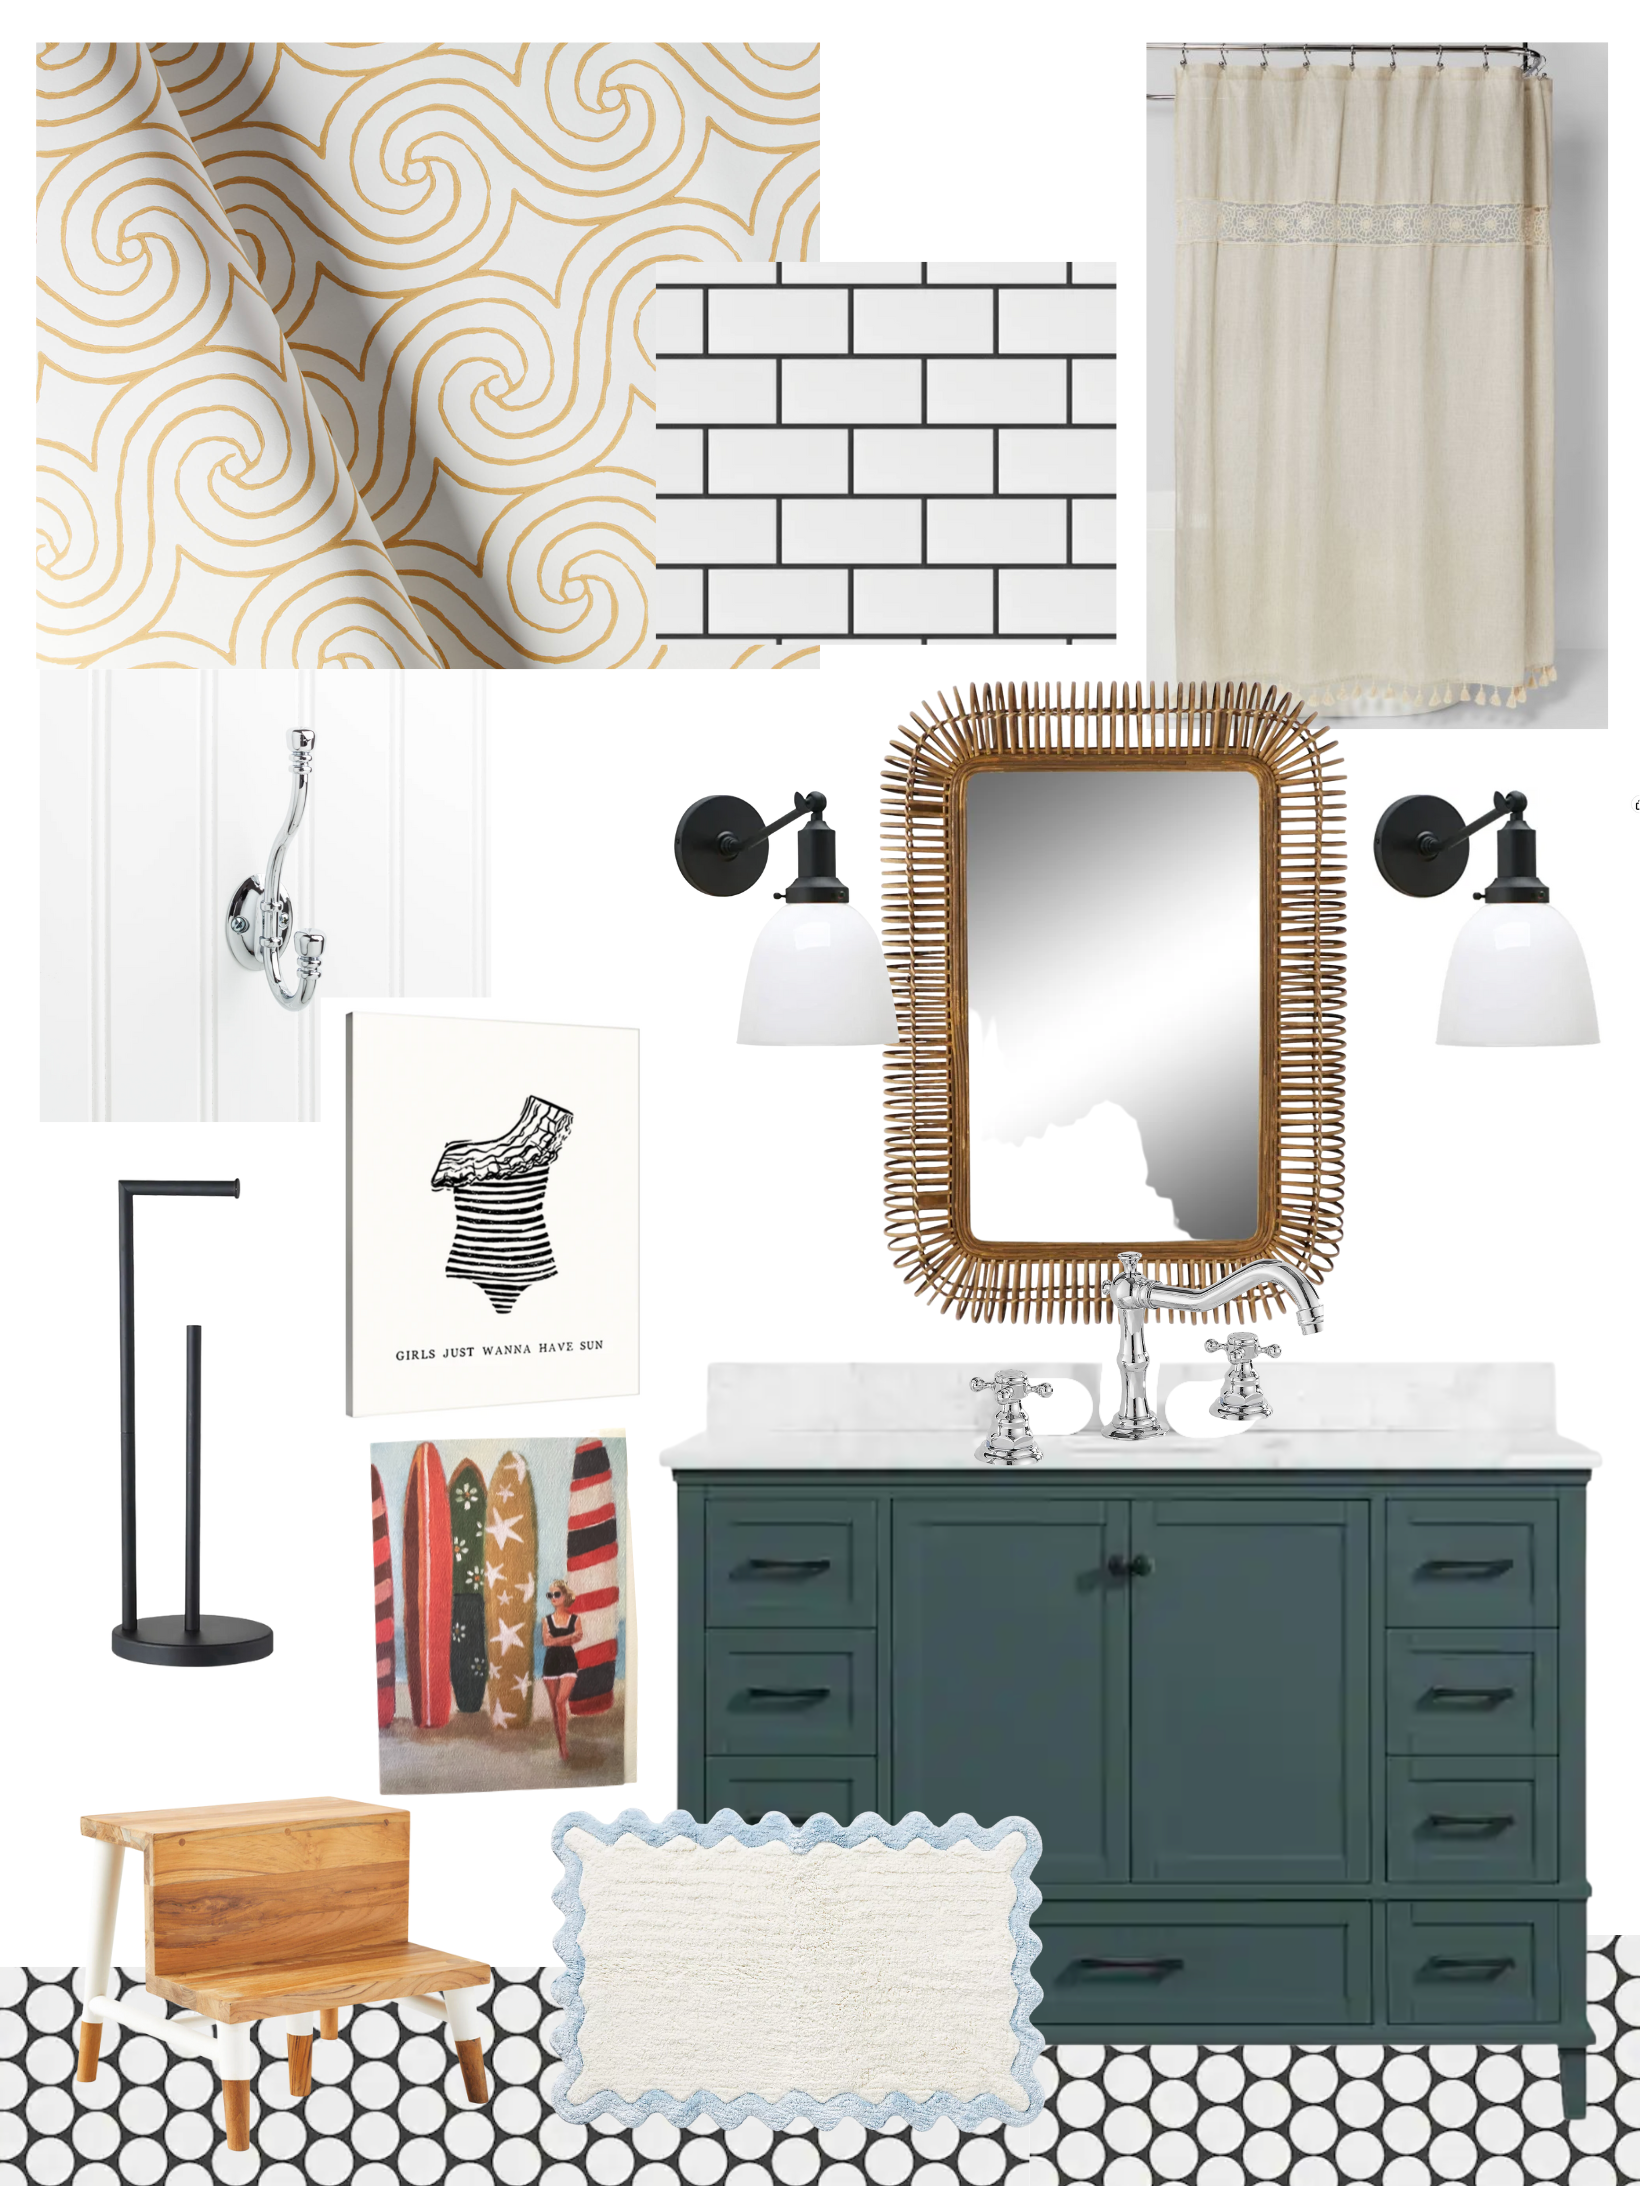
Here’s a reminder of the design plan I came up with before we started working in here. We wanted it to be fun for the girls and also fitting for our 1980s home. Stephen requested a “beach theme” (anyone else grow up with a “beachy” bathroom? It’s nostalgic for him!) and so even though I tend to not love ‘themes’, I designed the space with a nod to that.
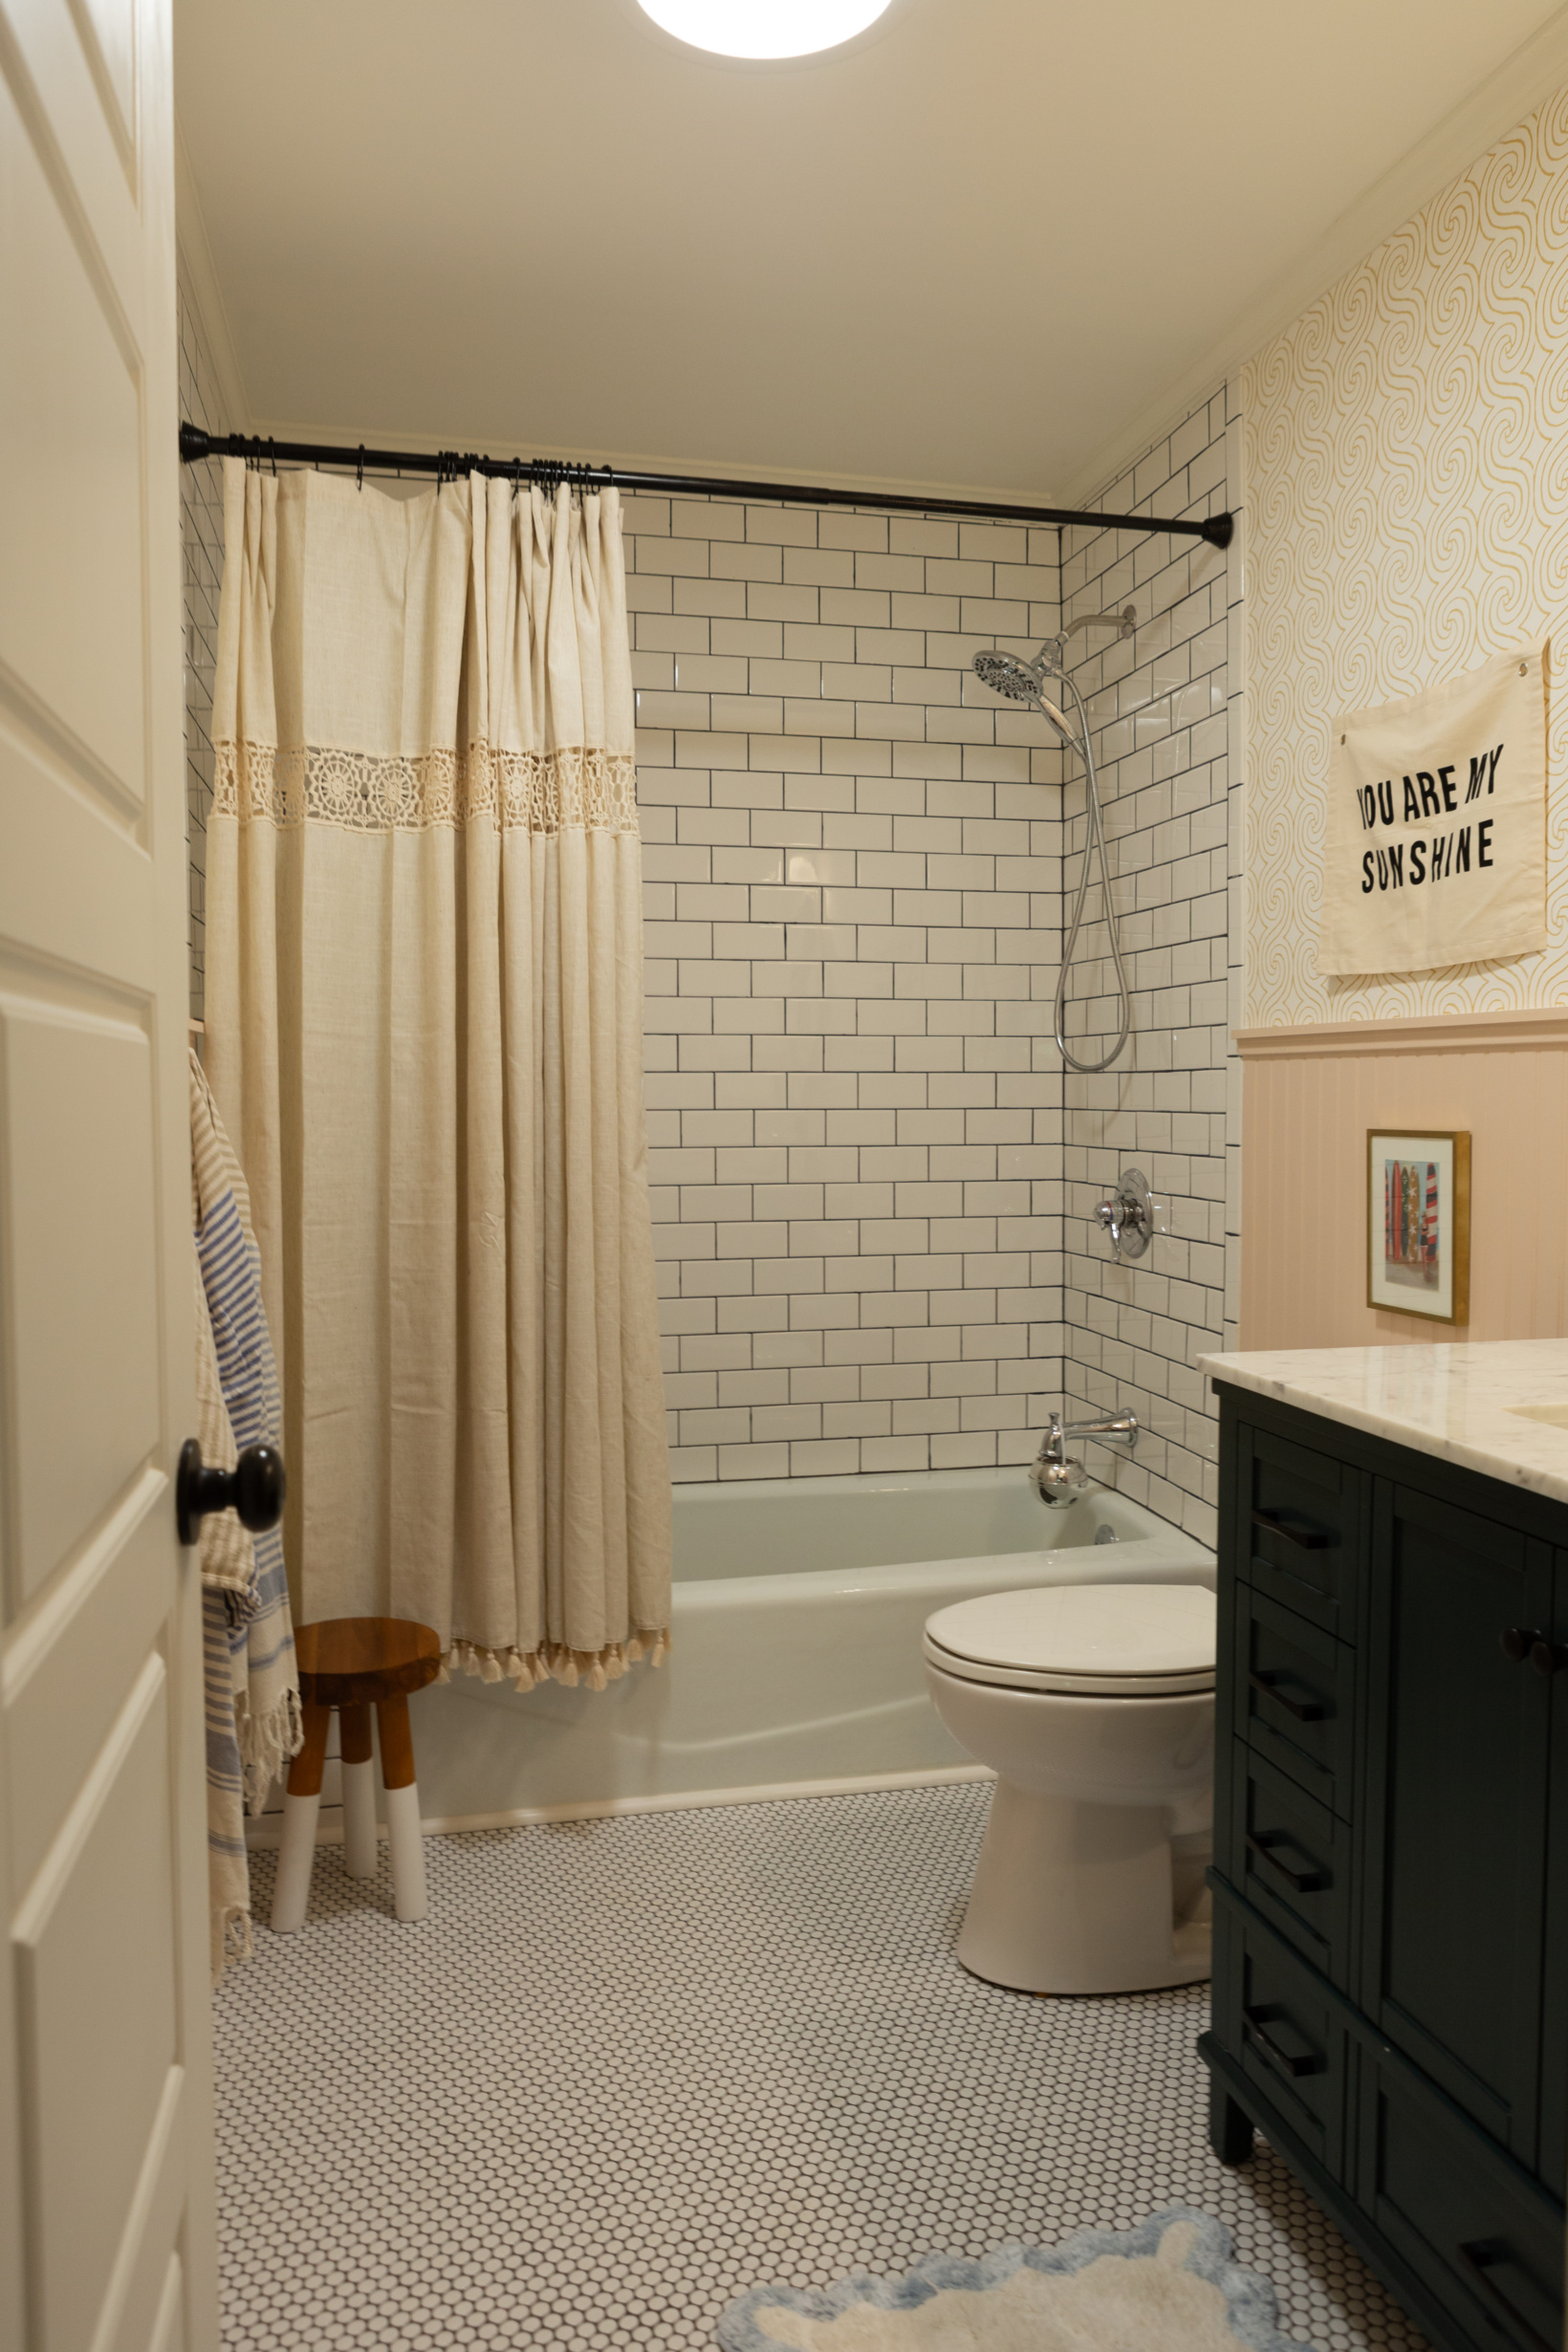
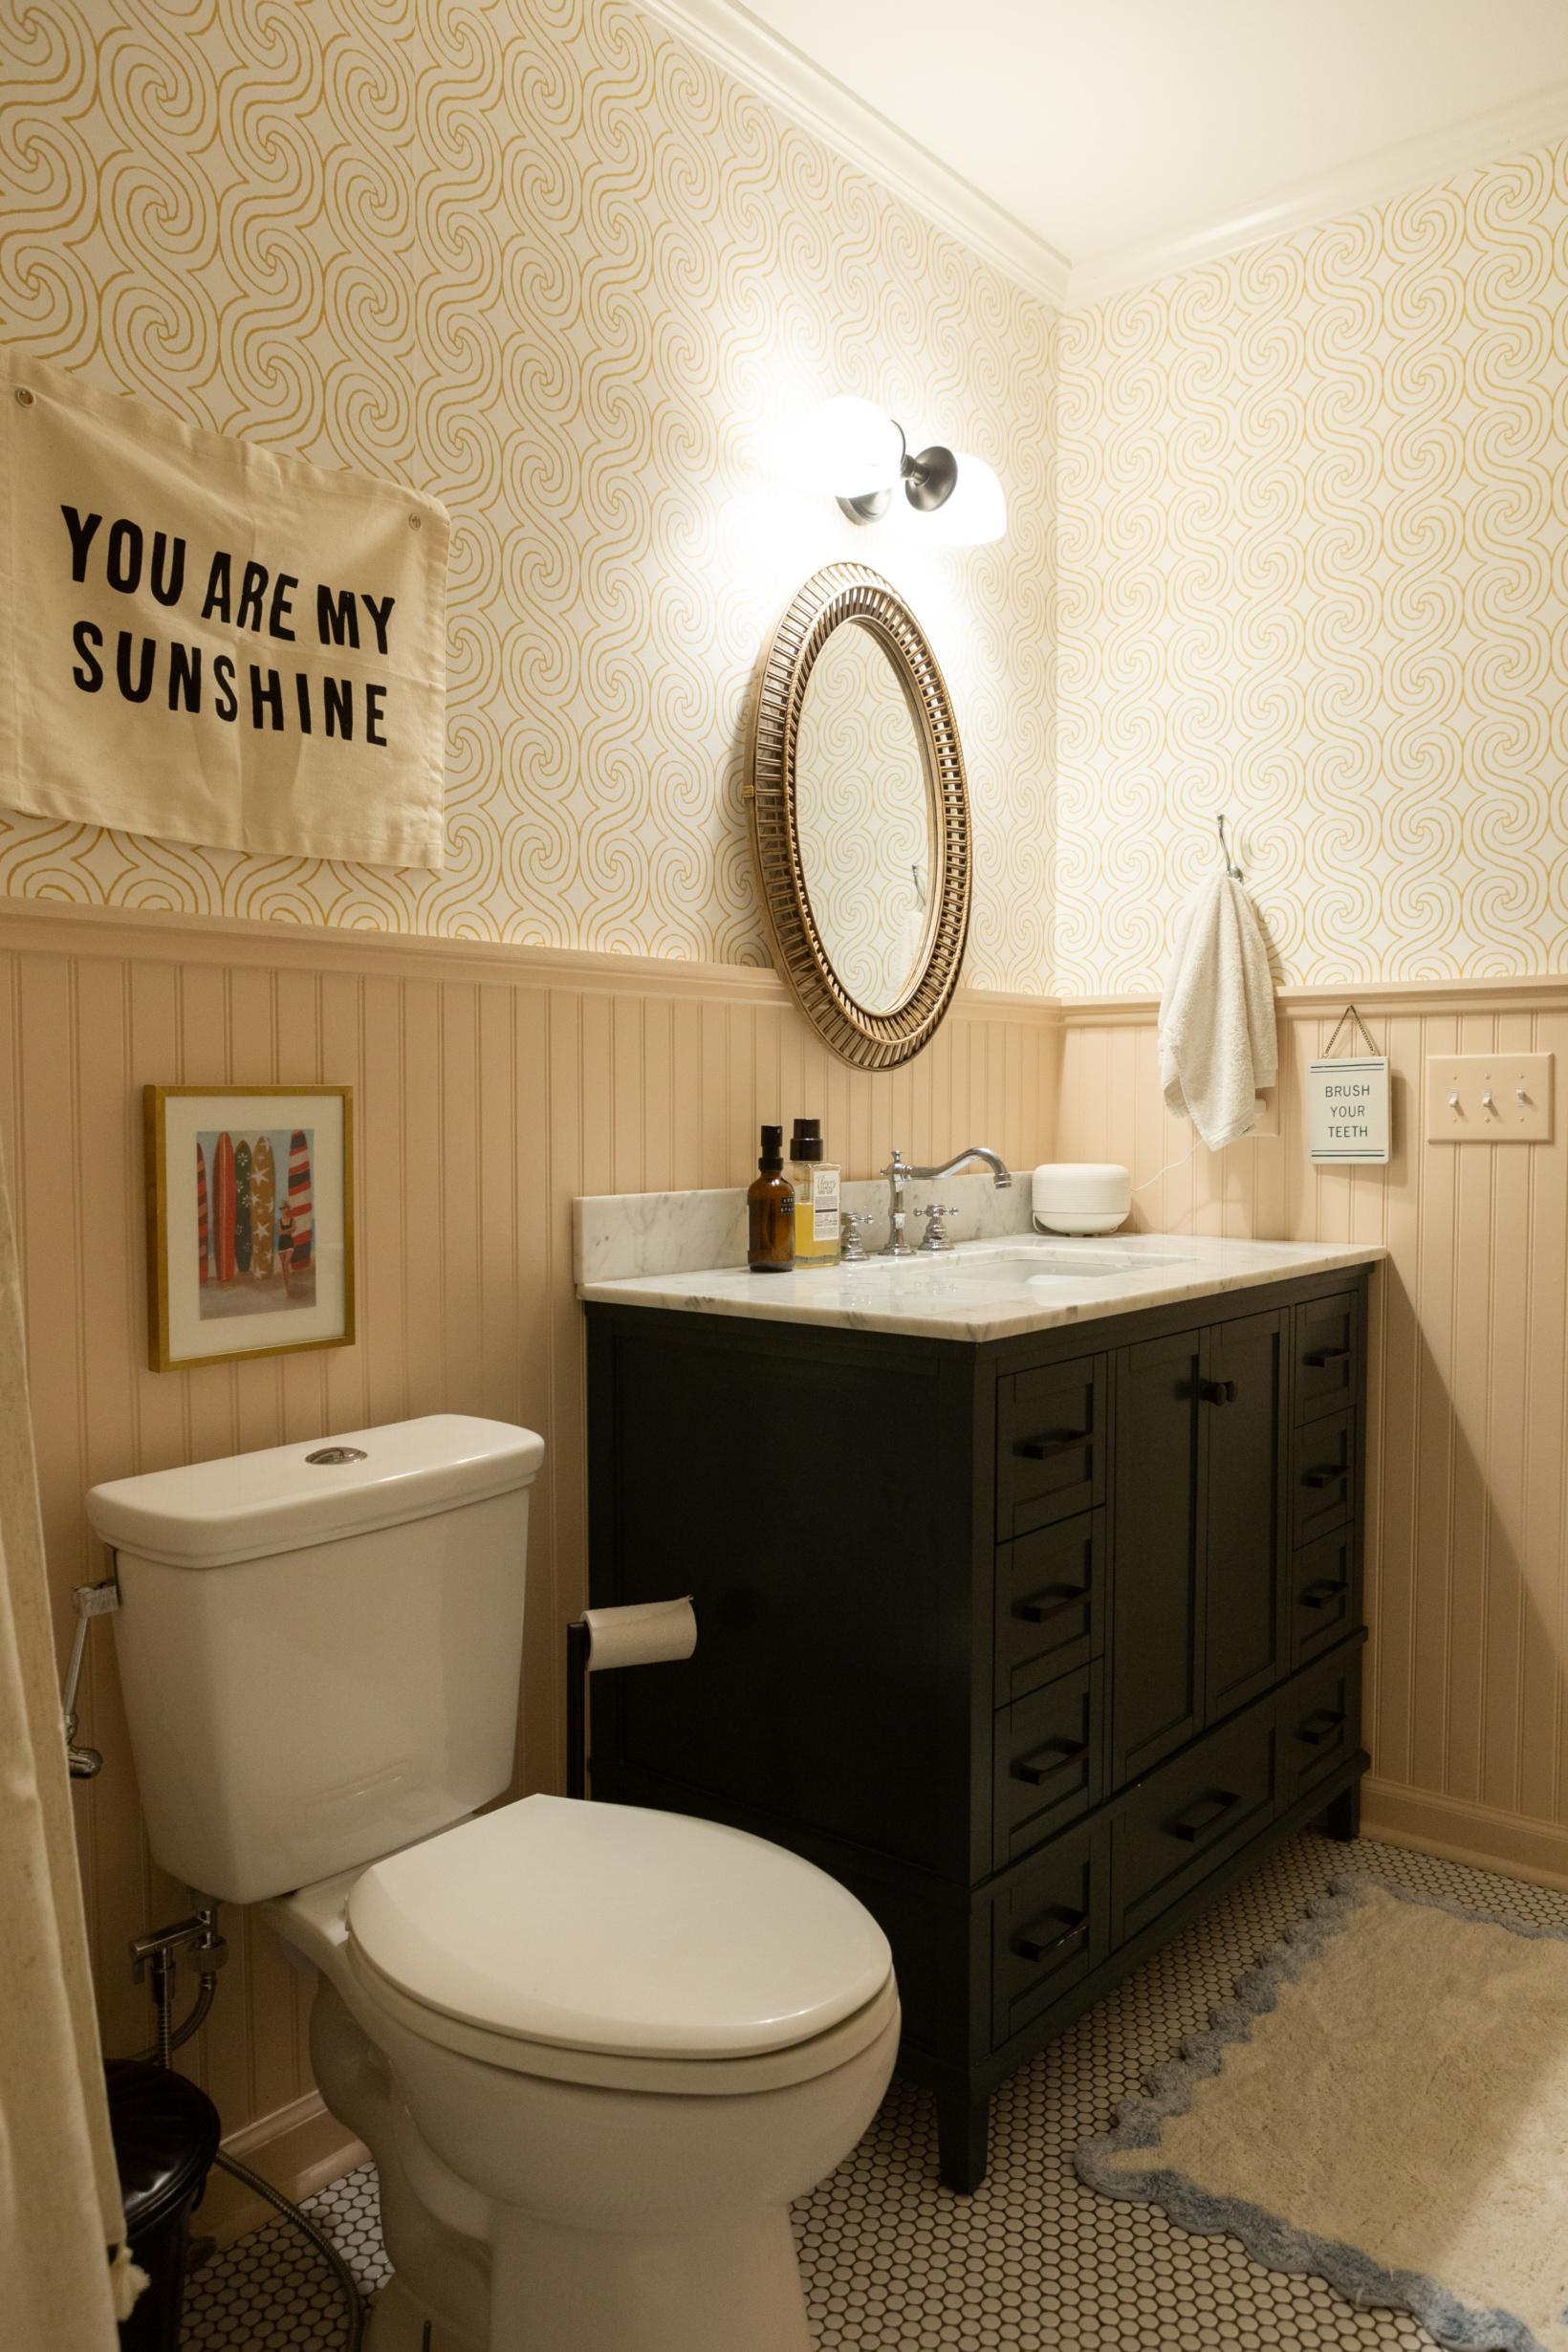
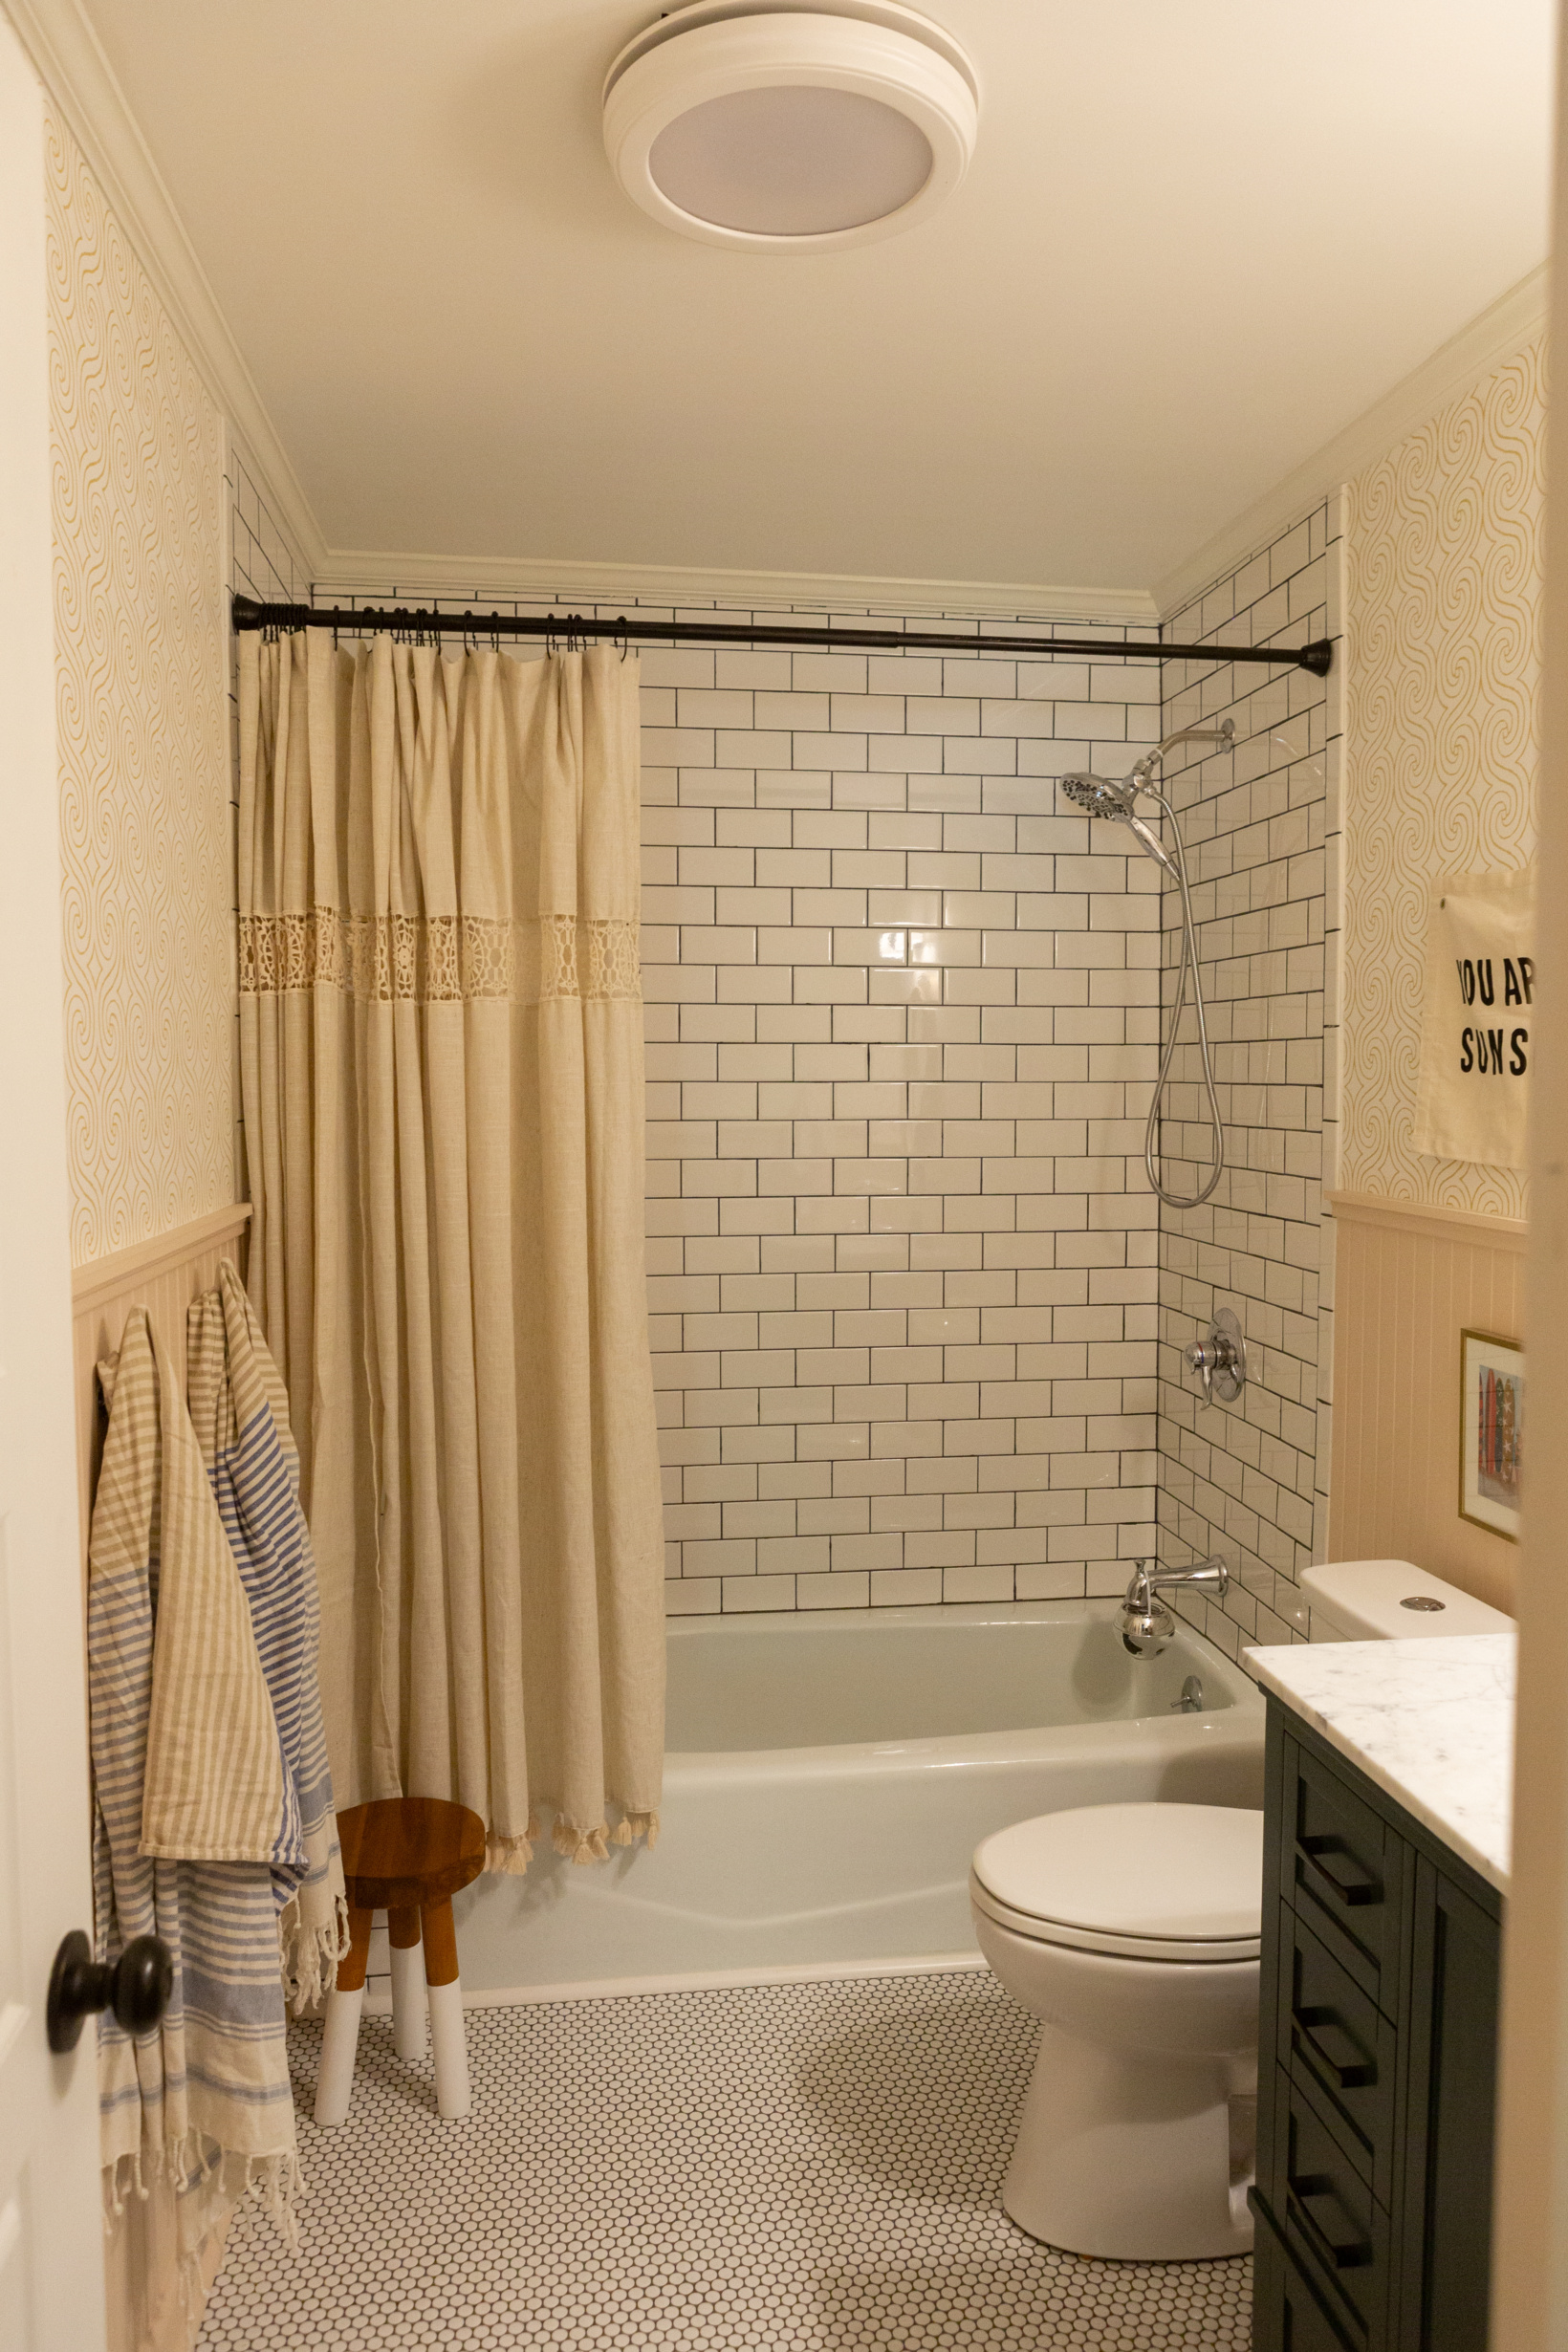
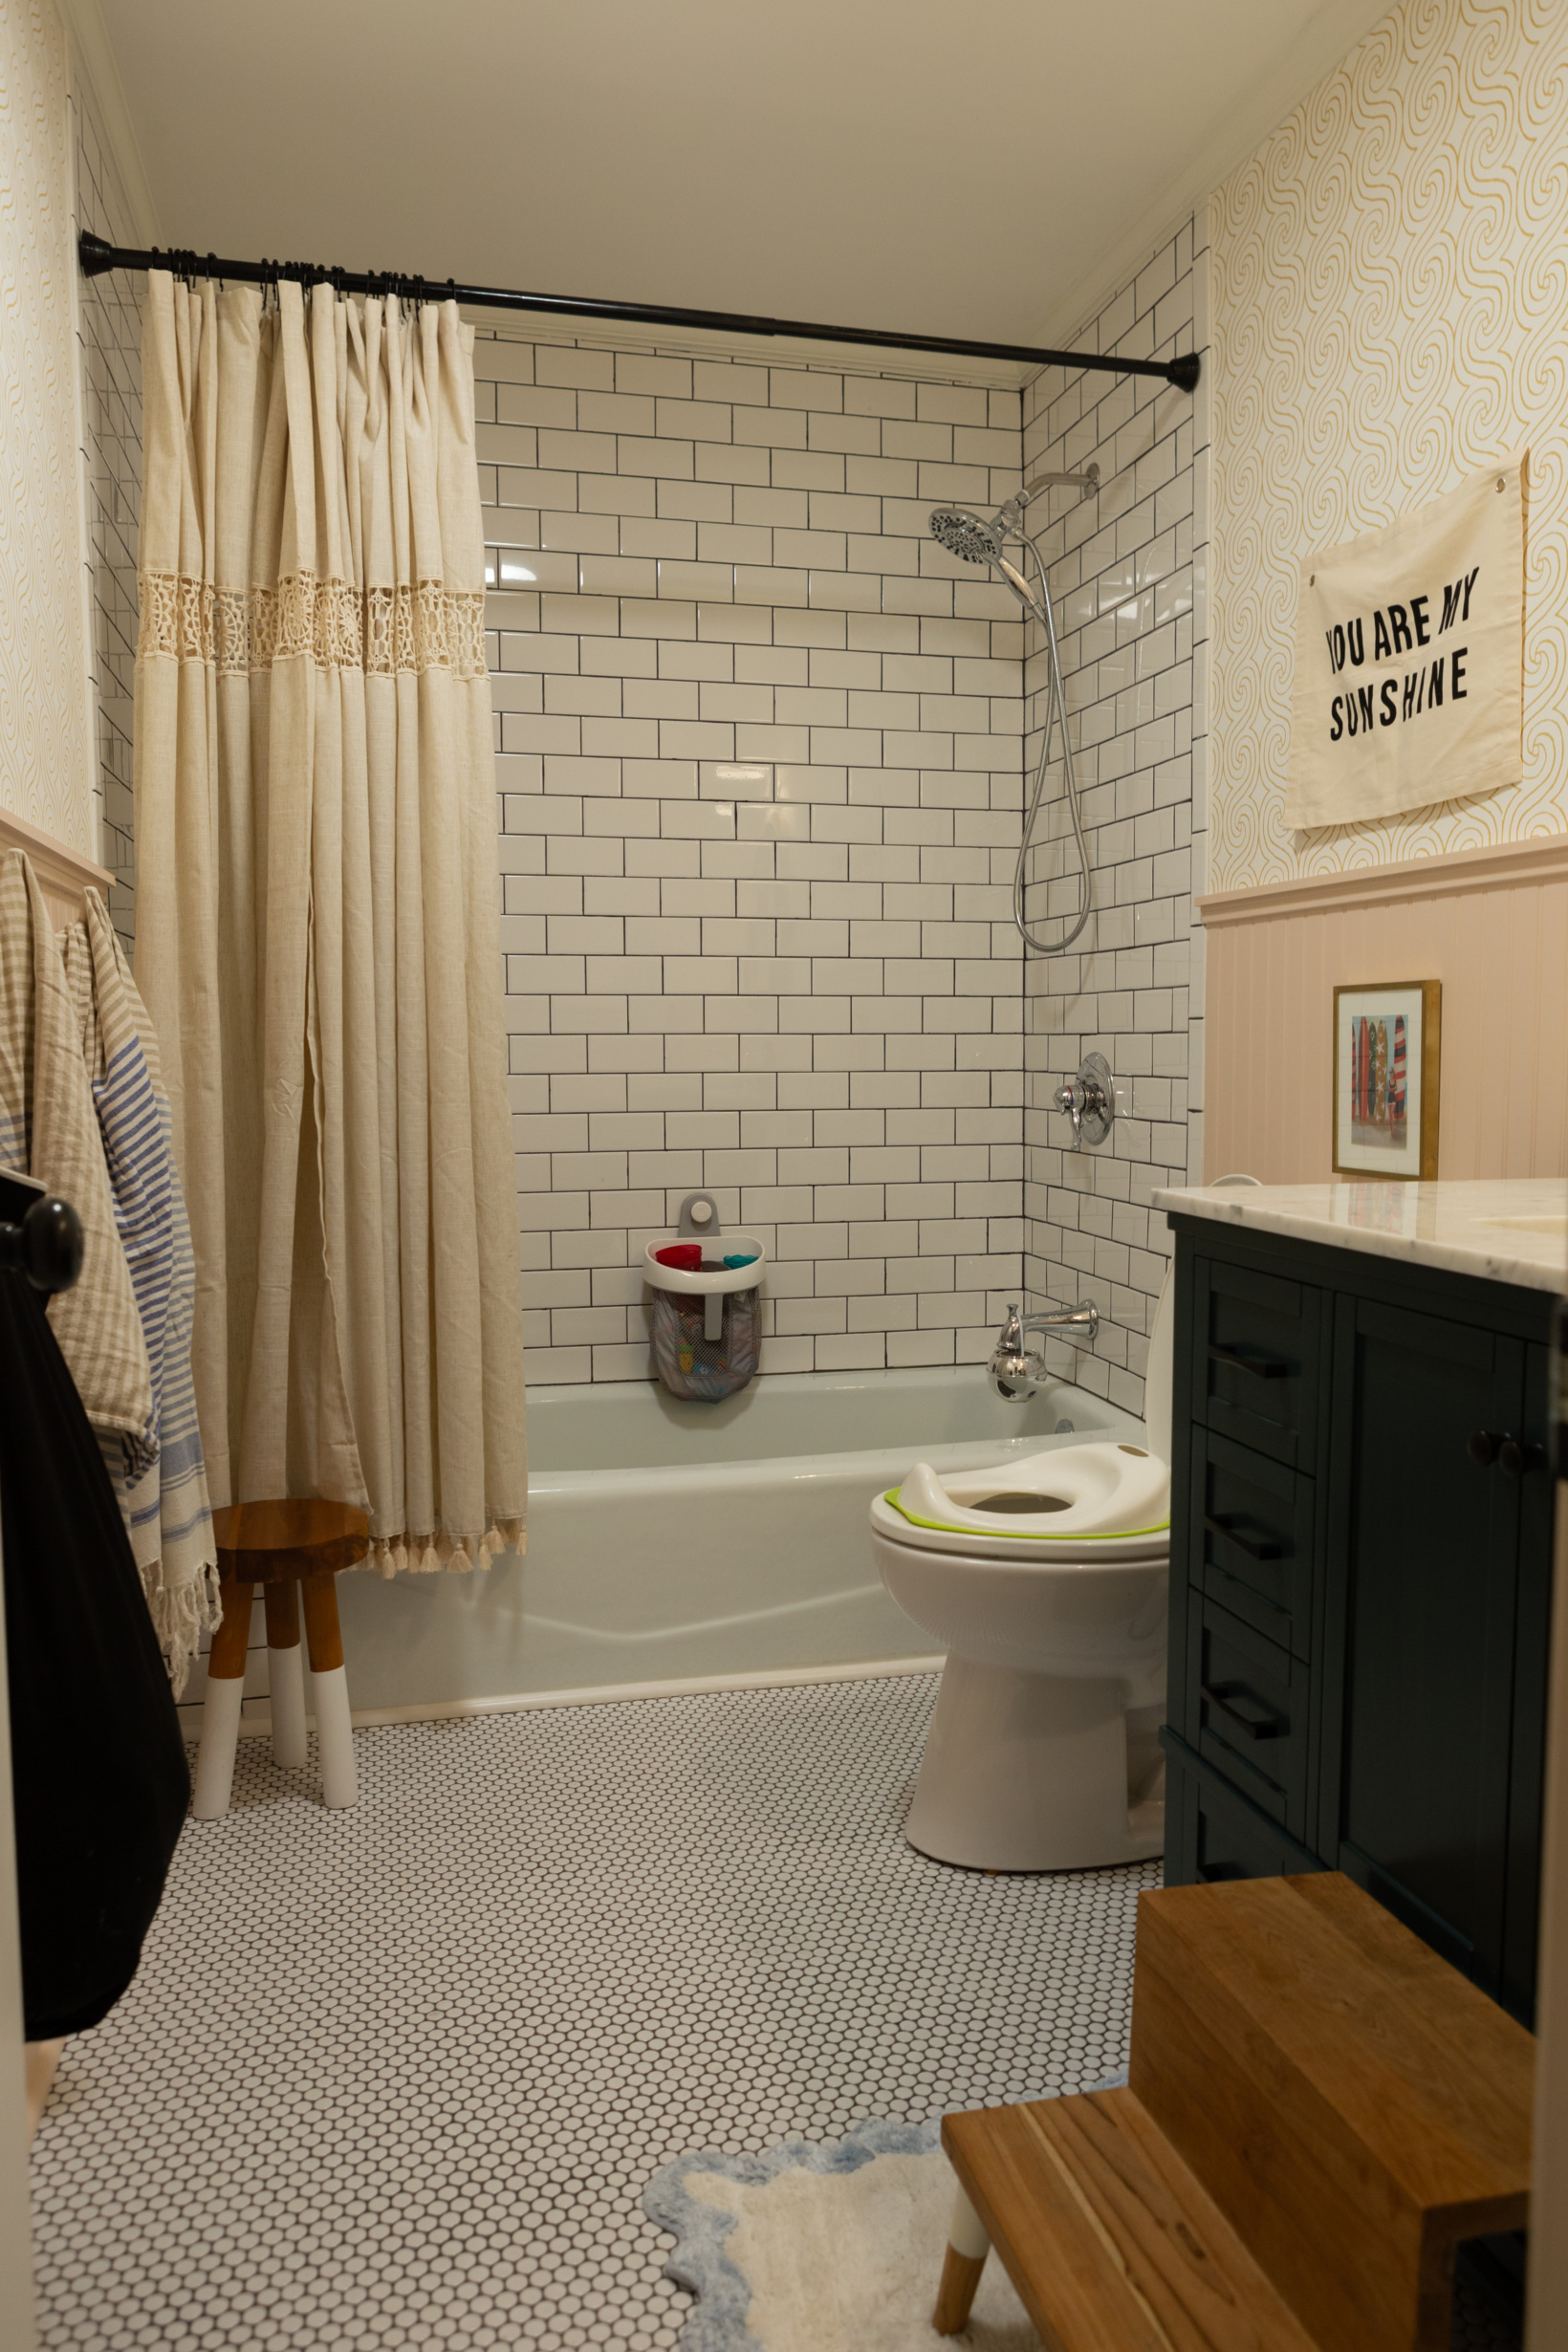
And here is the bathroom today! Just an FYI, this room gets zero natural light so it’s a doozy to photograph! Hopefully you get the picture!
Let’s rewind a bit and go back to the first steps after demo. With everything but the tub removed, we started by drywalling the entire bathroom. You can read about how we learned to do that ourselves HERE. Even though I would’ve loved to get a deeper, longer tub, we decided to keep the existing one because it was still in great condition, is cast iron, and saved us budget wise, of course.
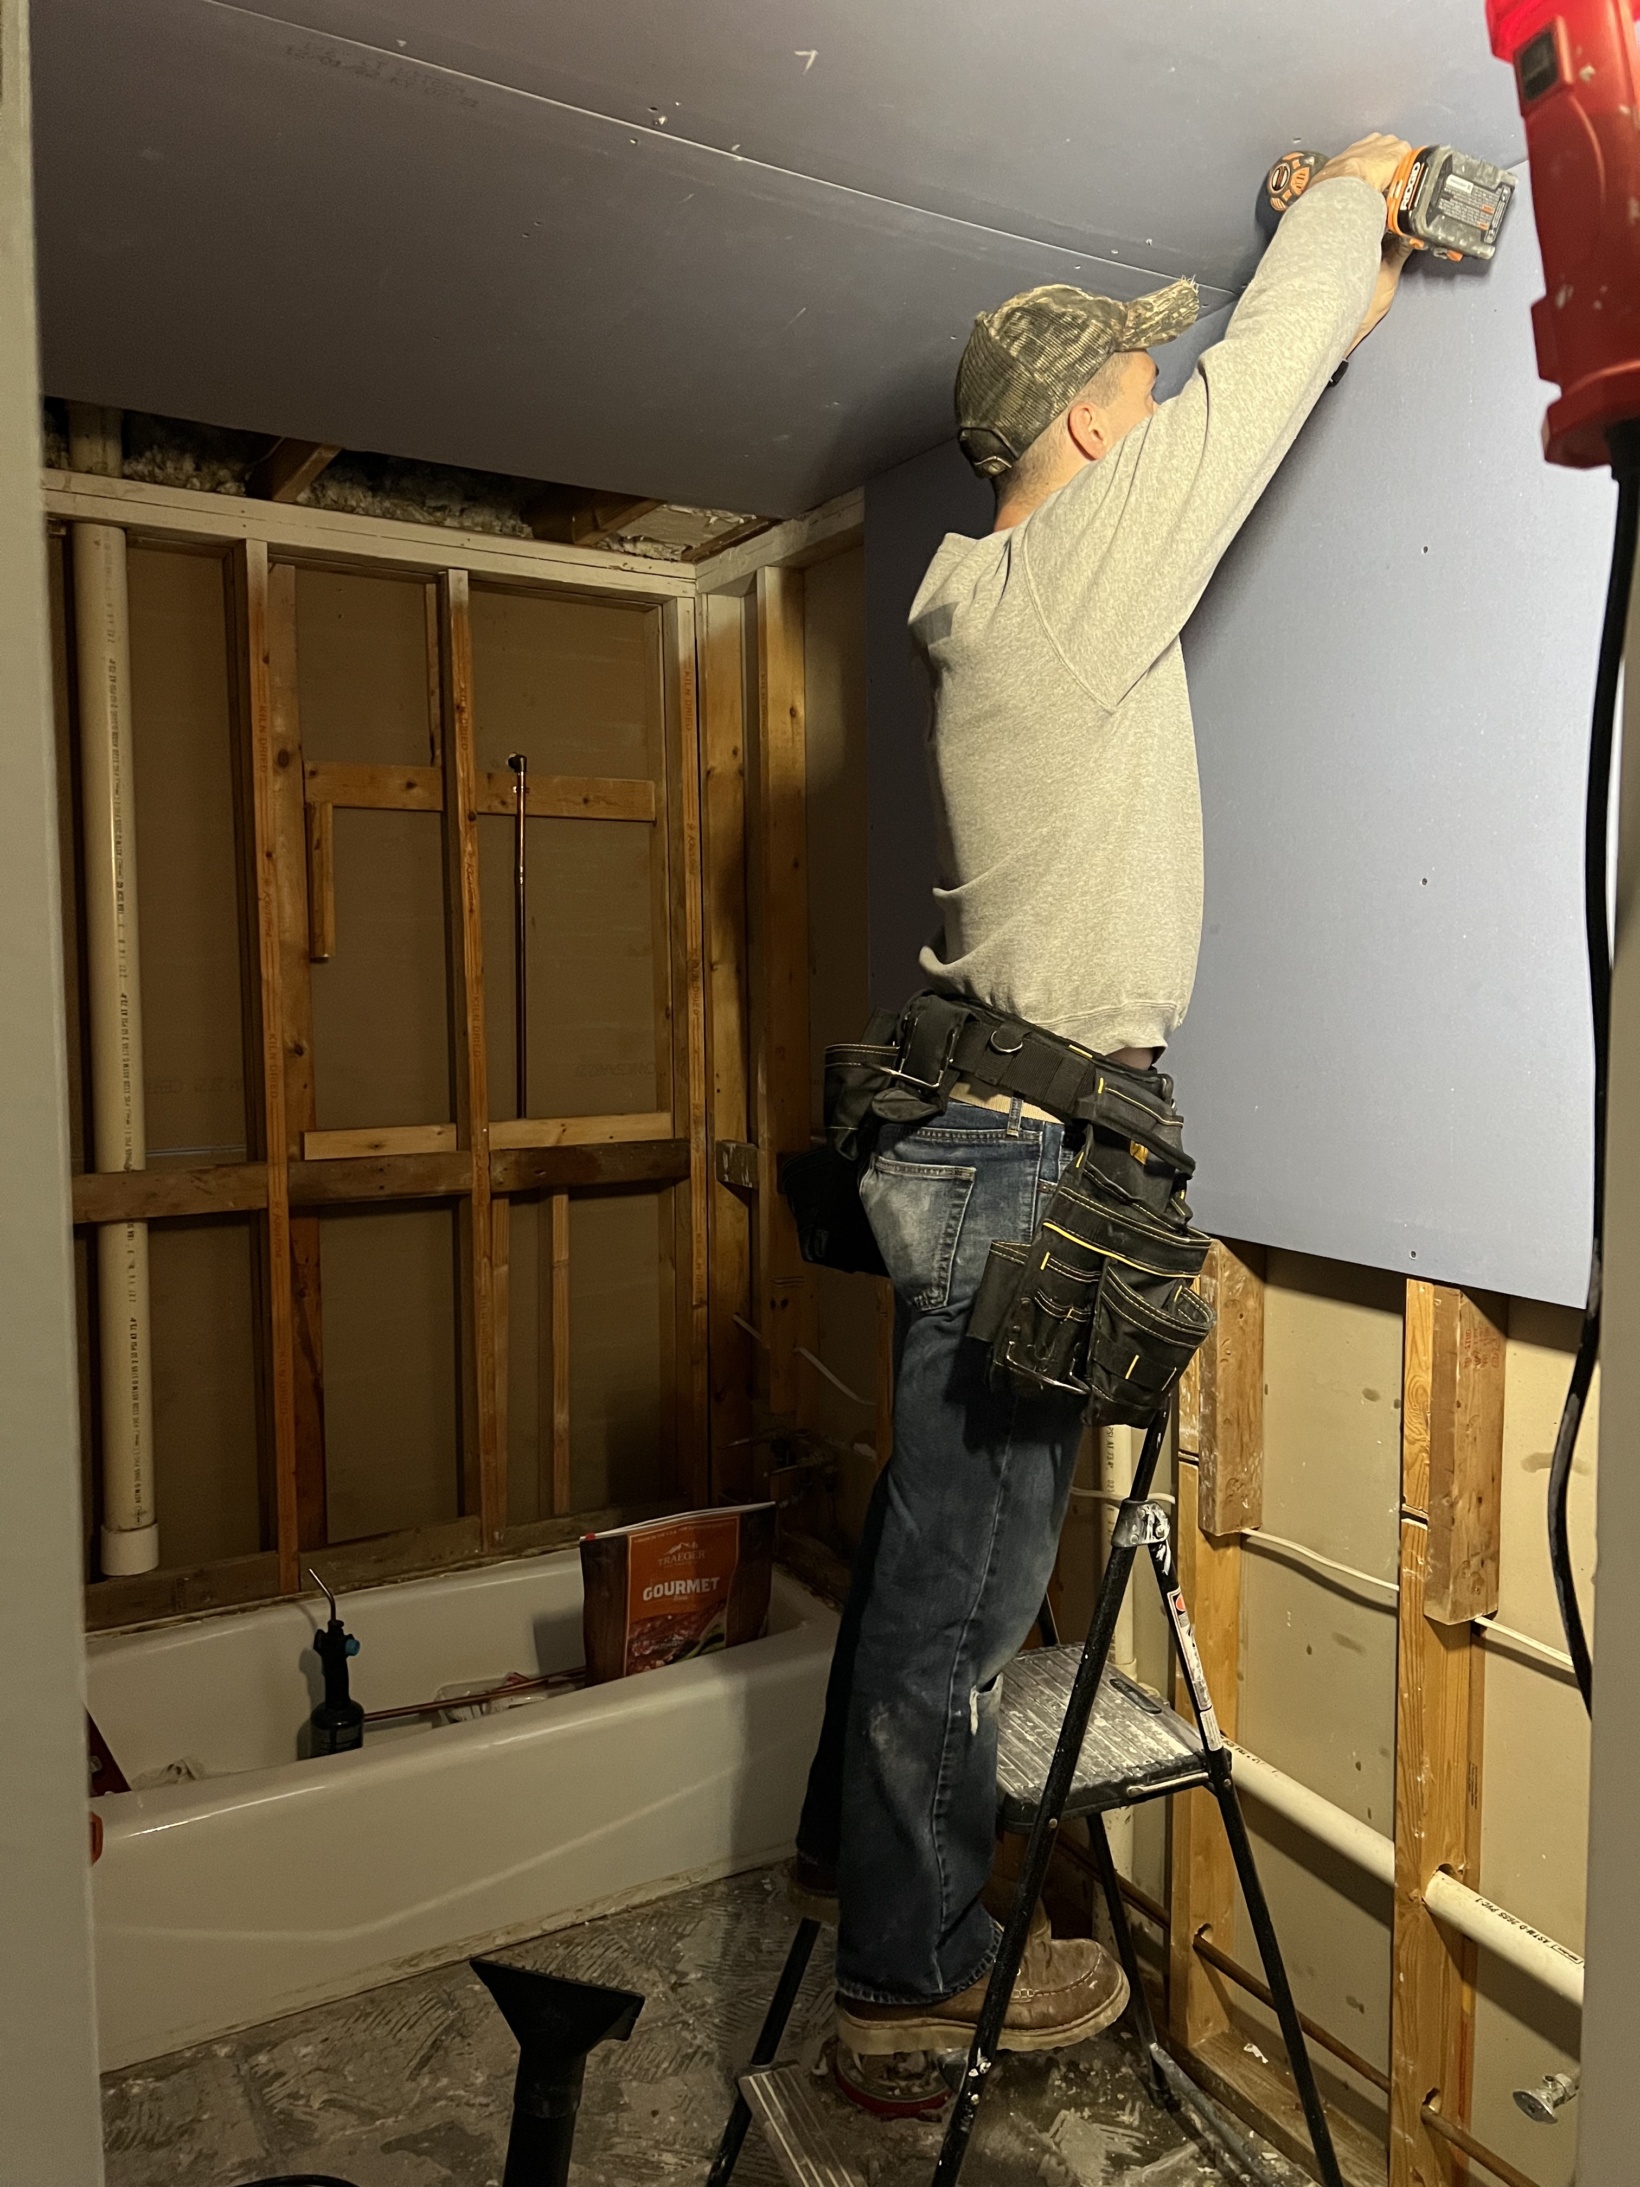
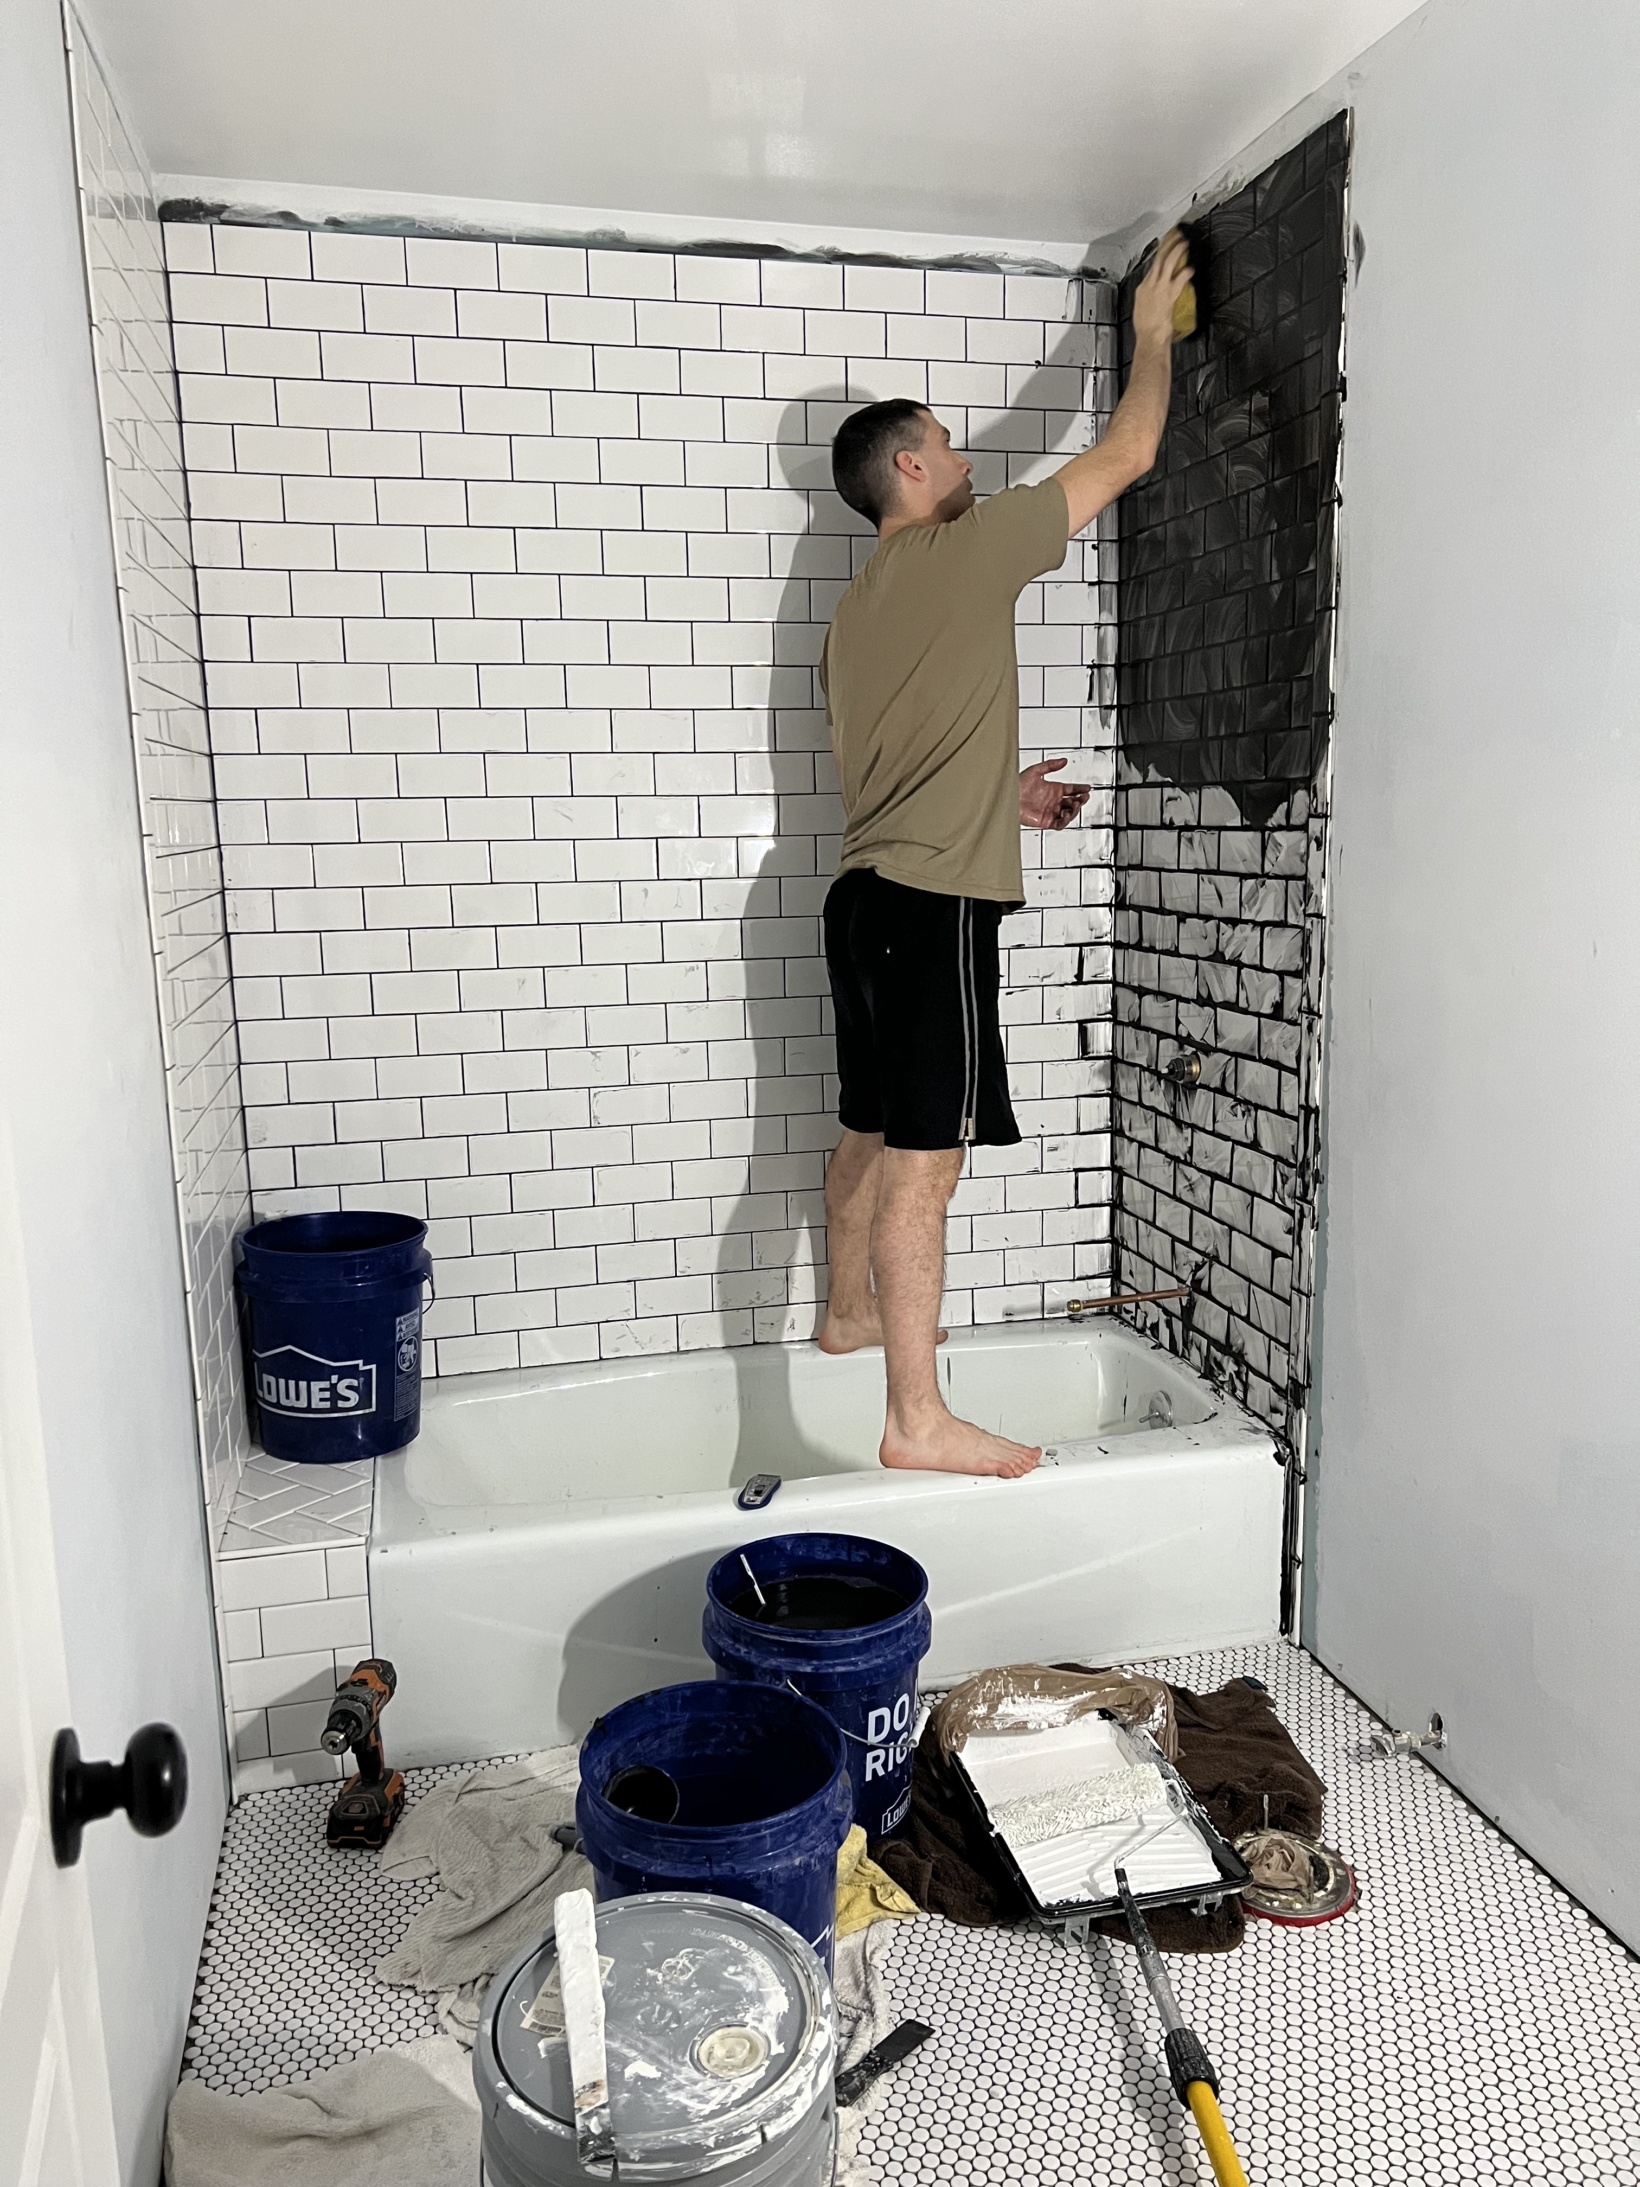
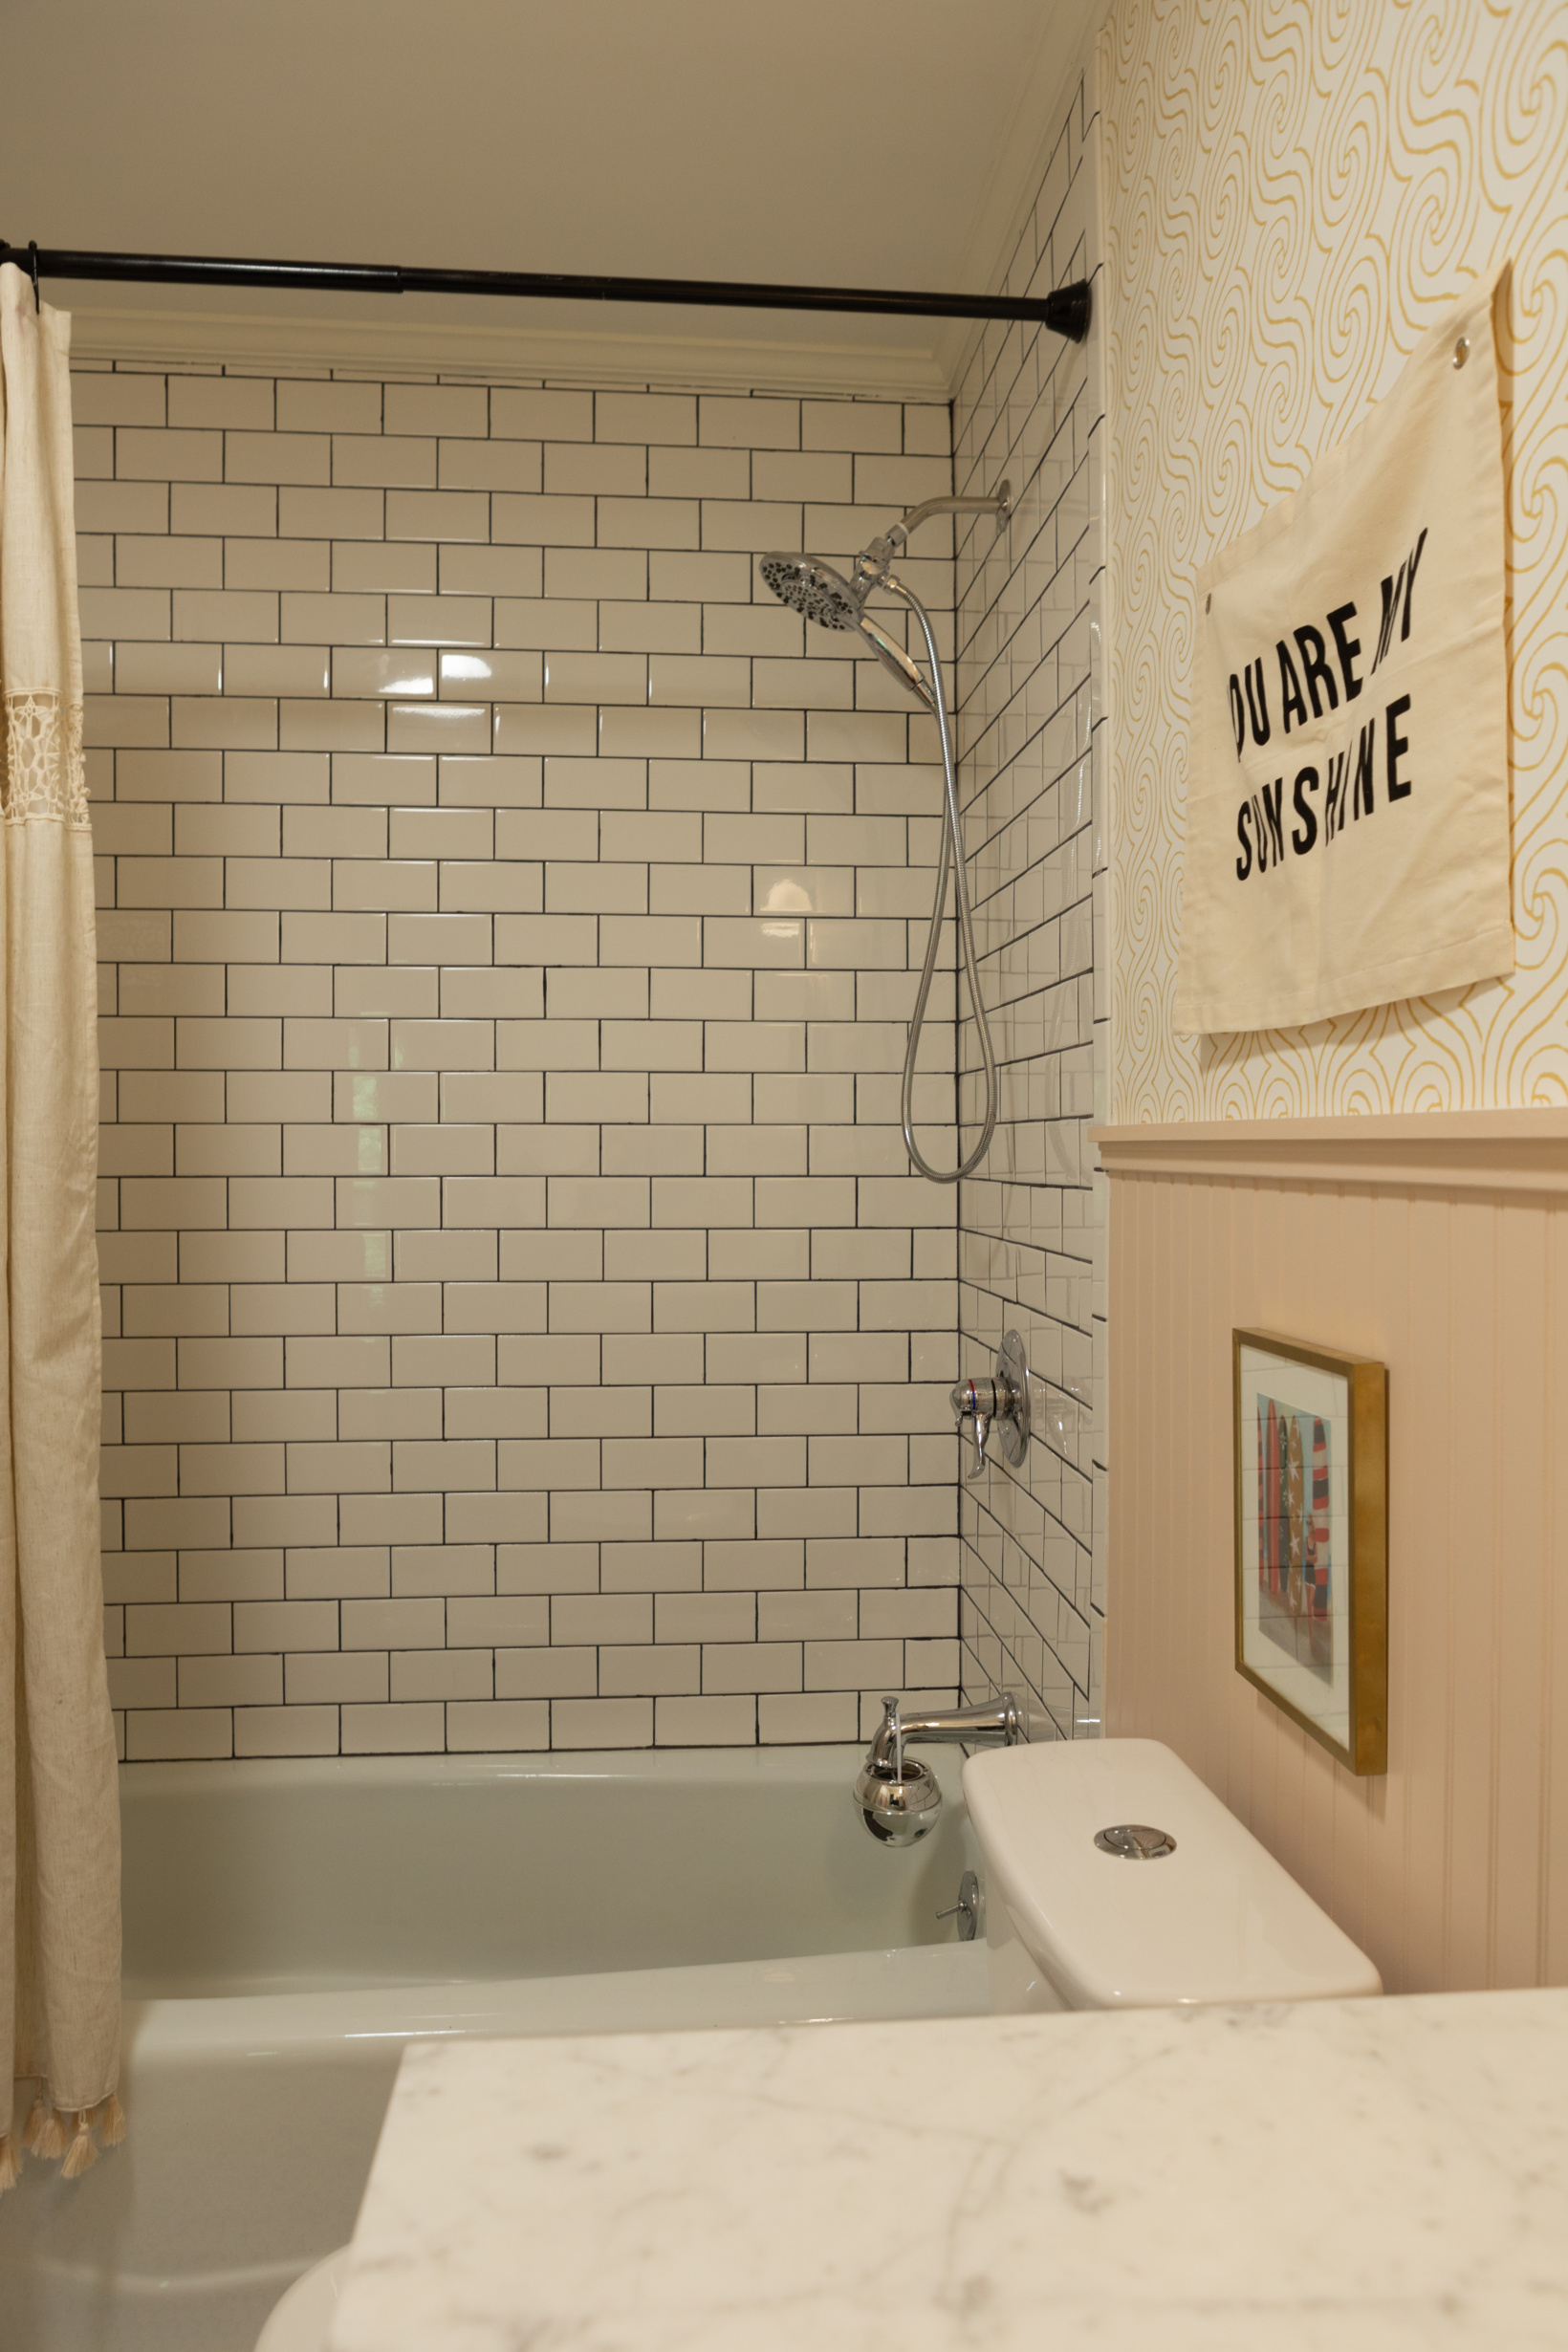
Once all of the mud work and sanding was completed, we primed everything and then we waterproofed the shower area and moved onto tile. We went with a classic white subway tile with dark grout (black from Mapei). I can’t stand dirty grout in the shower and so far we have loved the dark grout in our primary bathroom so it was an easy choice for us. We took the tile all the way up to the ceiling to help the bathroom appear larger. There was a little bench area originally next to the tub since the tub isn’t long enough to fill that entire space. Stephen made a new one that he then surrounded with drywall, I waterproofed (you can learn the method we have used twice now HERE), and then we tiled it to flow with the rest of the walls.
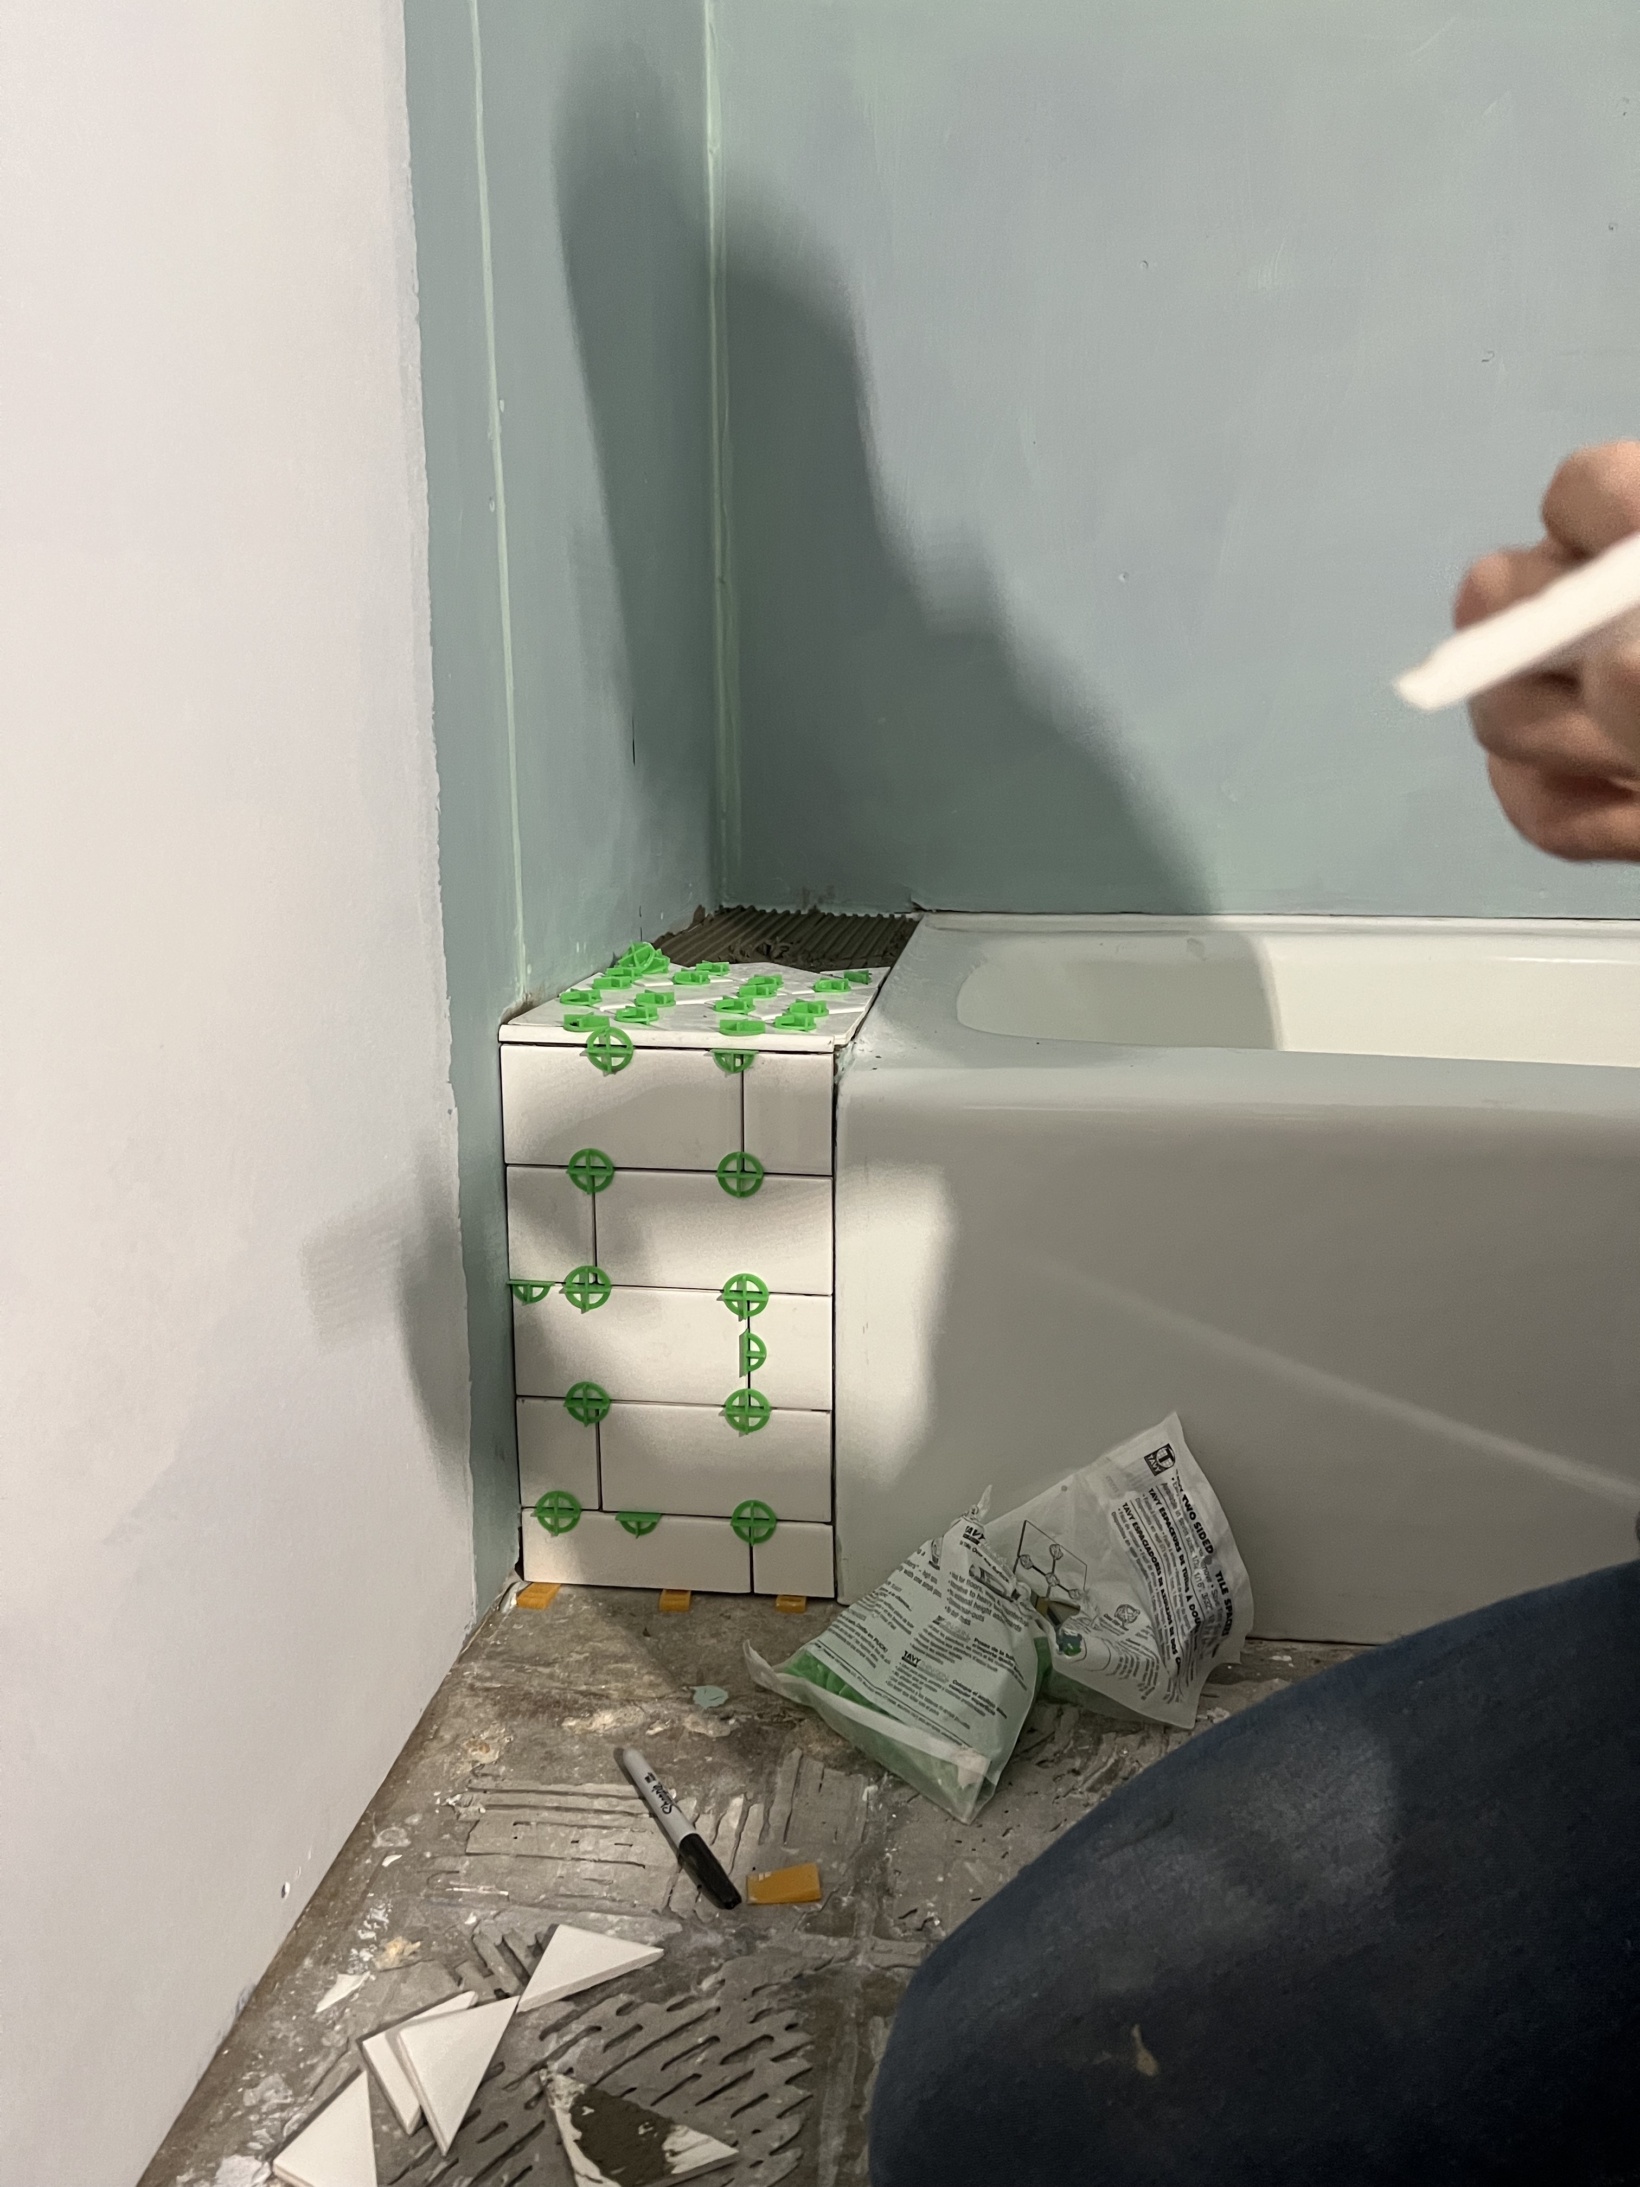
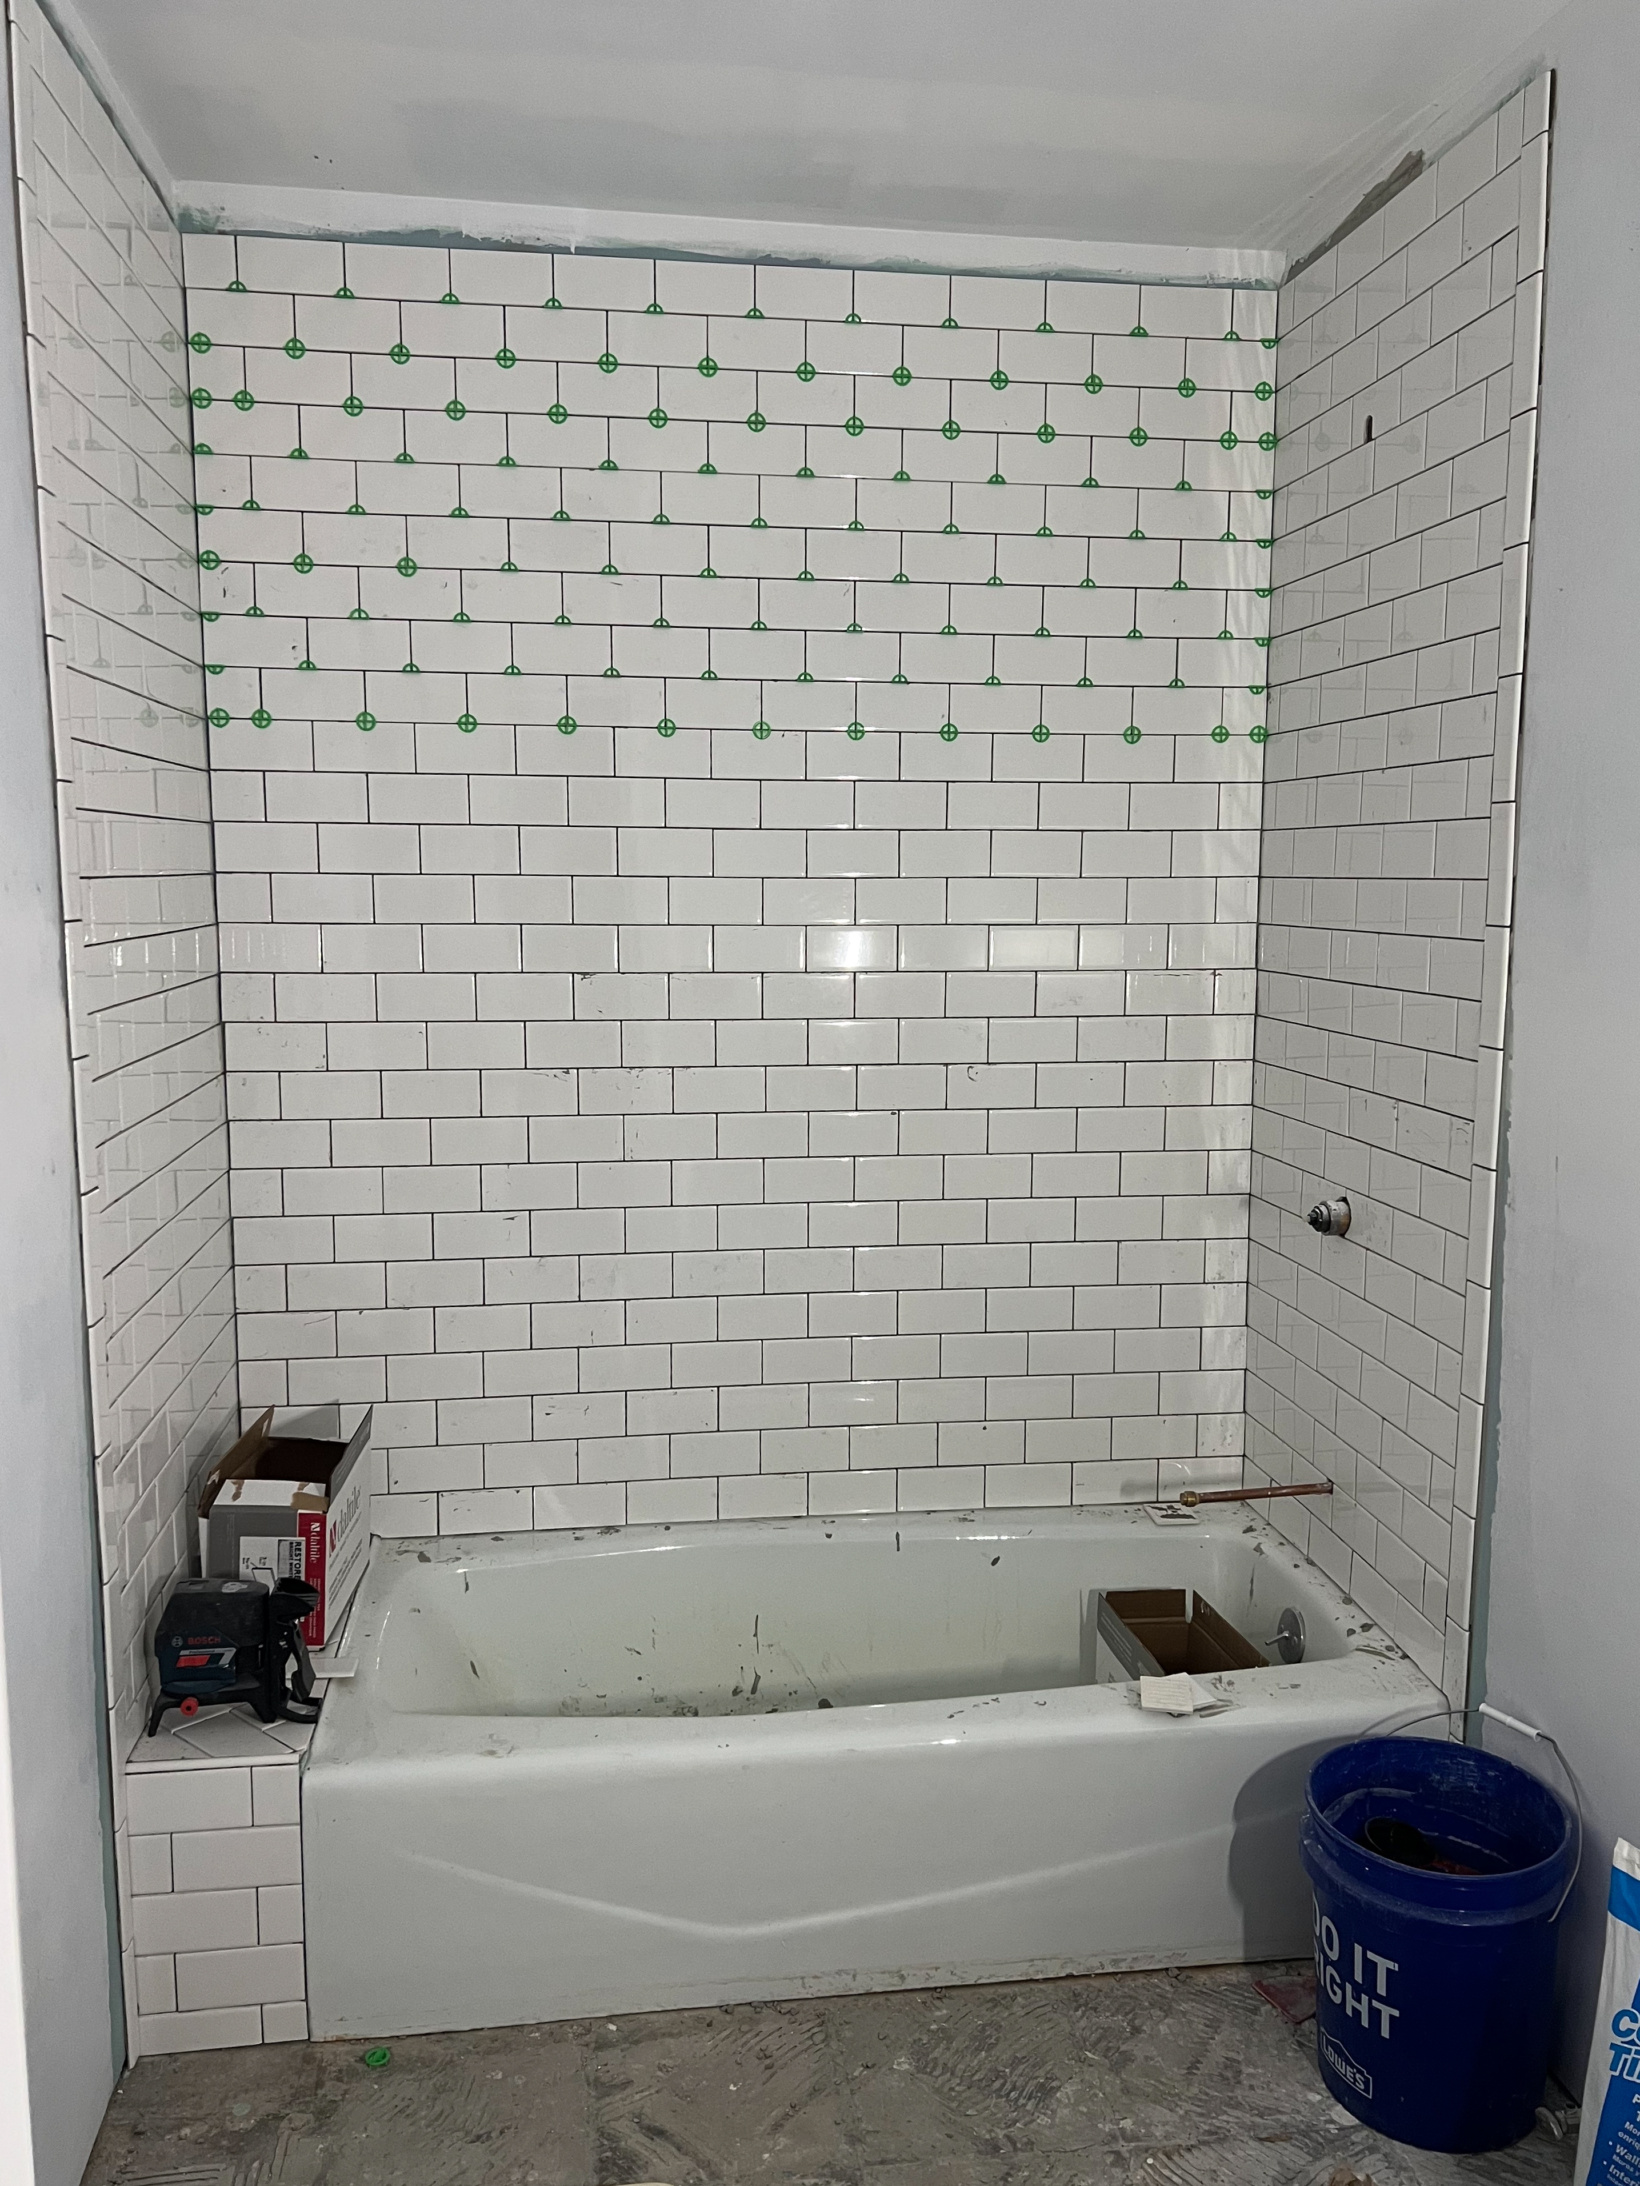
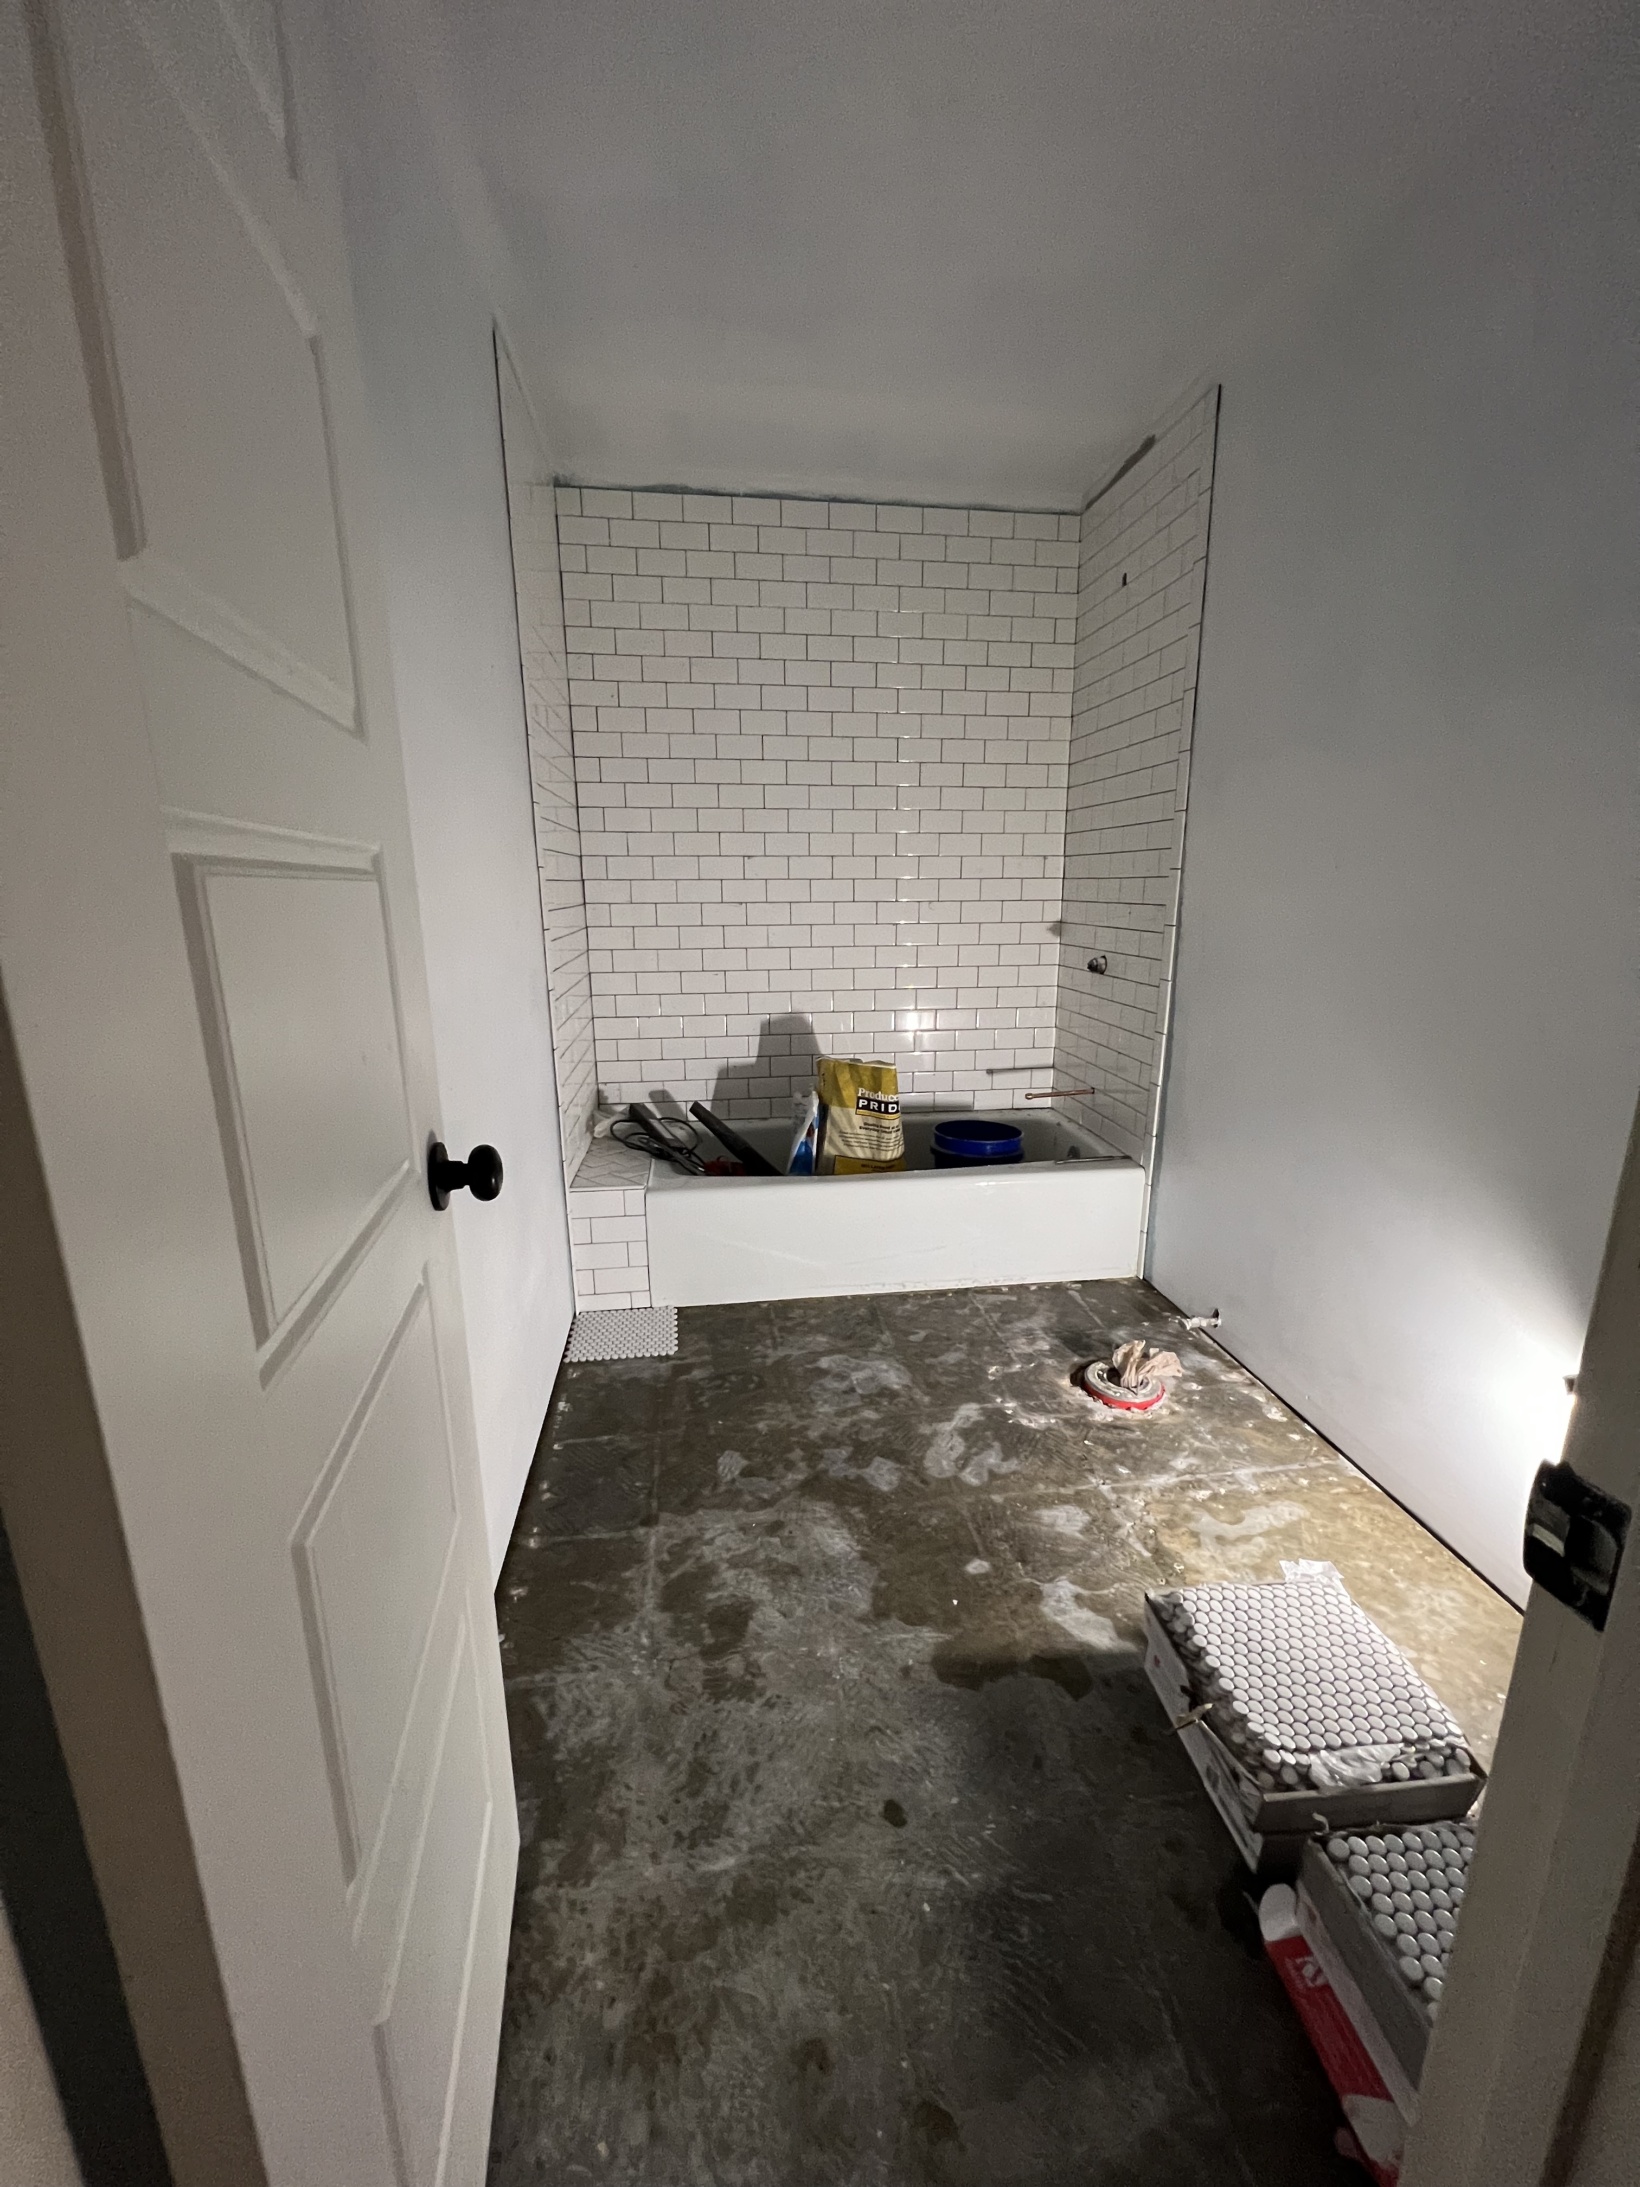
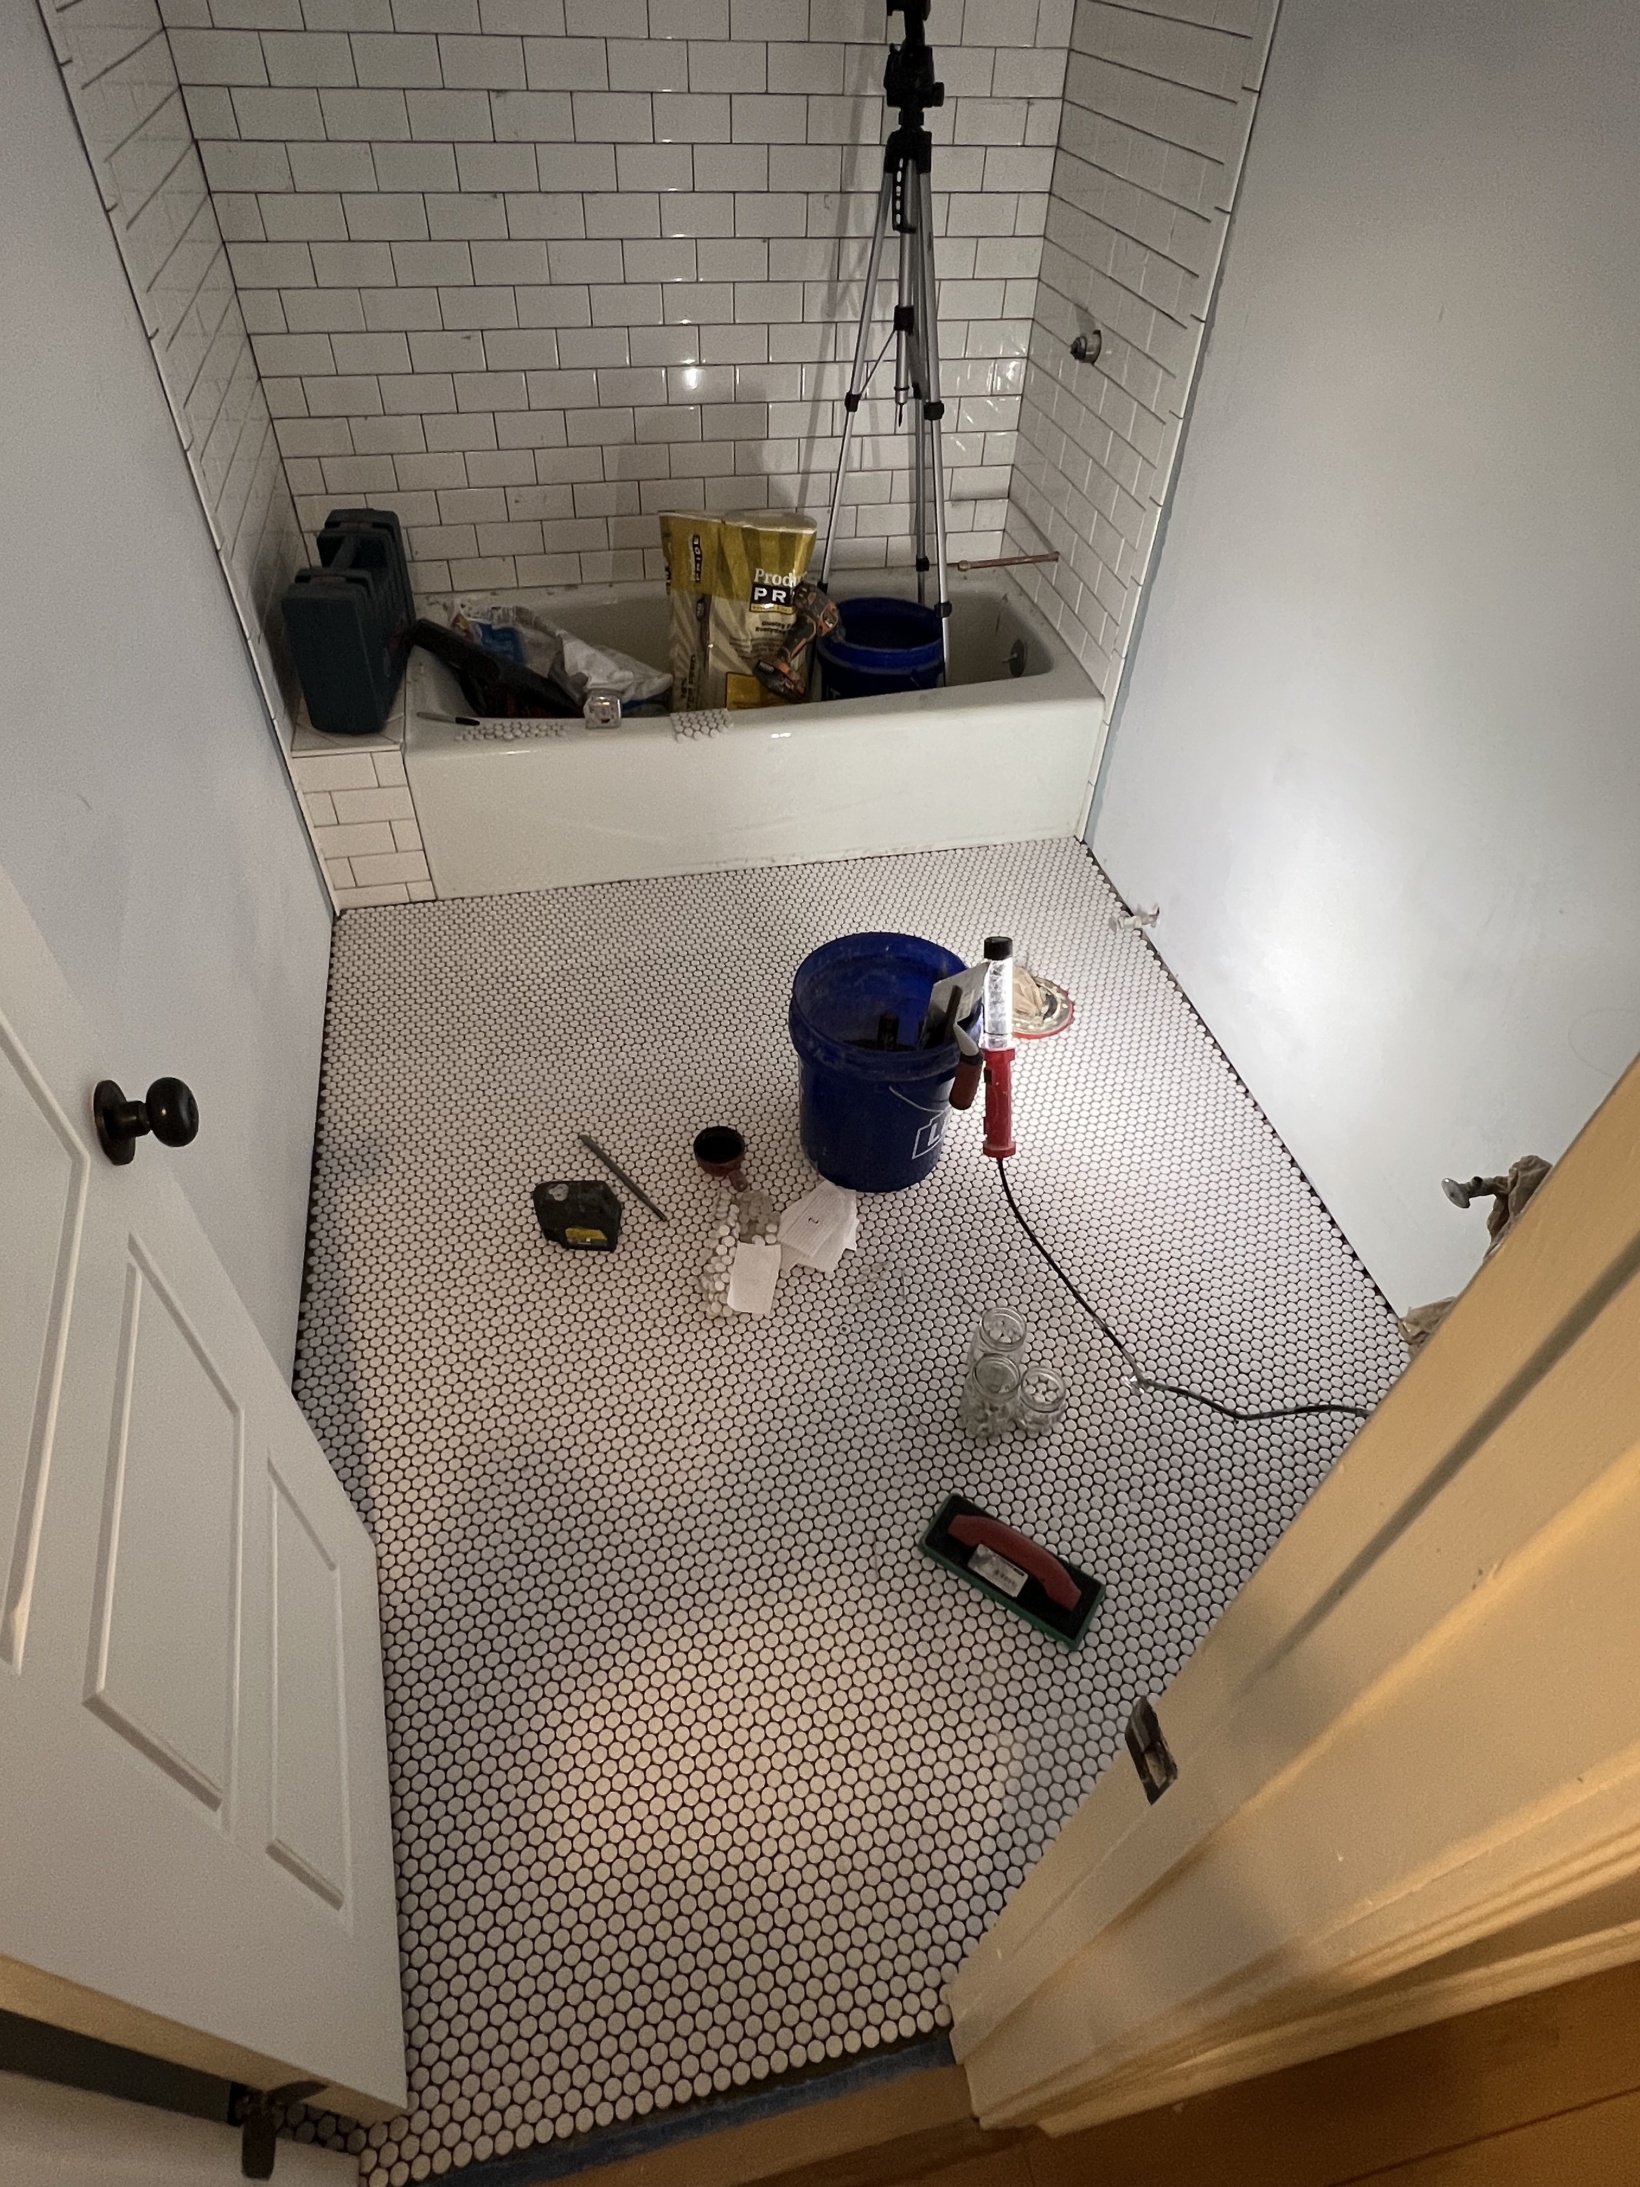
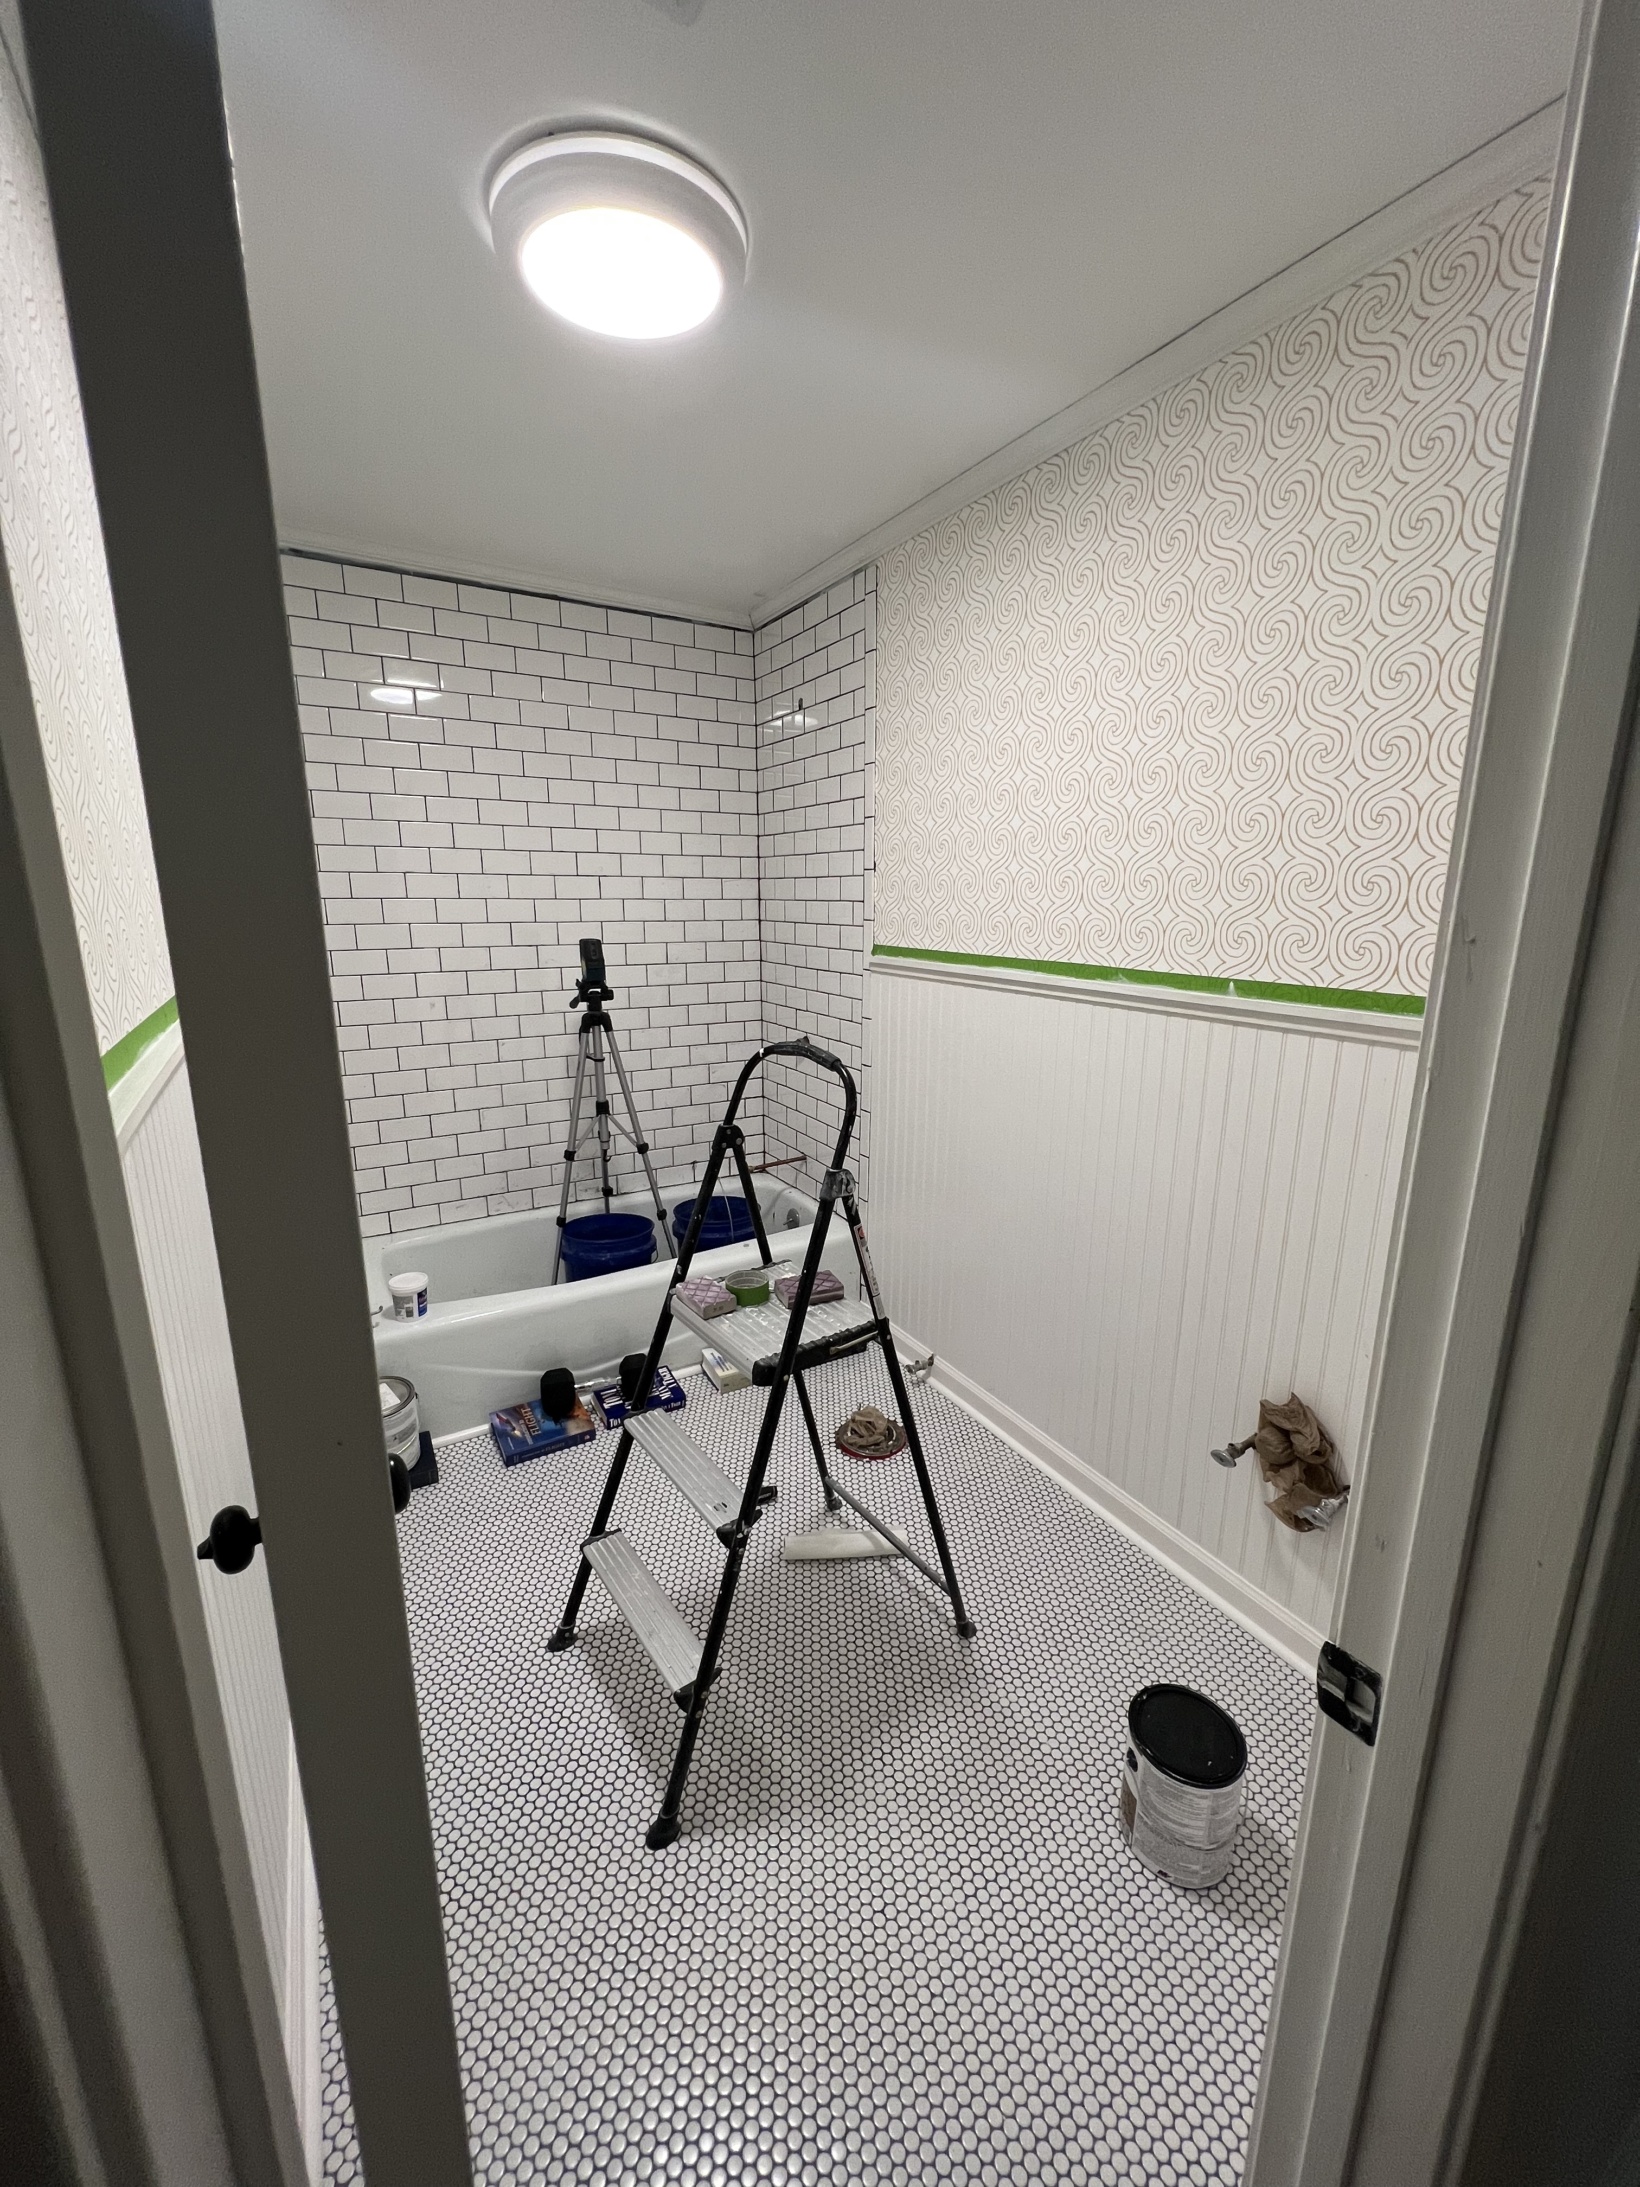
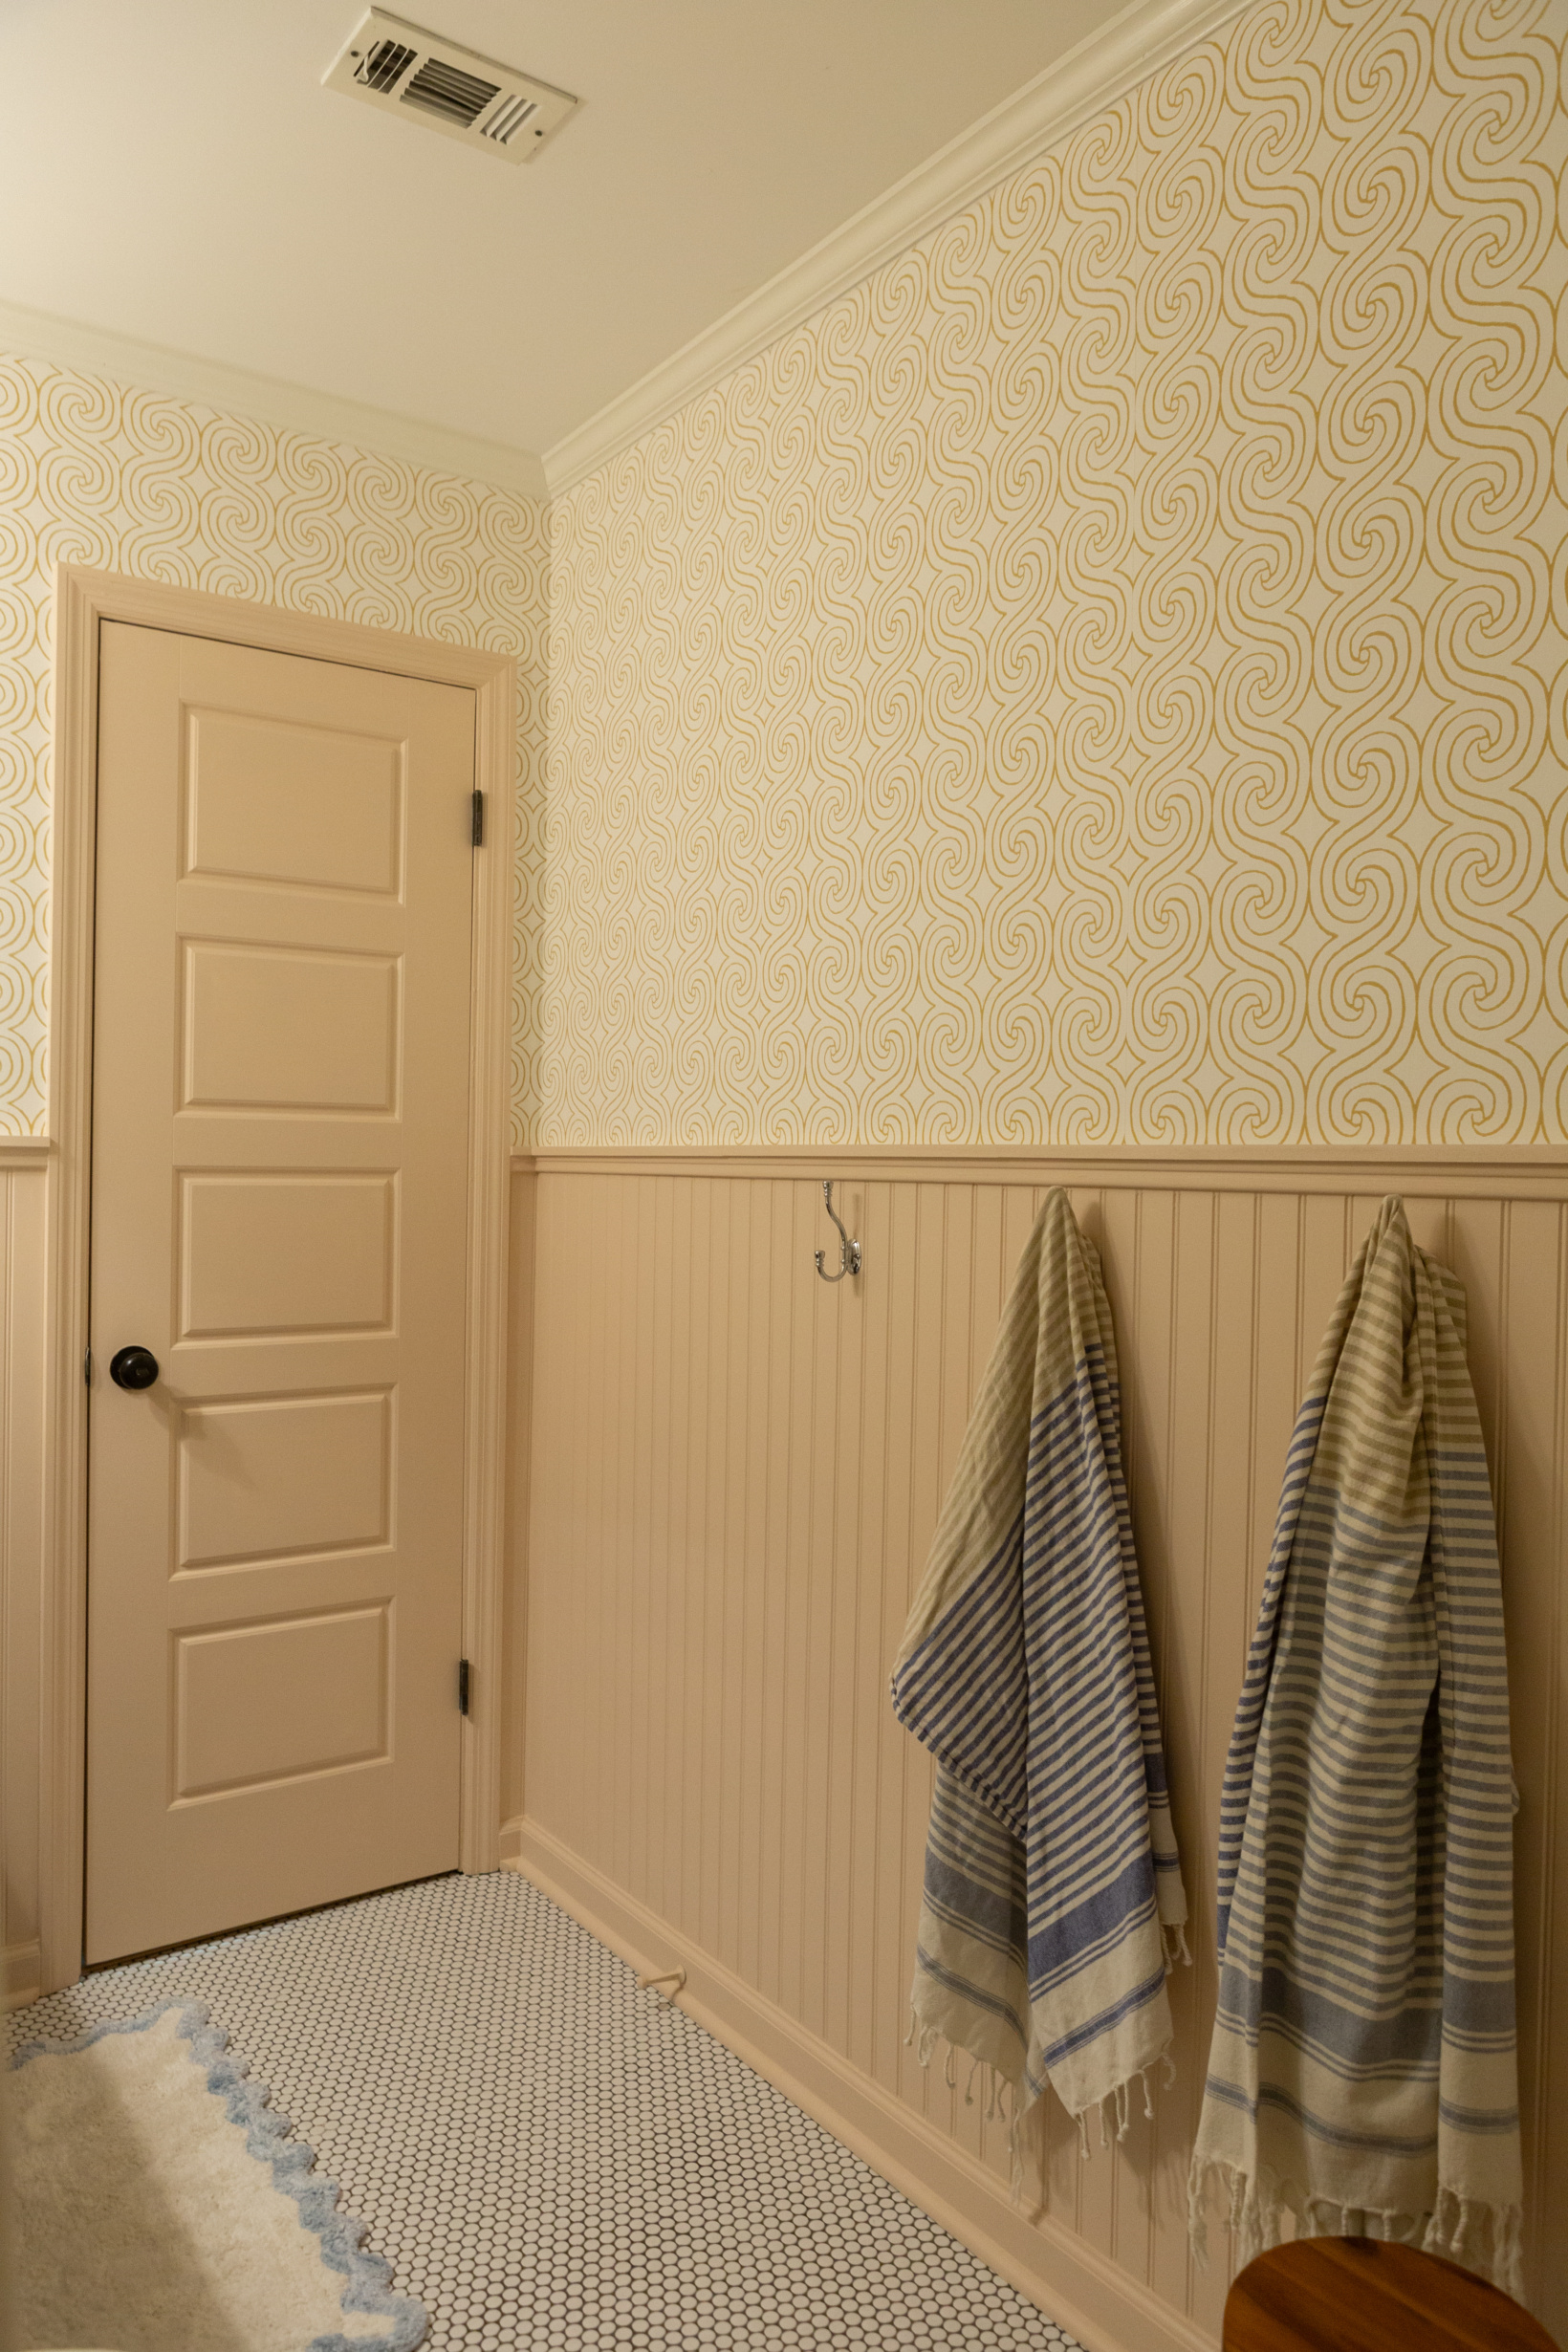
Just the tiled shower to the ceiling alone was a night and day difference in here! It made us so excited. From there we moved onto tiling the floor. We decided to go with a white penny tile, again with dark grout, to give the bathroom an updated but timeless look. It’s like a play on the OG octagon penny tile, you know? Stephen loved working with this flooring and we love the way it turned out so much that we’ve pretty much guaranteed we’ll use it at some point in one of our next bathroom remodels. He watched THIS video on YouTube to learn how to install it properly.
Black grout can be a huge pain in the rump to work with. Our biggest tip: it makes the process much more efficient if you have one person working on the grout while the other is replacing buckets of dirty water with clean water. Also, work in smaller sections so that you can time all of the ‘set times’ and ‘wipe times’ pretty evenly, especially if you’re doing it for the first time. That way you’ll have a consistent grout color for the entire shower! We do NOT recommend using the Mapei Ultracolor Plus grout if you’re doing this for the first time as it includes a sealer so you have to work super super quickly while using it. Instead, use the Mapei Keracolor option. You can follow up with a grout sealer when it’s all said and done.
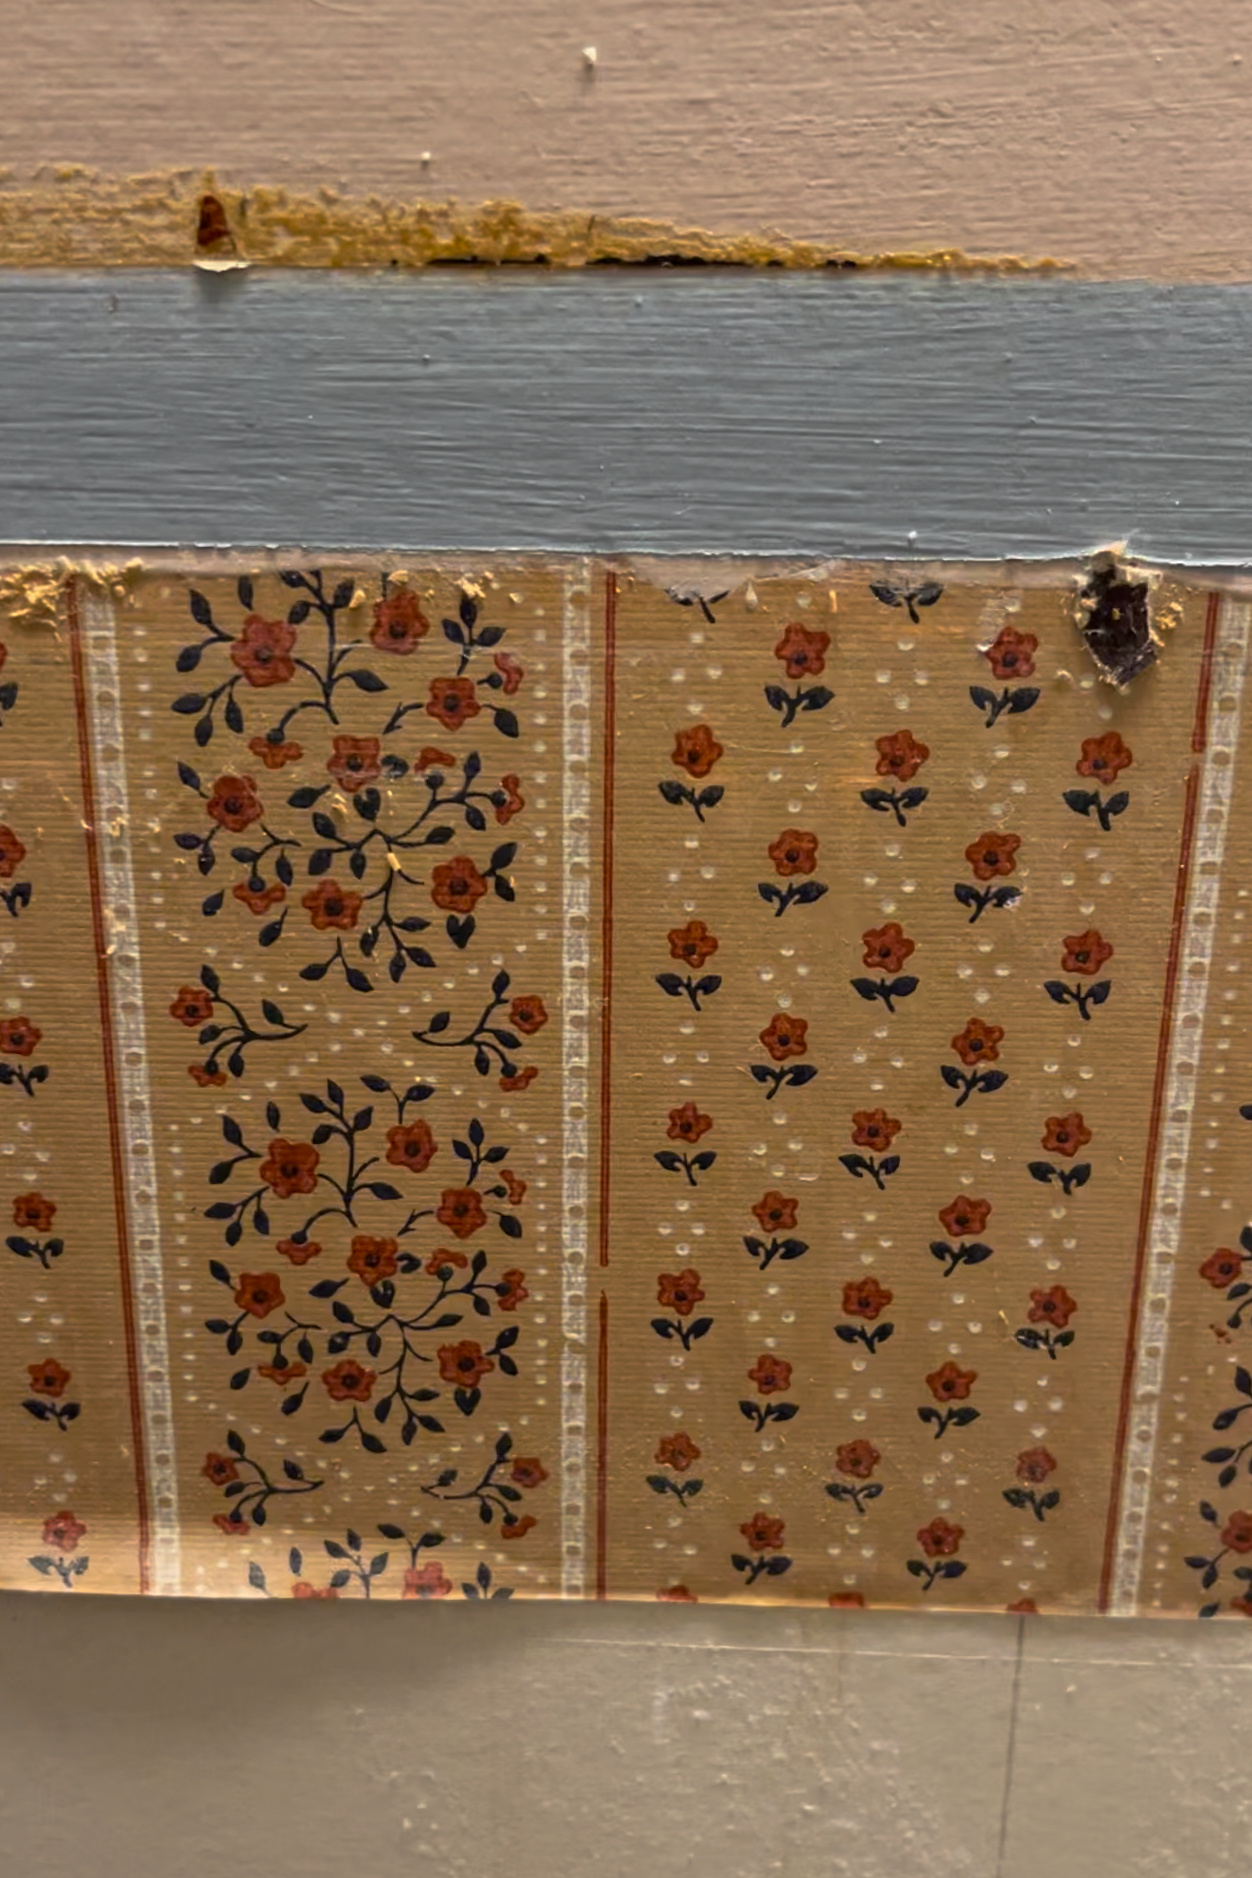
We knew from the beginning that we wanted to do bead board with wallpaper above it. We did that in the guest bathroom of our South Carolina home and loved the texture and charm that it added in there. We also found this swatch of wallpaper behind the vanity during demo so we felt like it was really fitting to add an updated version in our 1980s home. P.S. I think that wallpaper is SO CUTE. I would so use that somewhere if I could find some… Ha! We narrowed down our wallpaper to this funky wave selection. Again, leaning into the ‘beach vibes’ without screaming BEACH! It looks like they don’t offer it anymore on the site but we were closely considering this one (I recommend waiting until they have a sale before purchasing!). This wallpaper was a classic paste and place wallpaper and was a bit tricky at times but we figured it out… Free marriage counseling… “Let’s problem solve this together without snapping at each other” am I right?
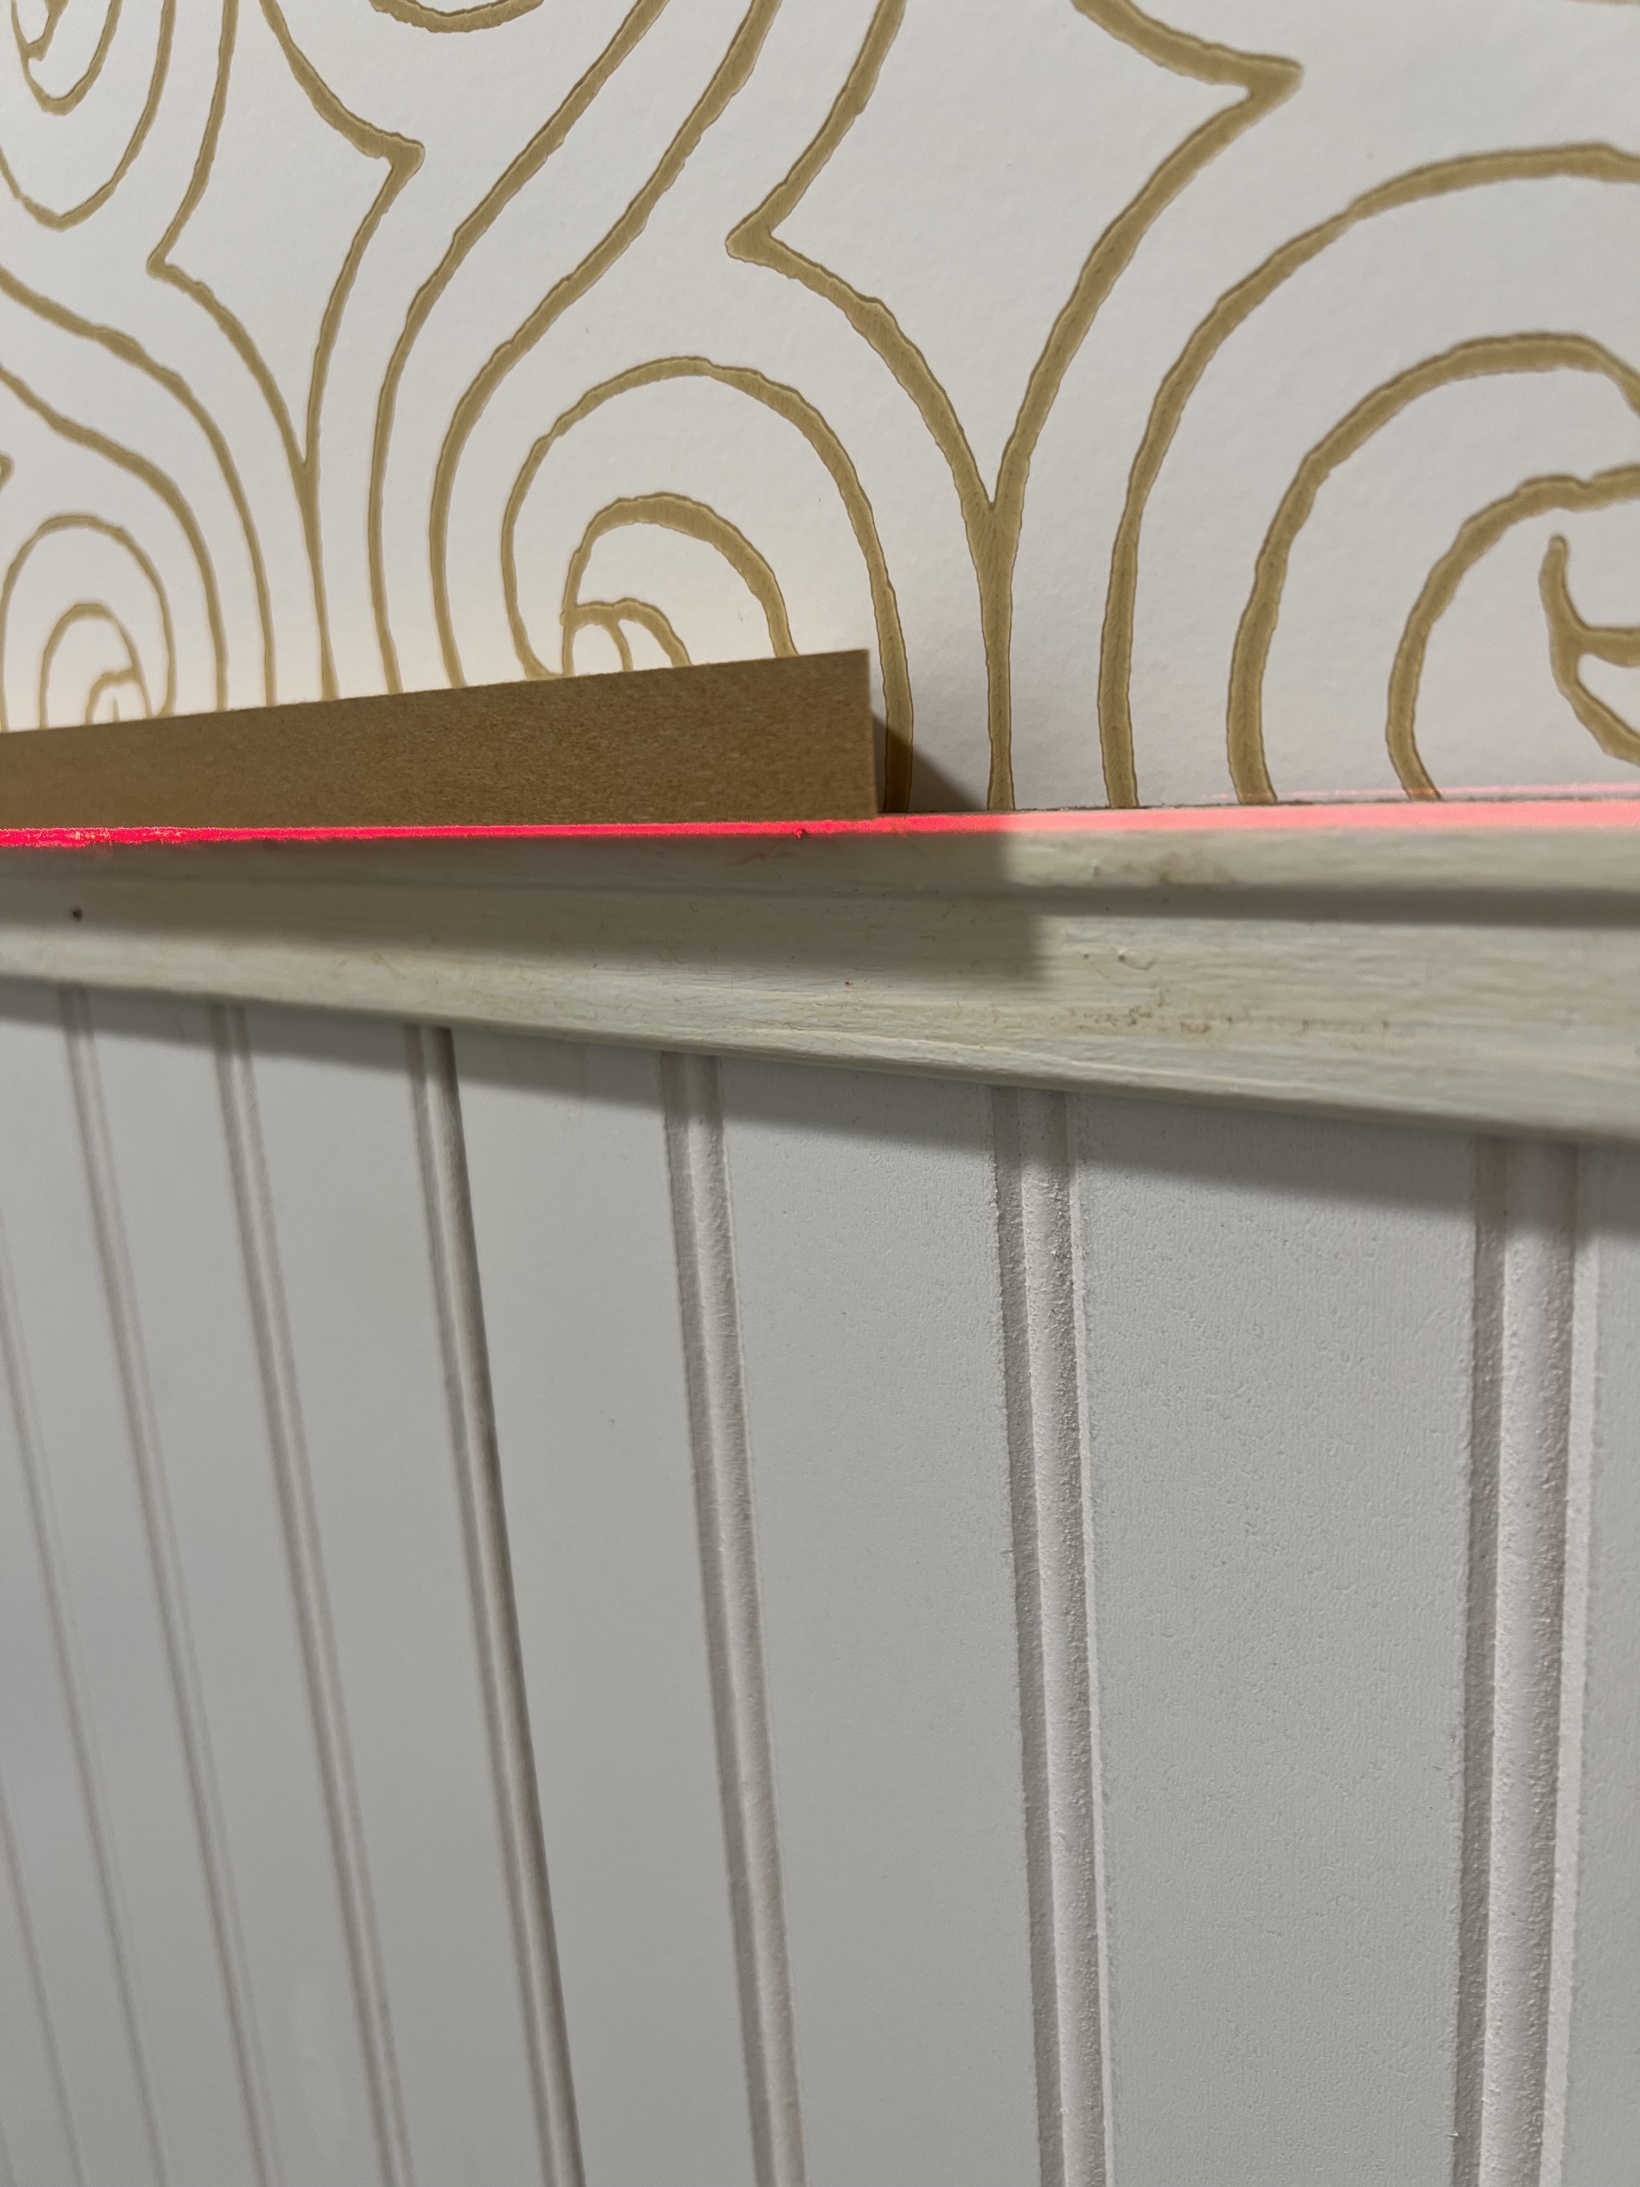
We installed the wallpaper first and then Stephen installed the bead board using our nail gun. This was just easier so that we didn’t have to cut the wallpaper super precisely. The bead board comes in 4×8′ sheets so Stephen cut them down to be 4′ tall. To make it look more finished, we repurposed pieces of trim that were in the bathroom previously and added a little “shelf” on top of that from MDF he had leftover in the garage that he ripped down using his table saw. You really can make this as simple or ornate as you want. Once you fill in all of the holes and caulk everything, it’ll look like it was meant to be! Make sure to also run a bead of caulk where the two sheets of bead board meet to fill in that gap and make it look seamless.
Stephen added the baseboard and quarter round and it was all looking great primed but we both stood in the doorway one night and both had the same thought, “This is way too white!”. It’s funny… Years and dozens of projects ago that maybe would’ve been perfectly fine for us! In fact we probably would’ve loved it. But it was also cool to realize that our style as evolved and really settled into what it is today. We knew that even with the green, blue vanity in here we’d want more of a contrast. See what I’m talking about below? There’s a lot of texture but not enough contrast with color.
Here comes the most entertaining part of this bathroom reno… I brought out our large deck of paint swatches and told Stephen we could either match the vanity or we could go with a pinky shade. I loved the idea of pulling in a those colors from the surf board painting. An orange shade would also work with this vanity in particular (think of the color wheel!) but that’s not our vibe. He immediately said, “No pink. The girls room is pink enough.” They only have a pink fan in there but that’s besides the point… He went through the swatches and decided that he thought Benjamin Moore Soft Satin would look good. I gave him a questionable, “Are you sure…..???” Later that night at Bible study I mentioned that we might go home and paint and our friend asked, “What color are you going to paint it?” and Stephen replied, “It’s like a tan with red undertones.” I giggled loudly and I said, “IT’S PINK!!!” He refused to believe me. The next day I had put a coat on all of the bead board and thought to myself how he was going to freak when he saw it after work. He (very masculinely, of course) screamed a tad when he saw it for the first time. He finally agreed that it is indeed a shade of pink (although I will say it does eventually dry a tad darker). Tan with red undertones…. Bless him. Anyway, it looked so good that we ended up keeping it and now here we are with a pink bead board, spunky bathroom. But hey, it looks so good with the green vanity, ties in the inspiration surfer girl painting beautifully, and it’s fun for the girls. Win win win.
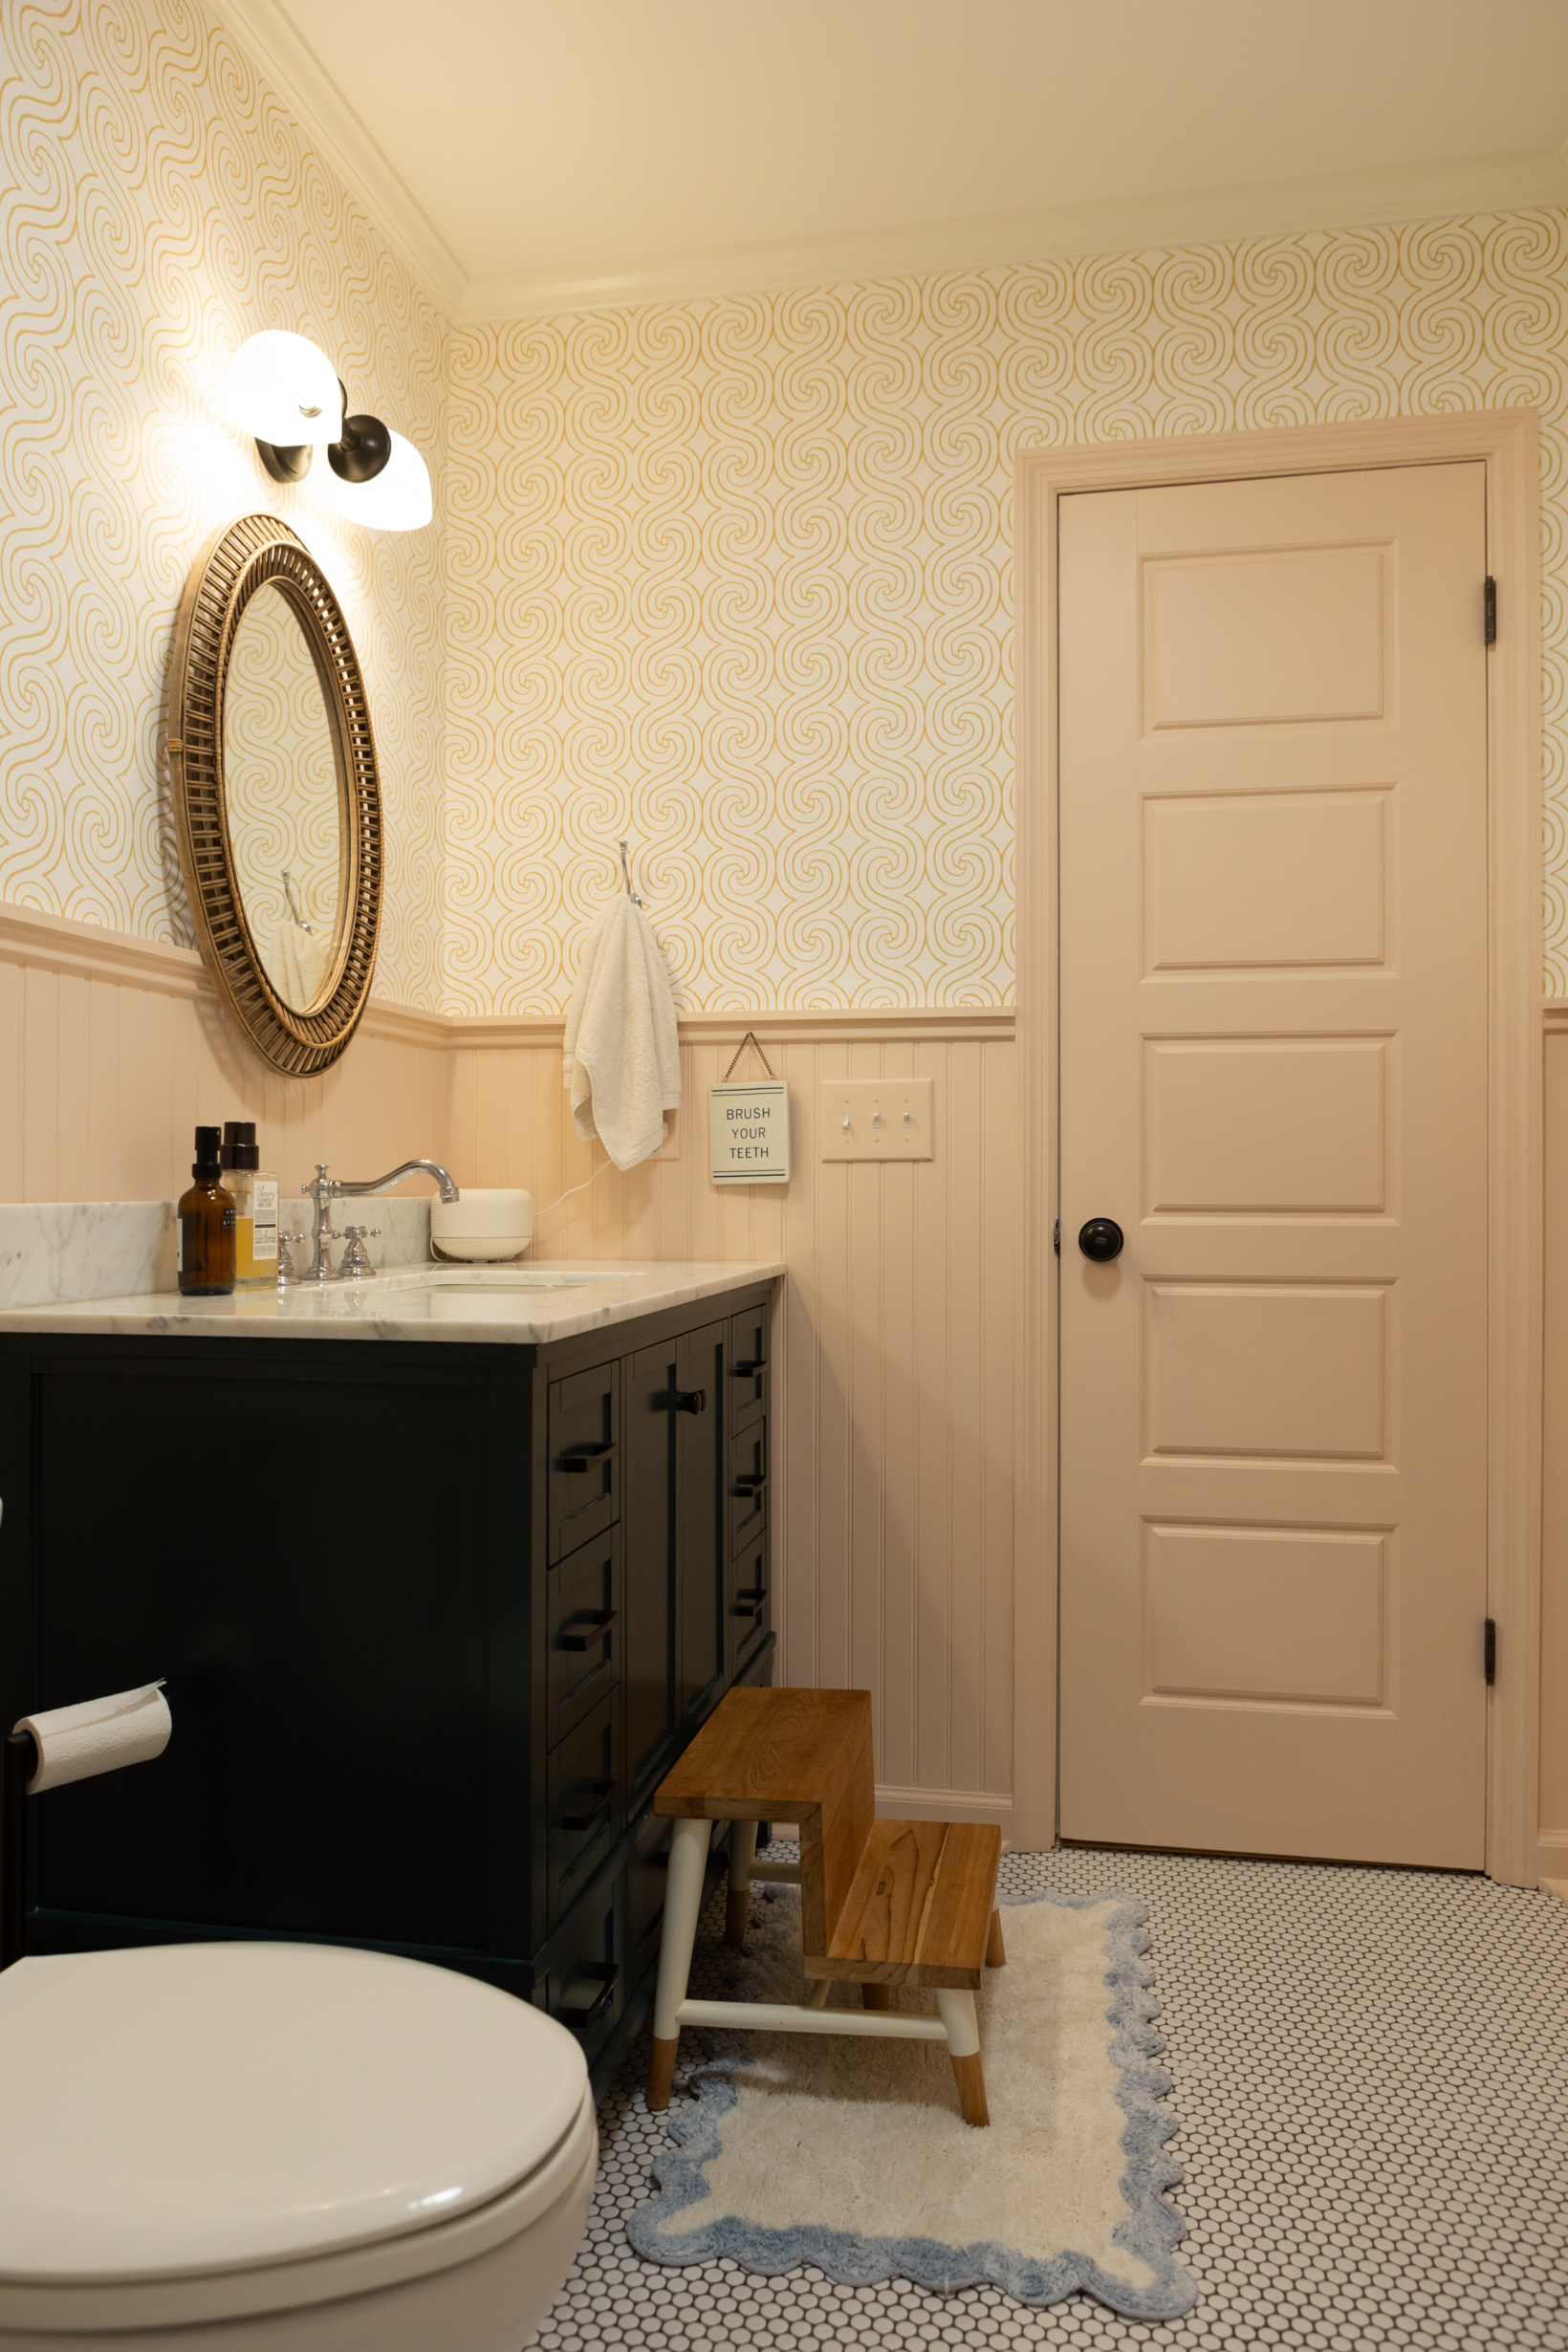
Speaking of the vanity, we LOVE IT! It comes with the marble top and the sink and has tons of storage which was important to us when thinking about this house becoming a rental. We had to buy the faucet separately. The color is a bit hard to share through photos but a green with blue undertones is I think a fair statement. We bought it during a really good sale. I’d keep your eye out for them! I think they happen fairly often. It was a beast to move in here but Stephen and I managed to do it with just the two of us.
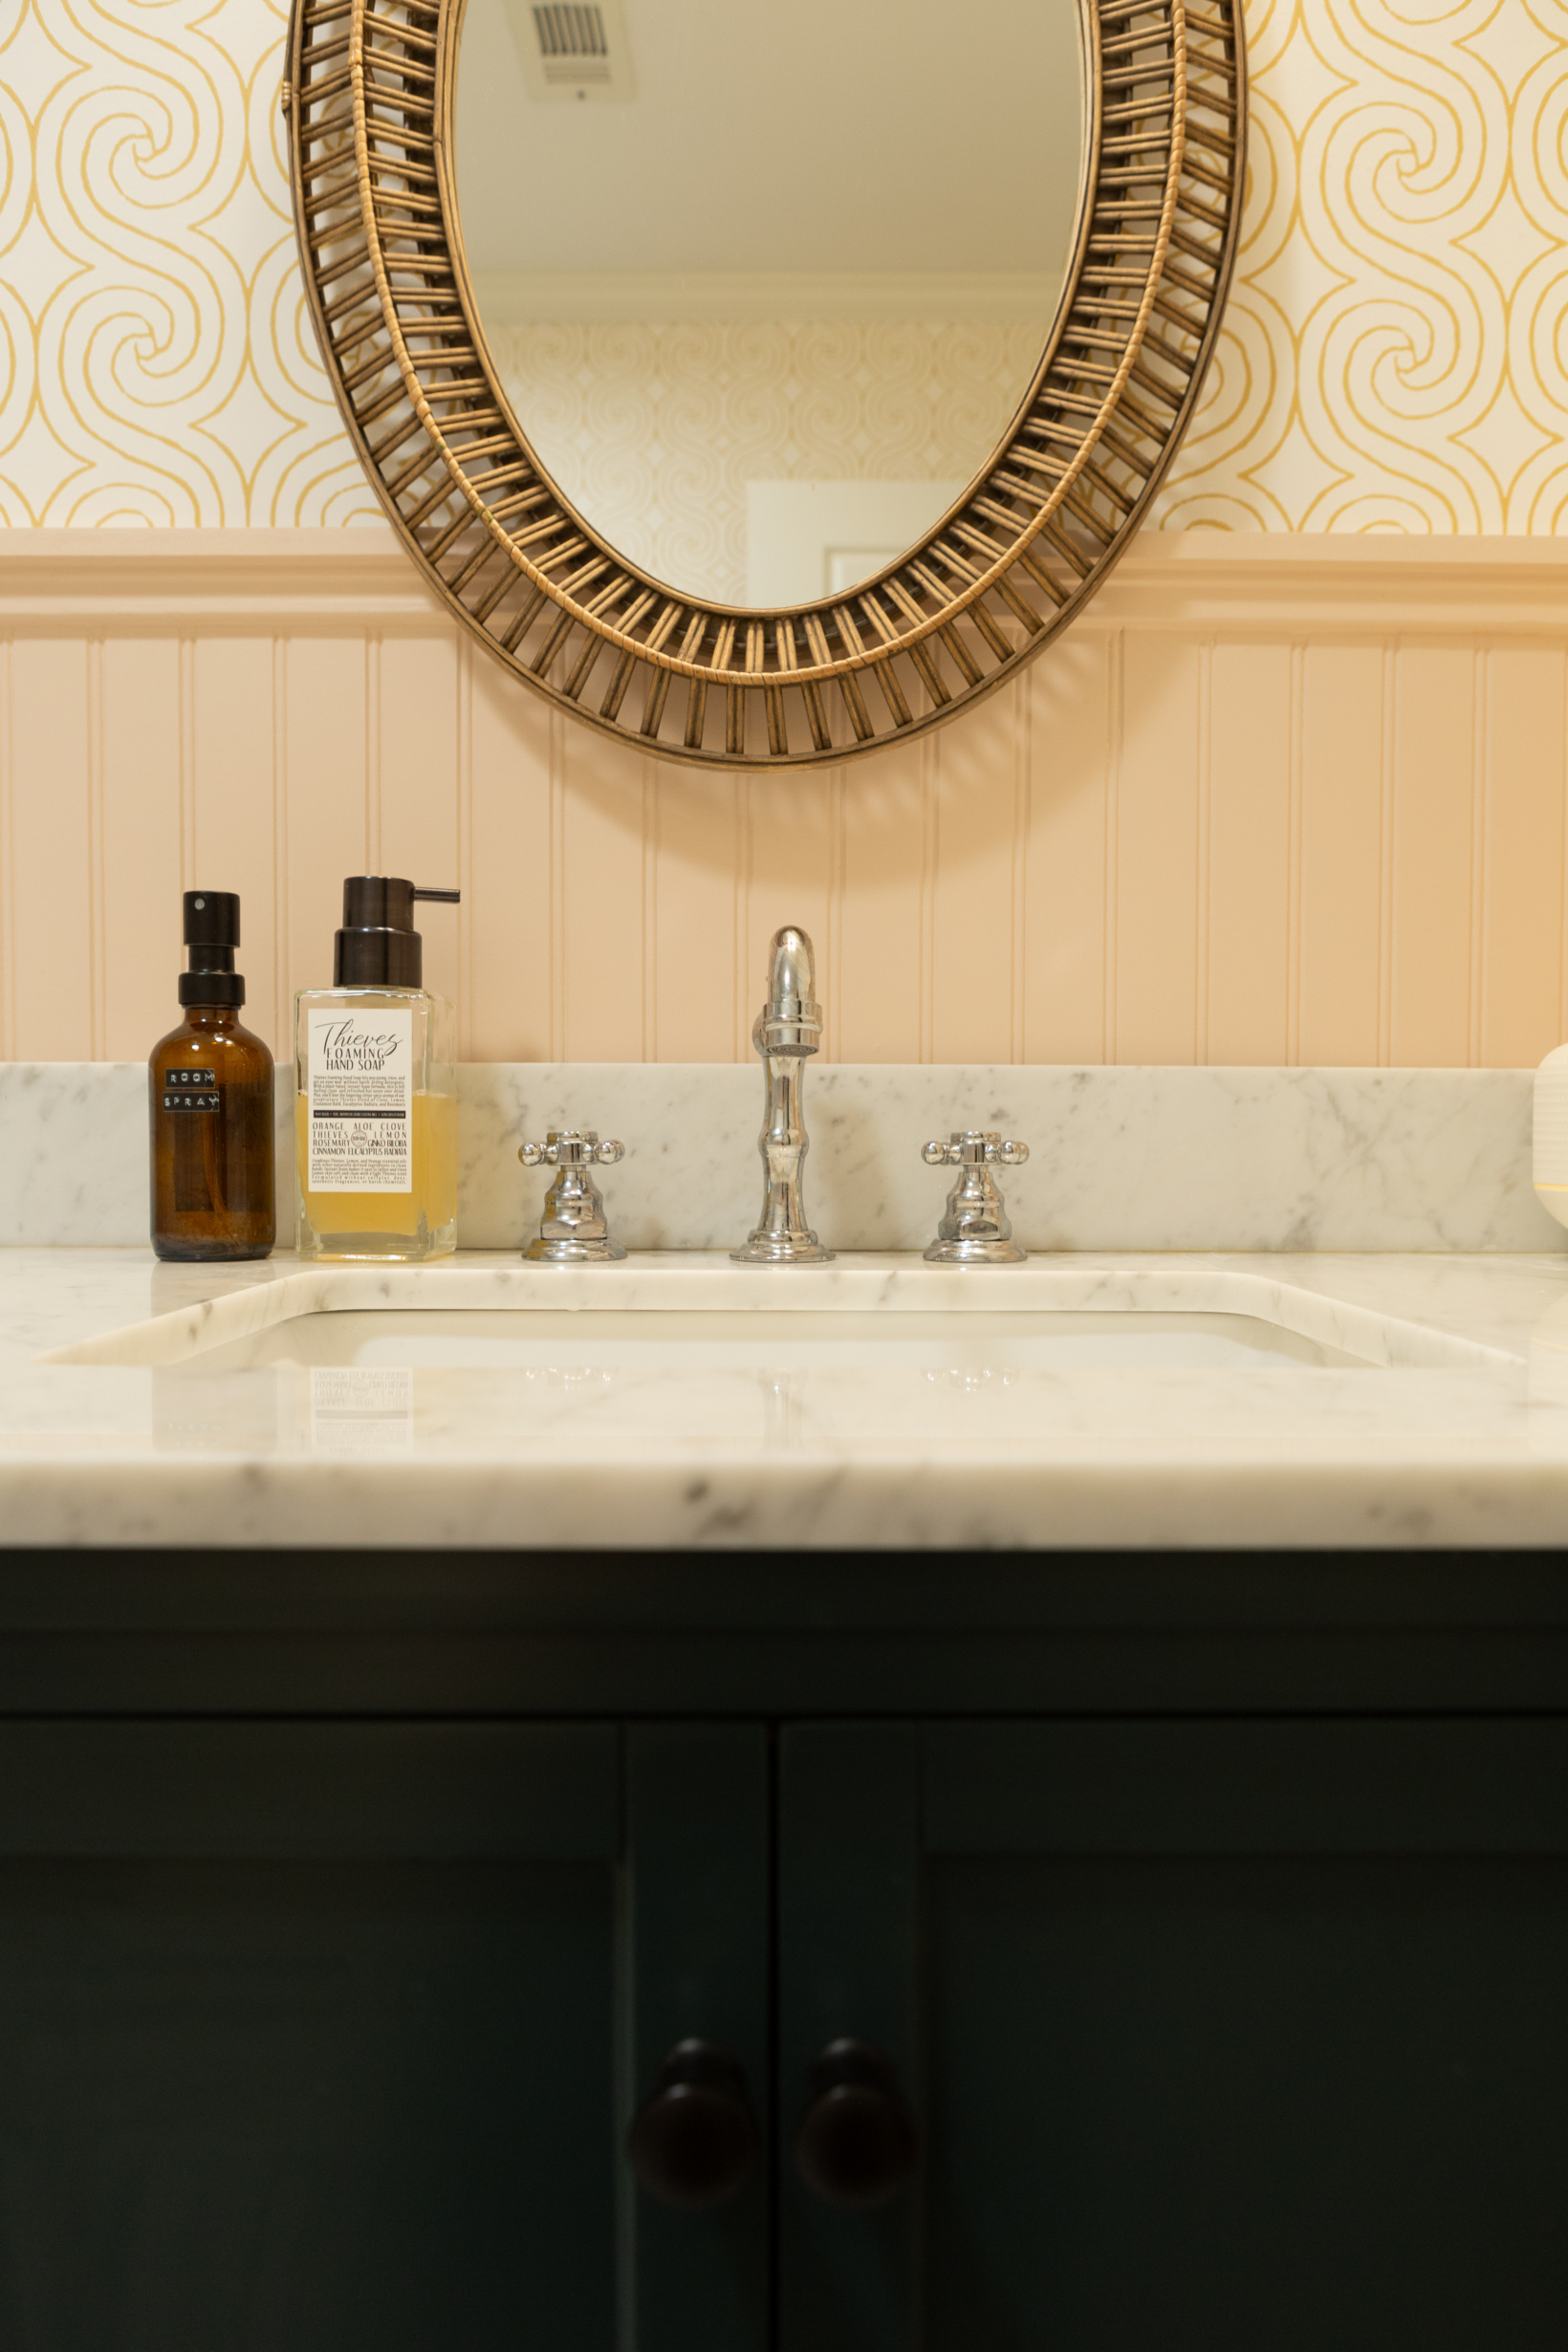
I really wanted to put a wicker mirror like this one (I’m a sucker for scallops!) in here to add to the beachy vibe and because I love the texture that it adds. But $399?! I was not about to spend that so I searched marketplace and eventually found this mirror. It was white when I purchased it but I gave it a wicker-like look by using various shades of Minwax stain that we had on hand. Not bad for $20, right?!
I shared how I paint the light switch plates and electrical plates in this post.
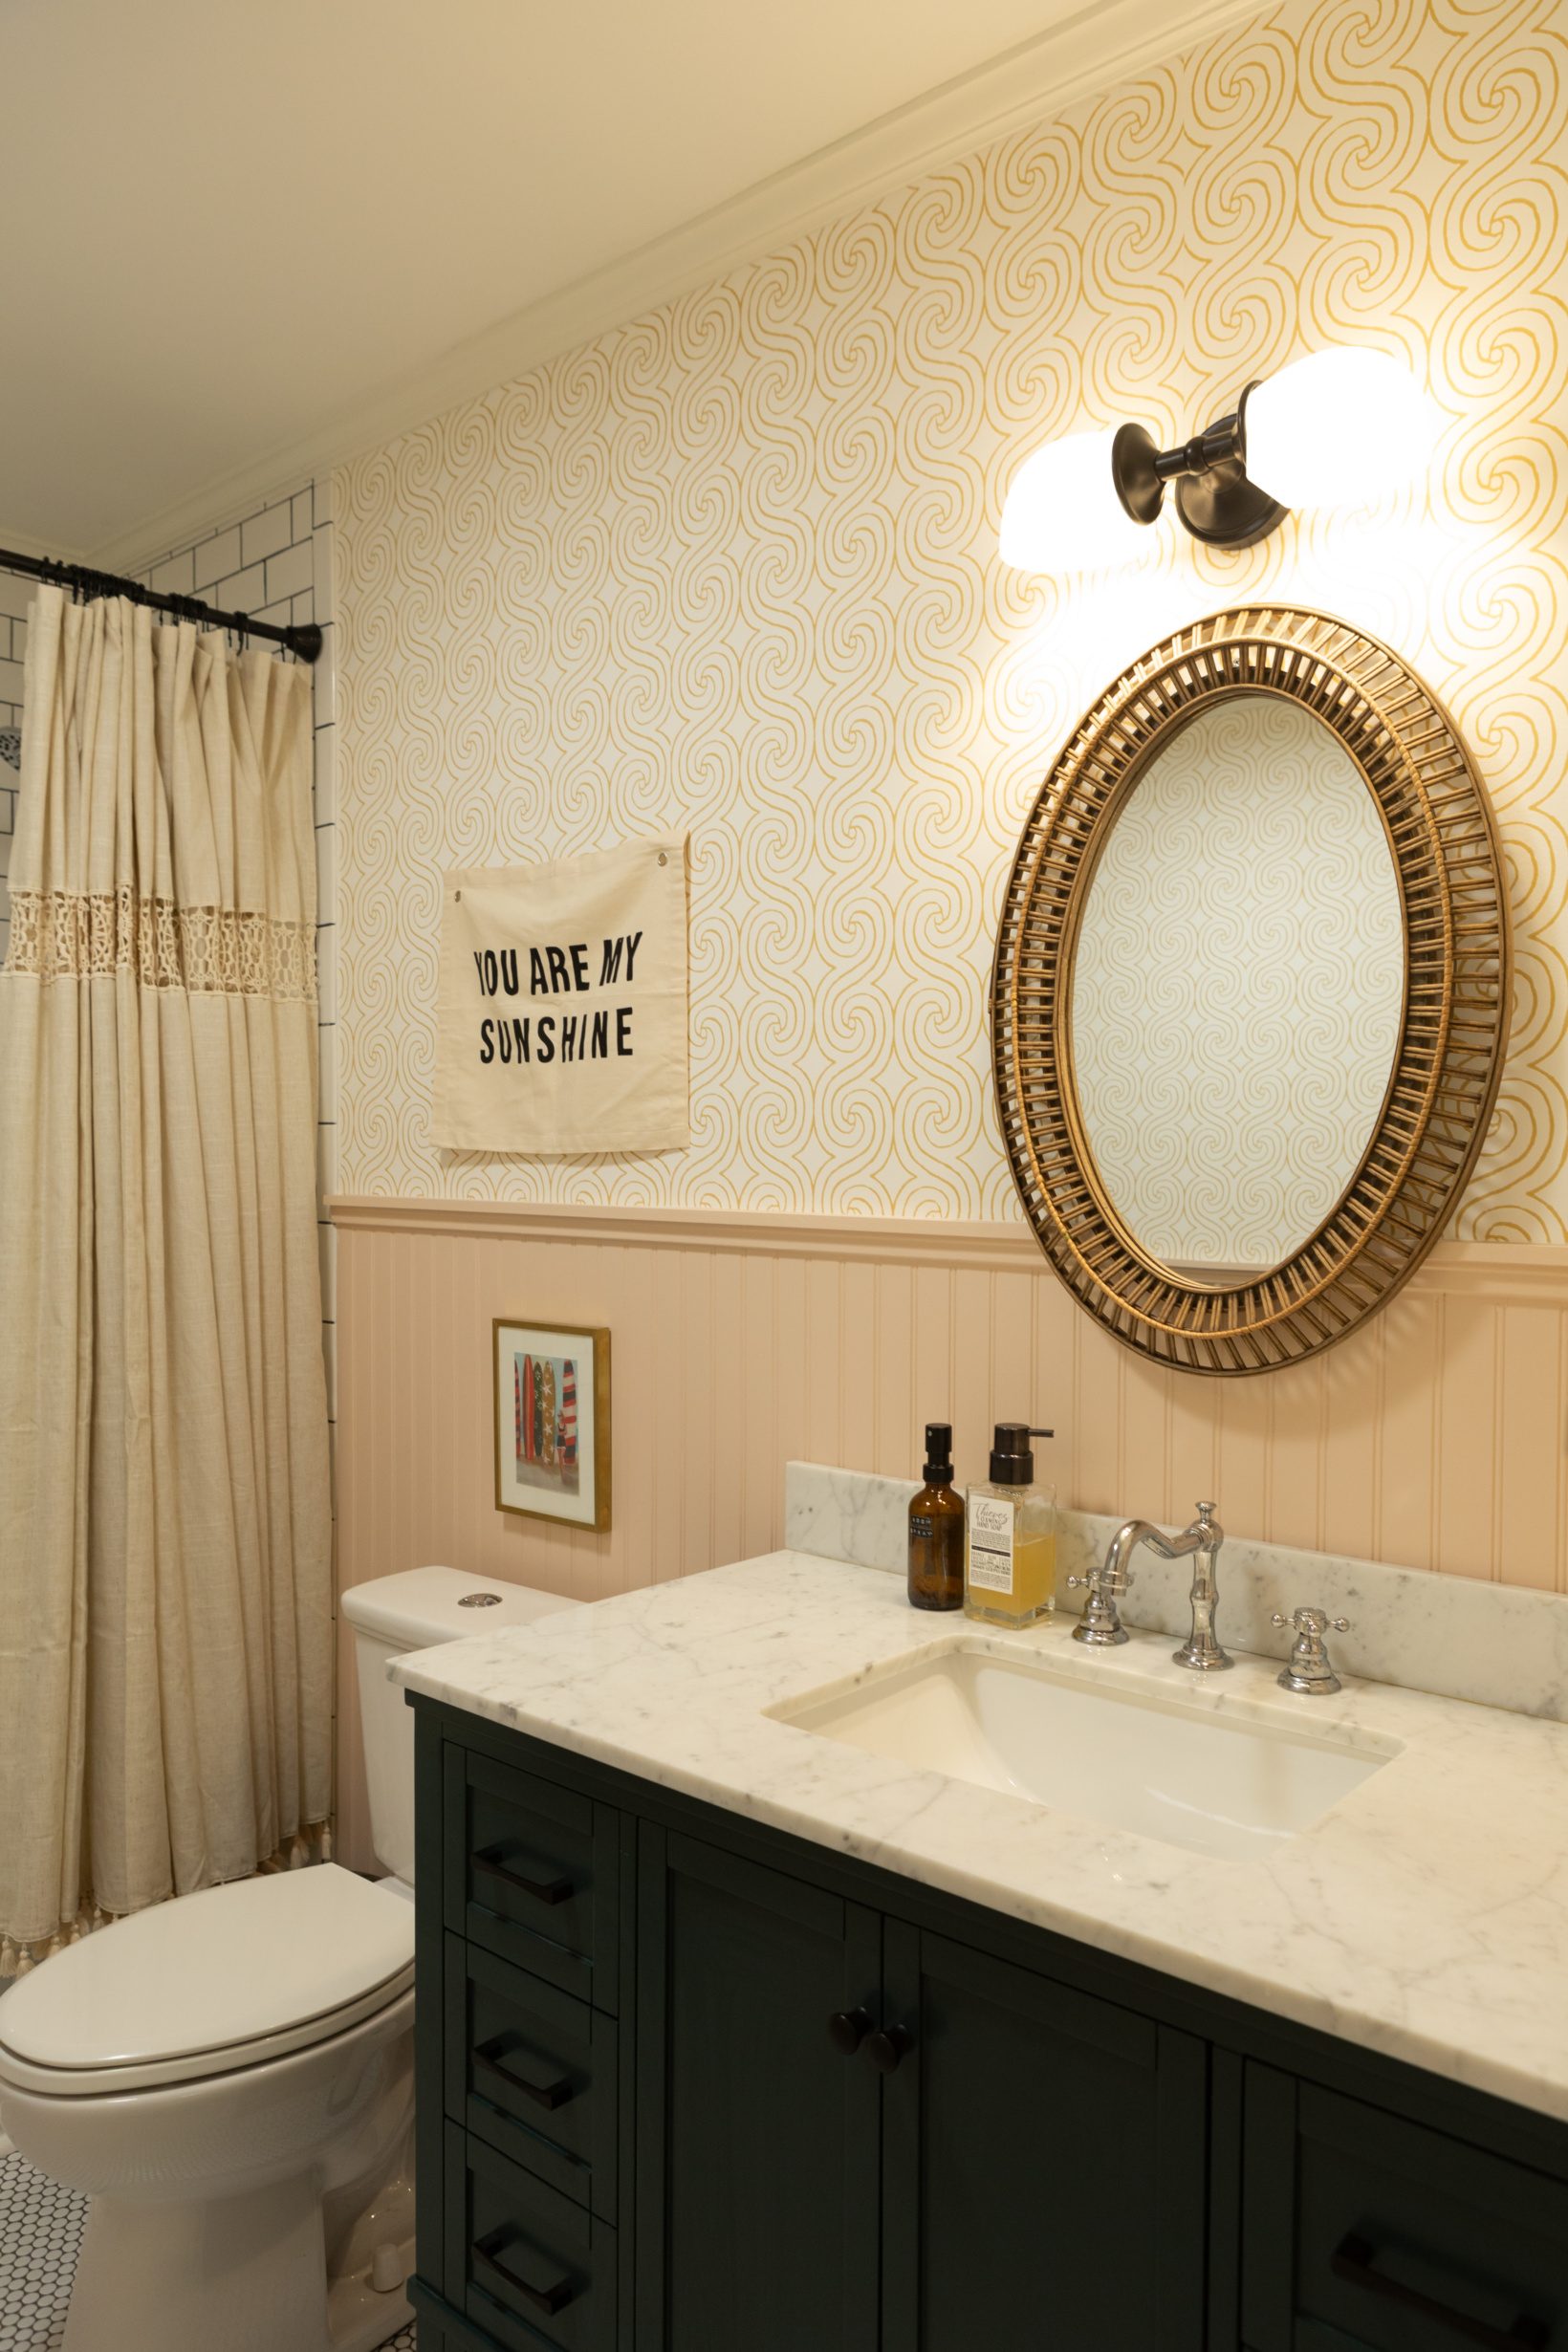
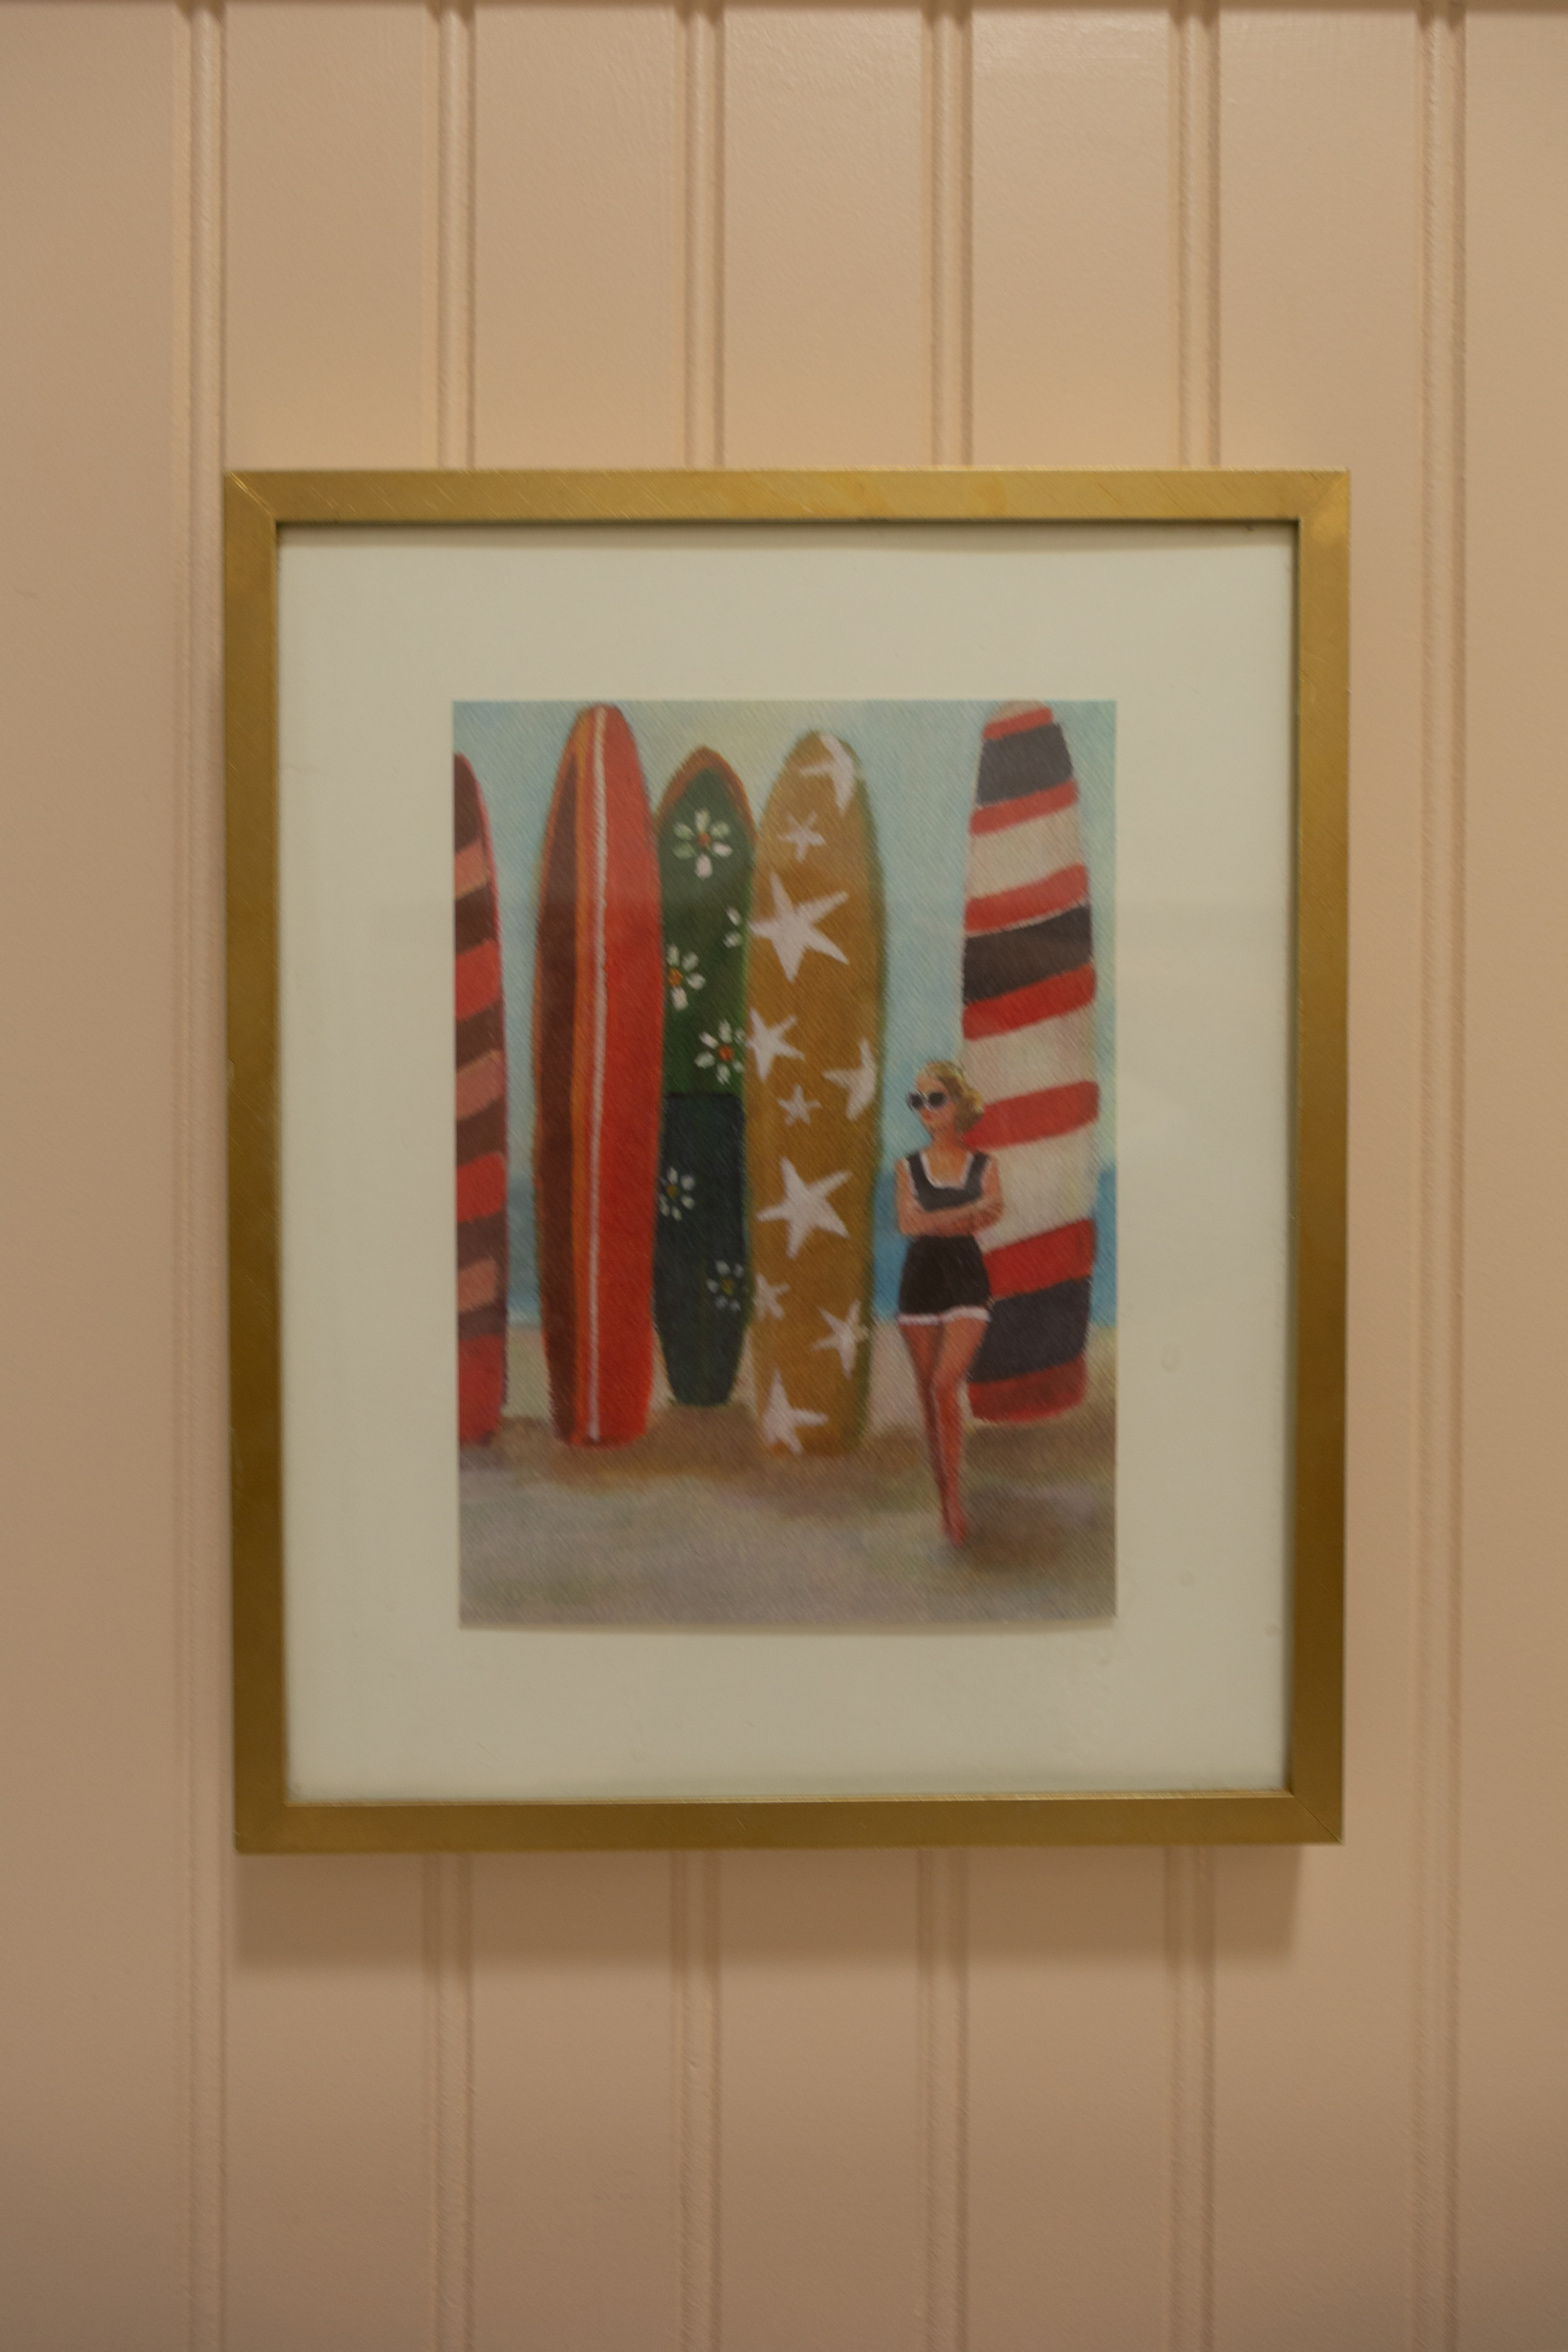
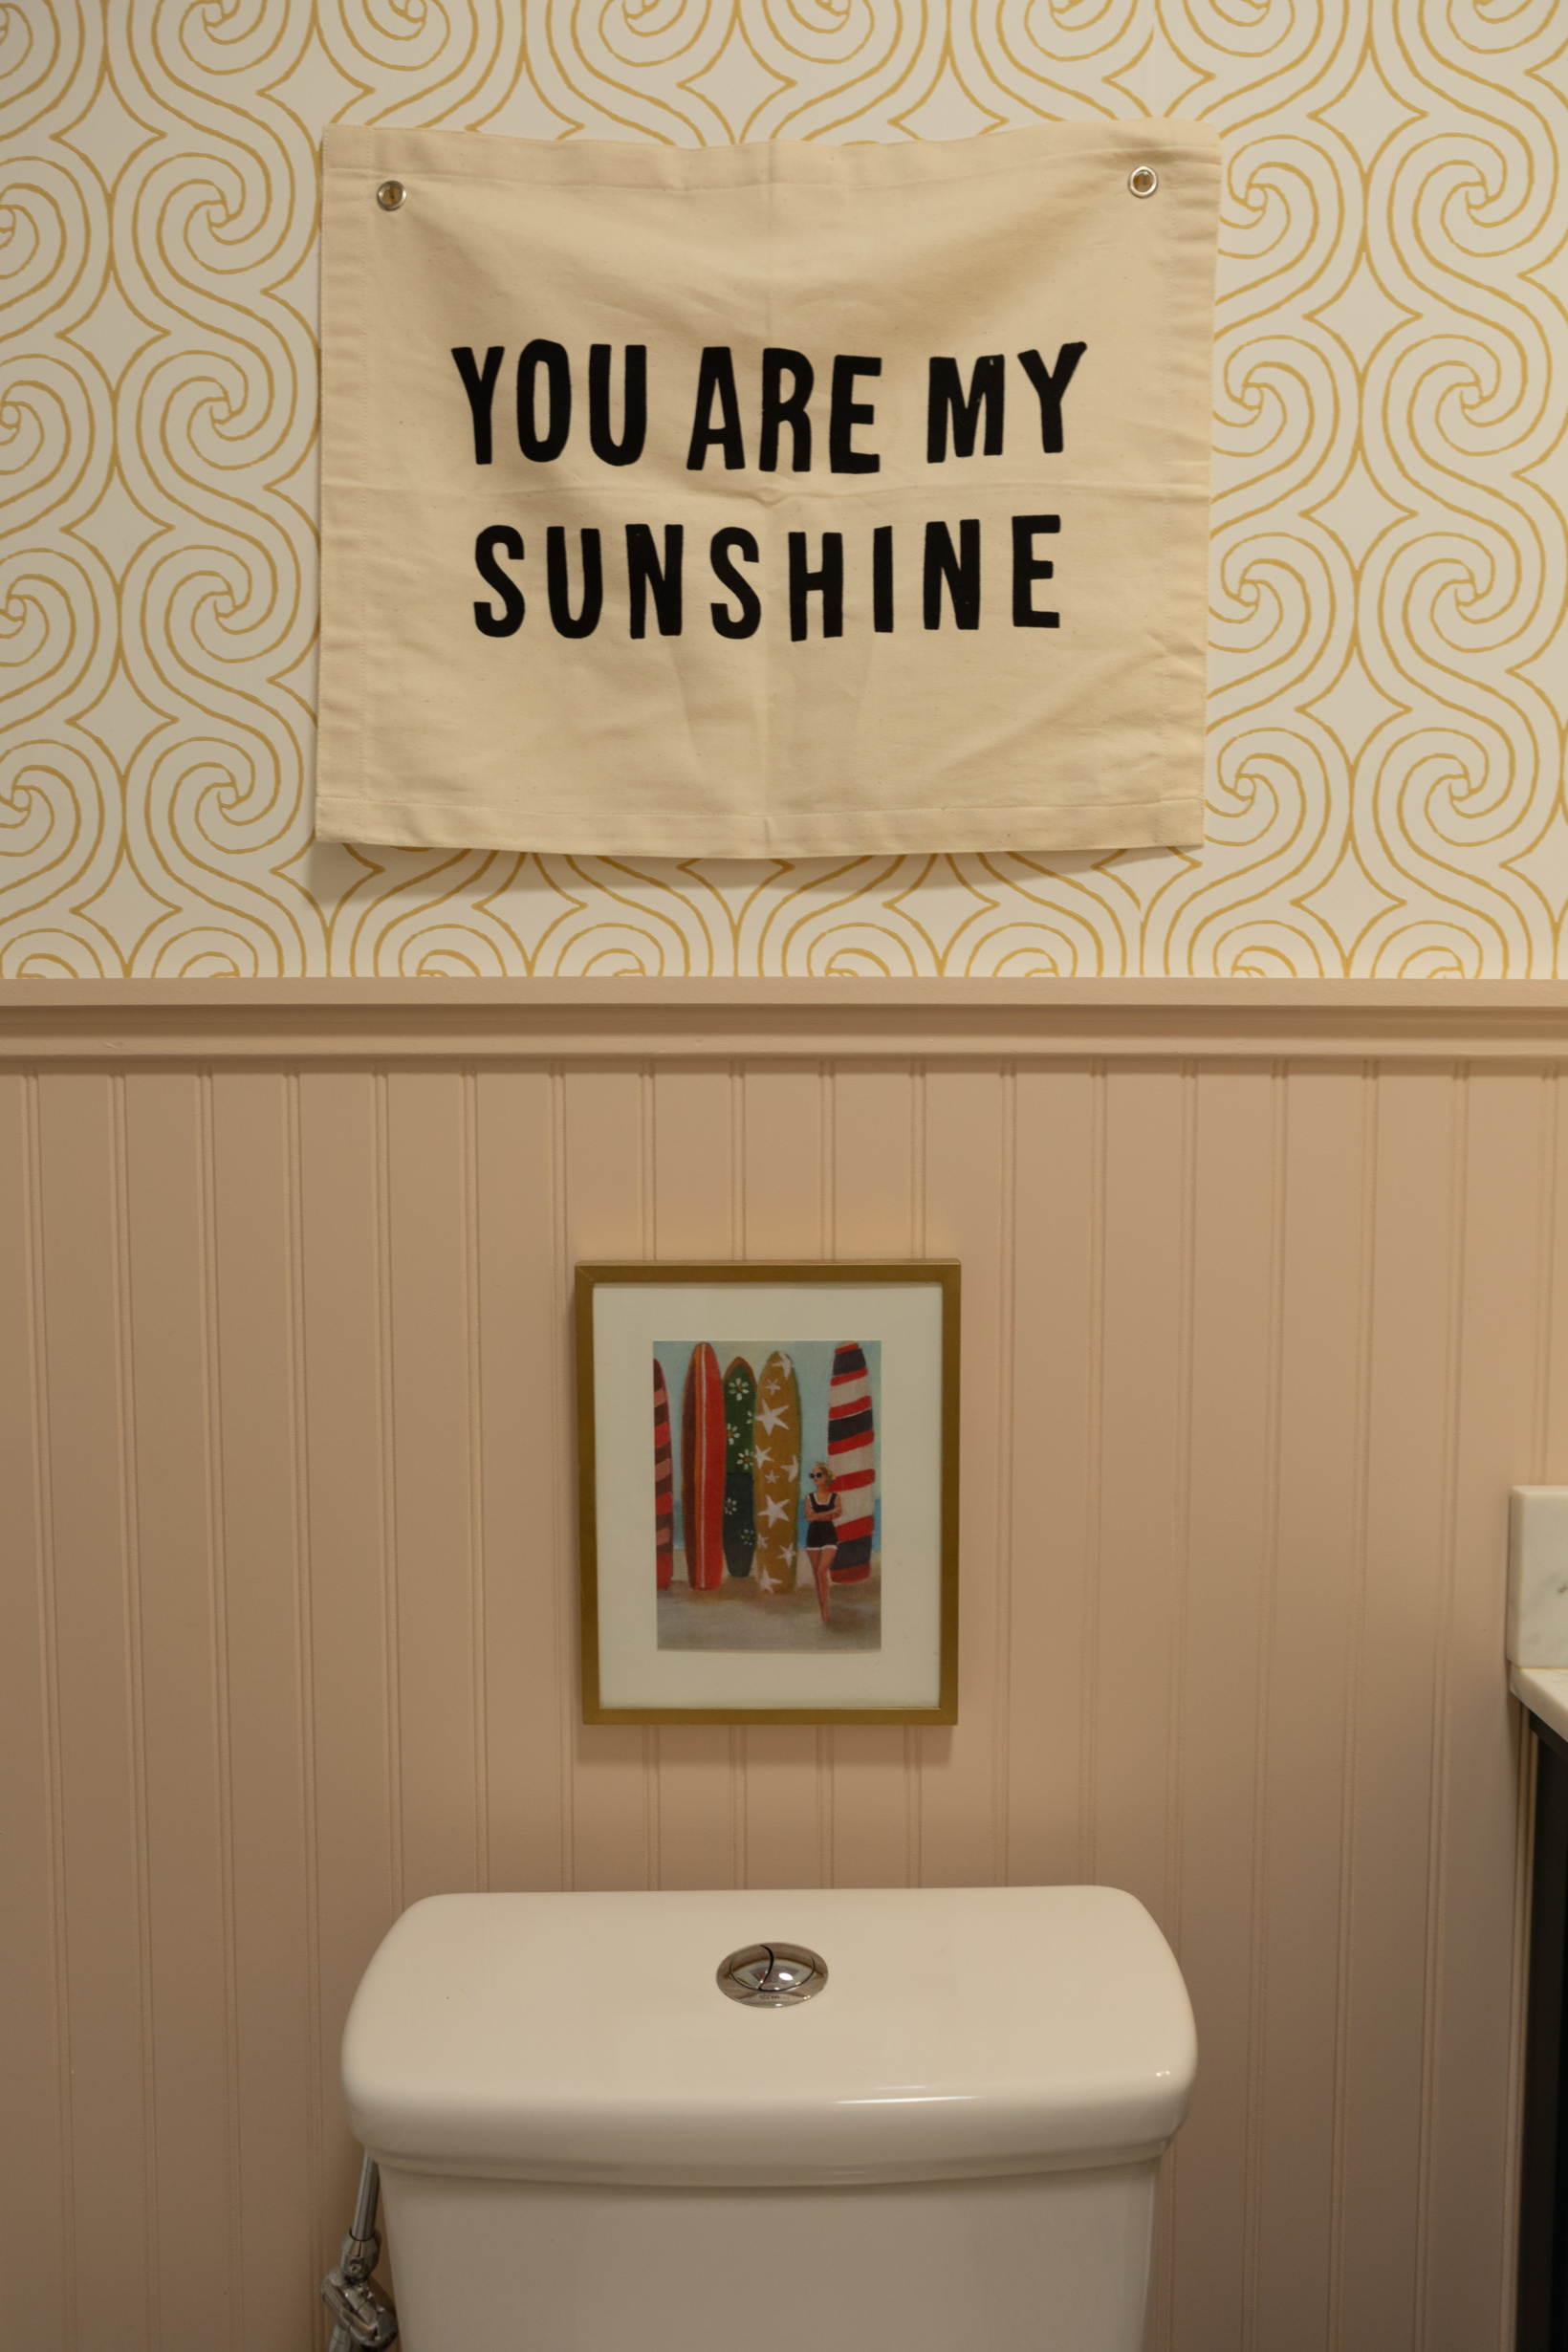
The inspiration for the entire room – the surfer girl painting! It’s originally a greeting card from Trader Joe’s (they have the best cards!) that I put into a frame that I painted gold. See how the vanity and bead board color all ties into it? I debated for a while what artwork to put above it since it’s small and it didn’t look finished to me all alone. I eventually landed on adding the flag. I love that it adds another texture, a touch of black, which I think every room benefits from, plays into the beach “theme”, and is true statement for our girls!
We let the wallpaper speak for itself on the towel wall instead of adding more artwork on top of it. For the shower curtain I used two shower curtains with one liner to not only make the curtain look fuller but also because the tub length plus the seat is too long for just one. It stays nice and warm in there while showering with the two!
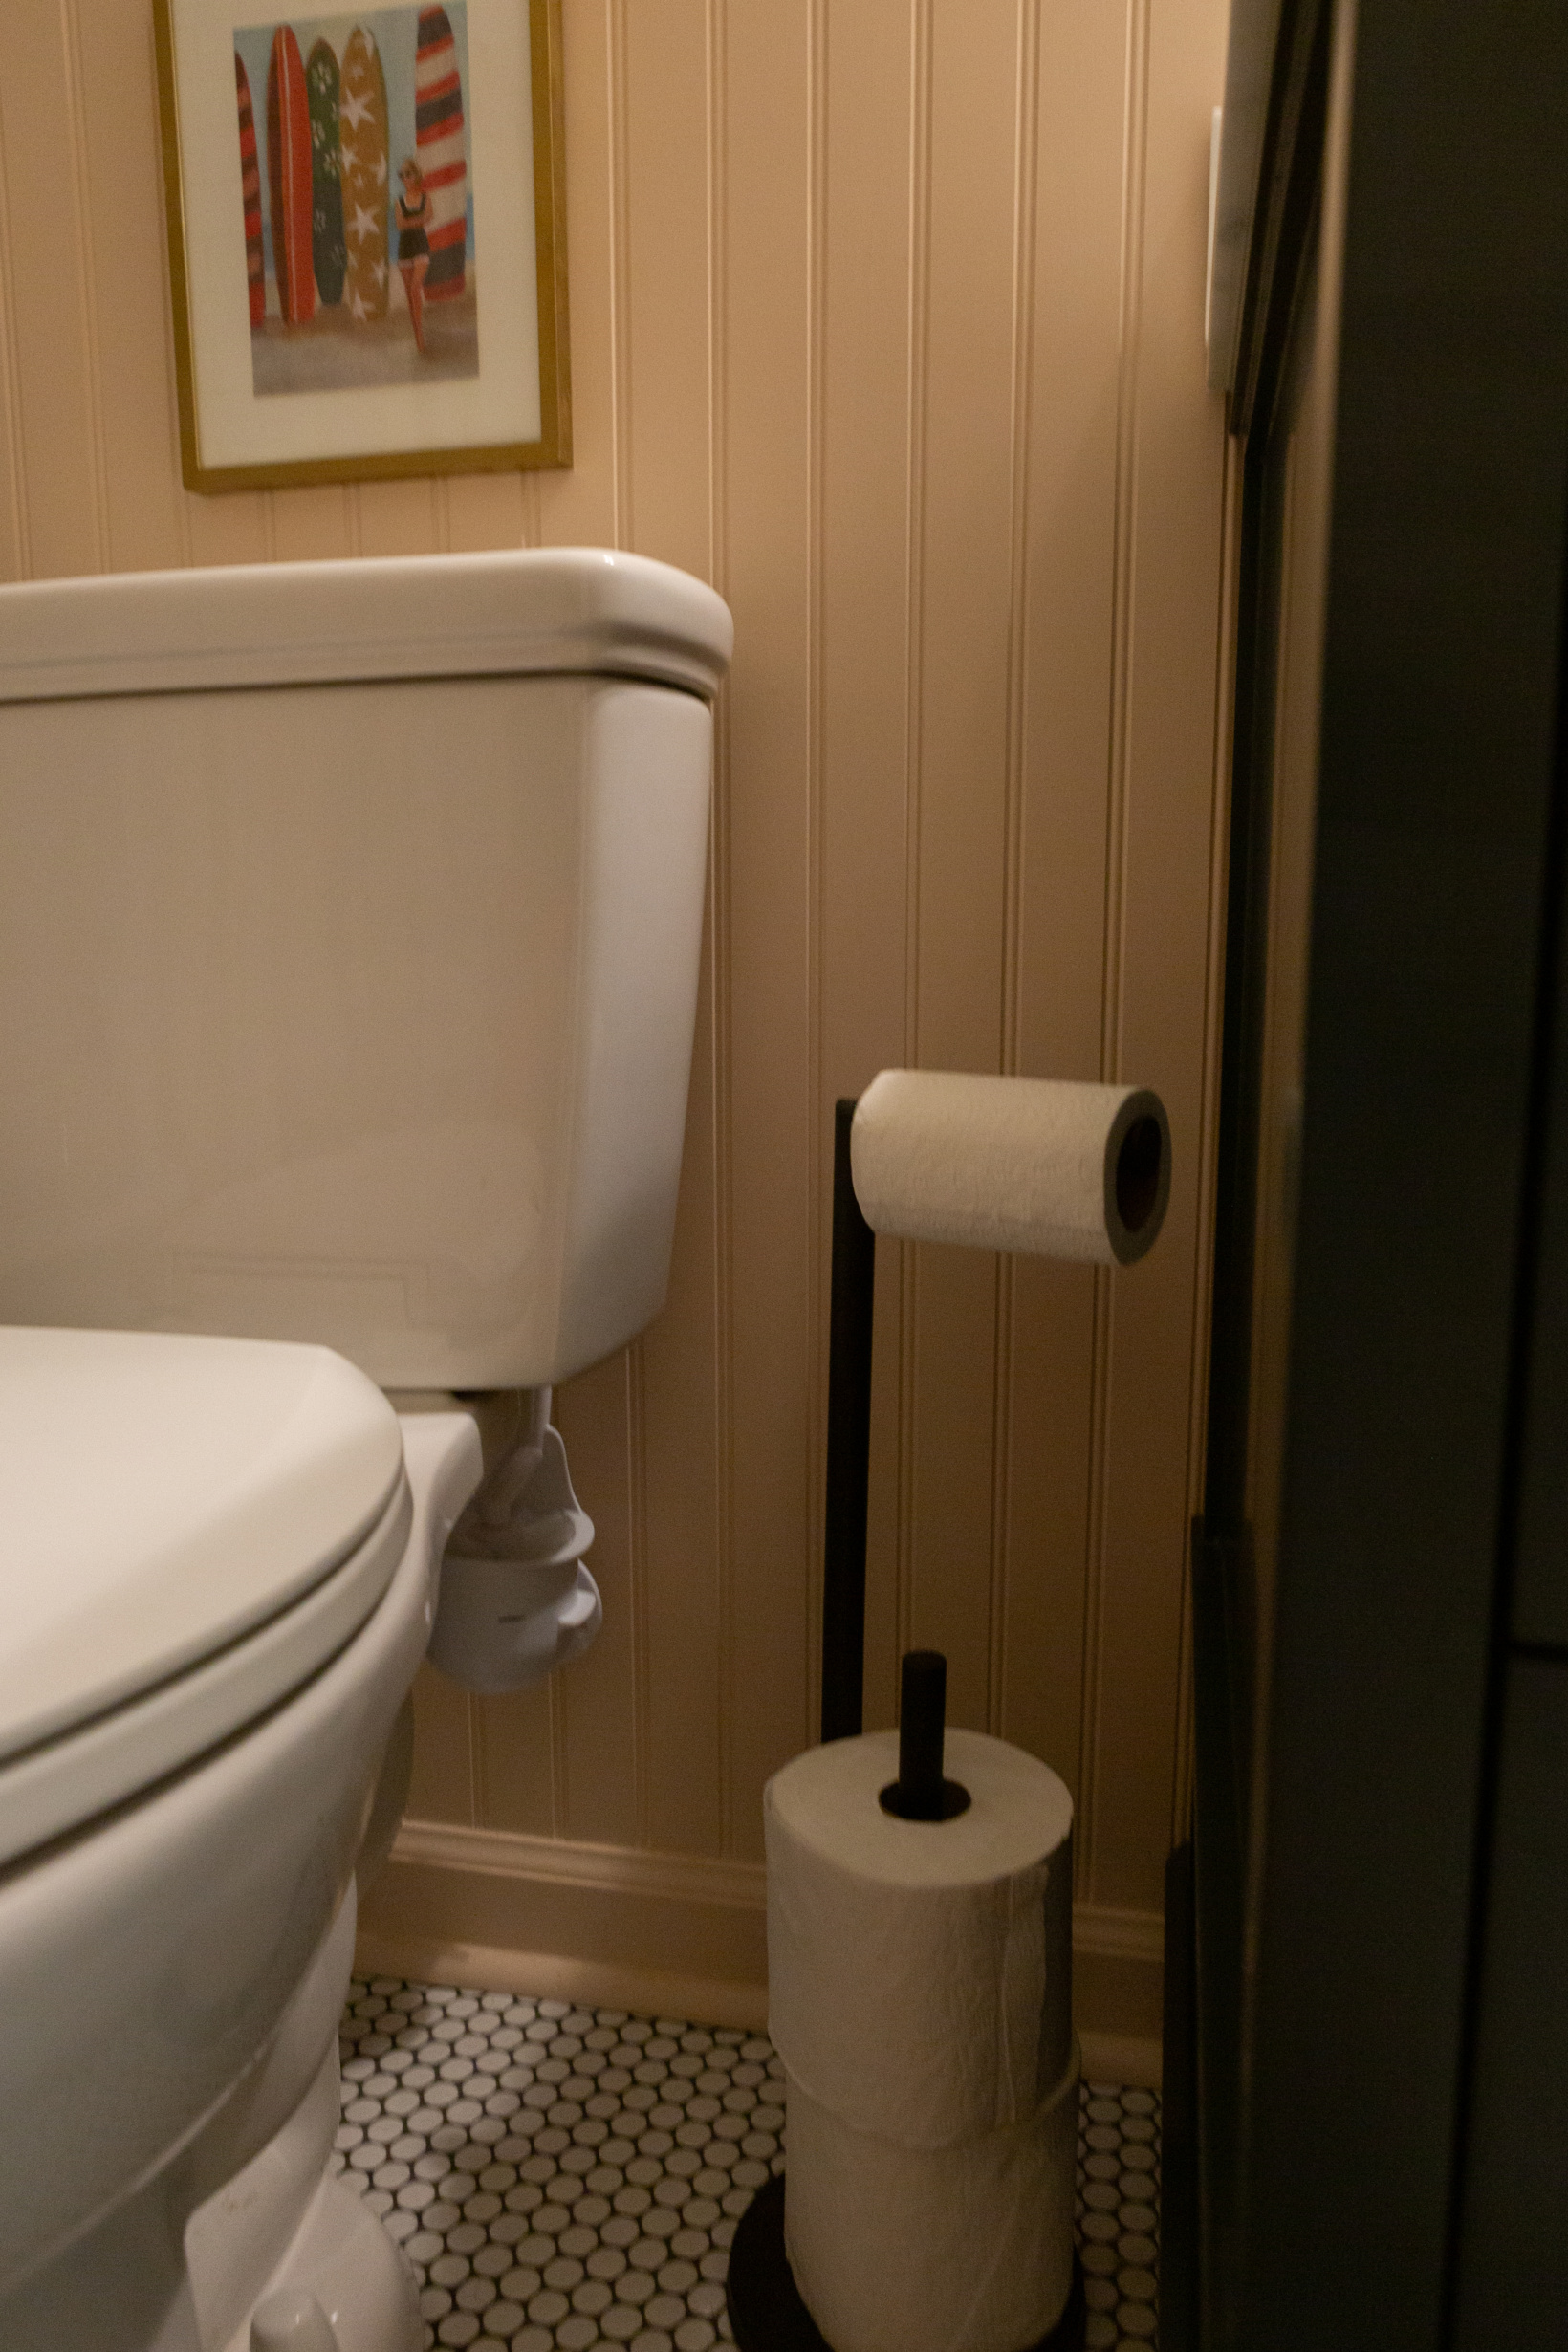
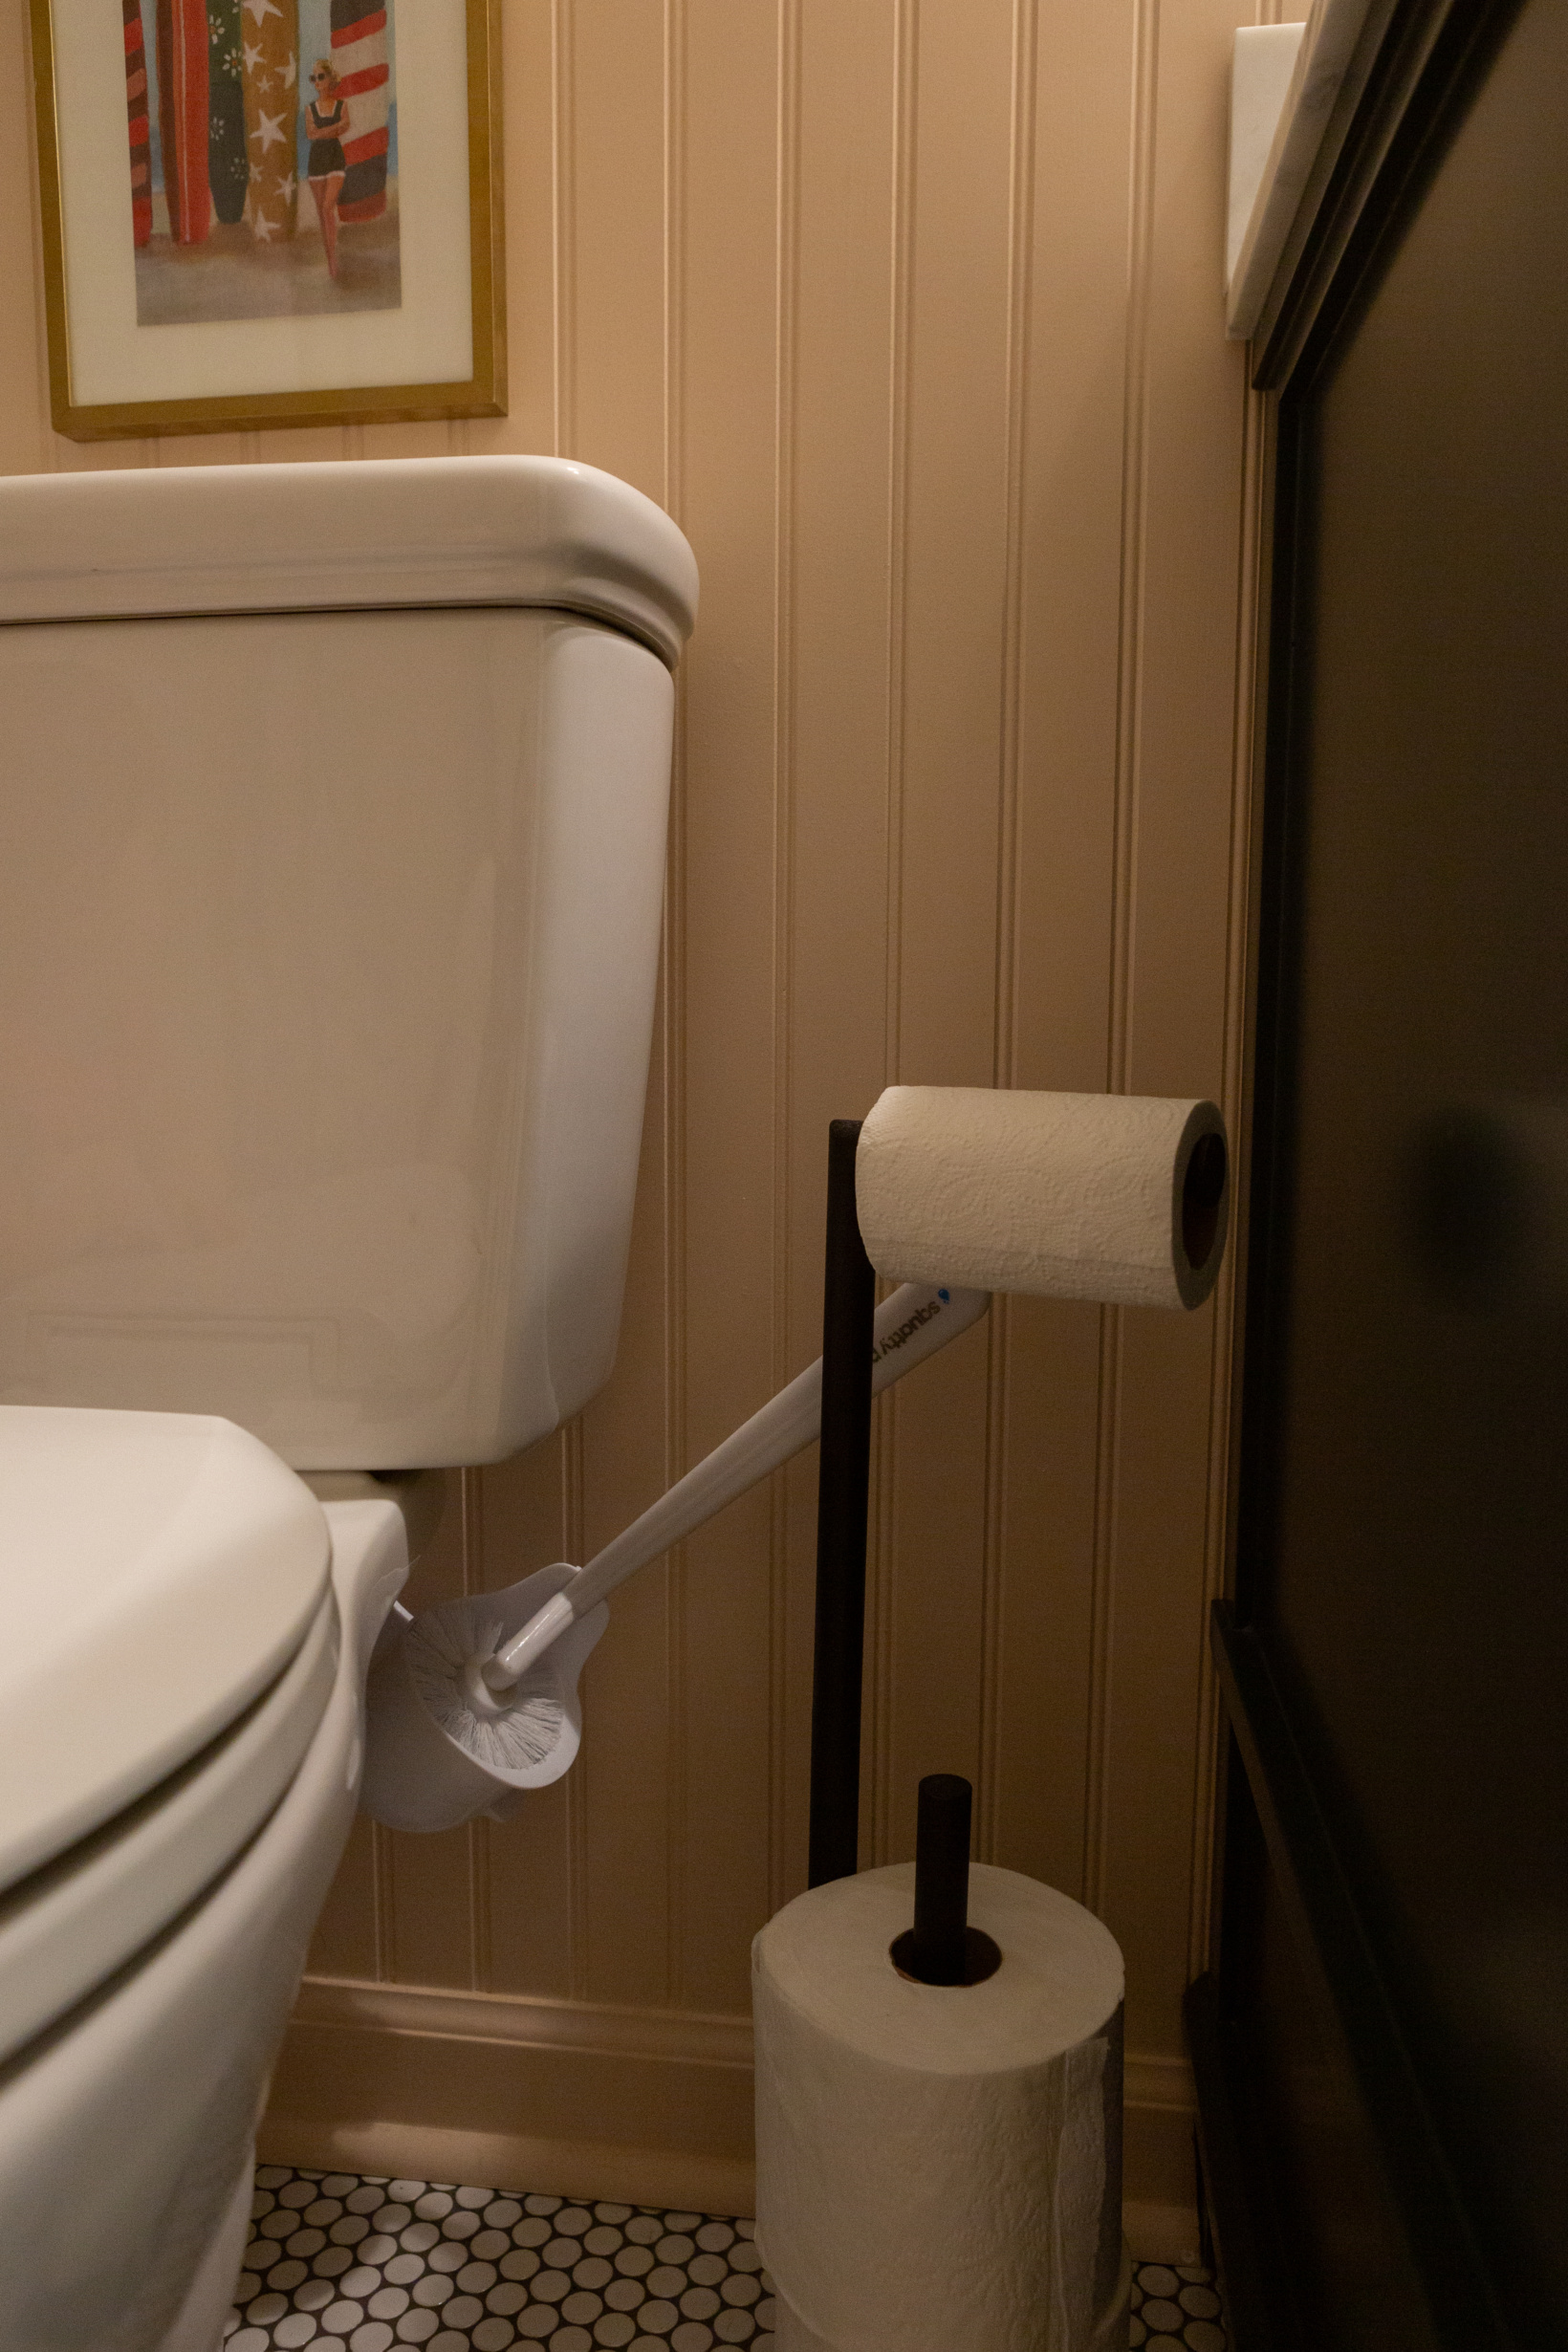
This is a bit silly but in case you’re on the hunt for a great toilet brush… Here it is. It stays hidden behind the toilet so you don’t have to worry about storing it somewhere or that the kids will play with it. Or maybe only my kids do that…?
I always try to remember to share the “in real life” photo of the spaces we work on. It wouldn’t be real life if these didn’t include a potty training seat, bath toys and a cloth diaper wet bag, right?
We love the way this bathroom turned out. We’ll be sad to leave it. Fortunately, if you’ve read this post you know that we won’t be without pink in the bathroom in our new home, that’s for sure. I’m grateful to have you here! Let me know if you have any questions in the comments below!

Sources:
- Ceiling color – Chantilly Lace in a flat finish
- Trim color – Chantilly Lace in a semi gloss finish
- Bead board color – BM Soft Satin in eggshell finish
- Wallpaper (no longer sold, linked another one we liked)
- Shower curtain (no longer sold, linked another one I like)
- Shower curtain liner
- Shower curtain hooks
- Bath faucet filter
- Flag
- Vanity
- Sconce
- Fan + light combo
- Stool
- Step stool
- Rug
- Toilet paper holder
- Hidden toilet brush
- Towels (similar)
- Bidet
- Bath toy container
- Sink faucet
- Shower faucet
- Floor tile
- Shower tile
- Mirror – thrifted
- Towel hooks
- Foaming hand soap dispenser
I sincerely appreciate you all shopping through my affiliate links like the ones included in this post. I make a small commission when you purchase through these links at no extra cost to you. These funds help support my family and allow for us to produce better content for you all. I can’t thank you enough for supporting all that we do!
jordan jean
Leave a Reply


You have now completed TWO bathrooms in the time I’ve been doing ONE. Hahahahahahaha! You are amazing!