July 8, 2019
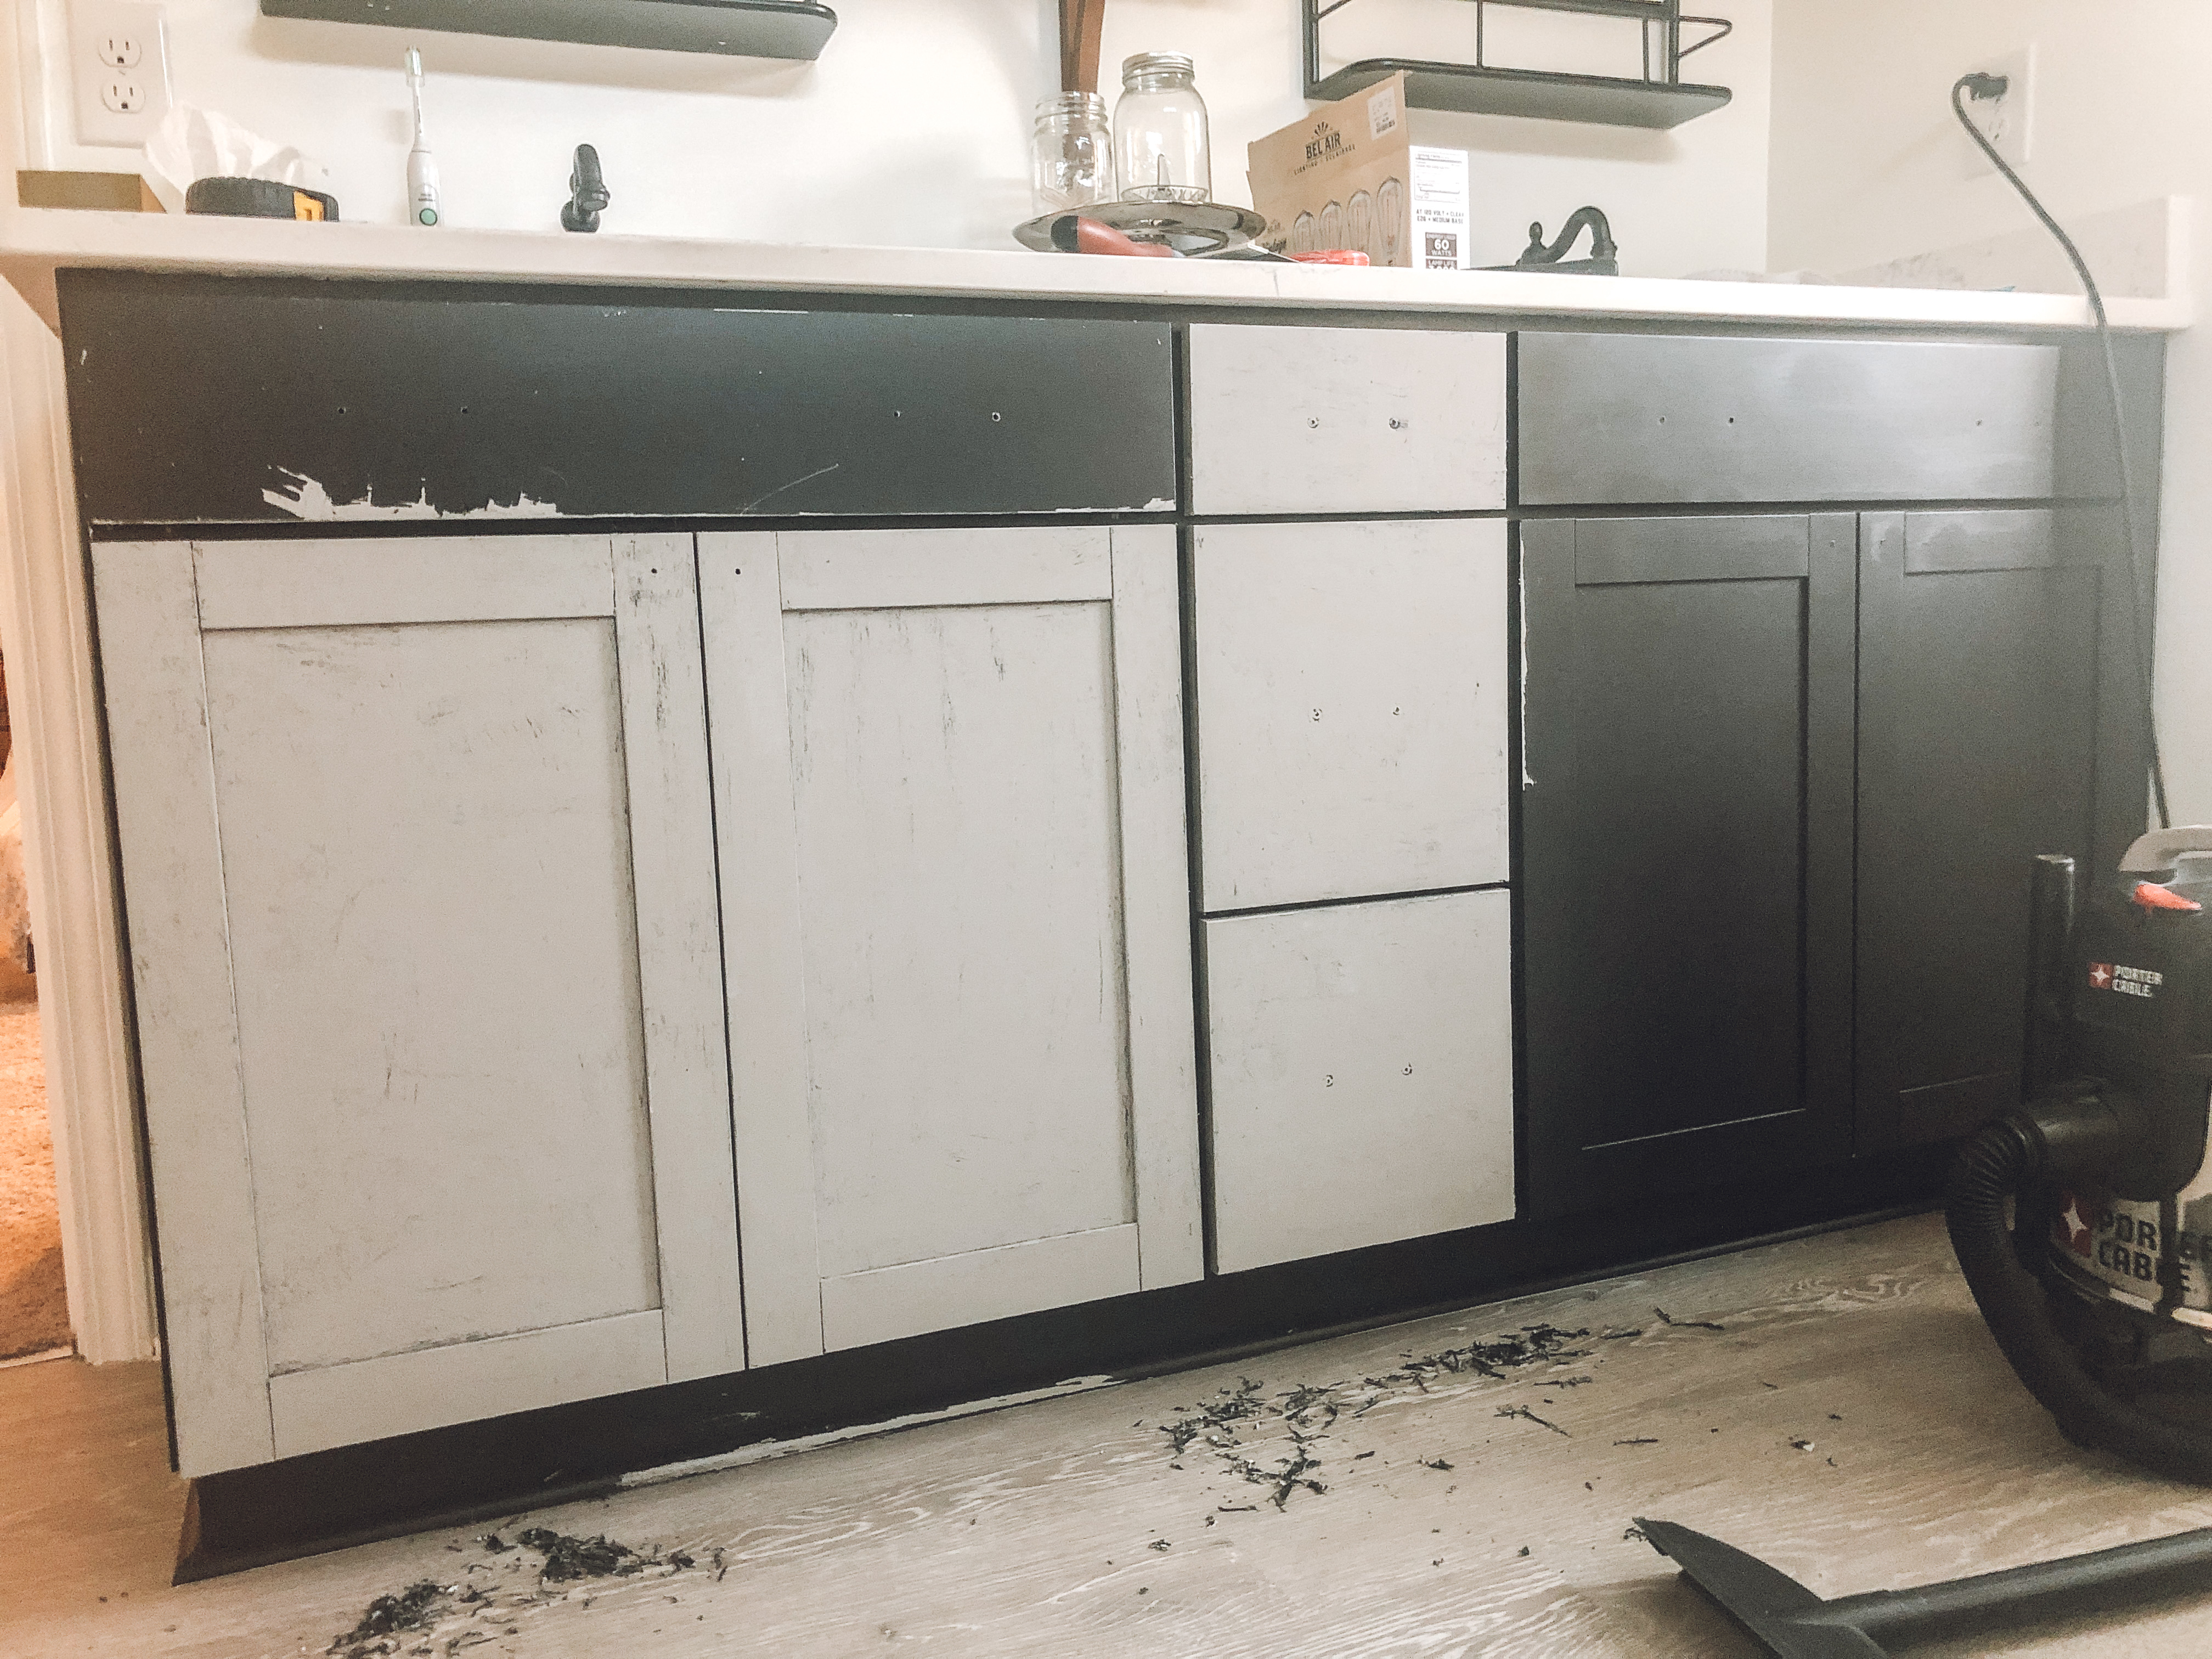
A project that was supposed to be relatively simple turned into an ordeal. Very shortly after we had removed the doors to start painting the vanity together, we found out that I was pregnant. We didn’t want to chance anything so Stephen took on all of the painting by himself. The unfortunate part though was that he had to leave for a month for work so he hustled to get all of the priming and painting done on the vanity in 3-4 days along with everything else he wanted to button up before he left. Since he was trying to save time and get it done quickly so I didn’t have to deal with it when he left, he didn’t do much prep work to the vanity as far as sanding/deglossing the smooth laminate surface. That coupled with a short amount of time for the primer to dry/cure, sadly resulted in paint that was extremely easy to peel off. It would’ve been a massive pain in the rear if we had left it as is. Anytime paint peeled off we would’ve had to touch it up and I couldn’t bear to think of leaving it that state for future homeowners (we know we’ll be moving when the Air Force says so). When he got home a month later, we had to peel all of the paint off using scrapers and start back at square one.
This time we were determined to do things differently so that we didn’t have to mess with this again. I did a lot of research to figure out what would be best for us to do. I have to say though, I am really curious to see how some of these people’s vanities/furniture pieces are holding up a year later after using their methods. I tested and tested some of them that I read/watched about and they just didn’t make me feel confident that the paint would be durable for an extended period of time. That was really important to me especially considering that we use this vanity daily! I eventually came up with my own method by combining some of the ones I read about. I have to say – this isn’t a “sand paper free” or a “easy way to paint a vanity” tutorial. I’m really sorry about that! I was hoping that I’d be able to do it that way but with the particular products that we used and the material of our vanity that just simply did not work. I was sure as heck not going to do this all over again for it to peel within no time AND I would never want to share mediocre and unreliable content with you all. That being said, here is what I suggest doing if you plan on painting cabinets!
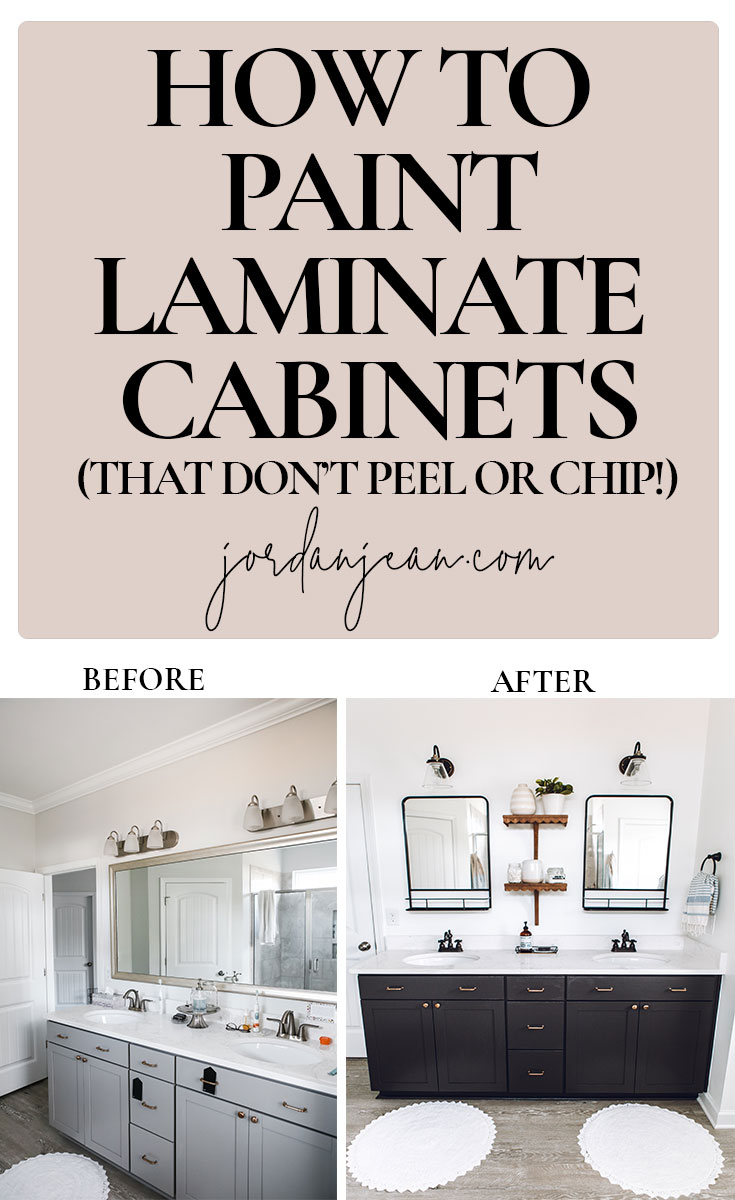
If you need a reminder of the before, here it is in all its lack of contrast glory (nothing was wrong with the vanity at all! You can see how we added some character to the bathroom with the same color vanity HERE):
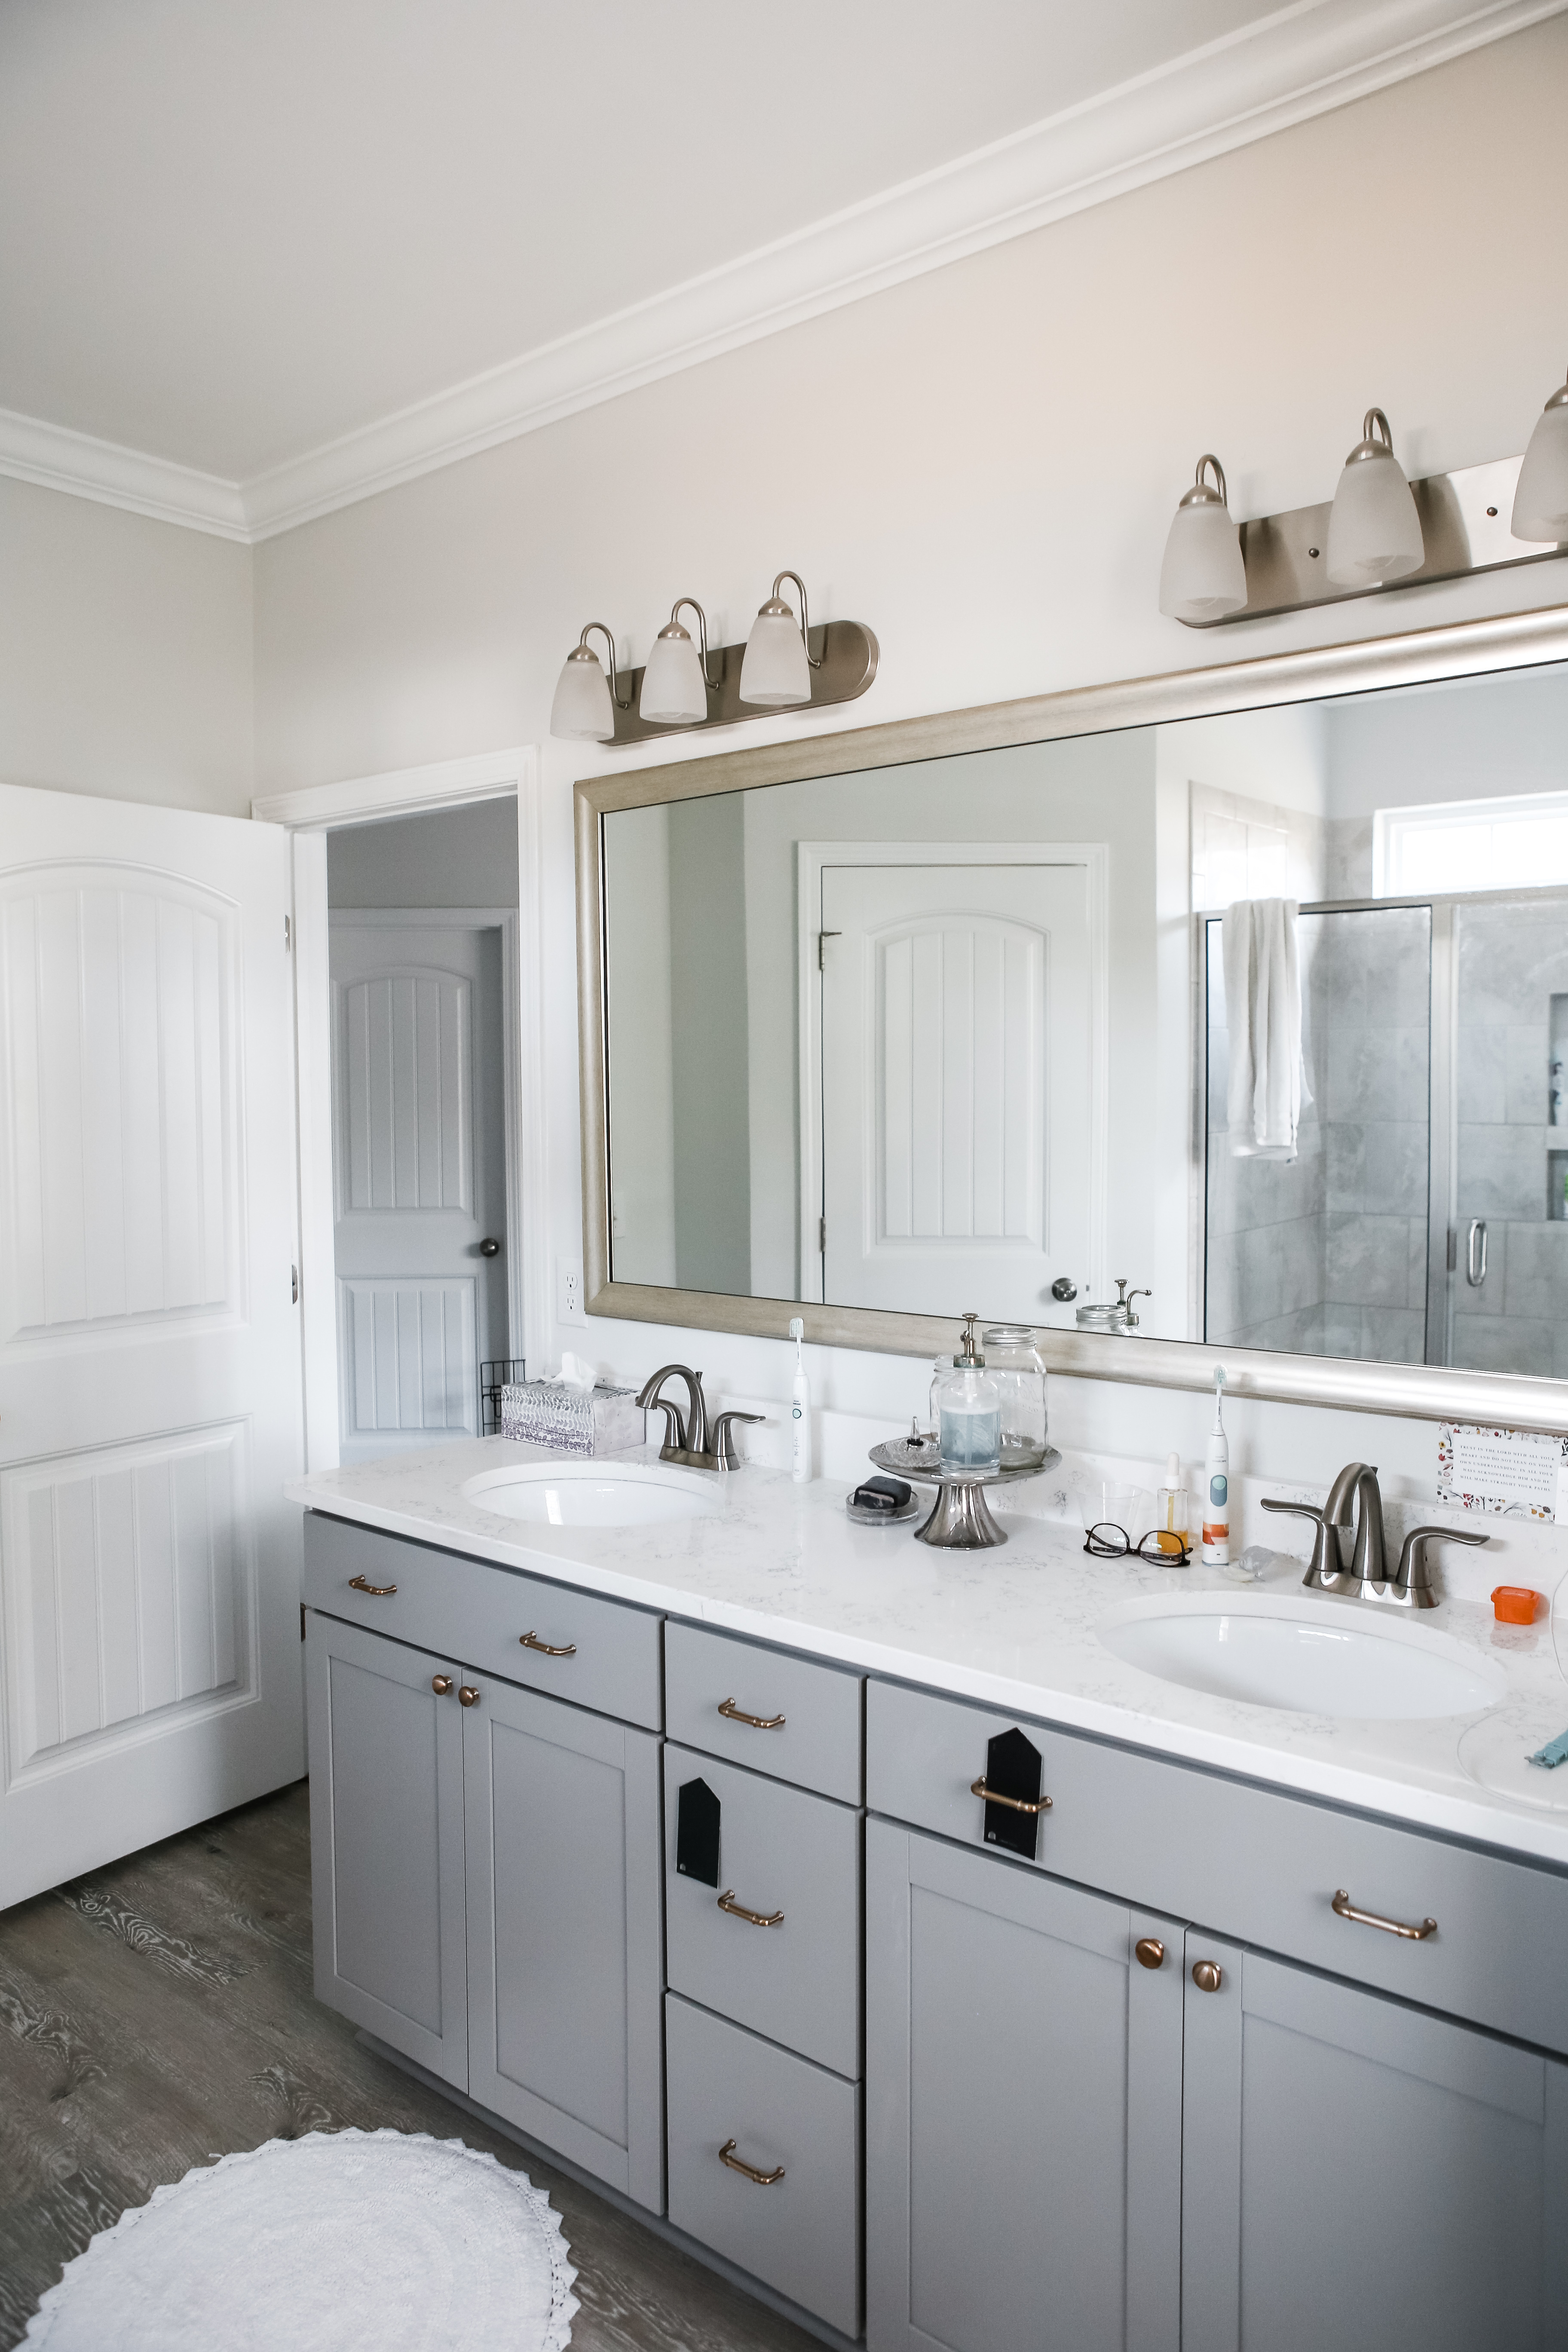
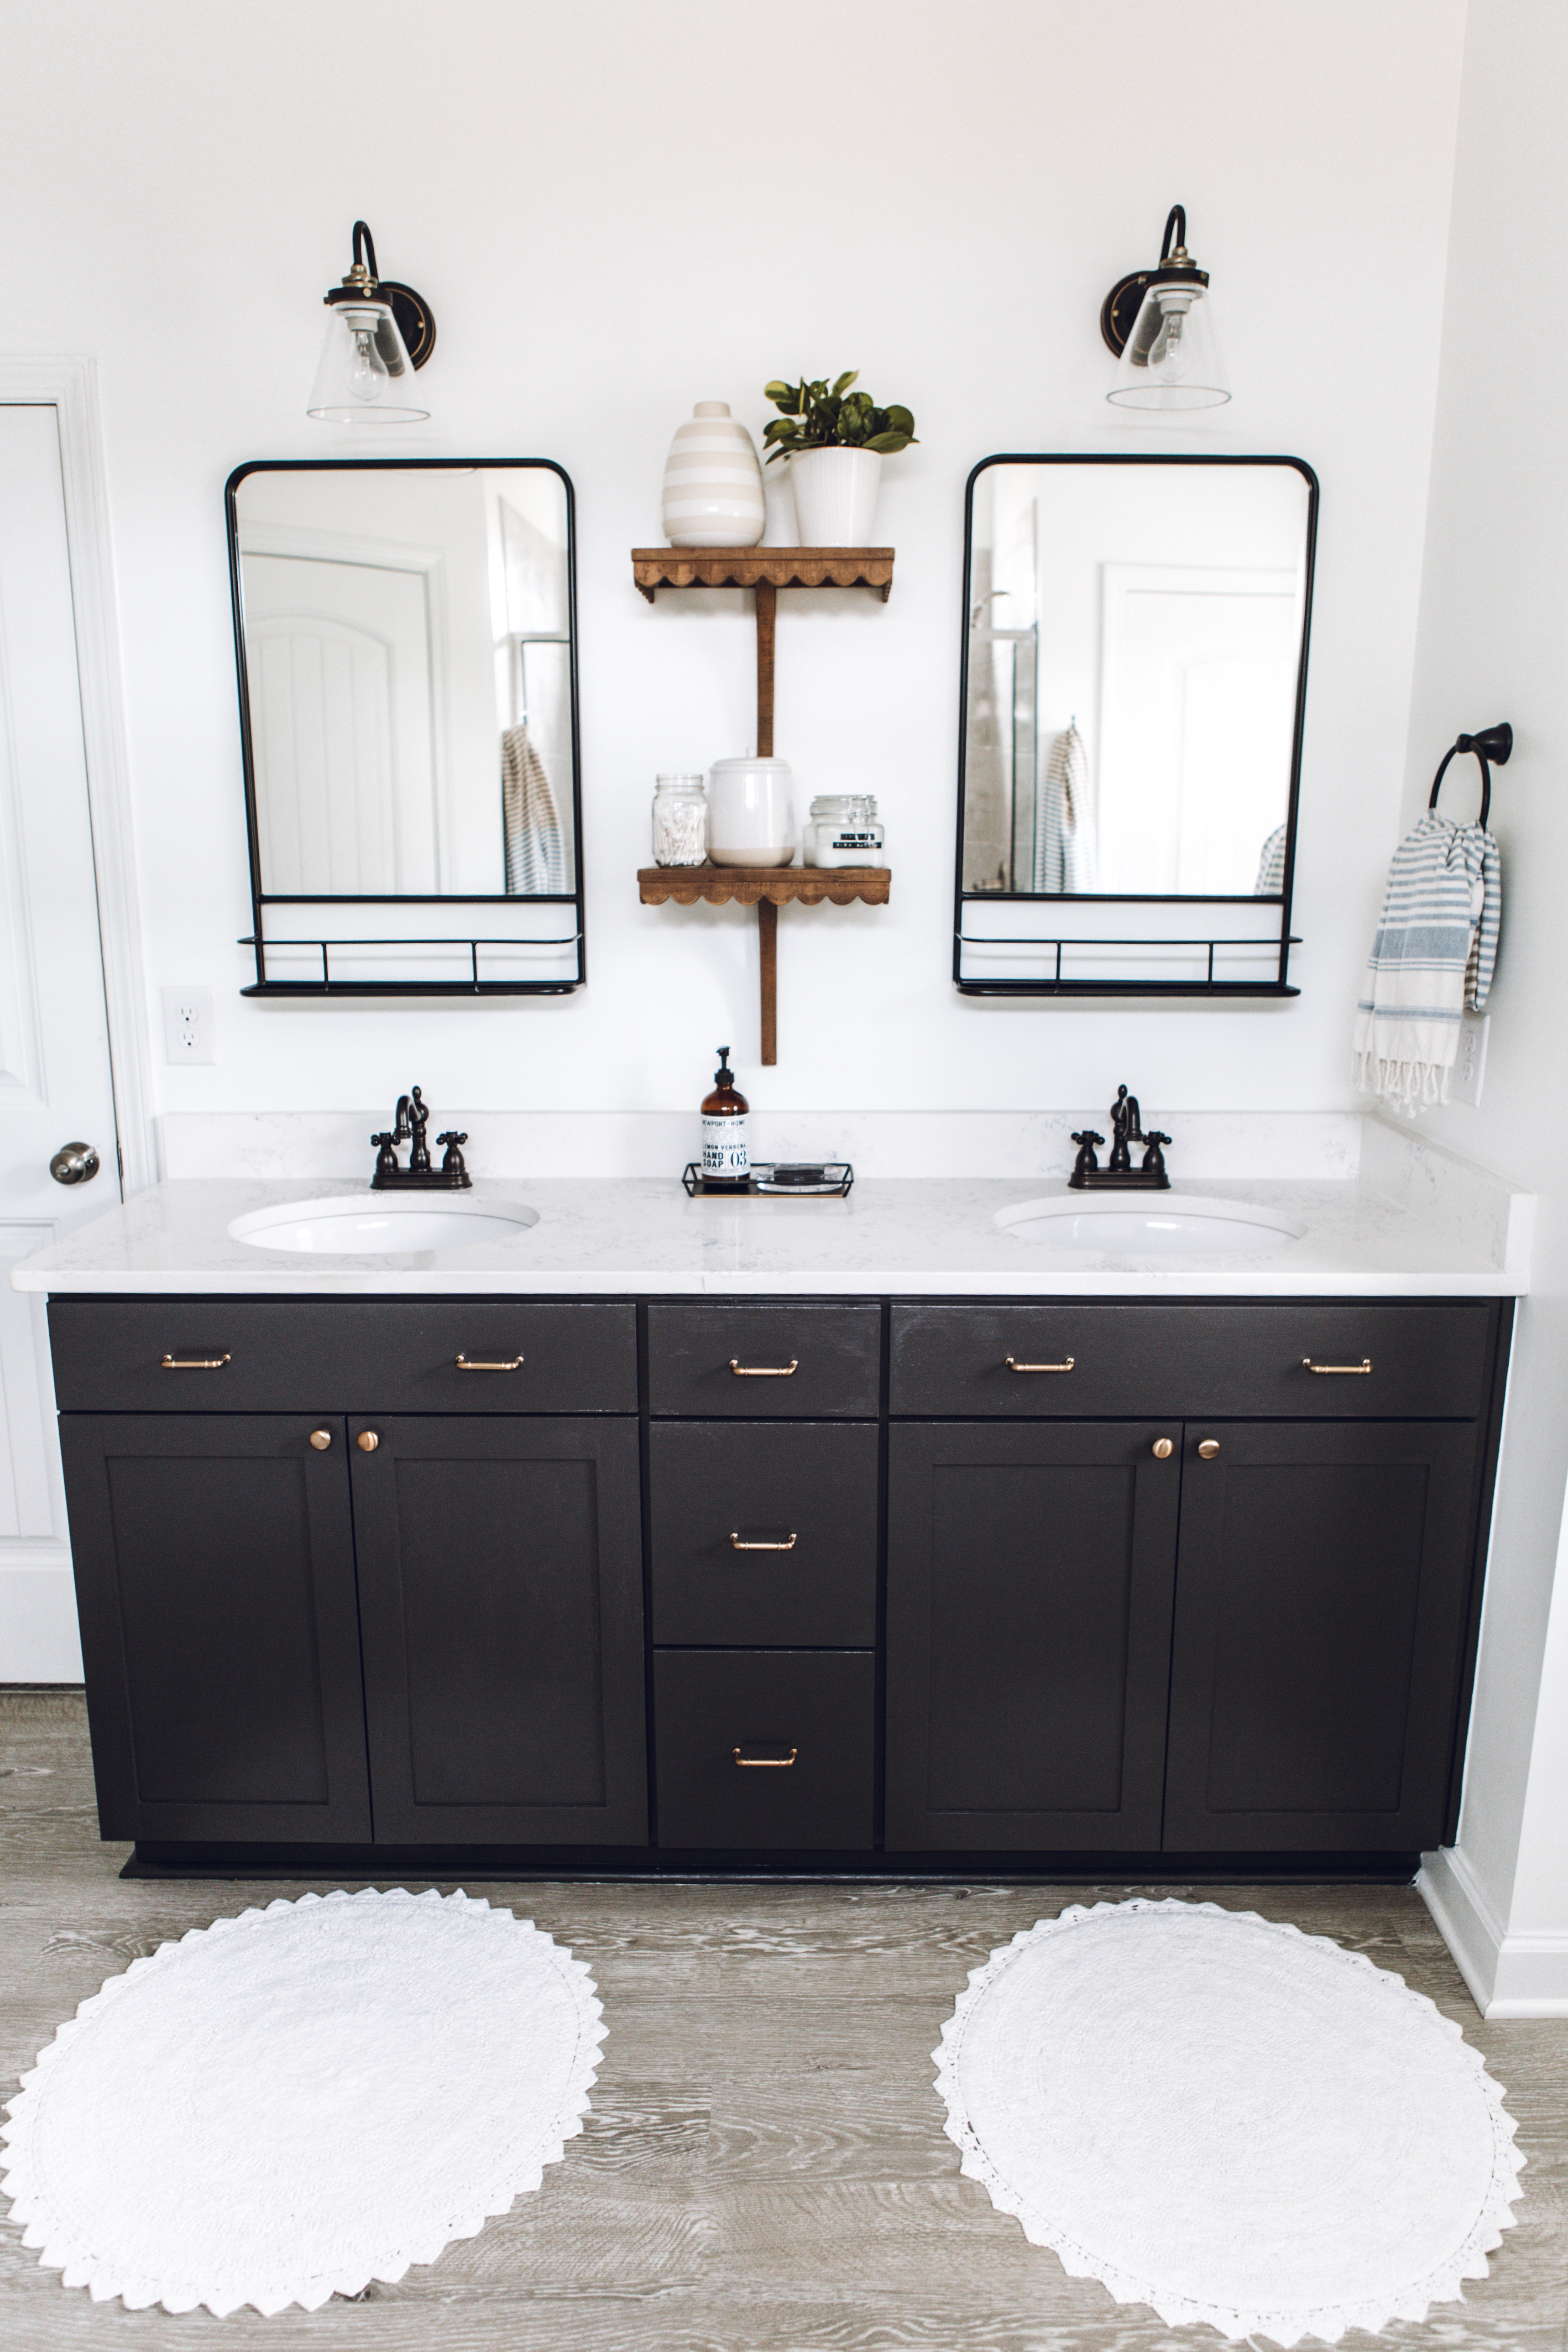
How the cabinets look now (you can see the full bathroom reveal HERE):
How to Paint Laminate Cabinets
TOOLS/MATERIALS I SUGGEST USING:
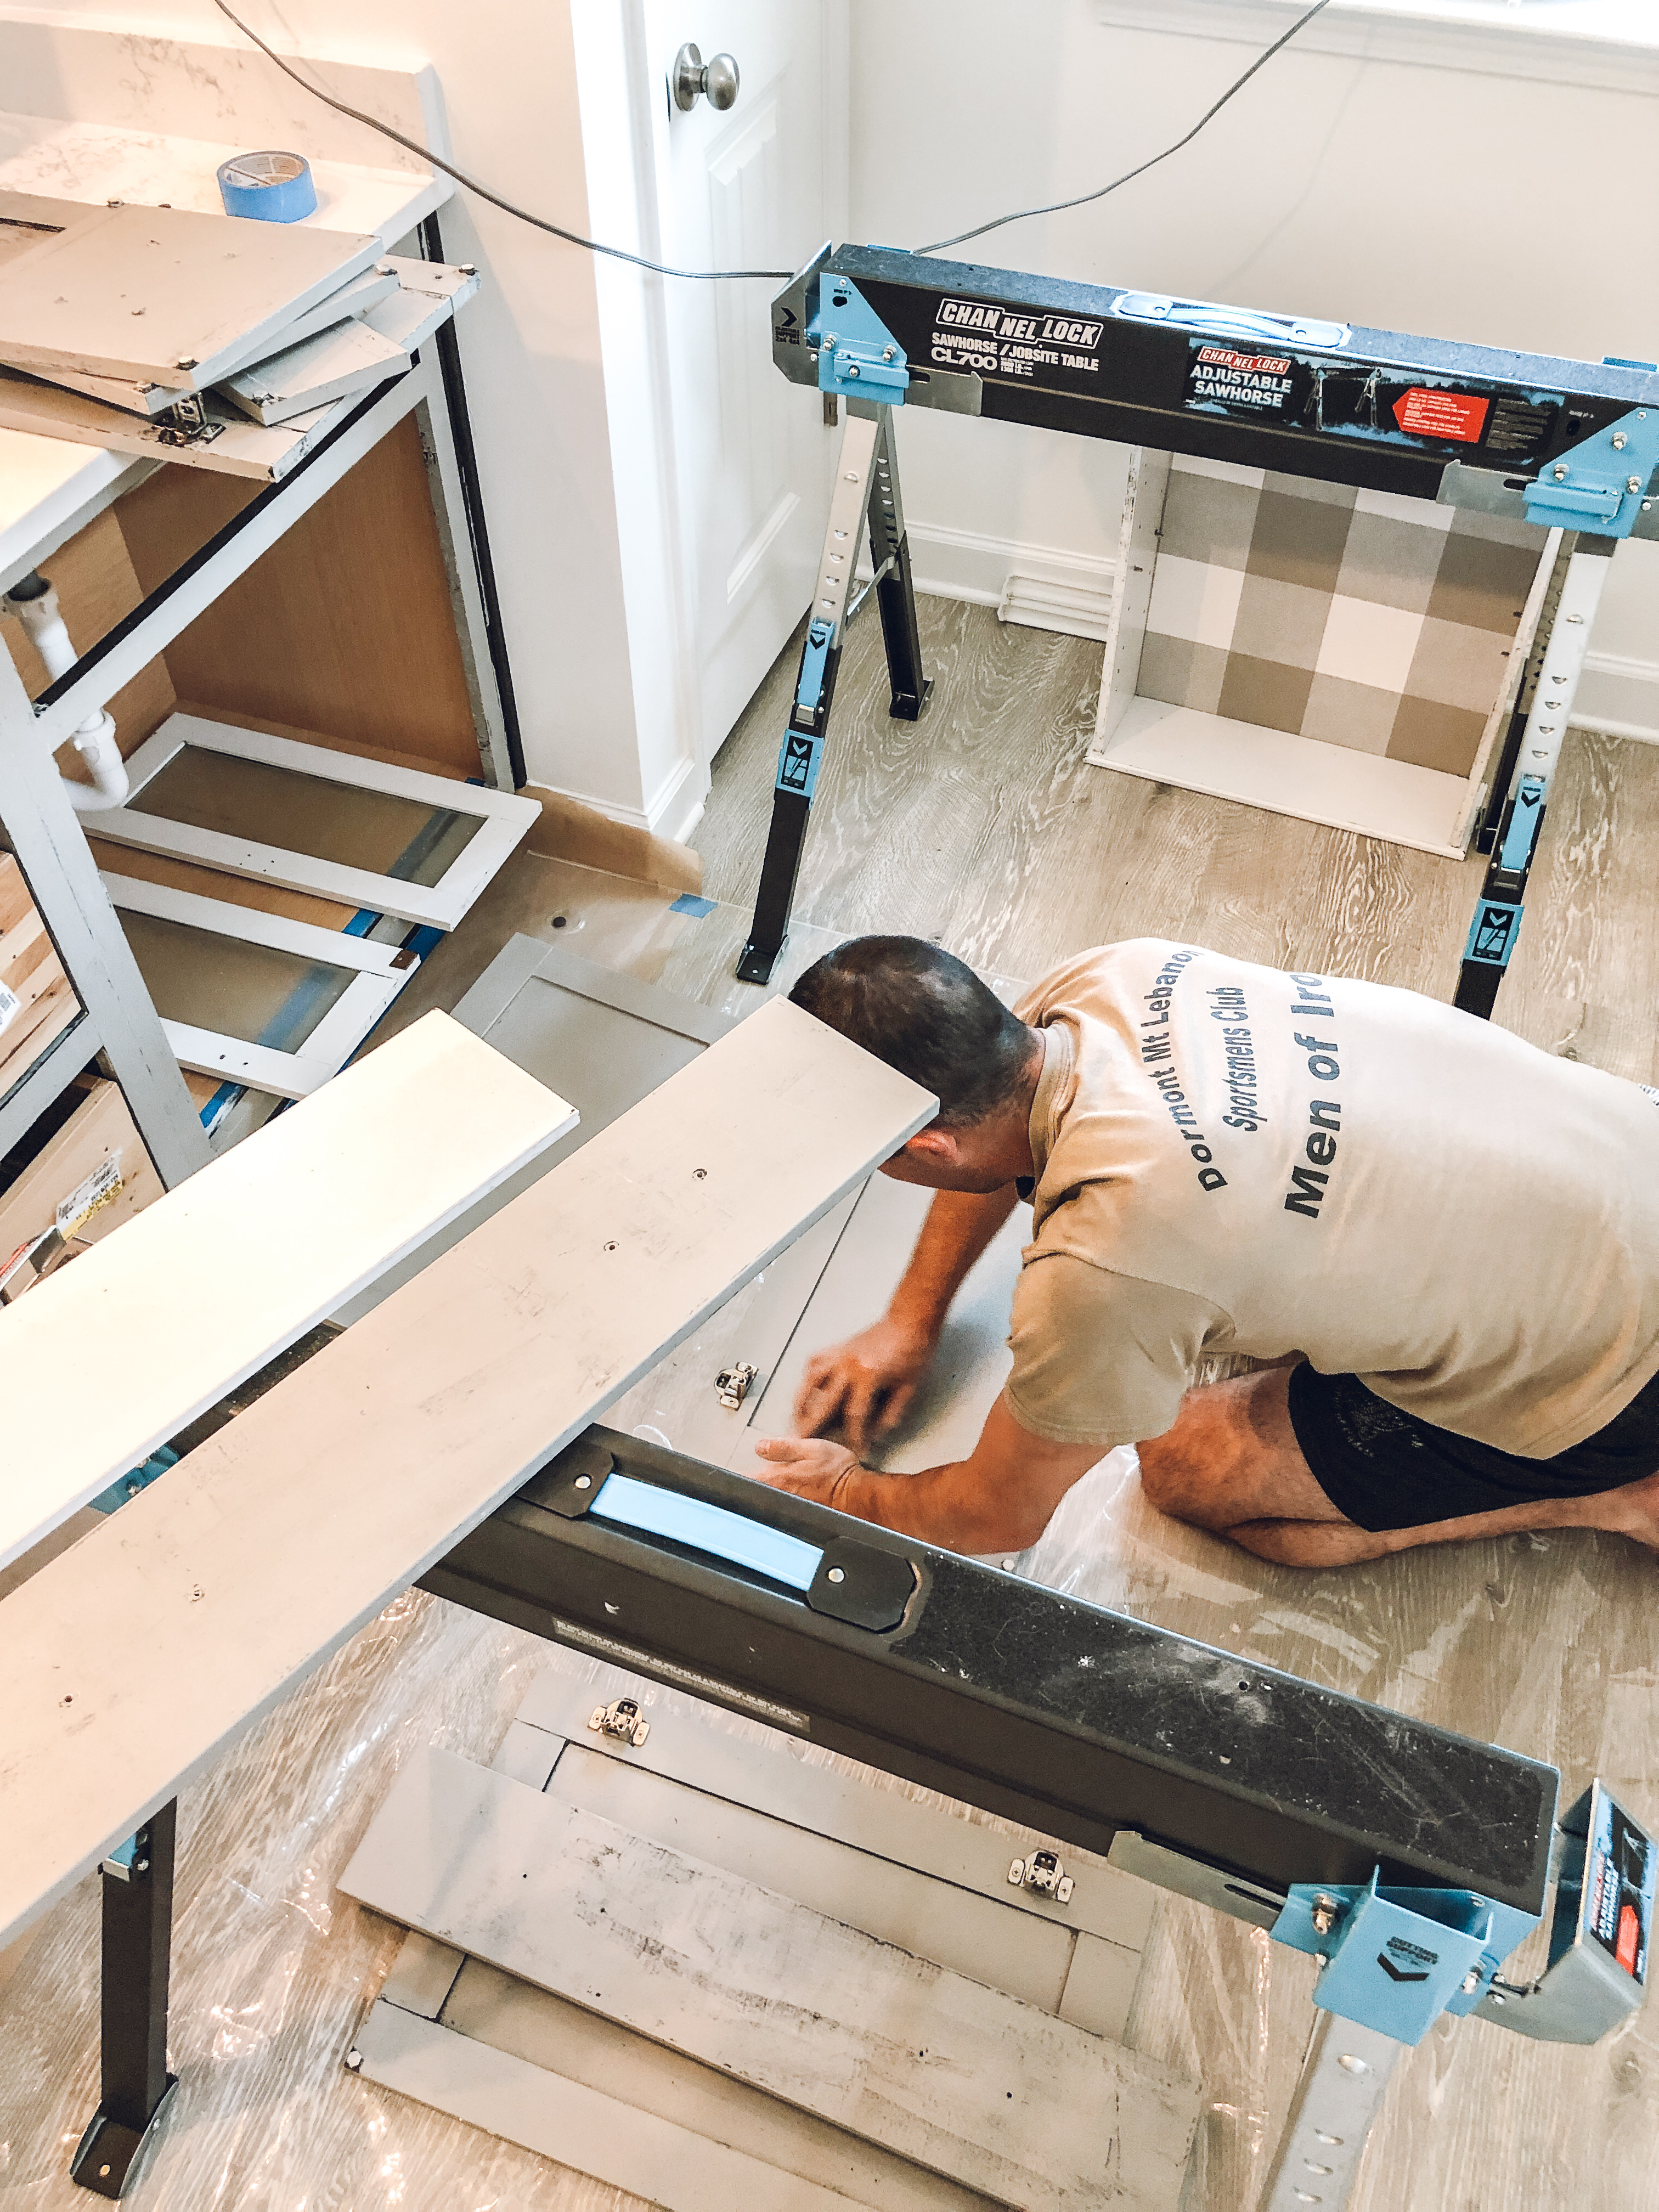
- We used THESE sawhorses to hold the doors off the ground. They were a gift from my parents and they are awesome! We highly recommend them.
- Liquid deglosser
- Sanding blocks – medium and fine grit
- Primer
- Benjamin Moore Advance Paint
- Drop cloth
- Painters tape
- Paint brushes/rollers/sprayer
- Cotton free cloths/microfiber cloths
- Minwax Polycrylic
PREP – this is the most important part! 100%.
- With a good bit of elbow grease, wipe down the entire piece with liquid deglosser using a lint free cloth. I’ve found that a microfiber cloth worked best.
- After 10 minutes, repeat step 1 again.
- At this point, if your piece looks and feels as though its not as shiny/smooth as it was before, I’d suggest testing a small area with your paint/primer and letting it dry. Once it is dry, test how it adhered by scraping your fingernails against it. If it peels right off and you can see the original finish underneath, I’d suggest continuing on with step 4. If not, continue on with the priming + painting portion of the instructions.
- If the finish still seems too smooth and/or shiny for paint to adhere, go over the entire thing again was a medium grit sanding block and wipe off all of the dust with a tack cloth. I also find it useful to have a vacuum nearby to clean up as much dust as possible.
- After sanding, I went over the entire vanity and doors one more time with the liquid sandpaper. I let it dry for 10 minutes before doing a small test with primer. If it’s still not adhering, sand again with the sanding block and go over it again with liquid sandpaper.
PRIME
- I used the Odorless Zinsser sold at Home Depot but I would go with THIS. Apply the primer using a paint brush and/or foam roller. However, I only used the brush simply because I didn’t want to have to clean up another container and roller every day. I also think that using a roller has a tendency to make the primer go on too thick and I don’t think it adheres as well in that case. Since this primer is oil based, use paint thinner in order to clean your brushes after painting. I would highly suggest wearing a respirator mask of some sort during painting and clean up and make sure the area in which you’re painting in has good ventilation!
- When painting double sided items, I would suggest waiting 24 hours before flipping it over to paint the other side.
- Before the second coat of primer, quickly go over the entire piece using a fine grit sanding block and then wipe off the dust with a tack cloth.
PAINT
- Use THIS paint. I can’t stress this enough! It was 100% worth the drive and extra cost. I tested the Valspar paint that we used on the first [failed] go around on the primer to see if it would peel and sure enough it did. It brought me some reassurance though to know that the primer underneath the paint didn’t peel. That told me that it was an issue with the paint not adhering to the primer, not the primer adhering to the vanity, which was my main concern. We used the satin finish and only needed 1 quart. For this vanity had them color match it to Sherwin Williams Caviar in a satin finish.
- Paint the first coat on the primed cabinets with the Benjamin Moore Advanced Paint using a brush, roller, or sprayer. We used a brush but I do think it would’ve looked even smoother using the latter two options.
- Let it dry for a minimum of 16 hours before applying a second coat.
- Remove the painters tape while the paint is still wet.
- Let the second coat dry for a minimum of 24 hours. The longer you can let it dry + cure, the better! We finished painting ours right before we went away for a week and let it be.
SEAL
- Considering how much time we had put into painting, because we didn’t want there to be any chance of chipping/peeling, and because these cabinets are used daily/in the bathroom, we decided to seal the vanity. I applied two coats of THIS because it’s what we had on hand and I wanted more of a matte finish. It’s still not completely matte but it is less shiny than it was before. If you’re painting kitchen cabinets I would definitely seal all of your hard work! I’ll report back to how these hold up in a year from now but so far this paint is not going anywhere!
- Let it dry for another 24 hours after the last coat of sealer is applied before adding hardware.
- Enjoy!!!!!
A couple of things I want to reiterate – the prep work is so important! Don’t skip it like we did the first time. Also, the Benjamin Moore Advance Paint is worth every penny. I will never paint another cabinet using a different product.
I hope this helps!!! I know a lot of you have plans to paint your kitchen/bathroom cabinets. If you do, share your photos on Instagram and use the hashtag #jordyjeanDIY! You all will rock this! Let me know if you have any questions that I didn’t answer in this post.
I sincerely appreciate you all shopping through my affiliate links like the ones included in this post. I make a small commission when you purchase through these links at no extra cost to you. These funds help support my family and allow for us to produce better content for you all. I can’t thank you enough for supporting all that we do!
Pin this image to save for later:
jordan jean
Leave a Reply


At my Home Depot in Guam, it is limited so there is no Benjamin Moore advance paint but it does recommend Behr satin cabinet, door, trim enamel paint with the Behr bonding primer. Have you had others try this product instead? If so, What is the result?
Hi Jenais!
I’ve since wrote a new post about how I’d recommend painting cabinets:
https://jordanjean.com/way-better-than-before-kitchen-my-new-recommended-method-to-paint-cabinets/
I do think the Behr product could be a good one! However, the prep will be much more labor intense compared to using the HTP paint that I recommended in the post I shared above. I hope that helps!
Hello. I hope that this finds you doing well. I’m going to be refinishing some laminate cabinets, doors and drawers and I would very much like to do them with your instructions since I feel confident in you and your tutorial. When I click on the items to purchase it is showing me that some are unavailable with no picture of the item. For example, under list of needed items, liquid deglosser. Can you please share with me a picture and name of the exact brand and type of liquid deglosser that you used? I want to have great results like you had so I’m wanting to follow exactly what you did. I look forward to your response. Thank you!!
Hi Angel! Since completing that project, I’d recommend using this product instead! Heirloom traditions paint actually offers a bundle that you can use to complete your entire project. A few of my friends have done projects using the bundle (entire kitchens!!) and I plan on sharing a blog post about it soon! The results have been PHENOMENAL! And so straightforward to use. If you join the Heirloom Traditions Facebook group there’s also tons and tons of helpful information. They also have live tutorials on their website. You can find the bundle here and if you join the Facebook group and find the cabinet bundle, there is a discount code in the comments. I hope this helps! I hope to get the blog post up soon. https://www.allinonepaint.com/project-bundles/countertops/cabinet-gallon-bundle-deluxe.html
In this post you state the primer you used was oil based. However, both links for the primer lead to water-based primer. Was it this one you used?
https://www.homedepot.com/p/Zinsser-Cover-Stain-5-gal-White-Oil-Based-Interior-Exterior-Primer-and-Sealer-3500/100207033
Yes! I’d recommend this oil based primer. https://www.homedepot.com/p/Zinsser-Cover-Stain-1-gal-White-Oil-Based-Interior-Exterior-Primer-and-Sealer-3501/100398377
I can’t read you font it is too small
I would look into the settings on your browser to troubleshoot this! It is readable on my end and this is the first time I’ve been told this despite the thousands that view this blog. Sorry I can’t be of more help!
Thank you for all these detailed instructions. We are getting ready to attempt doing our kitchen cabinets! Eek 😉
So a year later how well has the paint job held up?
Really well!!! We have 0 scratches on them whatsoever and they have been easy to wipe down. I’m really pleased with the results. Definitely took quite a bit of time but I do believe it was worth it.
Hi, would laminate be the same thing as mdf/melamine/vinyl? I’ve heard mine referred to as all 4 and I don’t know if there is a difference lol!
I believe those are all a form of pressed wood cabinets. I’d treat them the same way as I did in this post! 🙂 It’s basically a shiny-ish coating on the outside that makes it more difficult to paint and avoid scratches/chips compared to something like solid wood cabinets.
Awesome thanks so much!!
Where did u get the bathroom mirrors? I liove them !
Thank you! They’re linked here but they might be sold out 🙁 https://jordanjean.com/our-home-shaw
Hi! Thanks so much for this! Will a paint thinner work in a similar way as the liquid deglosser? or is there any other products you recommend that could achieve the same results as the deglosser?
No! I would do a liquid deglosser specifically! Hope that helps!