October 23, 2018
This post may contain affiliate links.
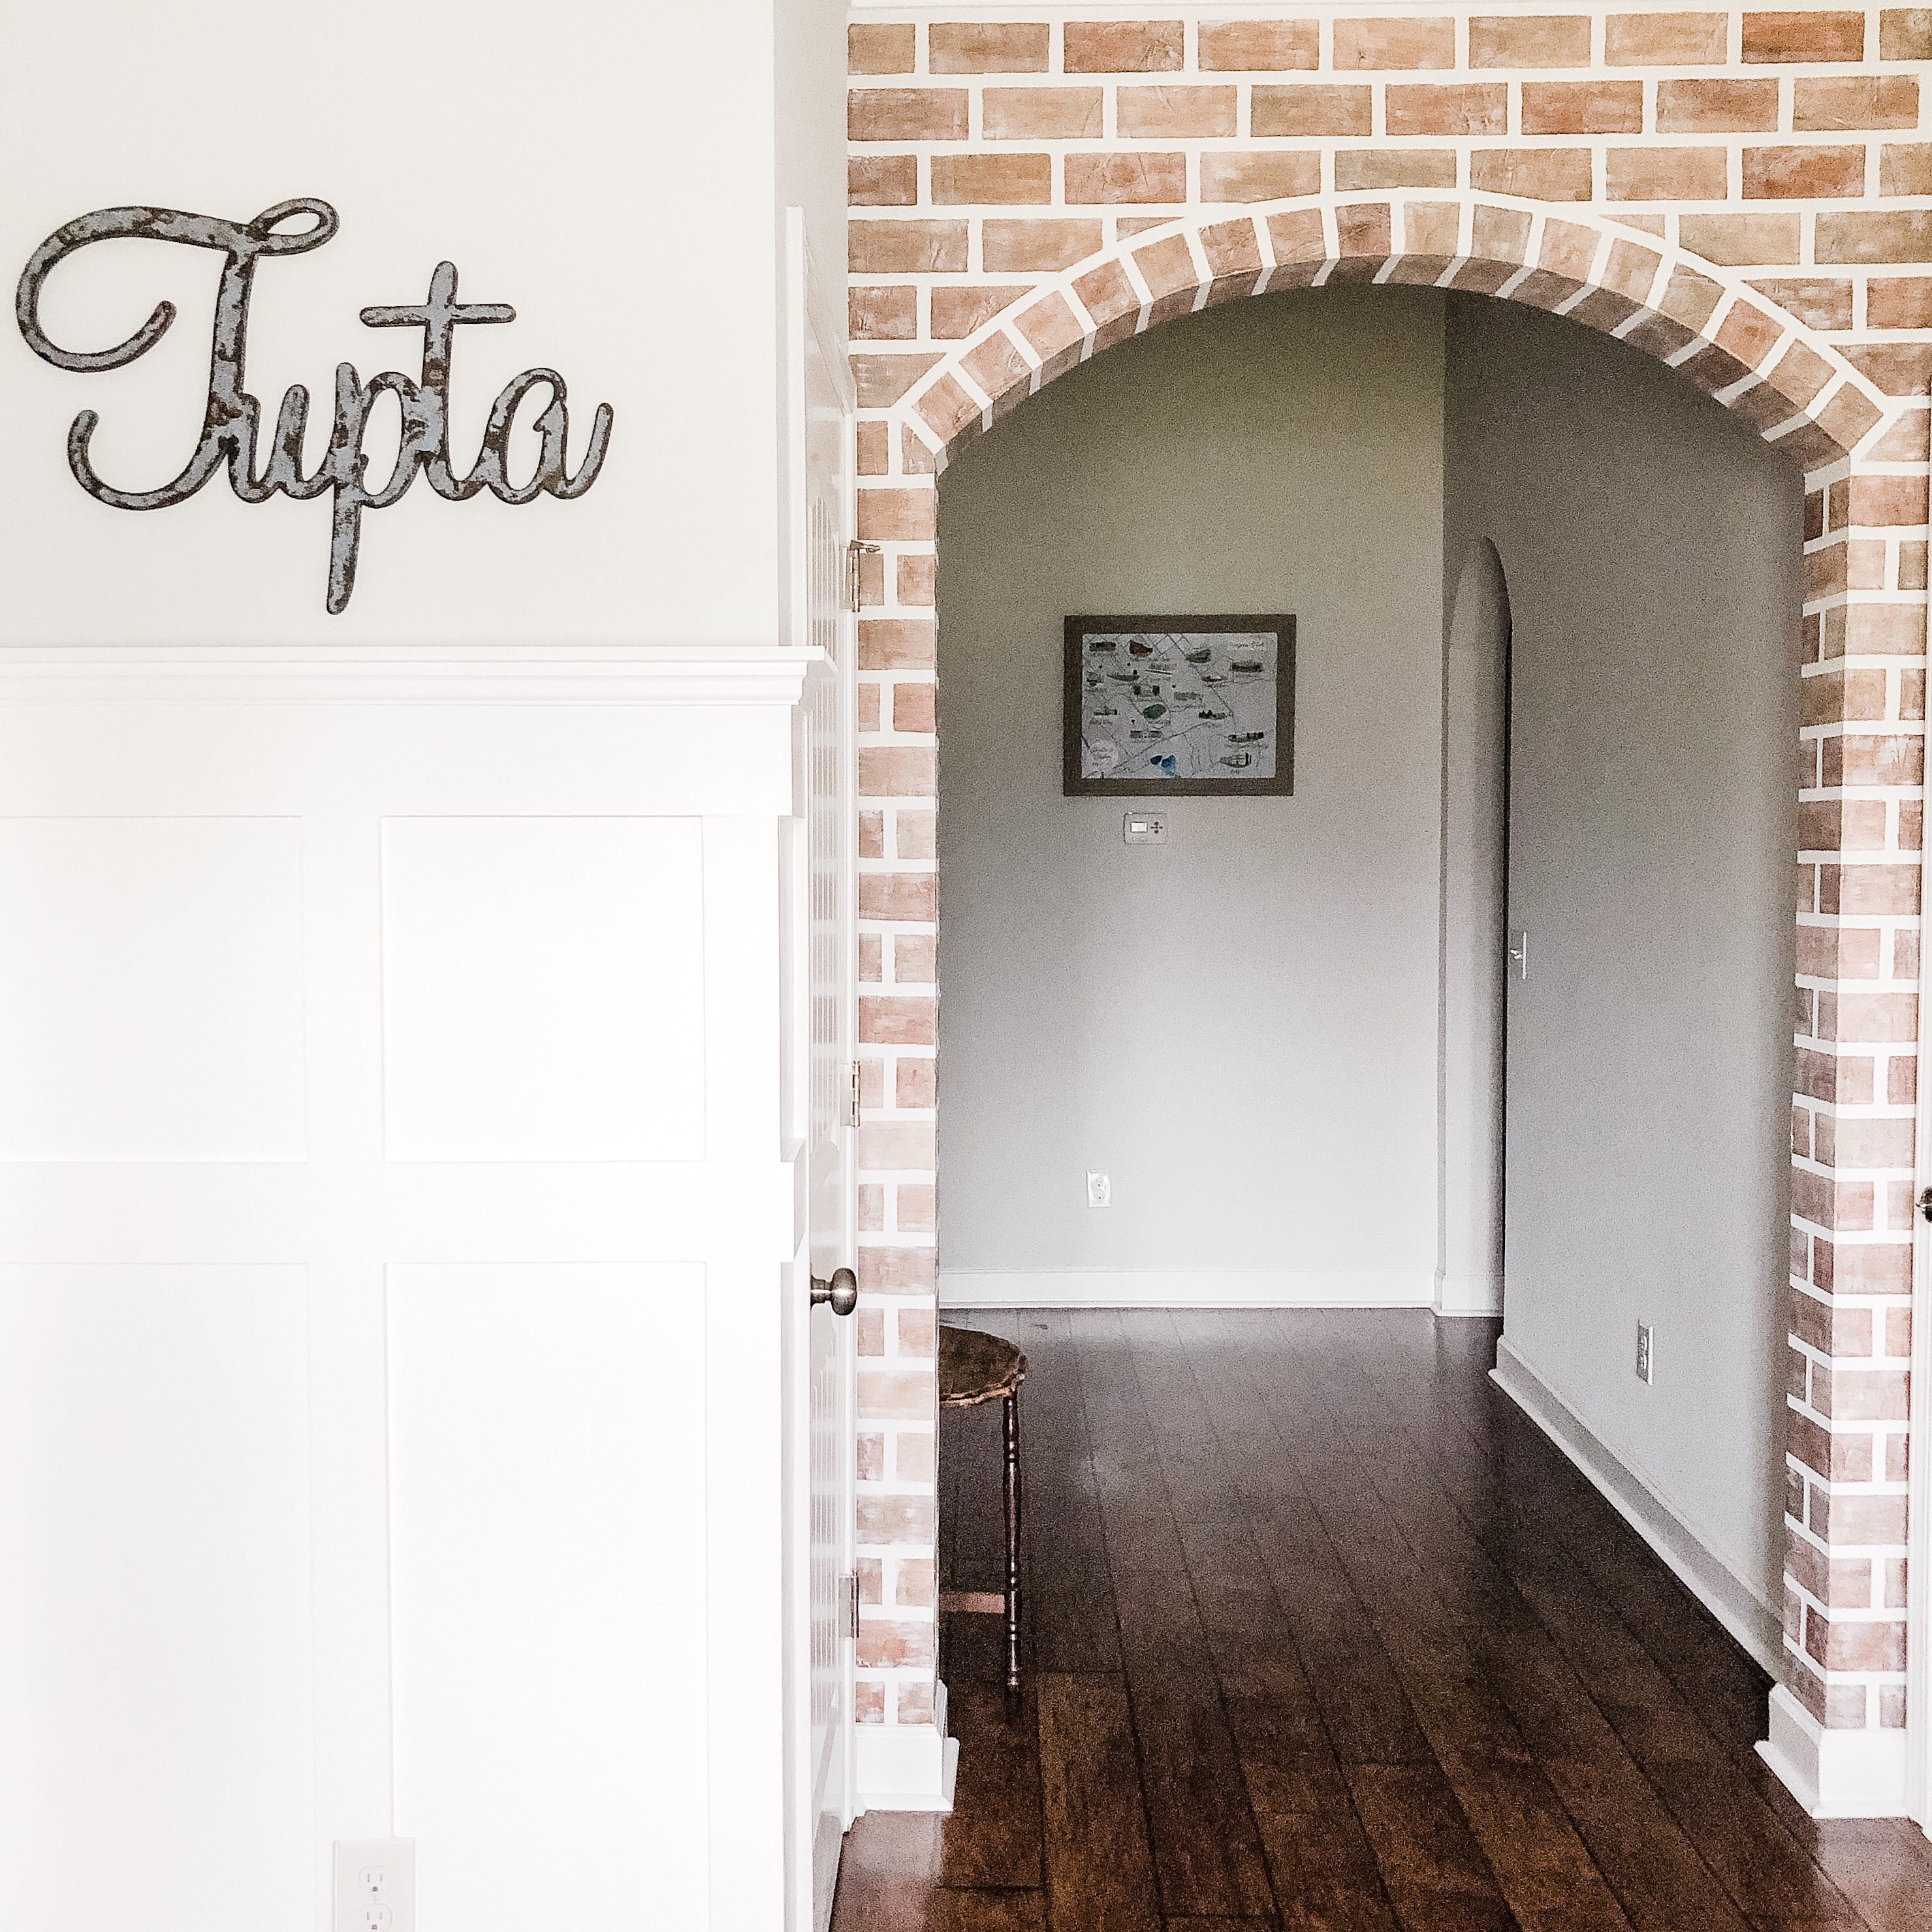
FINALLY! Goodness gracious, Jordan. This is something that I’ve been meaning to share for a couple of months now and I’m finally getting around to it — the faux brick archway tutorial. This is my second time taking on a faux brick project and I think this one takes the cake for me. I love how it turned out and I love the character it adds to the space. I think it’s also really great that it’s 100% customize-able. Not only during the process but after! If I decide sometime down the road that I want the bricks to look more red, easy. I’ll just paint on some red colors throughout. If I want it to be more white, I’ll add some more white to the bricks. It’s so versatile!
I was planning on getting this project done in 5 days but that didn’t happen (it took me 7 from start to finish… Only working during off-work hours). It takes awhile because their are quite a bit of steps and this was a large space to cover but HAVE NO FEAR! You can do it!
I’m going to walk through these steps to explain how I went about this arch shape. However, if you want to do something like a fireplace, check out this post to learn how to do that.
What You’ll Need:
- Joint compound: I used this one but I’ve also seen this one used. I tried to find the DAP version but they didn’t have it in Home Depot when I looked. This one was great and so inexpensive!
- Scraper: I used a cheap plastic one that I had on hand.
- Making tape: I used this one from Target or you could order this one off Amazon.
- Level/measuring tape/ruler
- Optional: a 3″ wide piece of MDF/wood/cardboard
- Pencil
- Primer: I used this one which I’ve used for lots and lots of projects.
- Chalk Paint: I used this one. It’s inexpensive compared to other chalk paints, it’s easy to find and it works well!
- “Brick” colors: I used this paint in the colors dark taupe, khaki, and brown that I found at Michael’s. Really you could use whatever tones you want for this. If you want to have a redder brick, pick colors with more red tones in them, if you want a completely white “bricks” then you don’t need these colors. Don’t forget to use a coupon!
- Brushes: A bristle brush for the primer and chalk paint like the largest one in this set. I used a sponge brush for the brick colors worked for me but really you could use anything. I just used what I had on hand.
What To Do:
Before I explain all of this let me say that your bricks do not have to be the exact same size and you do not have to use the colors I used. Do whatever makes you happy and works for your space! I didn’t follow a tutorial or anything to do this so a lot of it was just me and Stephen standing there trying to imagine what would look best and the most “realistic”. It’s not perfect. In fact, you might be able to spot my ONE oopsie I made but it’s okay! Maybe the “contractor” just never noticed that the company that produced the bricks cut one an inch short. 😉
Hopefully this helps! I’ve included some videos because I know videos are much easier to understand most of the time!
TAPE:
- Start by taping off the bricks along the underside of the arch first. These are the bricks that you’ll see the “short sides” of when looking at the big picture. I made each brick 3″ wide so I started by taping off the edge of the arch and then measured from the outside edge of the tape 3 inches. Use the level to create a straight line, mark with a pencil, and then tape on the outside of the pencil mark. Use the level to make sure the tape is straight and adjust if it’s not.
- Tip: to make this process MUCH easier and faster, cut yourself a 3″ wide piece of wood, MDF, cardboard, whatever you have. Then just use that as a stencil to make your pencil lines by holding it against the outside edge of the tape from the previous “brick”. Don’t go onto the next line without taping off the pencil mark first or your bricks will be too small.
MEASURE – MARK – TAPE … MEASURE – MARK – TAPE … MEASURE – MARK – TAPE …
- Tape off the arch on the side of the wall. Use the lines you created on the underside of the arch as guides for the width of the bricks. Continue the pre-existing pencil marks on the underside on both sides of the wall 3″ up to finish off the “short side” of the brick and draw a horizontal line to indicate the top of the bricks. Tape off the pencil marks (these should be in line with the tape you put on the underside) for the sides of the bricks and then tape off the top part of the bricks by taping along the horizontal lines.
I know this is confusing and a lot of words so here’s a poor quality video to help give you a visual…
ARVE error: Mode: lazyload not available (ARVE Pro not active?), switching to normal mode
- To start the straight bricks, you’re going to do the same process that I shared for the faux brick fireplace. Start by taping off a [level] line all the way across where the arch wall meets the ceiling and measure down 3″ from the bottom of the tape, draw a level line all the way across, tape underneath that line.
- Now you should have 2 horizontal lines of tape going across your entire arch wall. From there, measure 7″ from the left wall, mark a vertical line with the pencil and tape off on the outside of that line. Measure 7″ from the outside of the tape, pencil a vertical line, tape off on the outside of the pencil line, etc. until the entire row is finished.
- For the next row, measure 3″ down from the horizontal line and tape off that entire horizontal line. Then, to stagger the bricks, measure 3.5″ (half of 7″ 😉 ) from the left side of the wall. Pencil, tape, and then measure 7″ to create a full brick, pencil, tape, measure, etc.
- Tape your horizontal line, measure 7″ from the left side of the wall. Pencil, tape, measure, pencil, tape. etc. Then 3.5″ from the wall, etc. Do this until the entire top portion is complete.
- For the “pillars” (I can’t think of another word to explain them) going down the sides of the arch, we wanted the bricks to remain staggered so we basically found the middle and taped every other brick down on all sides. If you look at them you’ll see that every other row on both sides of the pillar is alternating. Words are hard… Just look at this picture to figure out what the heck I did.
- Measure and tape the entire space off before moving onto the joint compound step!
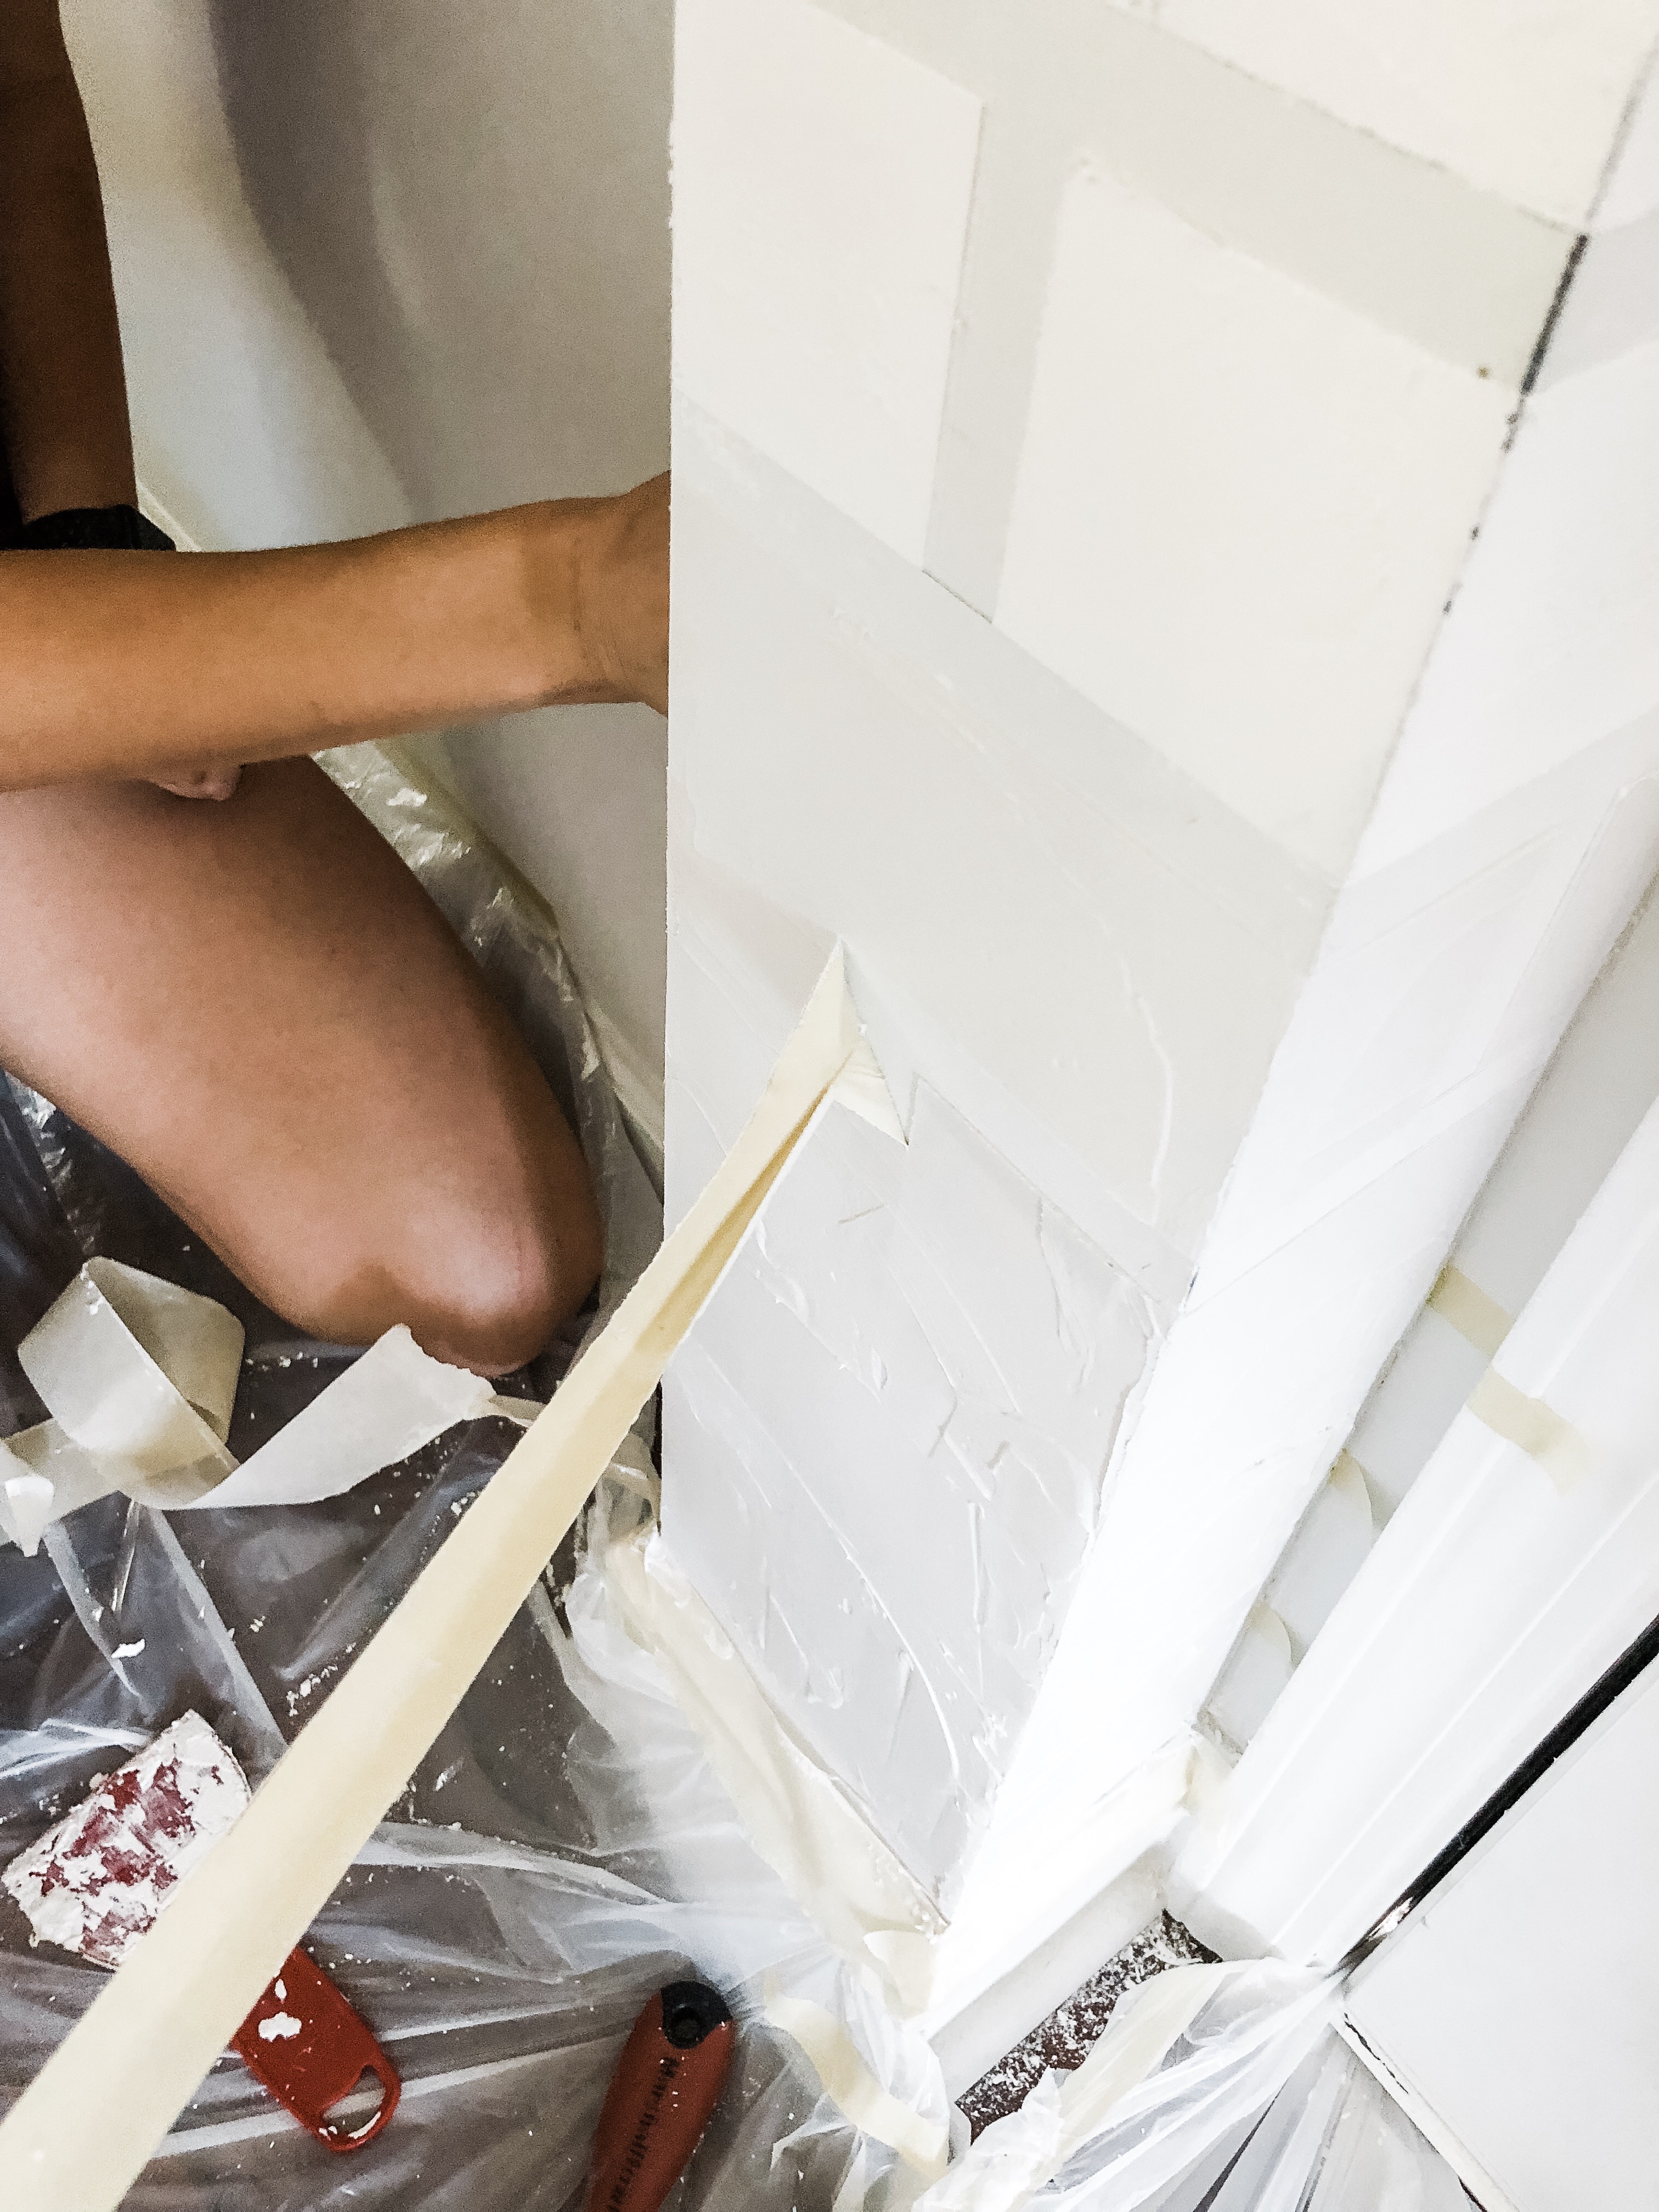
JOINT COMPOUND:
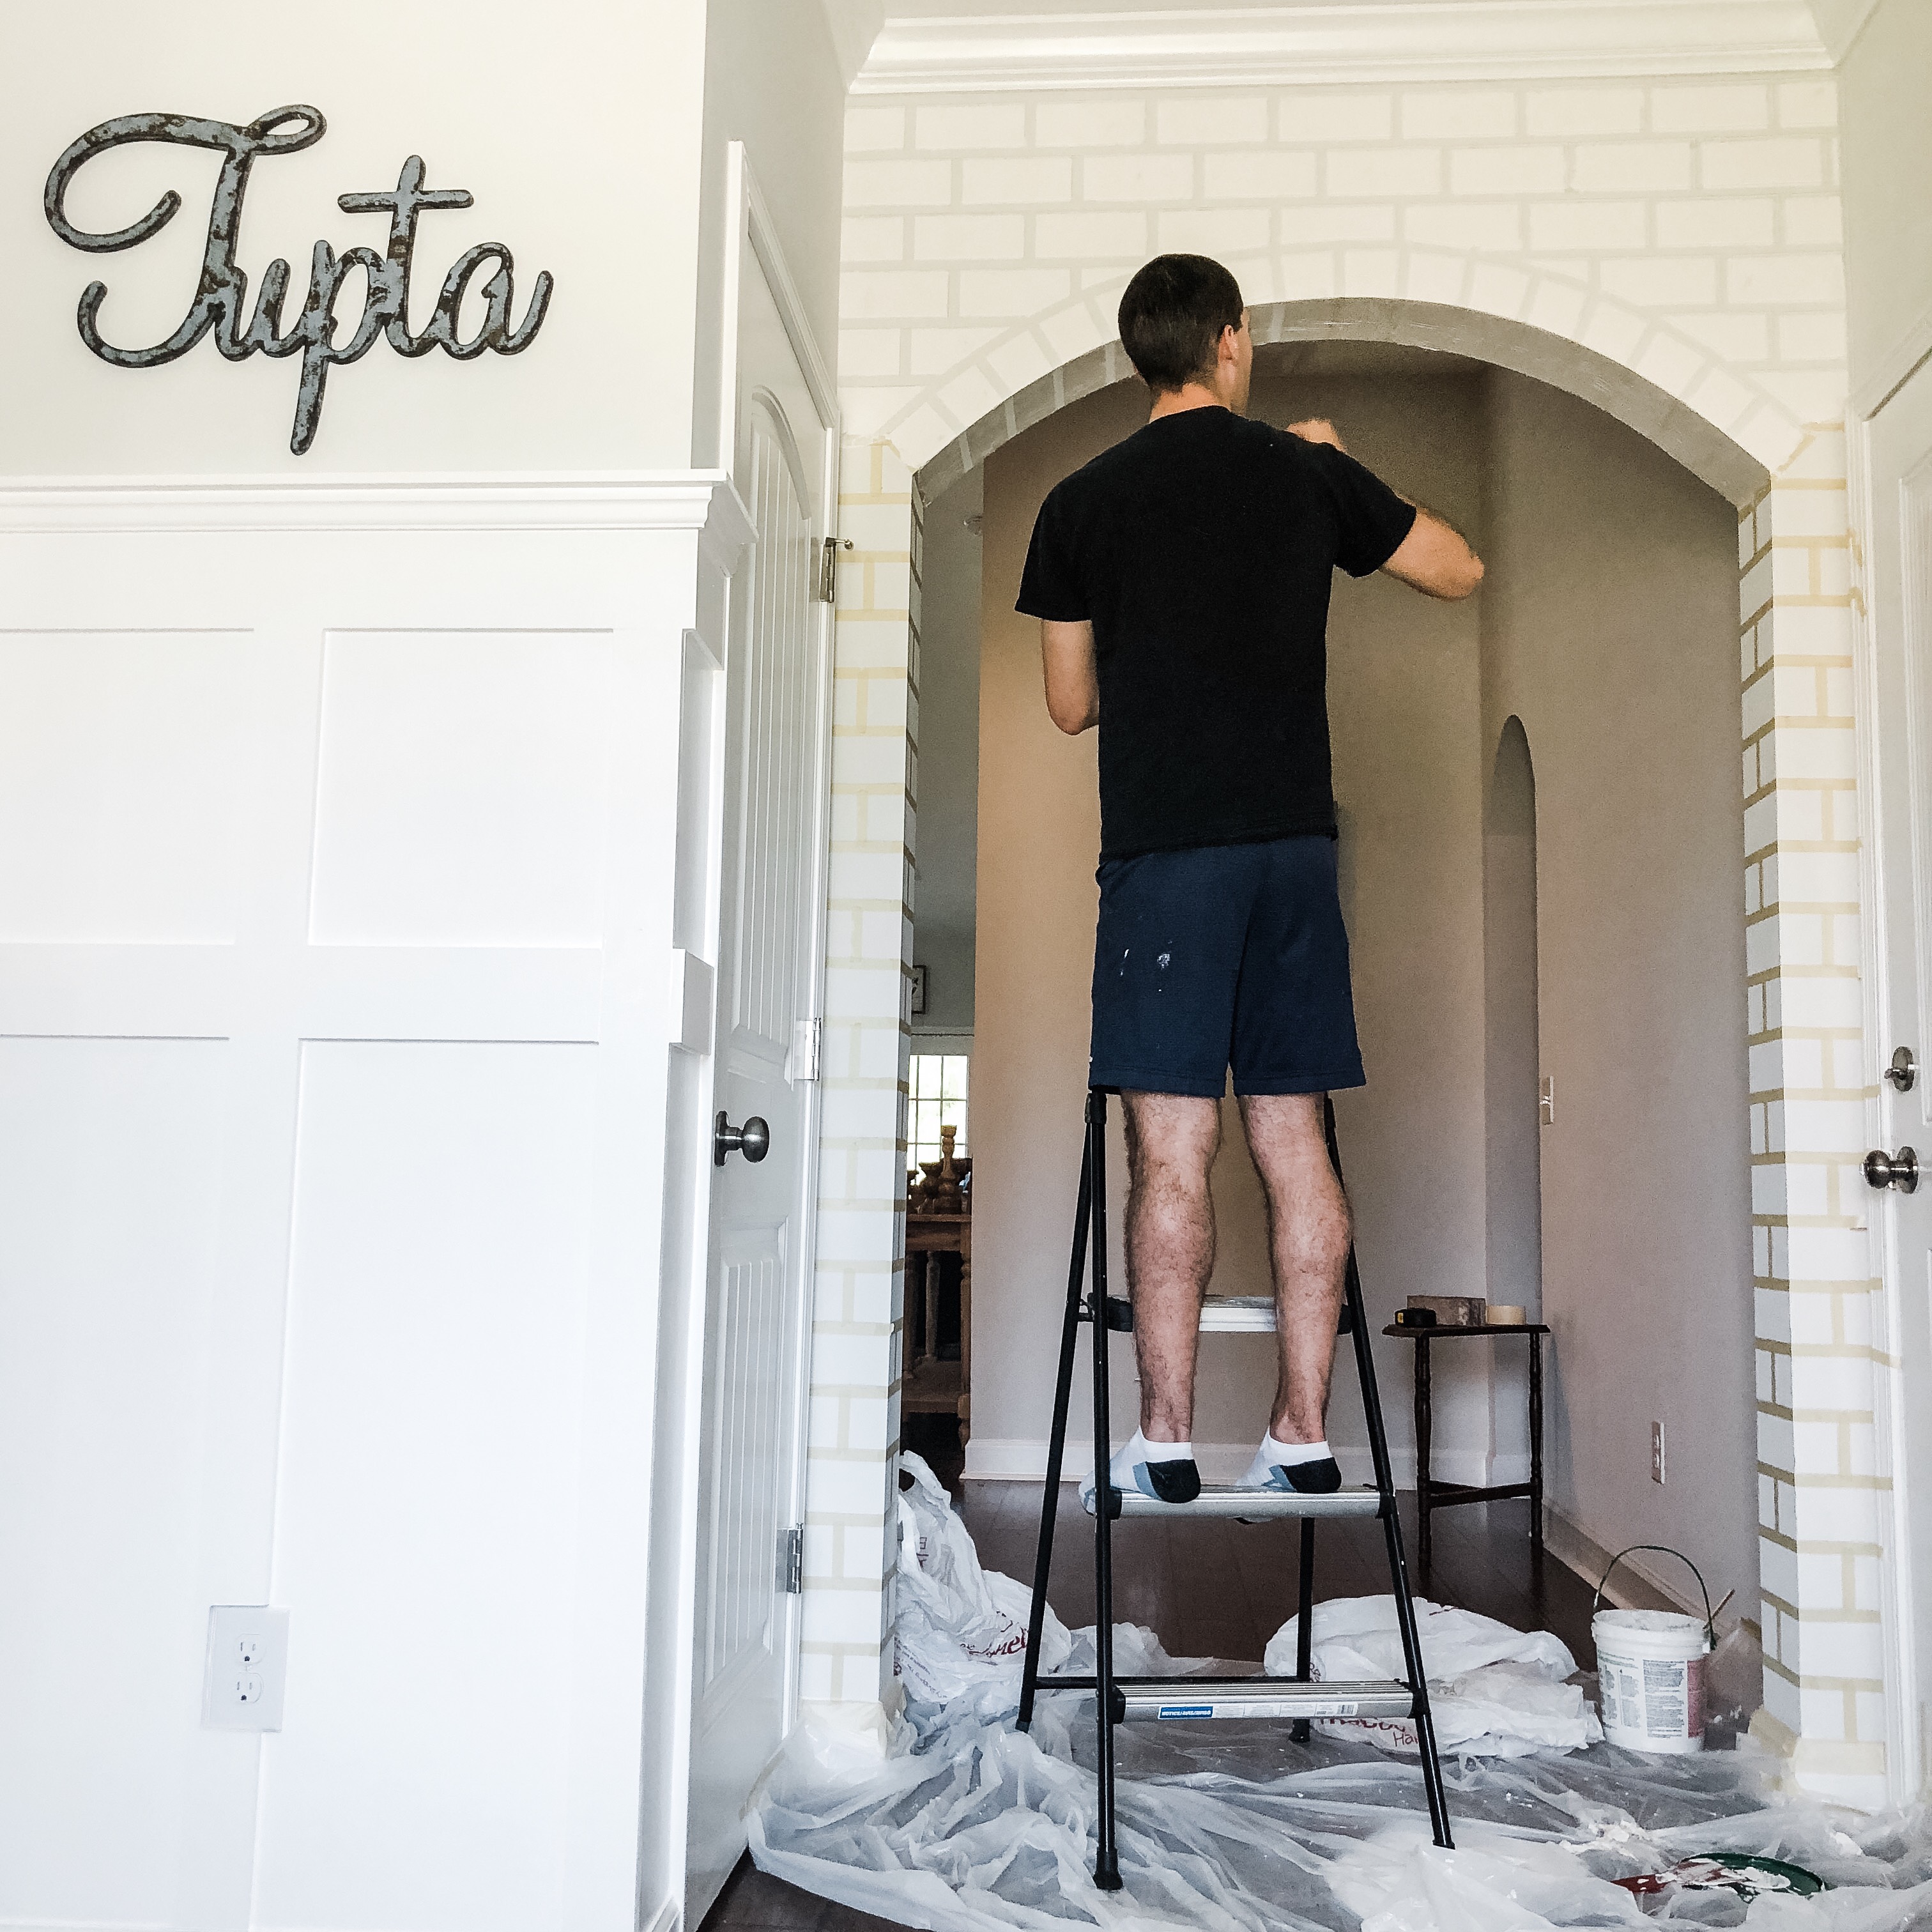
- Since this space was so much larger than the fireplace, we had to apply the joint compound to the wall in smaller sections because the tape has to be removed before the joint compound dries.
- We applied the joint compound starting at the top on one side and then moved to the top of the other side of the wall. I suggest doing it this way because removing the tape can be pretty messy and if you already have compound on the wall at the bottom, for example, chances are likely that it’ll get messed up as you’re doing another part of the wall.
- Stir your bucket of joint compound first using a paint stirrer so that it is not runny and sticks properly.
- Using a scraper tool, apply the joint compound liberally on the wall over the tape.
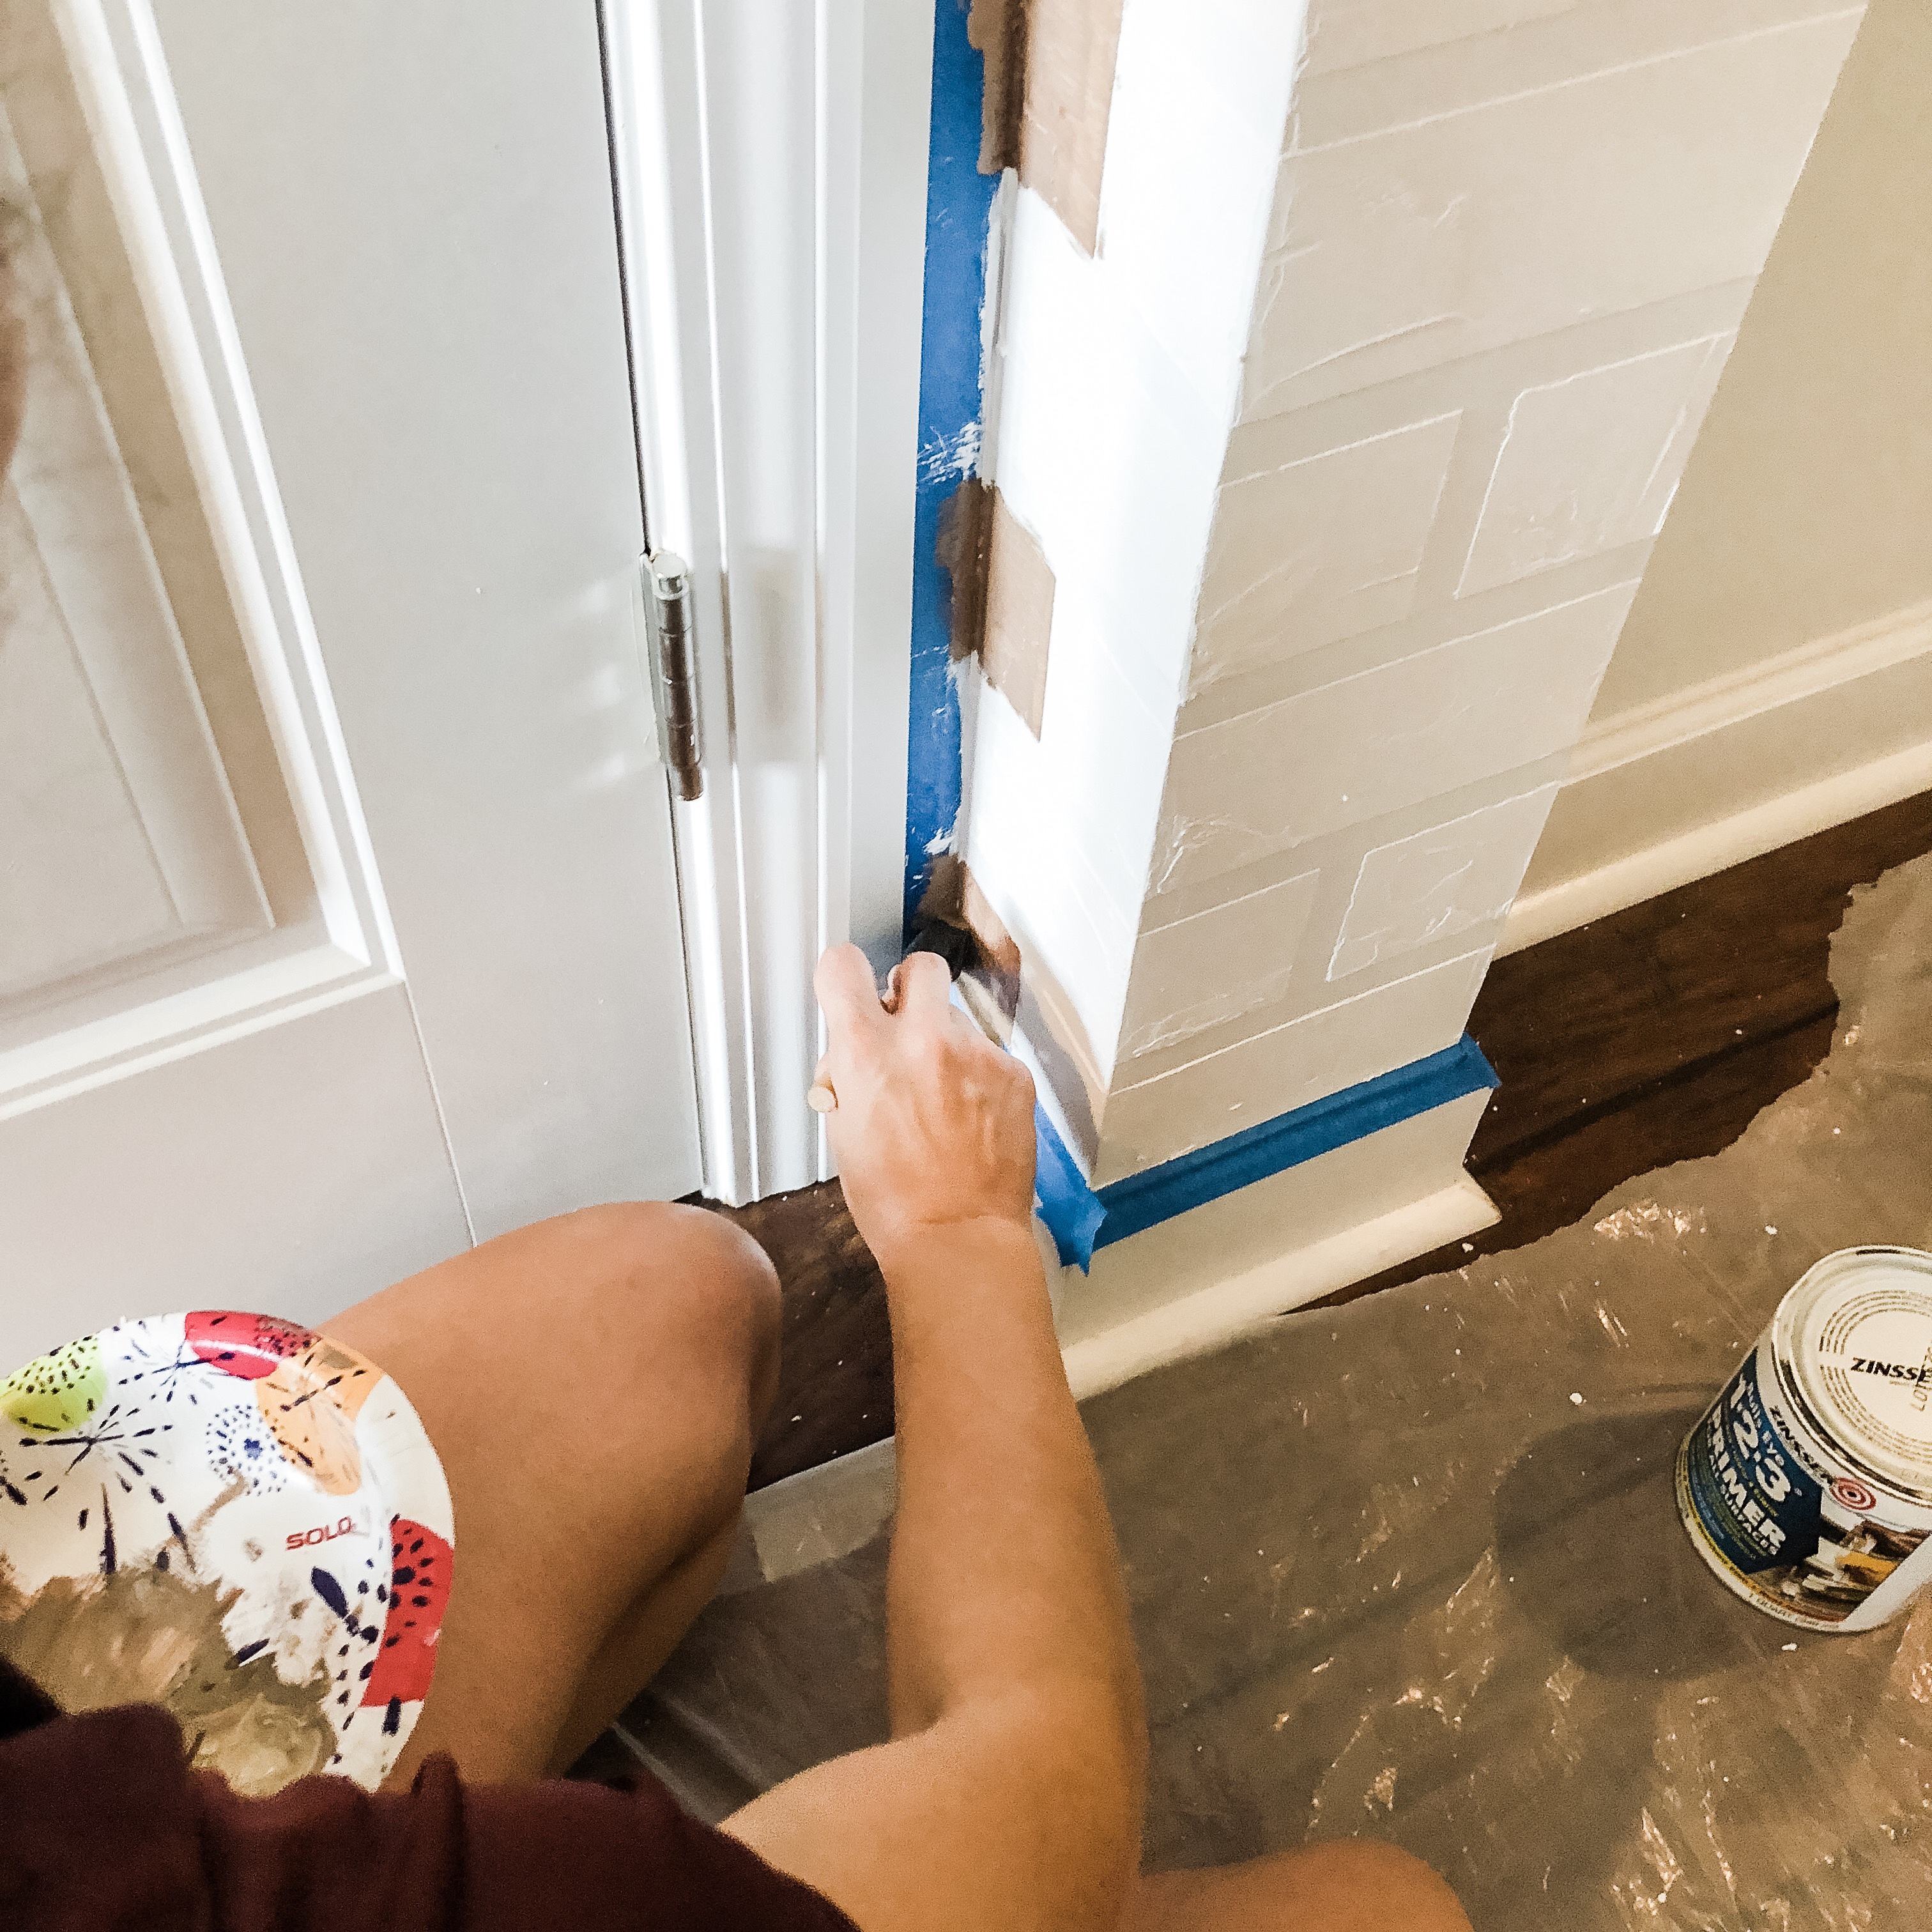
- Tip: when doing a tricky area where there is little space for tape, use a (clean) straight edge to act as tape to protect the wall.
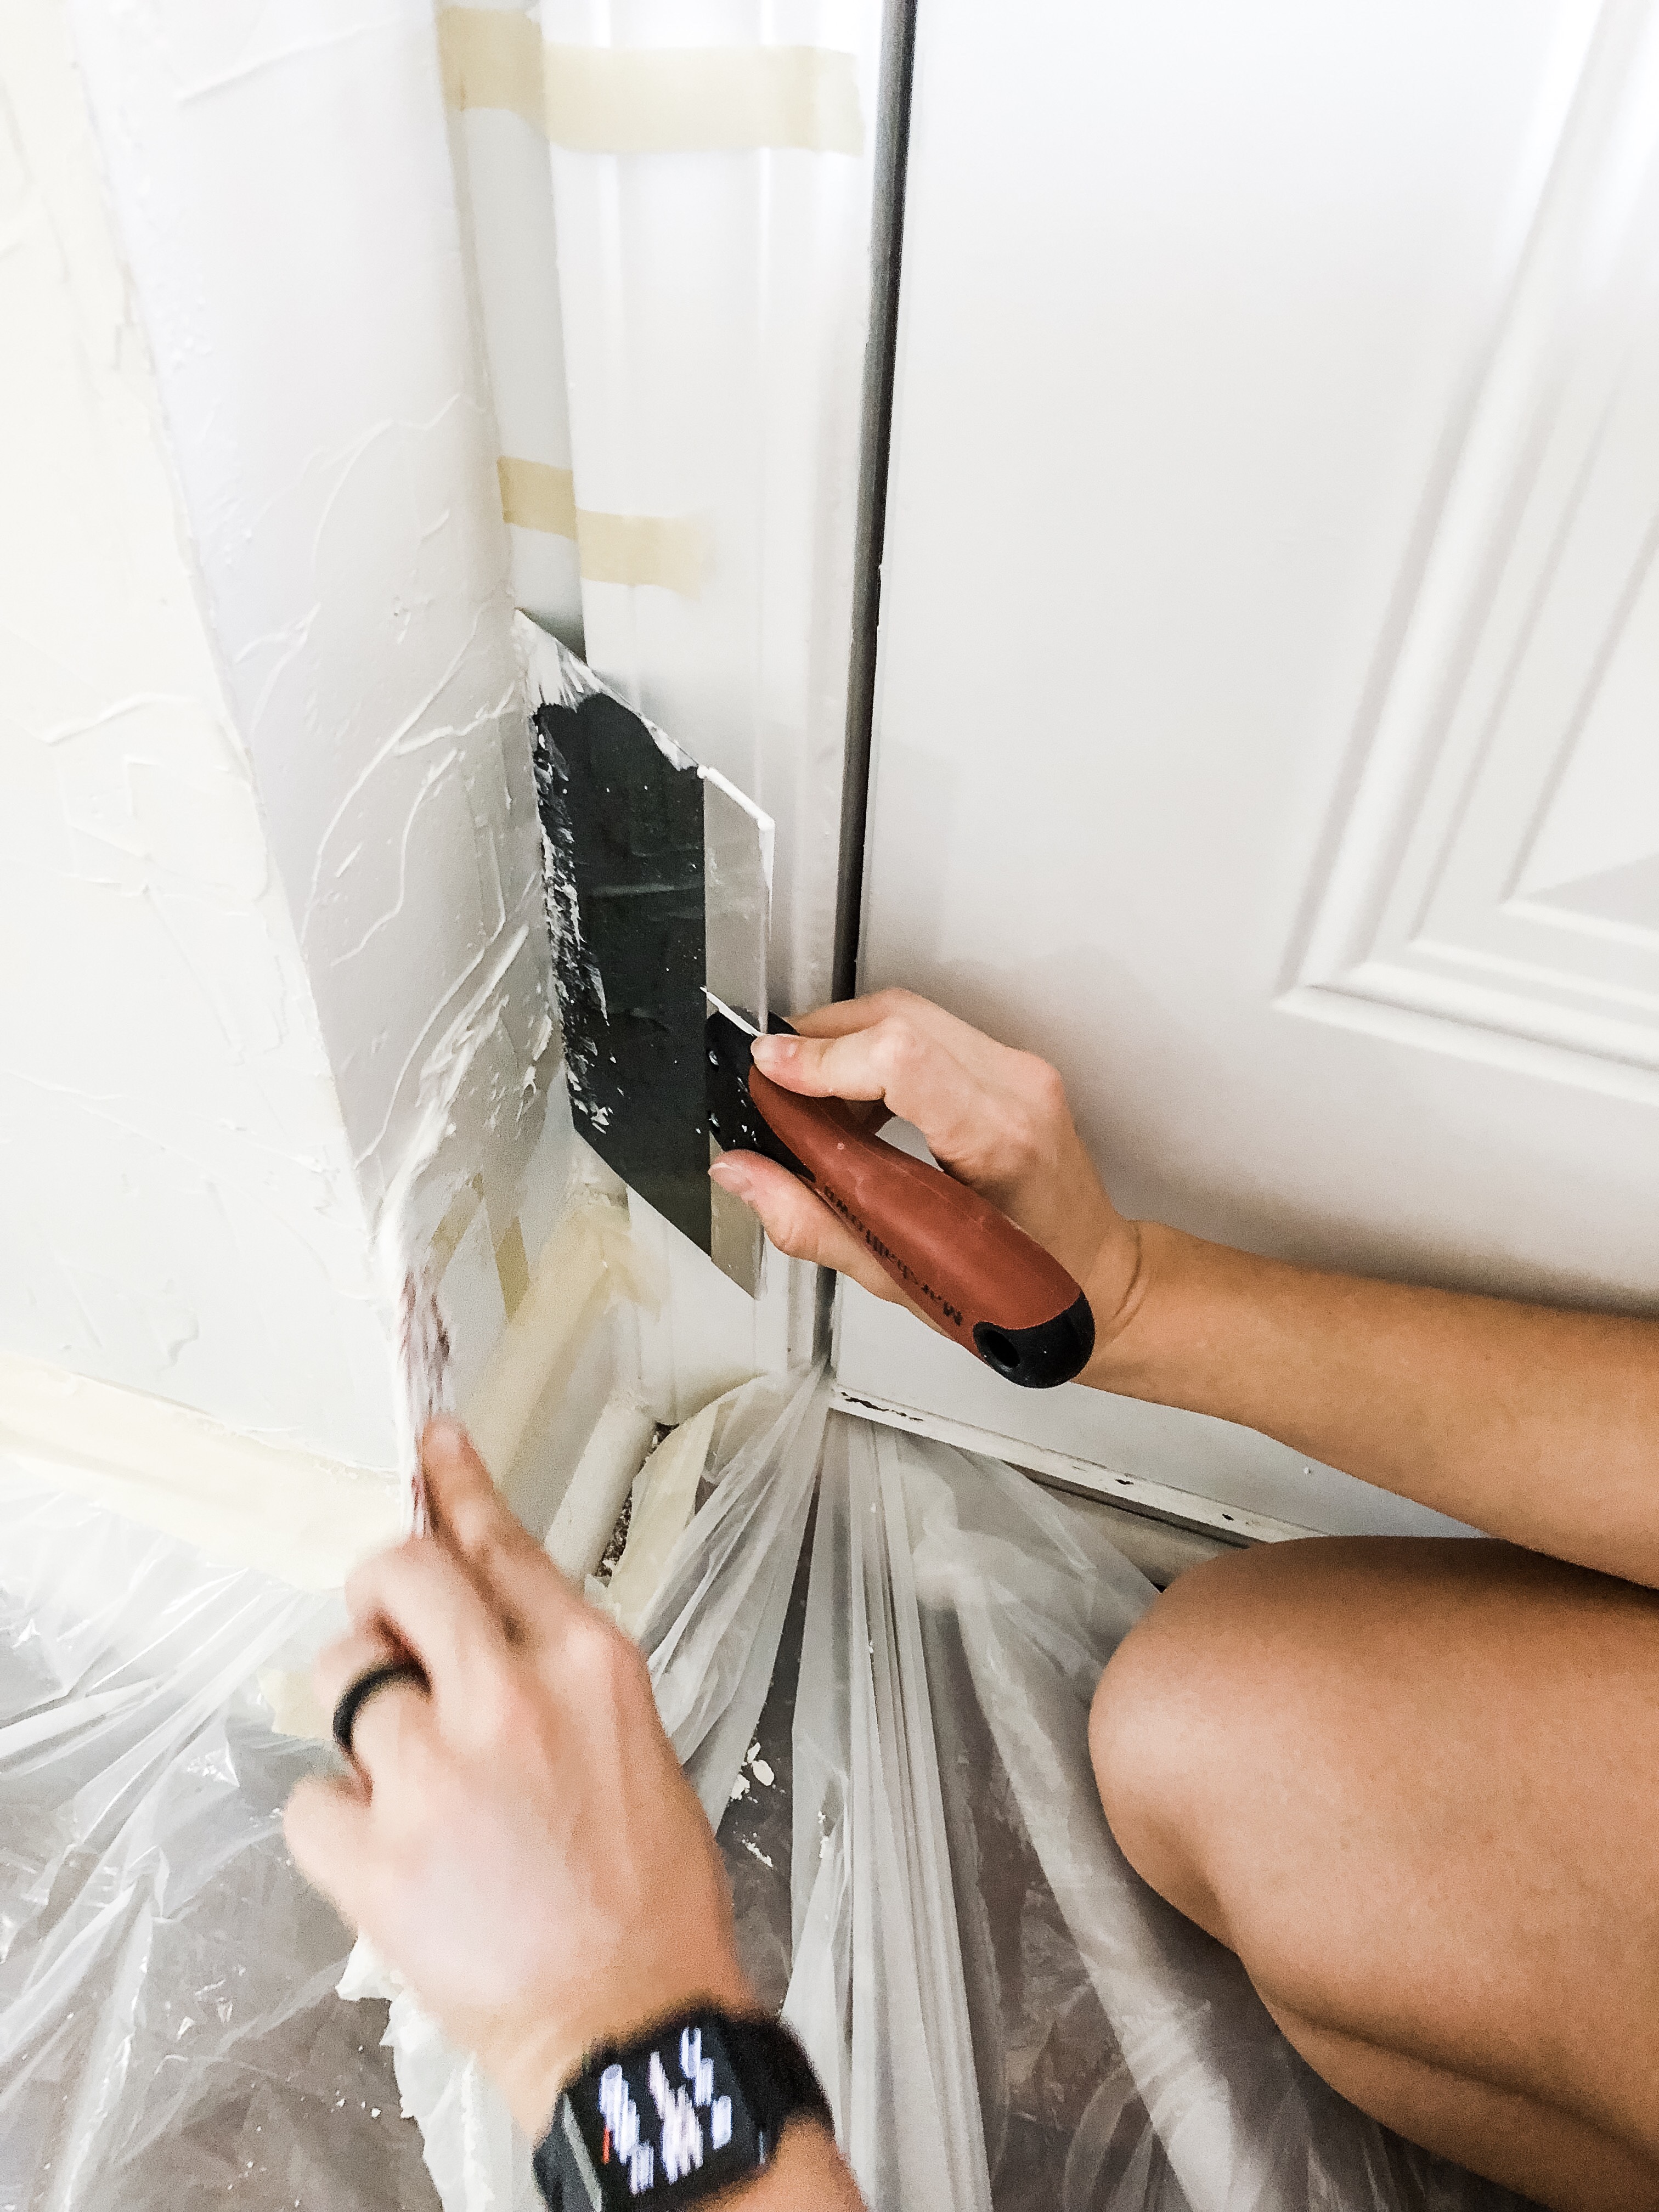
- Once the section you want to do is completely covered, slowly and carefully start peeling off the tape. It helps to have a big trashcan near by that you can just drop the mess into and another [clean] set of hands nearby if possible!
- Continue doing this process in small sections working your way down the wall until the entire wall is complete.
- LET THE COMPOUND DRY FOR 24 HOURS. Trust me on this one. You might think it’s dry (or just not care at all and try to rush the process) but you’ll go to prime it and find out the hard way that it’s not and it’ll get all messed up.
ARVE error: Mode: lazyload not available (ARVE Pro not active?), switching to normal mode
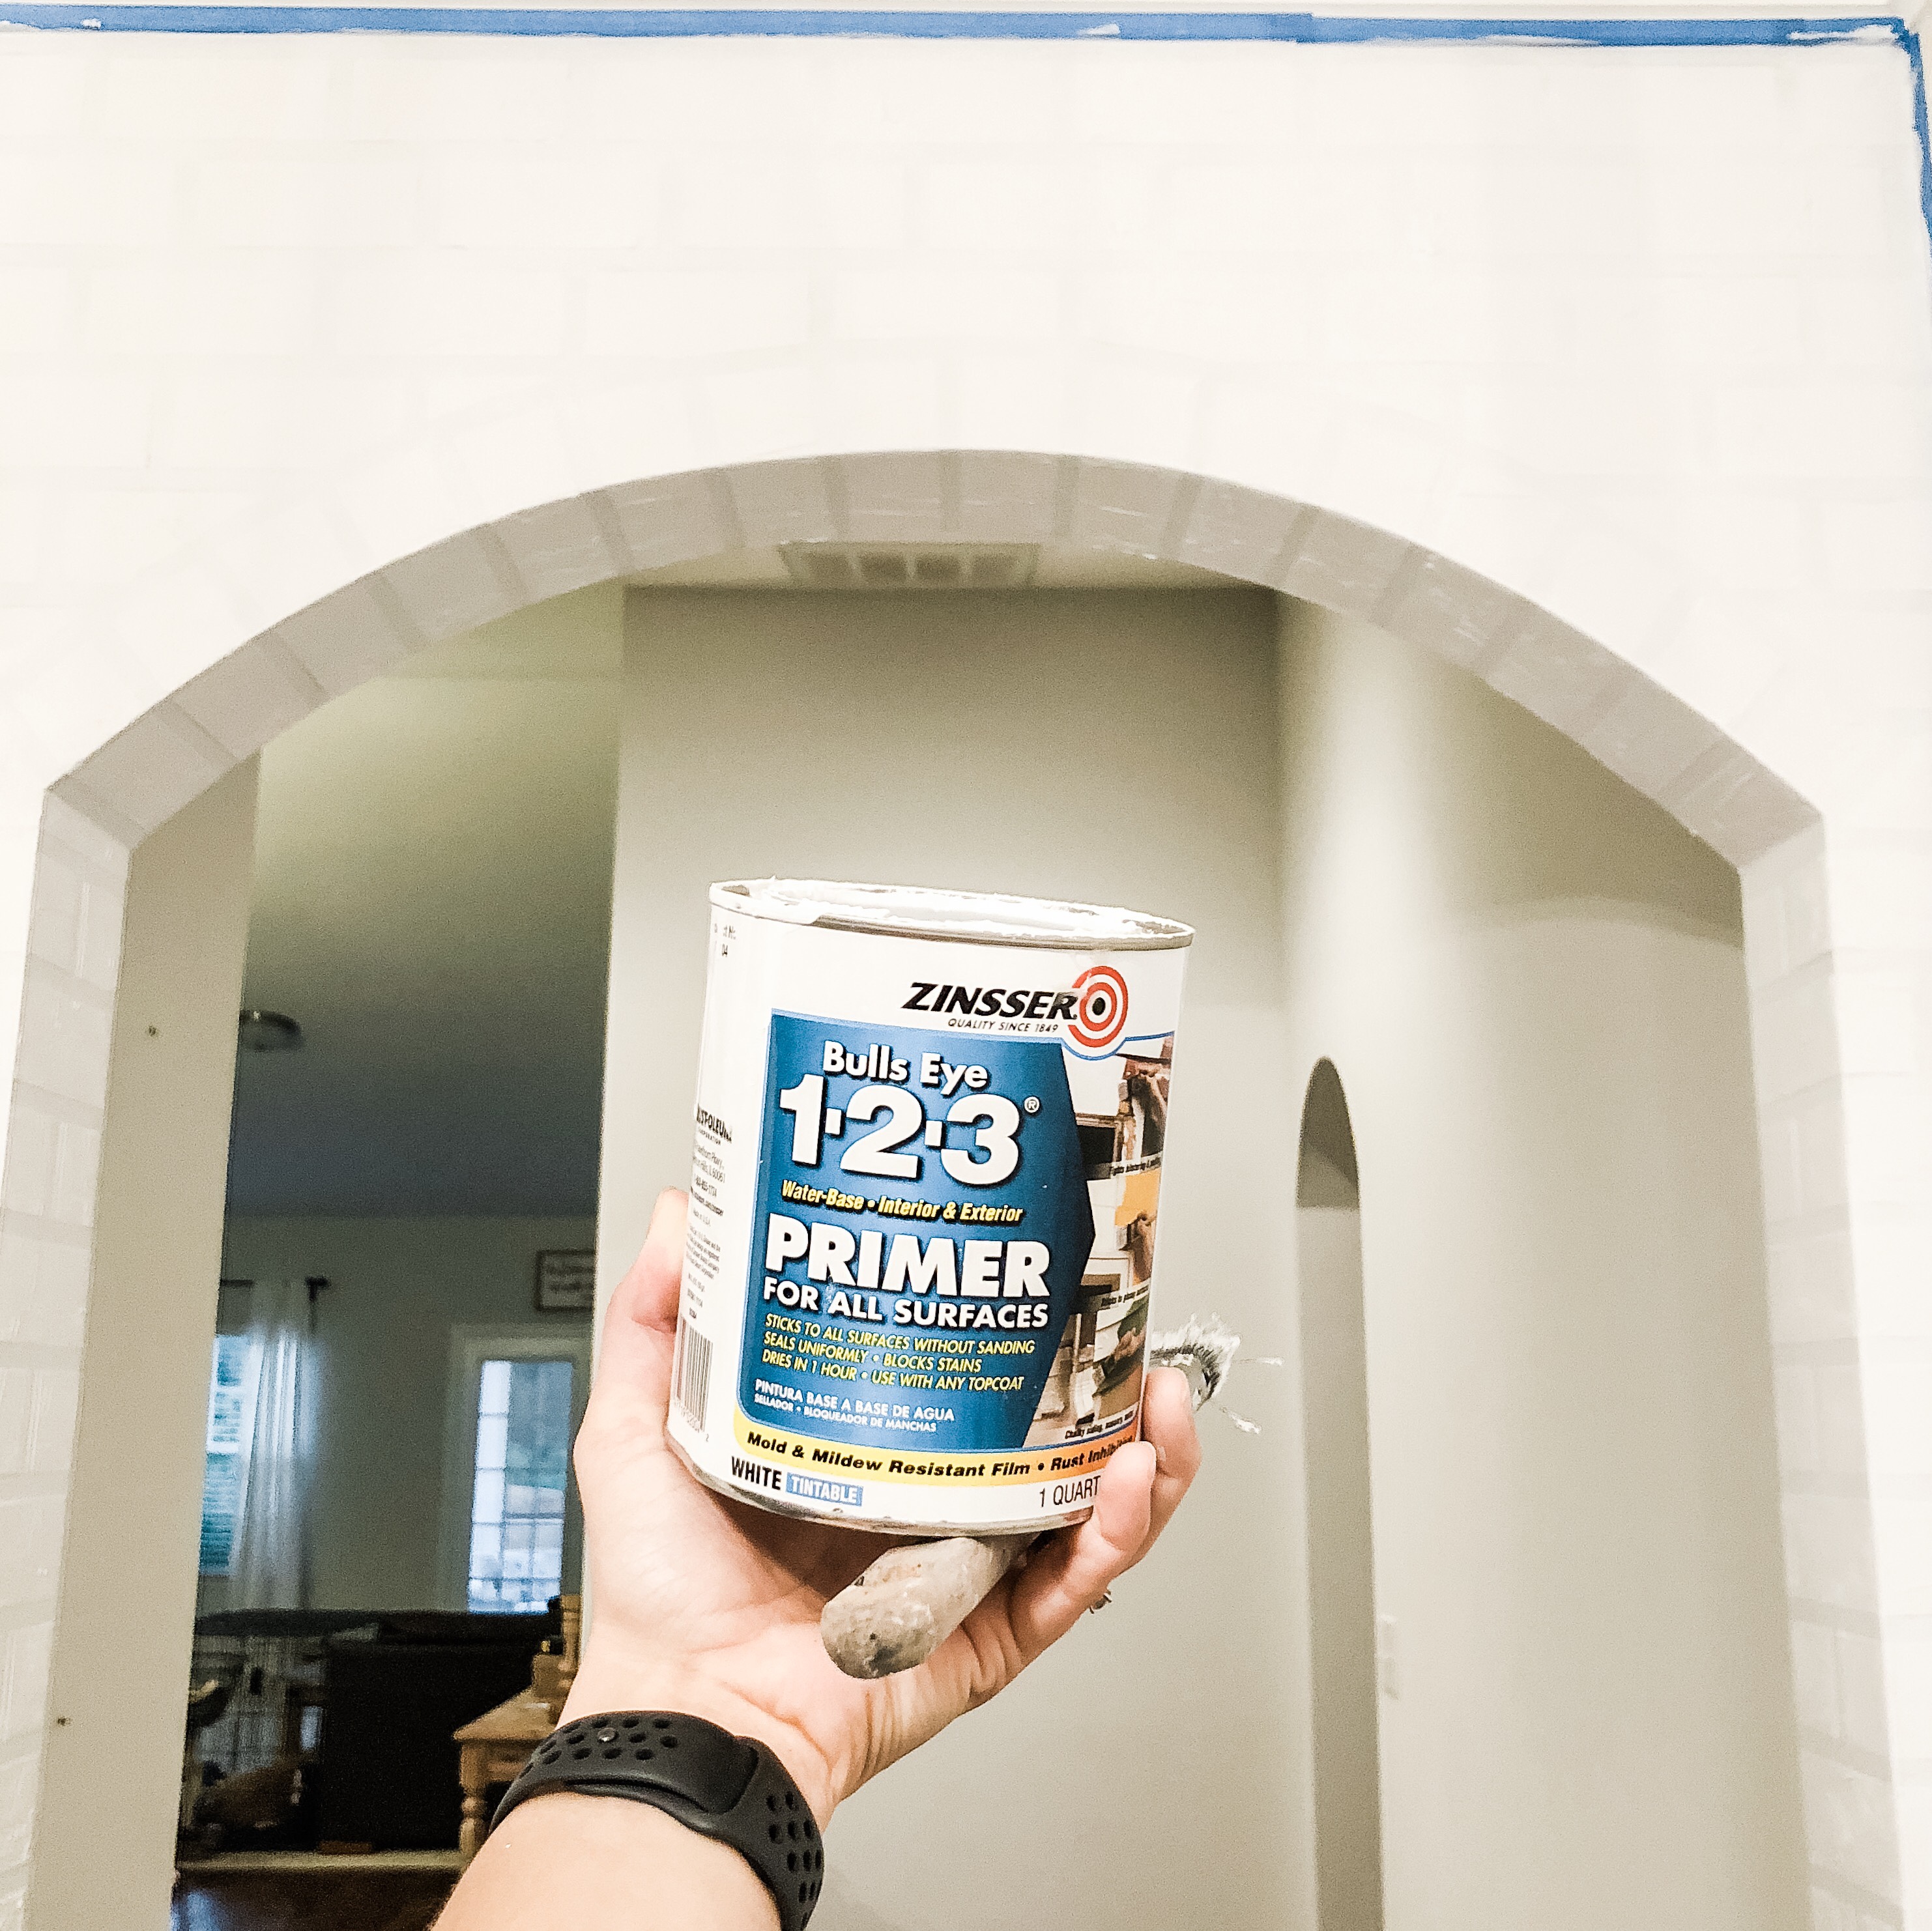
PRIME:
- Prime the entire wall, joint compound and all, using this primer.
- Let it dry completely (I let mine dry overnight).
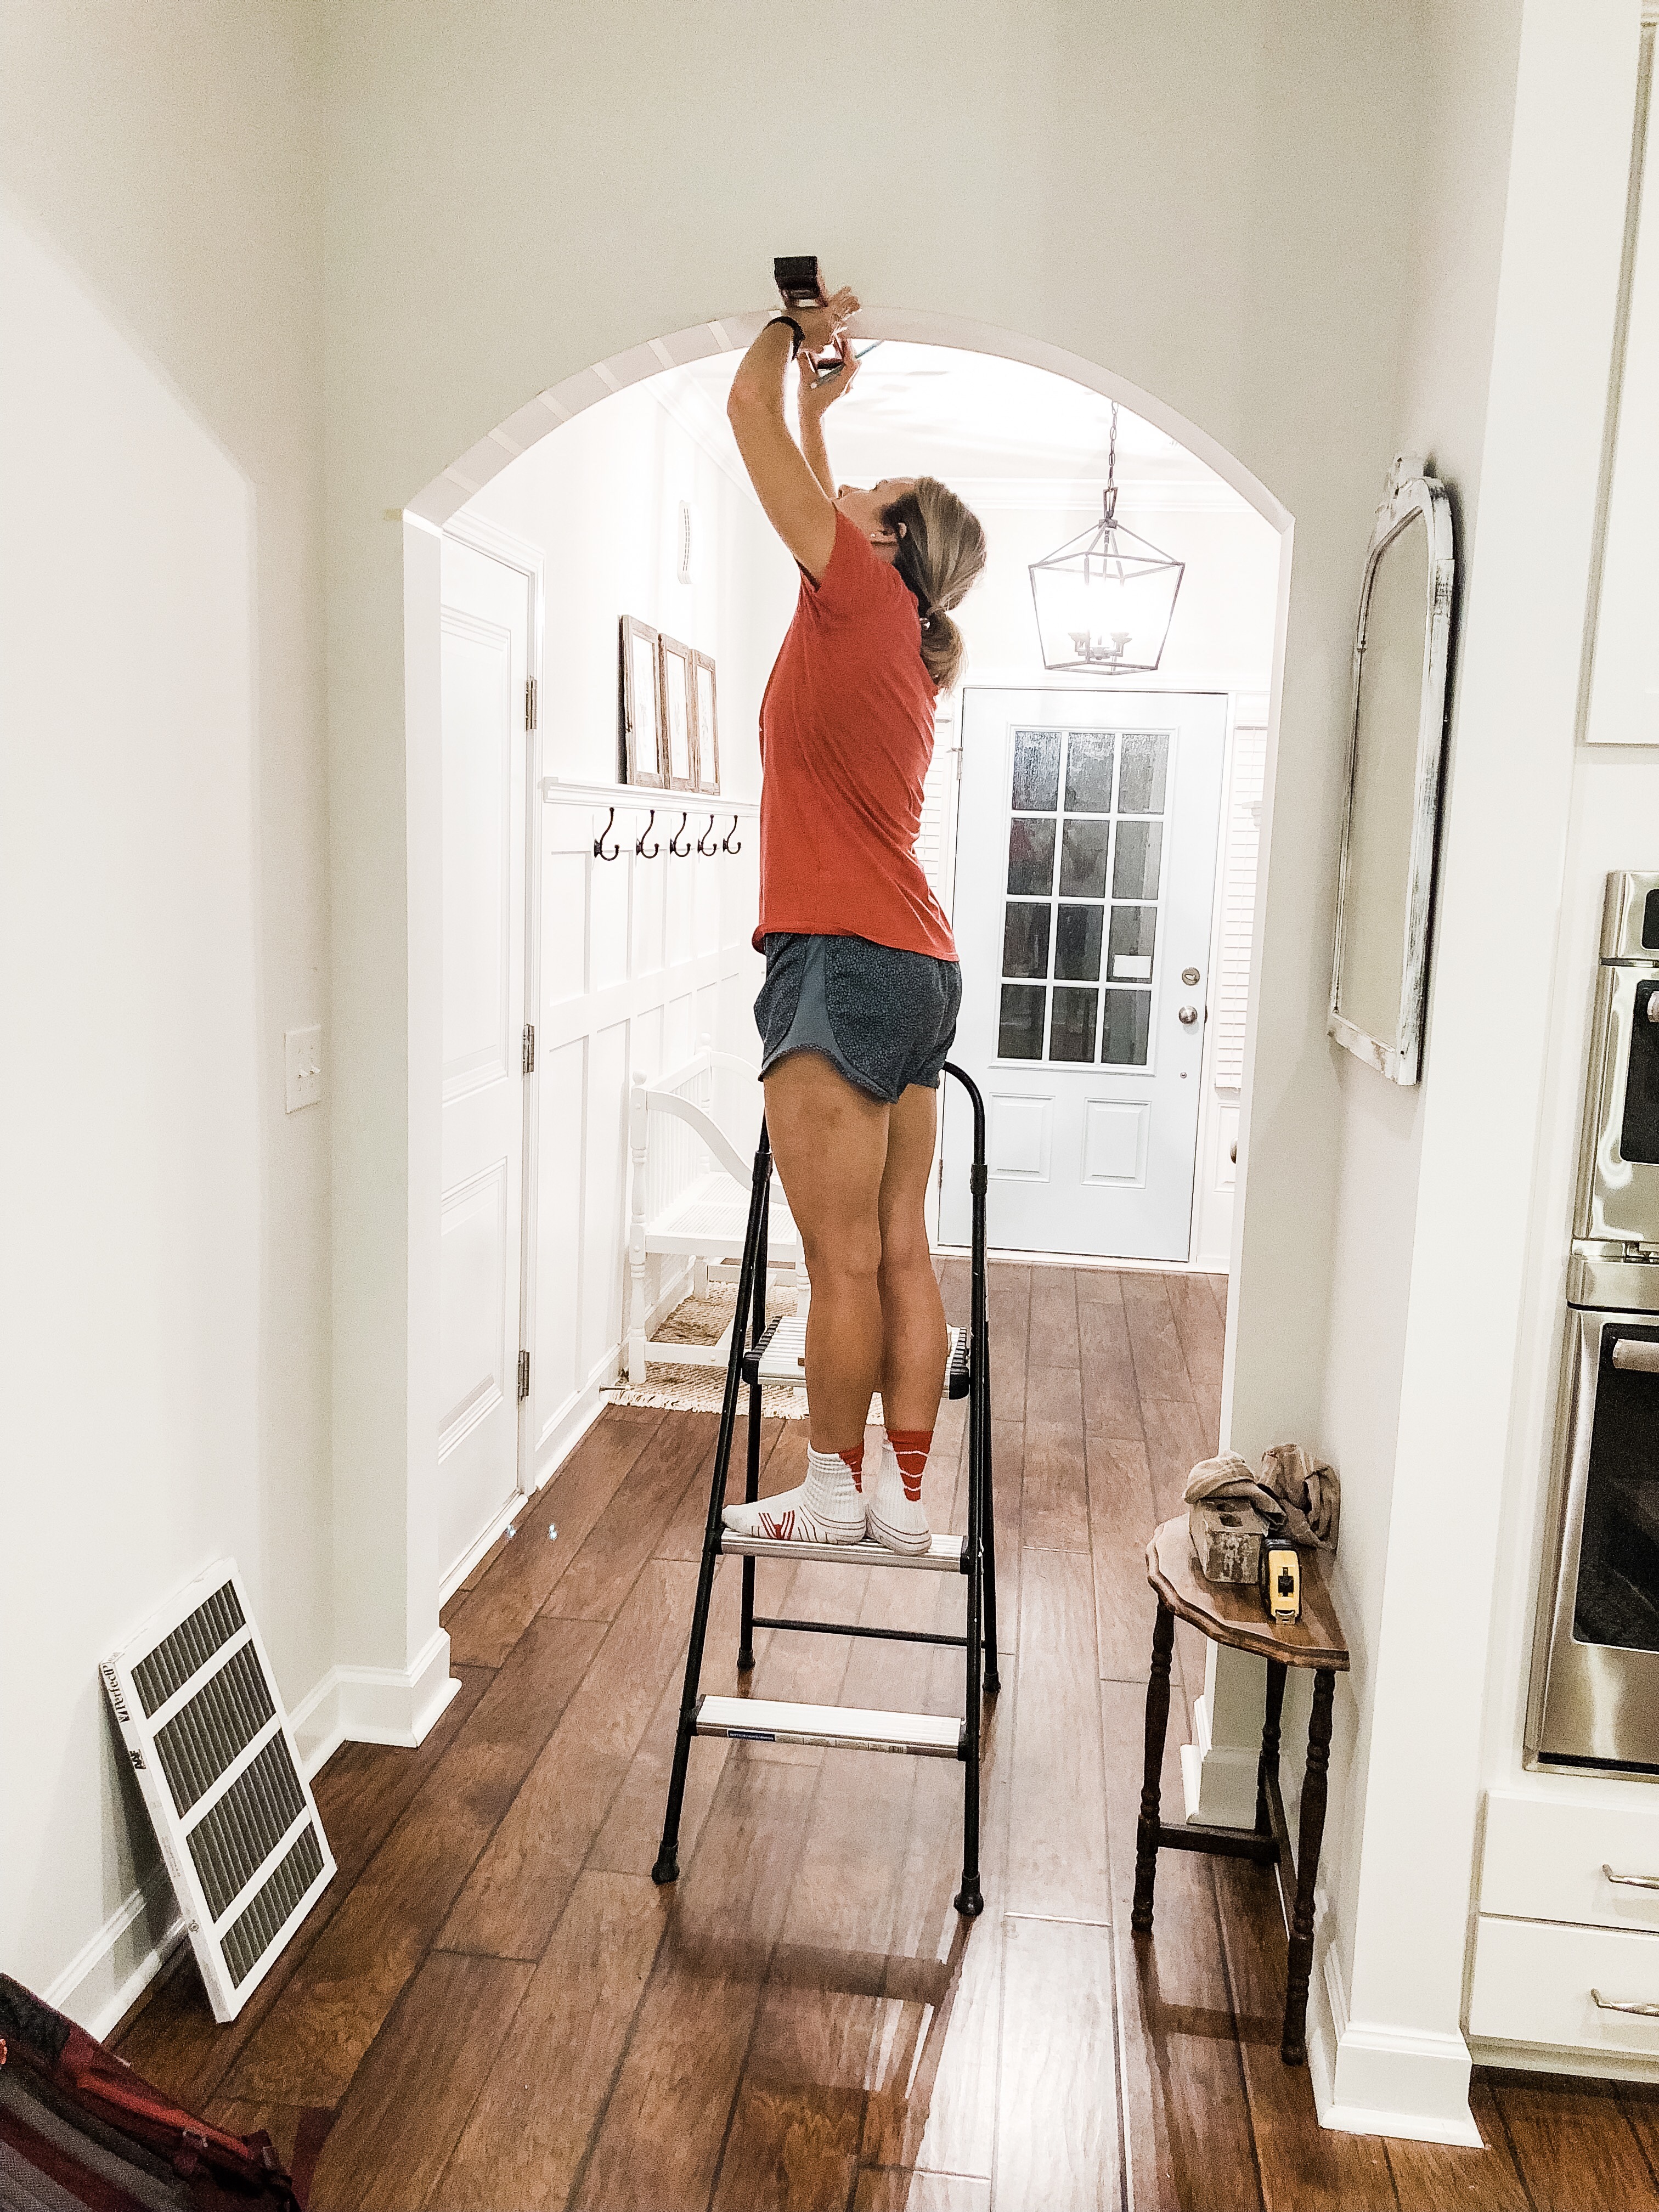
PAINT IN THE BRICKS:
- Turn on some Friends or your favorite podcast and start painting each “brick” with whatever colors you want! I used a combination of three. There was no science to it. I try to be pretty random with it so that it looks realistic.
- Let it dry completely (again, I let mine dry overnight).
PAINT IN THE GROUT LINES AND WHITEWASH:
- Once all the brick paint is dry, start painting in the grout lines using white paint. To whitewash the bricks, I’d dip my brush in paint, paint in the grout line until the brush was practically dry and then start painting over the bricks to give it a washed look. You can add more or less white color depending on your preference.
- If you end up painting on too might white and you don’t like it, don’t worry!! Just paint over it with some of the colors you used for the bricks and it’ll look good as new!
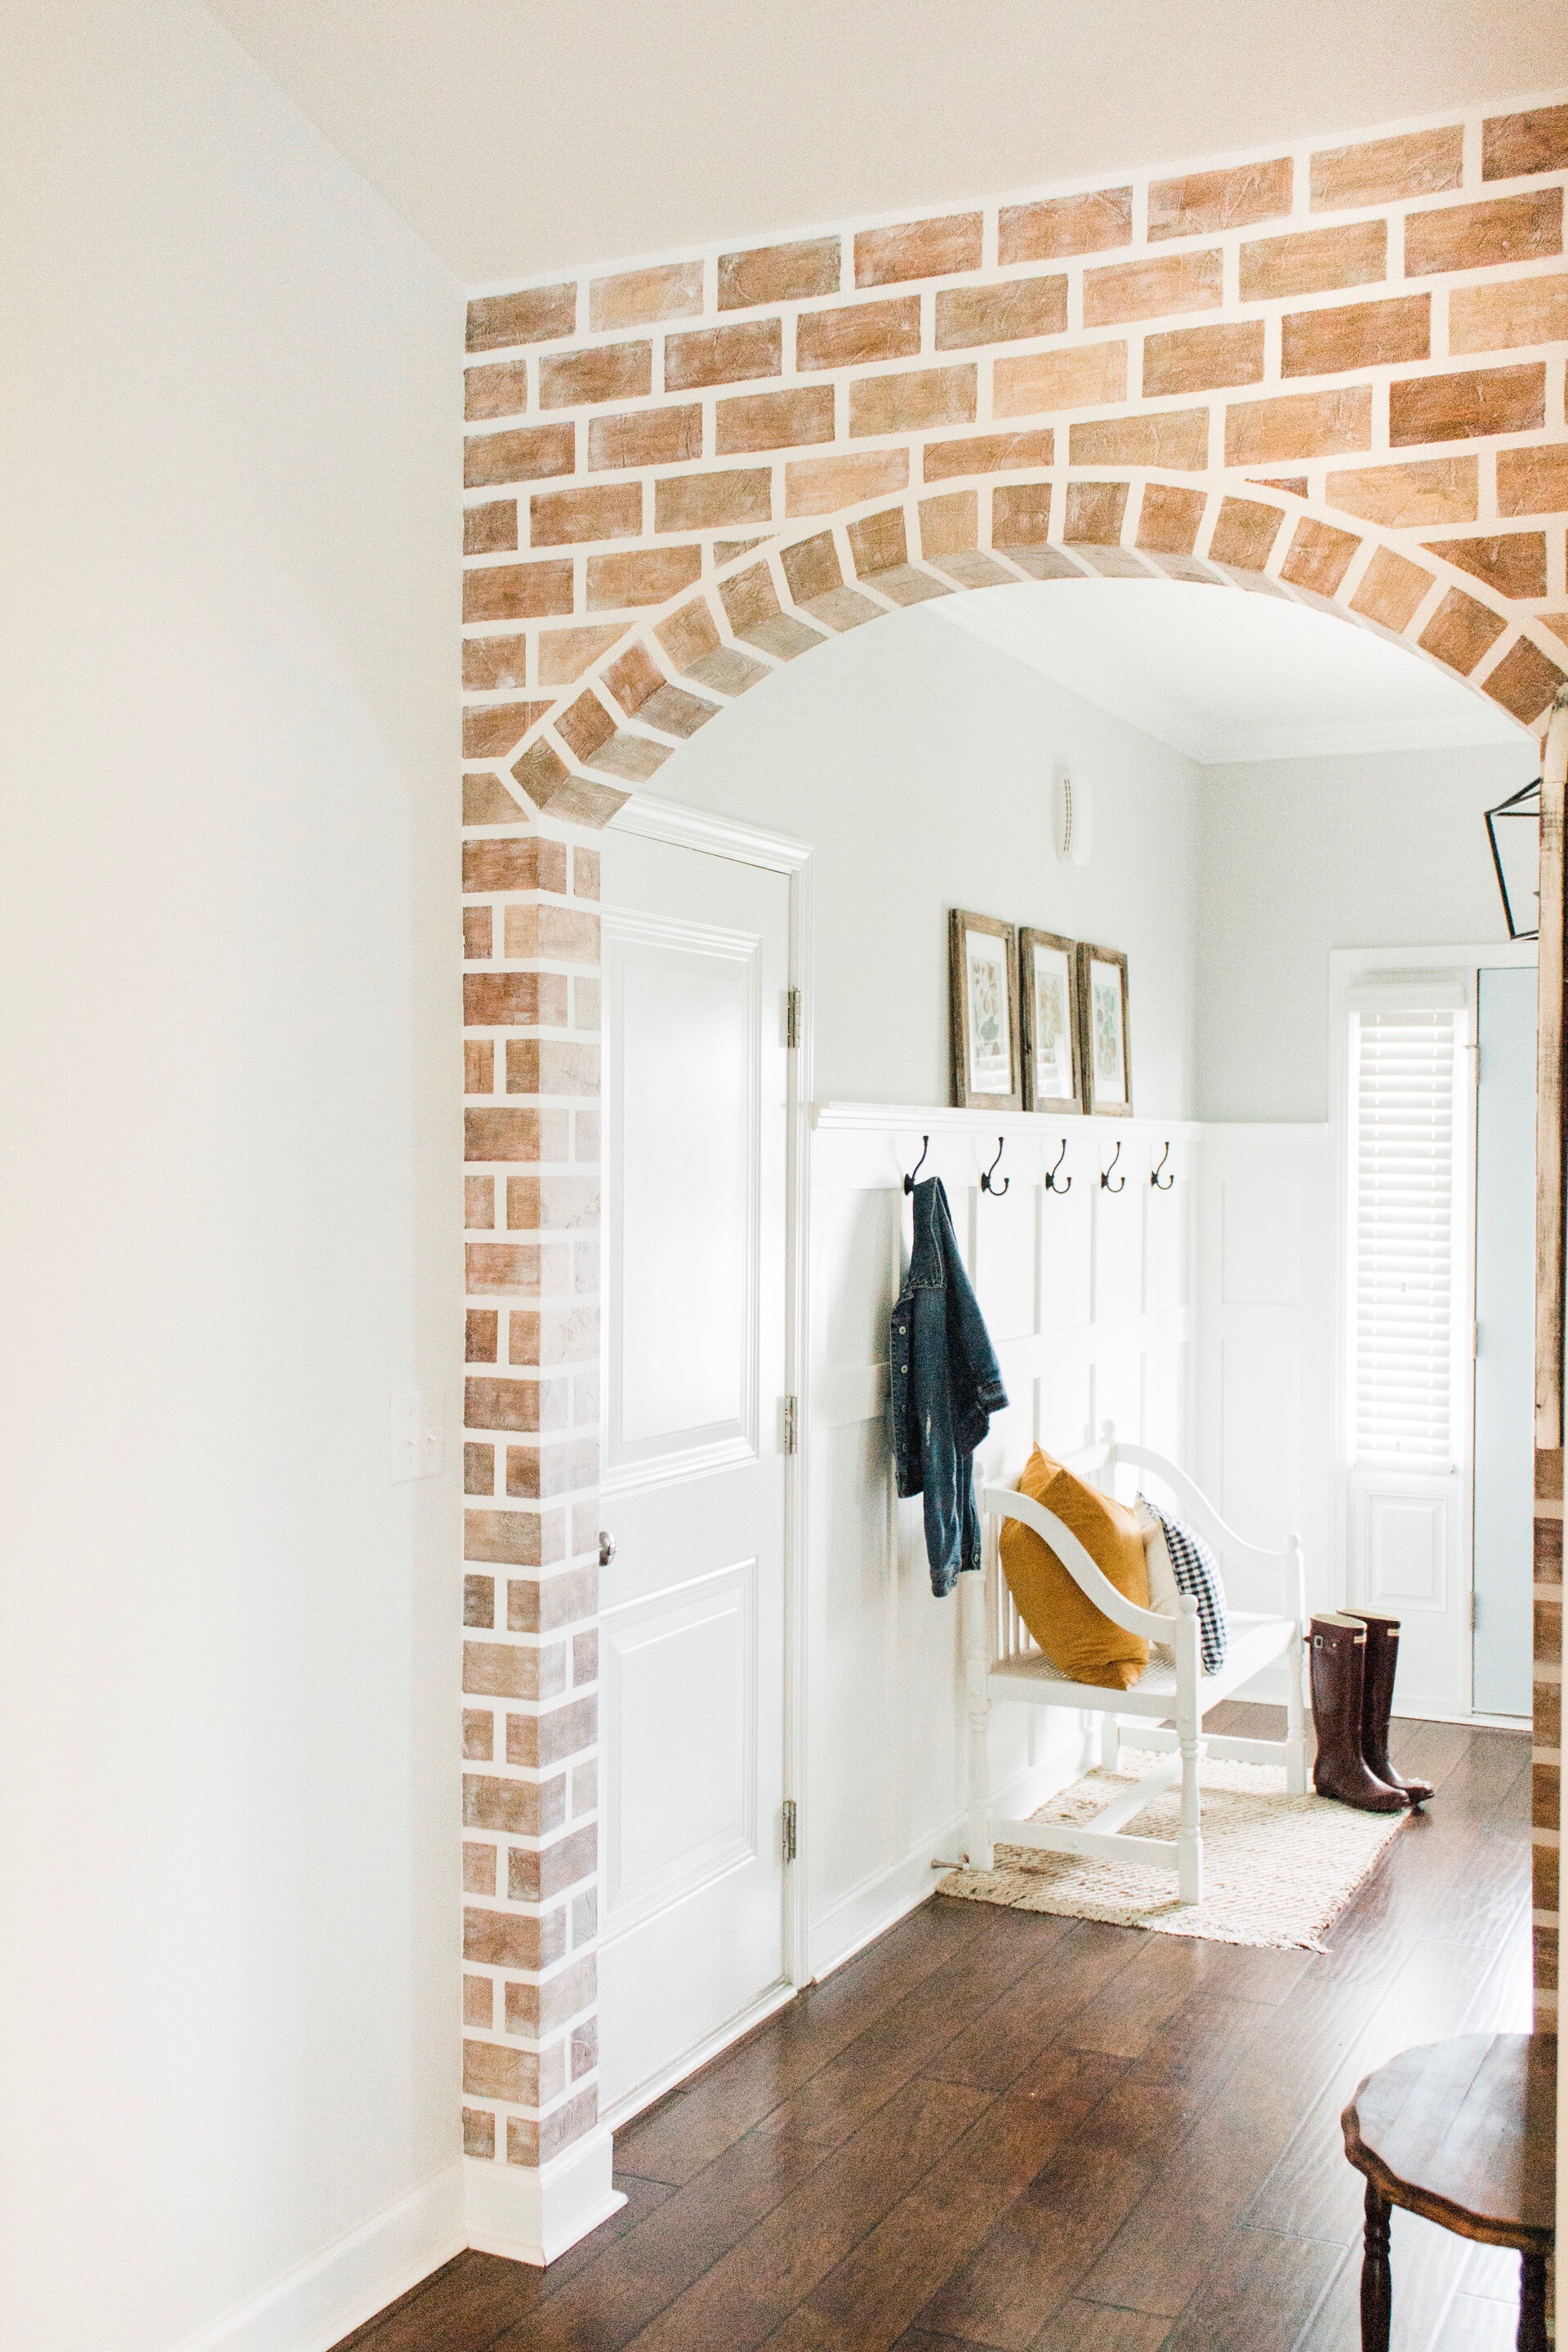
Once you finish the grout and white wash… YOU’RE DONE! If you’ve made it to this point, you deserve a big piece of cake or whatever you love to eat to celebrate. It takes quite a bit of time to complete this project and it’s very monotonous but it’s EASY! You can do it! If you do, I’d love to see how you incorporate the fall brick in your home!
Let me know if you have any questions!
Other posts you might enjoy:
DIY Faux Brick Fireplace
DIY Budget-Friendly “Shiplap”
Modern Farmhouse Entryway Reveal
Pin this post to save for later:

jordan jean
Leave a Reply


SHARE