July 16, 2018
Hi!! Before I get into this I want to say thank you so much for all of the love on the post I shared of our board and batten in the foyer! It’s so much fun sharing all of that stuff with you all and seeing your reactions. I get so many messages that make me either laugh out loud or smile. It rocks my world.
Today I’m sharing a tutorial that is relatively inexpensive and easy to accomplish that adds so much character to a home – custom door trim! As soon as I saw this tutorial on @ourfauxfarmhouse I showed Stephen and we decided that we would start on the pantry door in the kitchen. We love the way it turned out and considering how much it cost per door, we’ll probably end up doing it to most of them around our house! I also shared the videos on Instagram of us completing this project. You can find those under the highlights section titled “door trim”.
What you’ll need (this is enough for 2 doors):
- 1- 0.75″ x 2.5″ x 6′ pine board — BOTTOM PIECE
- 1- 0.75″ x 1.5″ x 6′ pine board — TOP PIECE
- 1- 0.75″ x 7.25″ x 8′ pine board (aka because wood naming is dumb 1″ x 8″ x 8′ board) — MIDDLE PIECE
- 1- 1-3/8″ x 3/8″ x 7′ primed finger joint stop trim — TRIM PIECE
- Nail gun – we used our ride or die Hitachi 18 gauge brad nailer
- Oscillating saw/something to remove existing trim with
- Putty to fill holes – we used Dap DryDex
- Primer + paint – Our trim color is Sherwin Williams Glossy Extra White
Total cost for materials: $35.83 which makes it $17.92 + tax per door
What to do:
- Measure the width of your door including the trim. Ours from edge-to-edge is 32 7/8″.
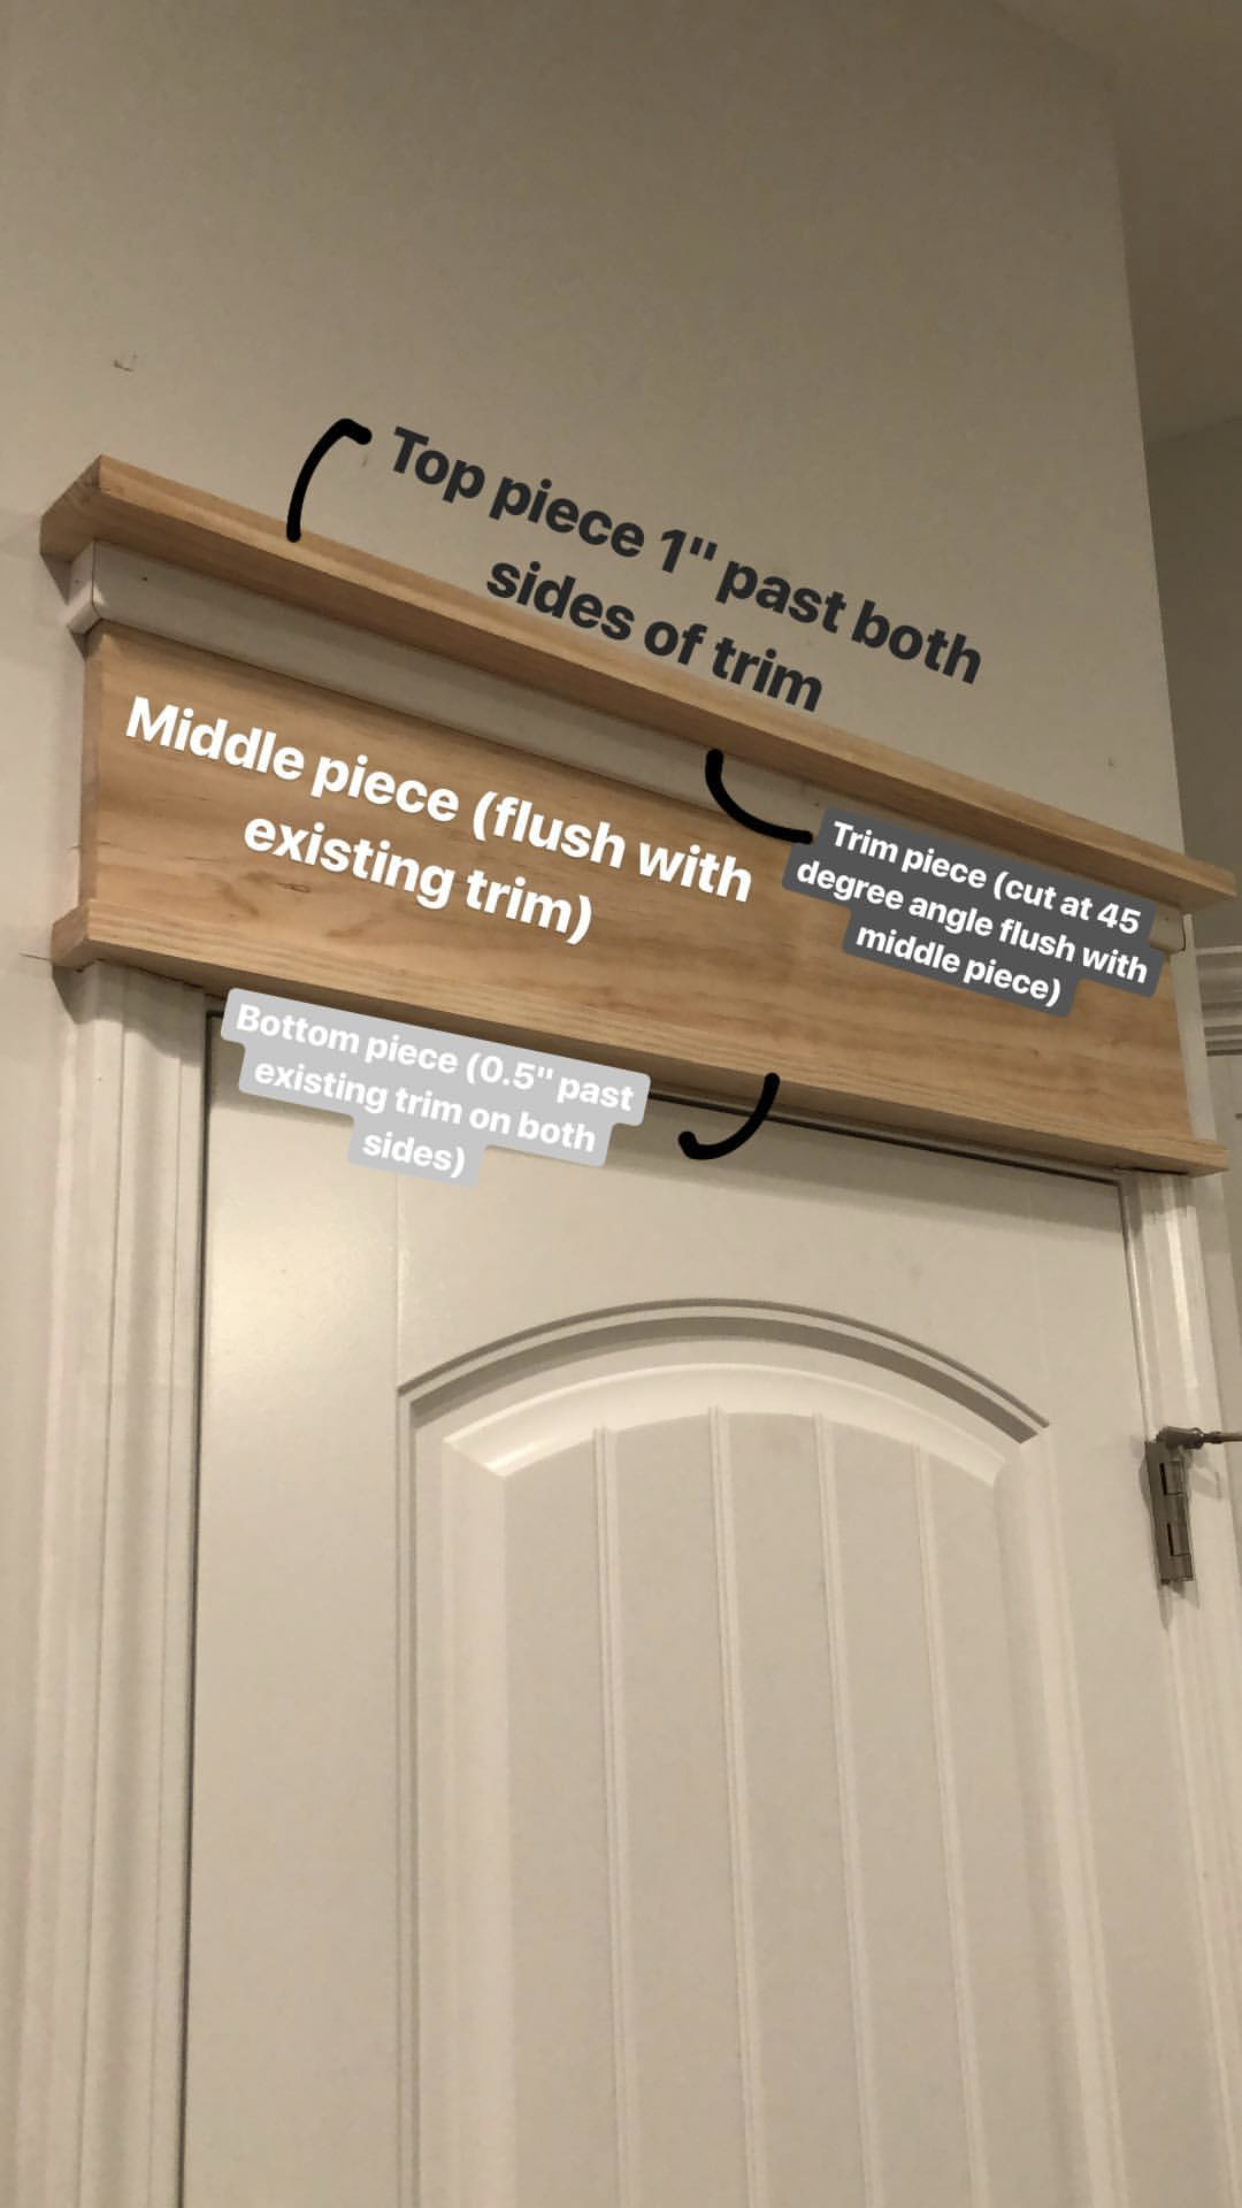
- Based on that measurement, cut your pieces:
- Bottom piece = cut so that 0.5″ hangs over the existing trim on both sides (ours was cut 33 7/8″)
- Middle piece = cut so that it is flush with the existing trim (ours was cut to 32 7/8″)
- Top piece = cut so that 1″ hangs over the existing trim on both sides (ours was cut to 34 7/8″)
- Trim piece = cut the same as the middle piece except cut it at a 45 degree angle to close off the sides with smaller trim pieces
- Remove the top piece of your existing door trim. To do this, we used this oscillating saw and hammer to pry it off. Don’t worry if you bang up the wall a bit. It’ll be covered with the new trim.
- Nail the bottom piece straight downward into the existing trim, it should be 0.5″ off the edge of both sides.
- Nail the middle piece directly into the wall, this one should be flush with the existing trim.
- Nail the top piece downward into the middle piece, this one should be 1″ over each side of the existing trim.
- Nail the trim piece into the middle piece.
- Fill in the sides of the trim with small 45 degree angled trim pieces (pictured below).
- Fill in any holes from the nails with the putty.
- Prime. 1-2-3 Bullseye primer is my go-to primer.
- Paint. We used the same color that is on the existing trim of the house – Extra White by SW.
- Enjoy!
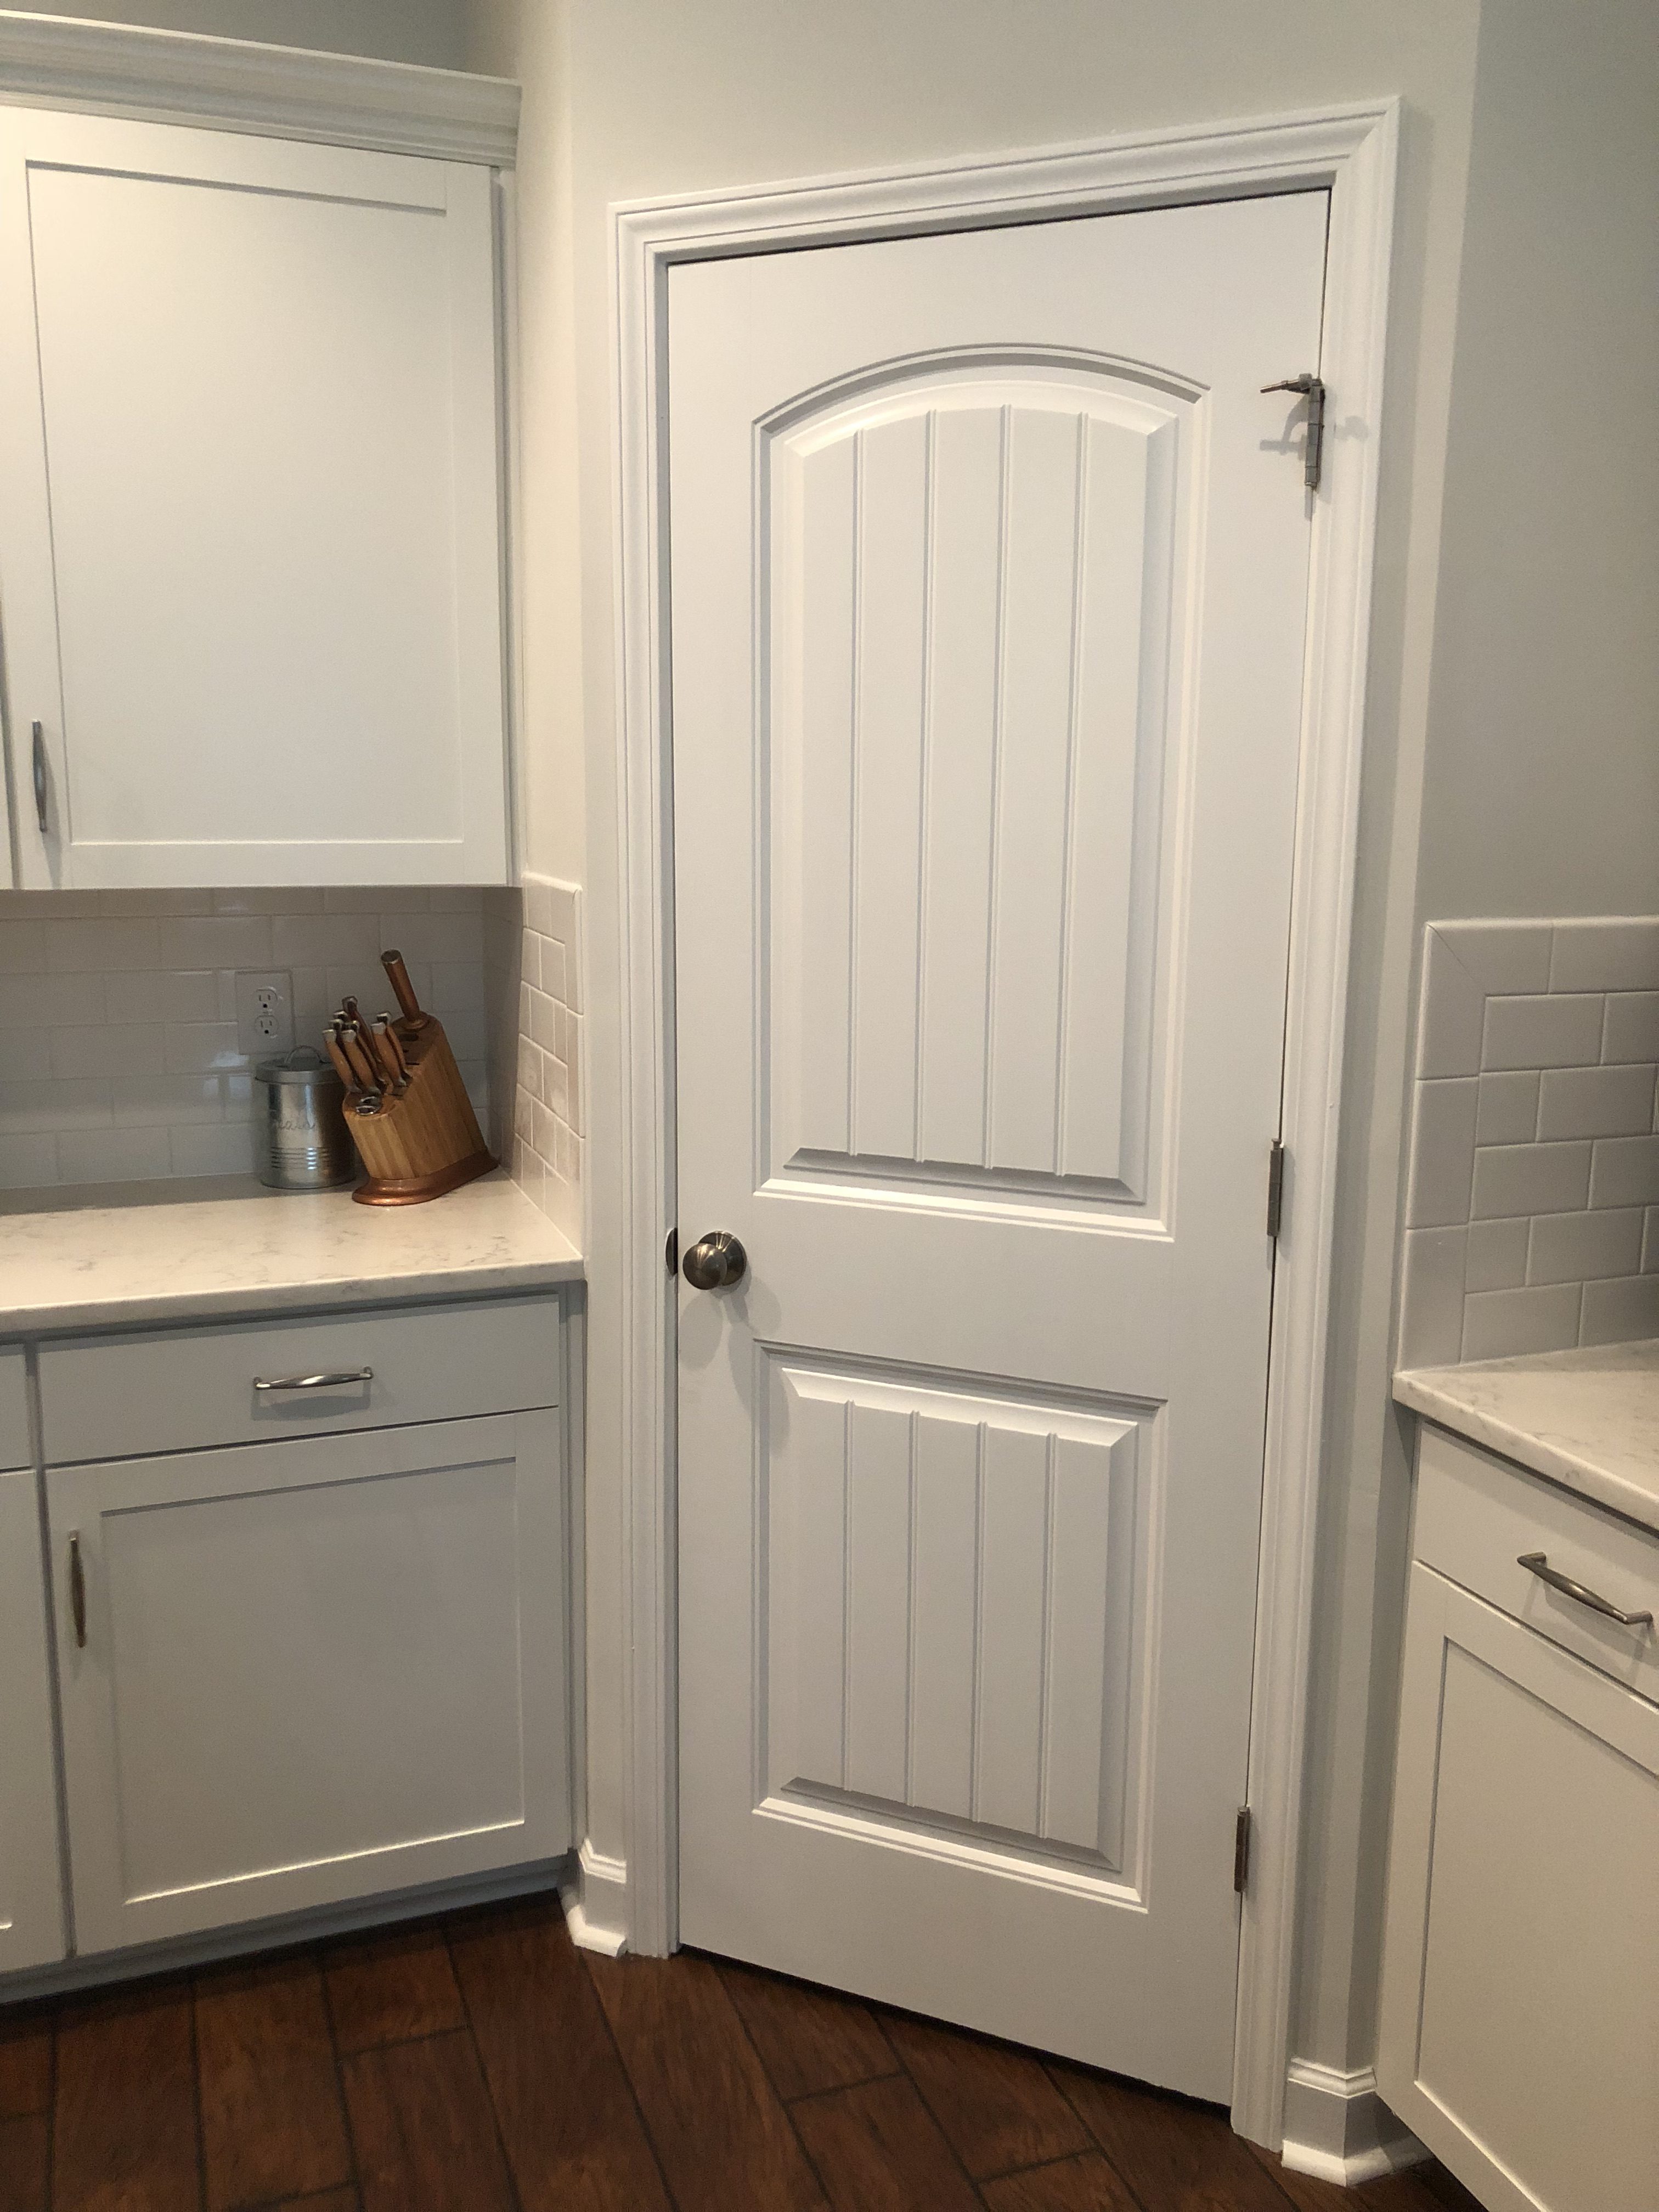
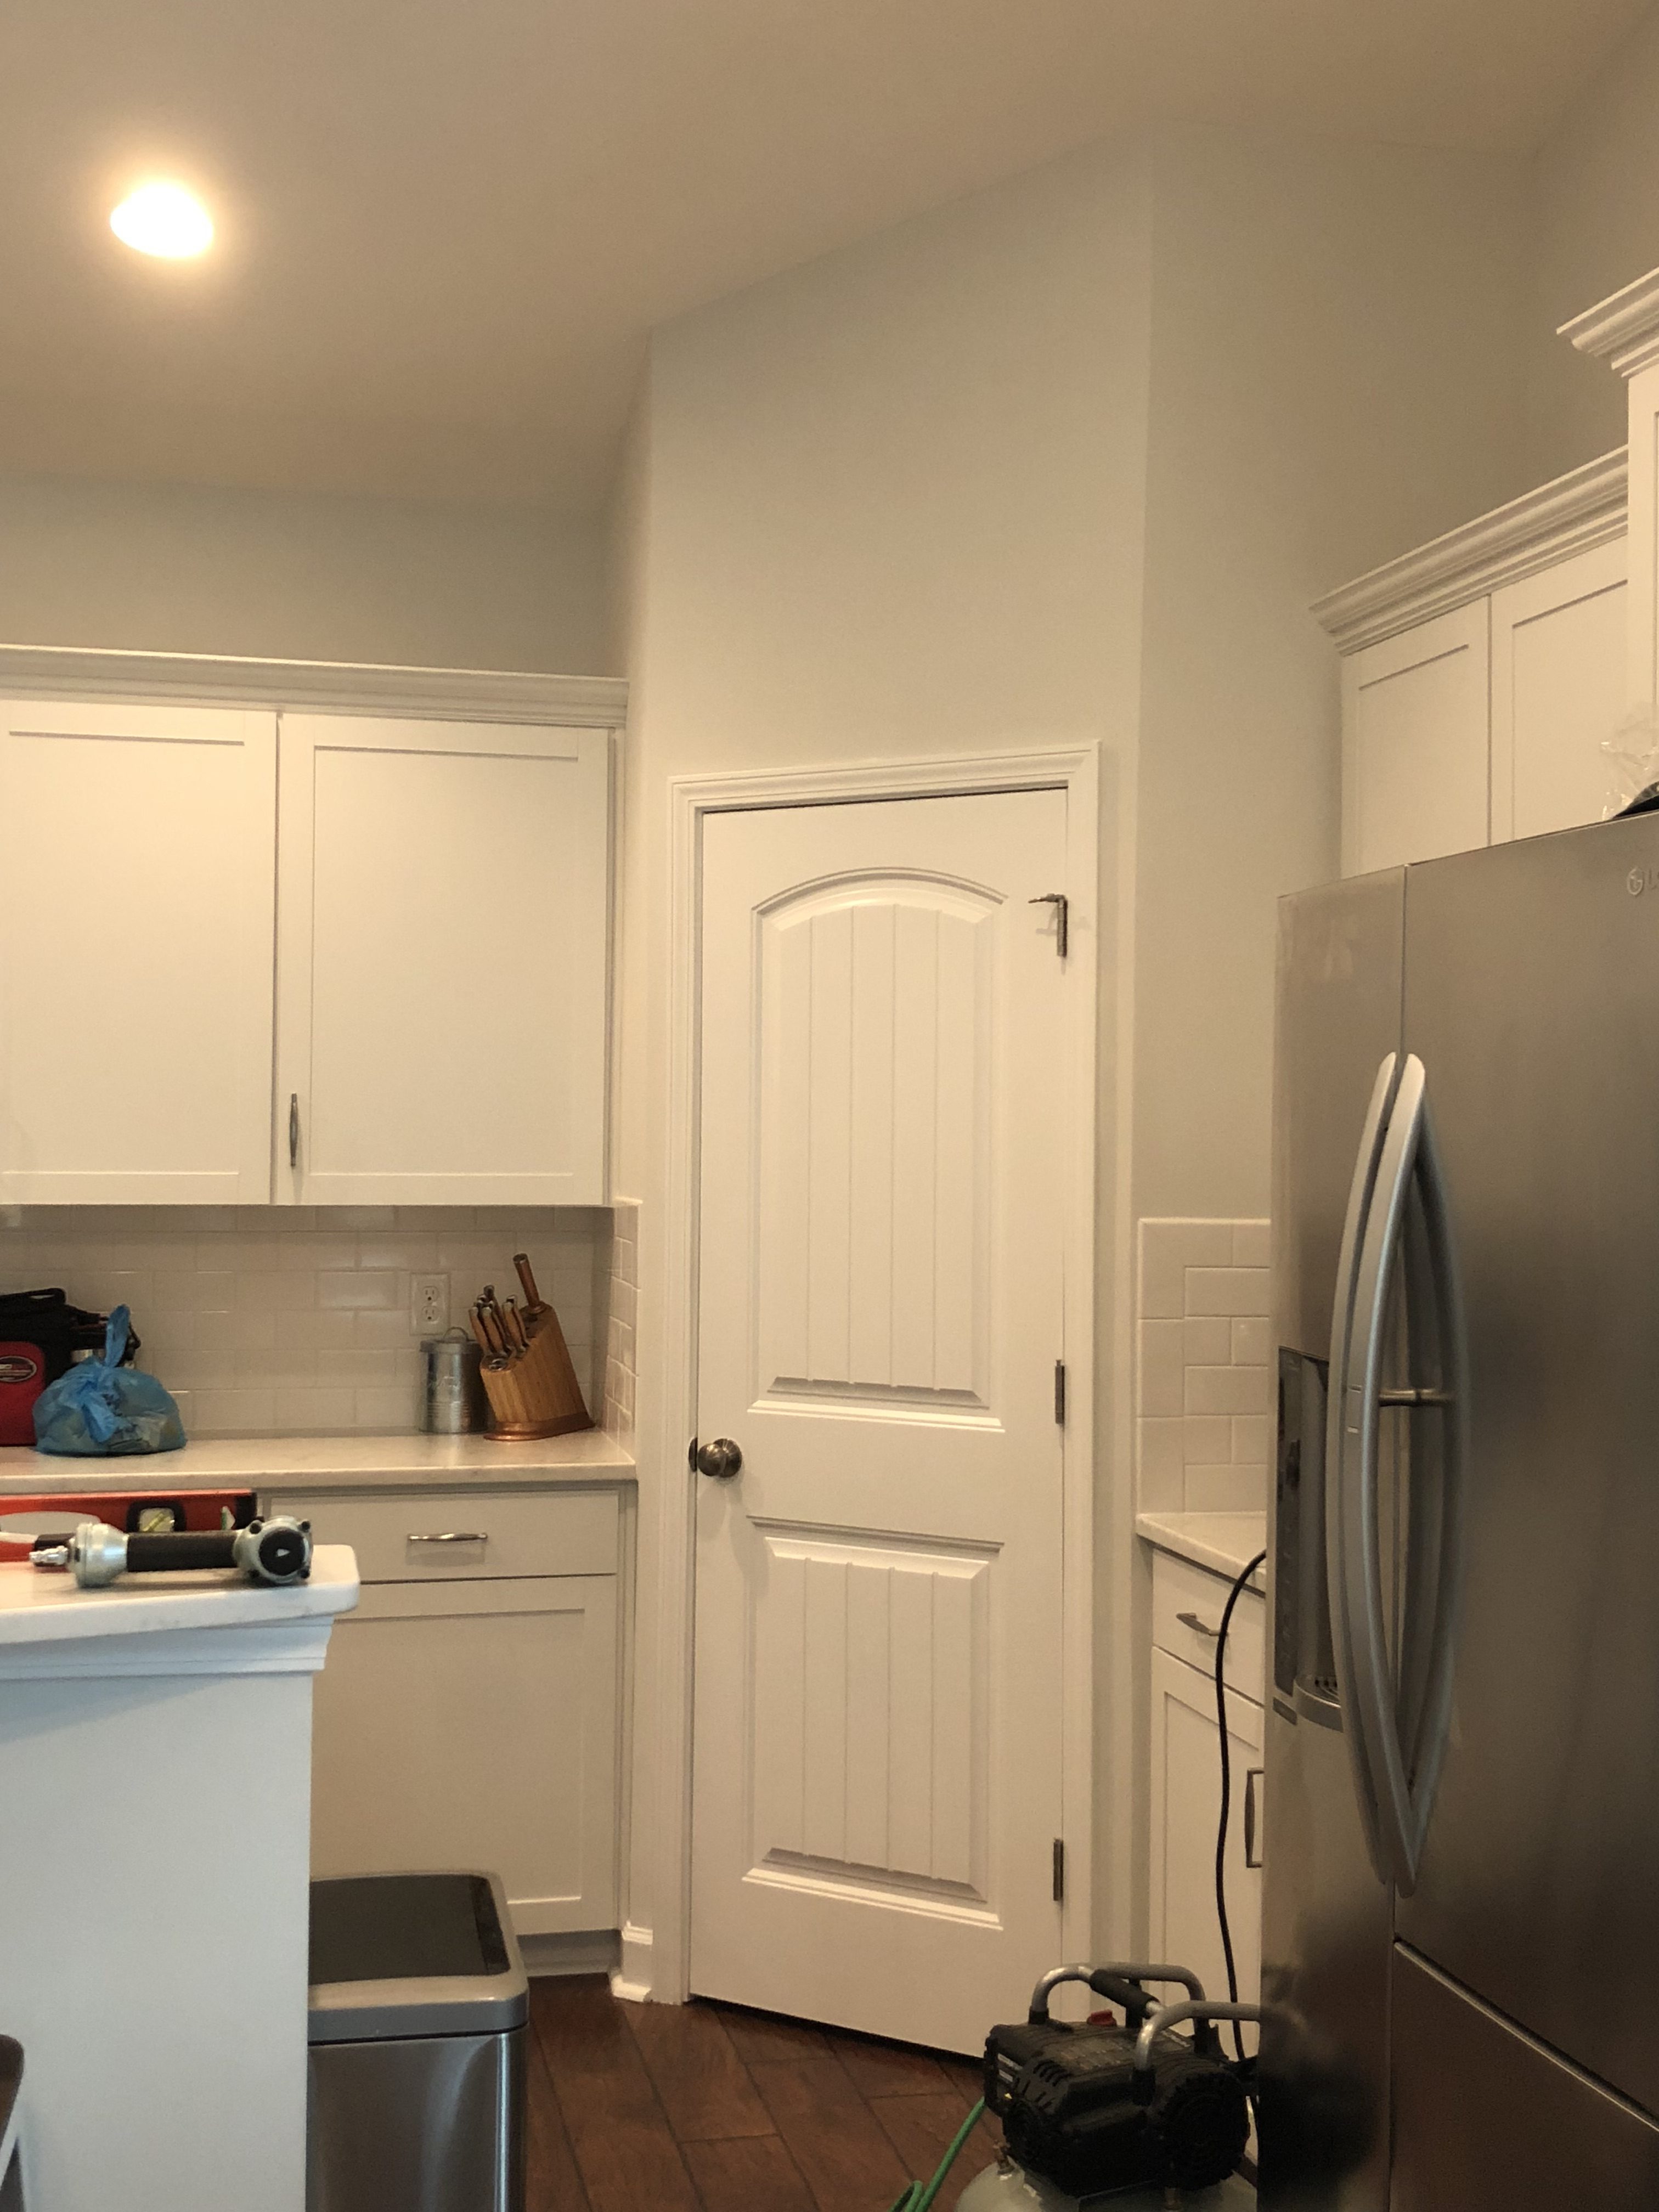
Before we added the trim:
After we added the trim:
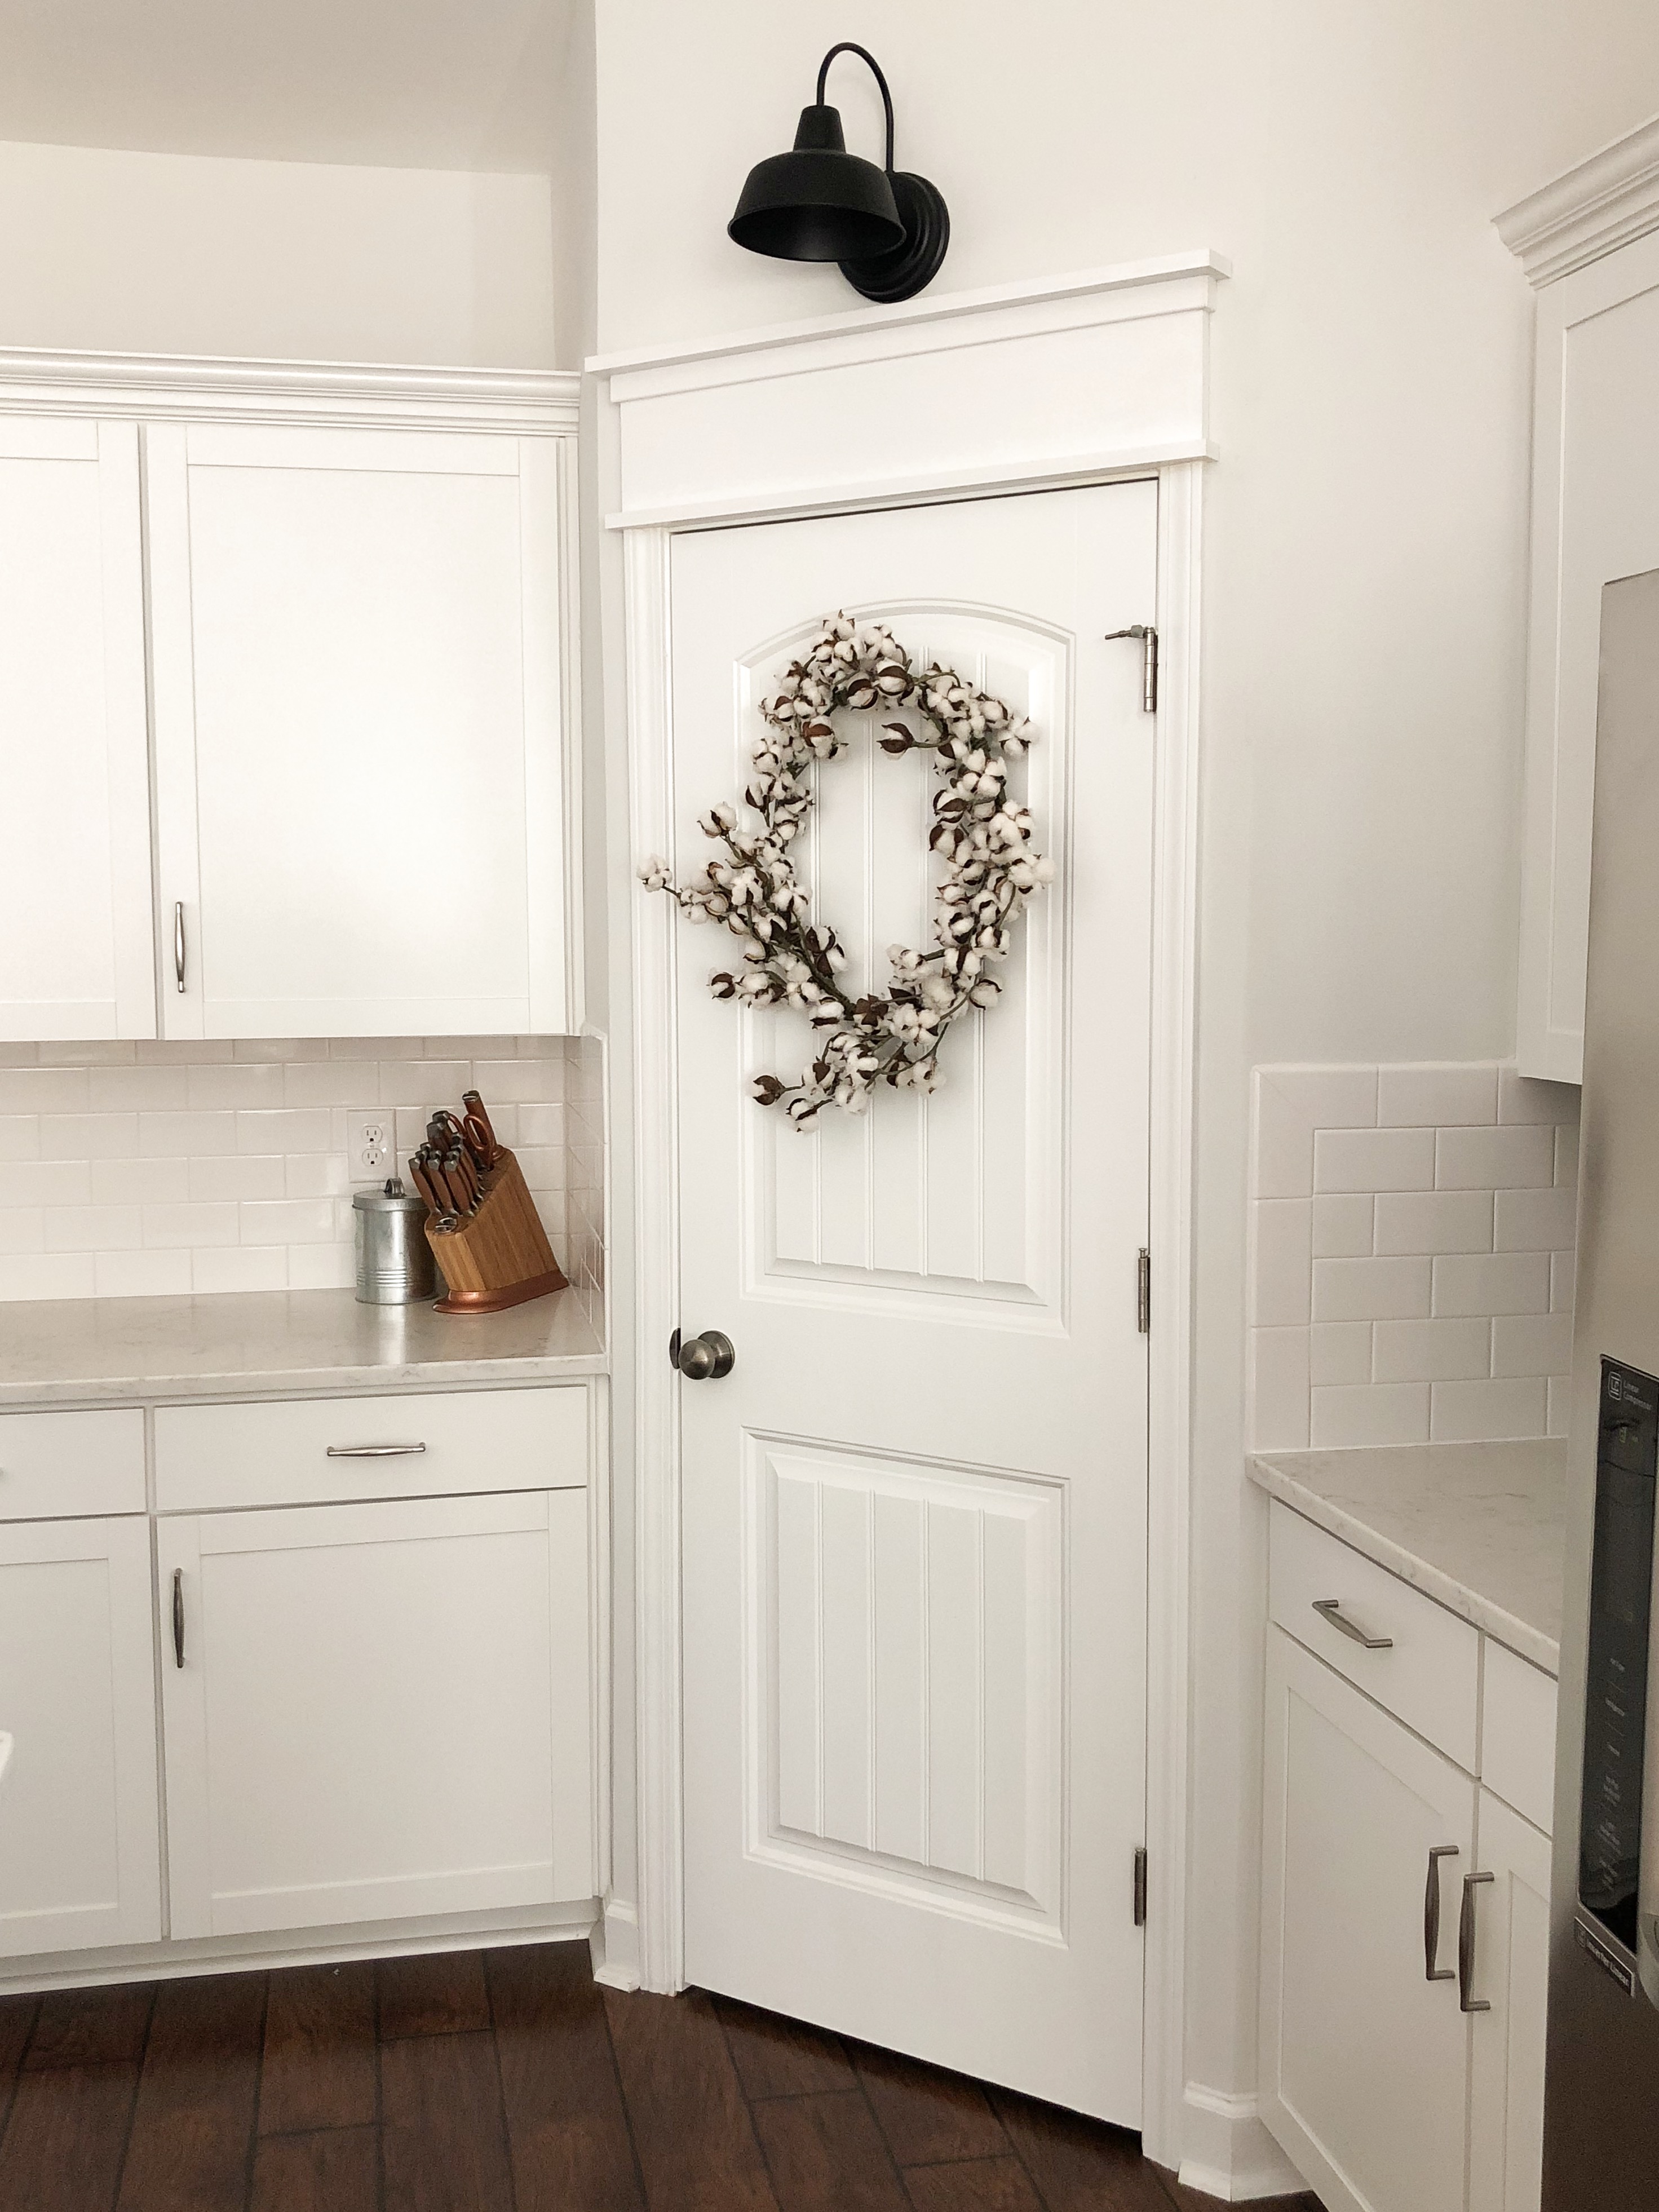
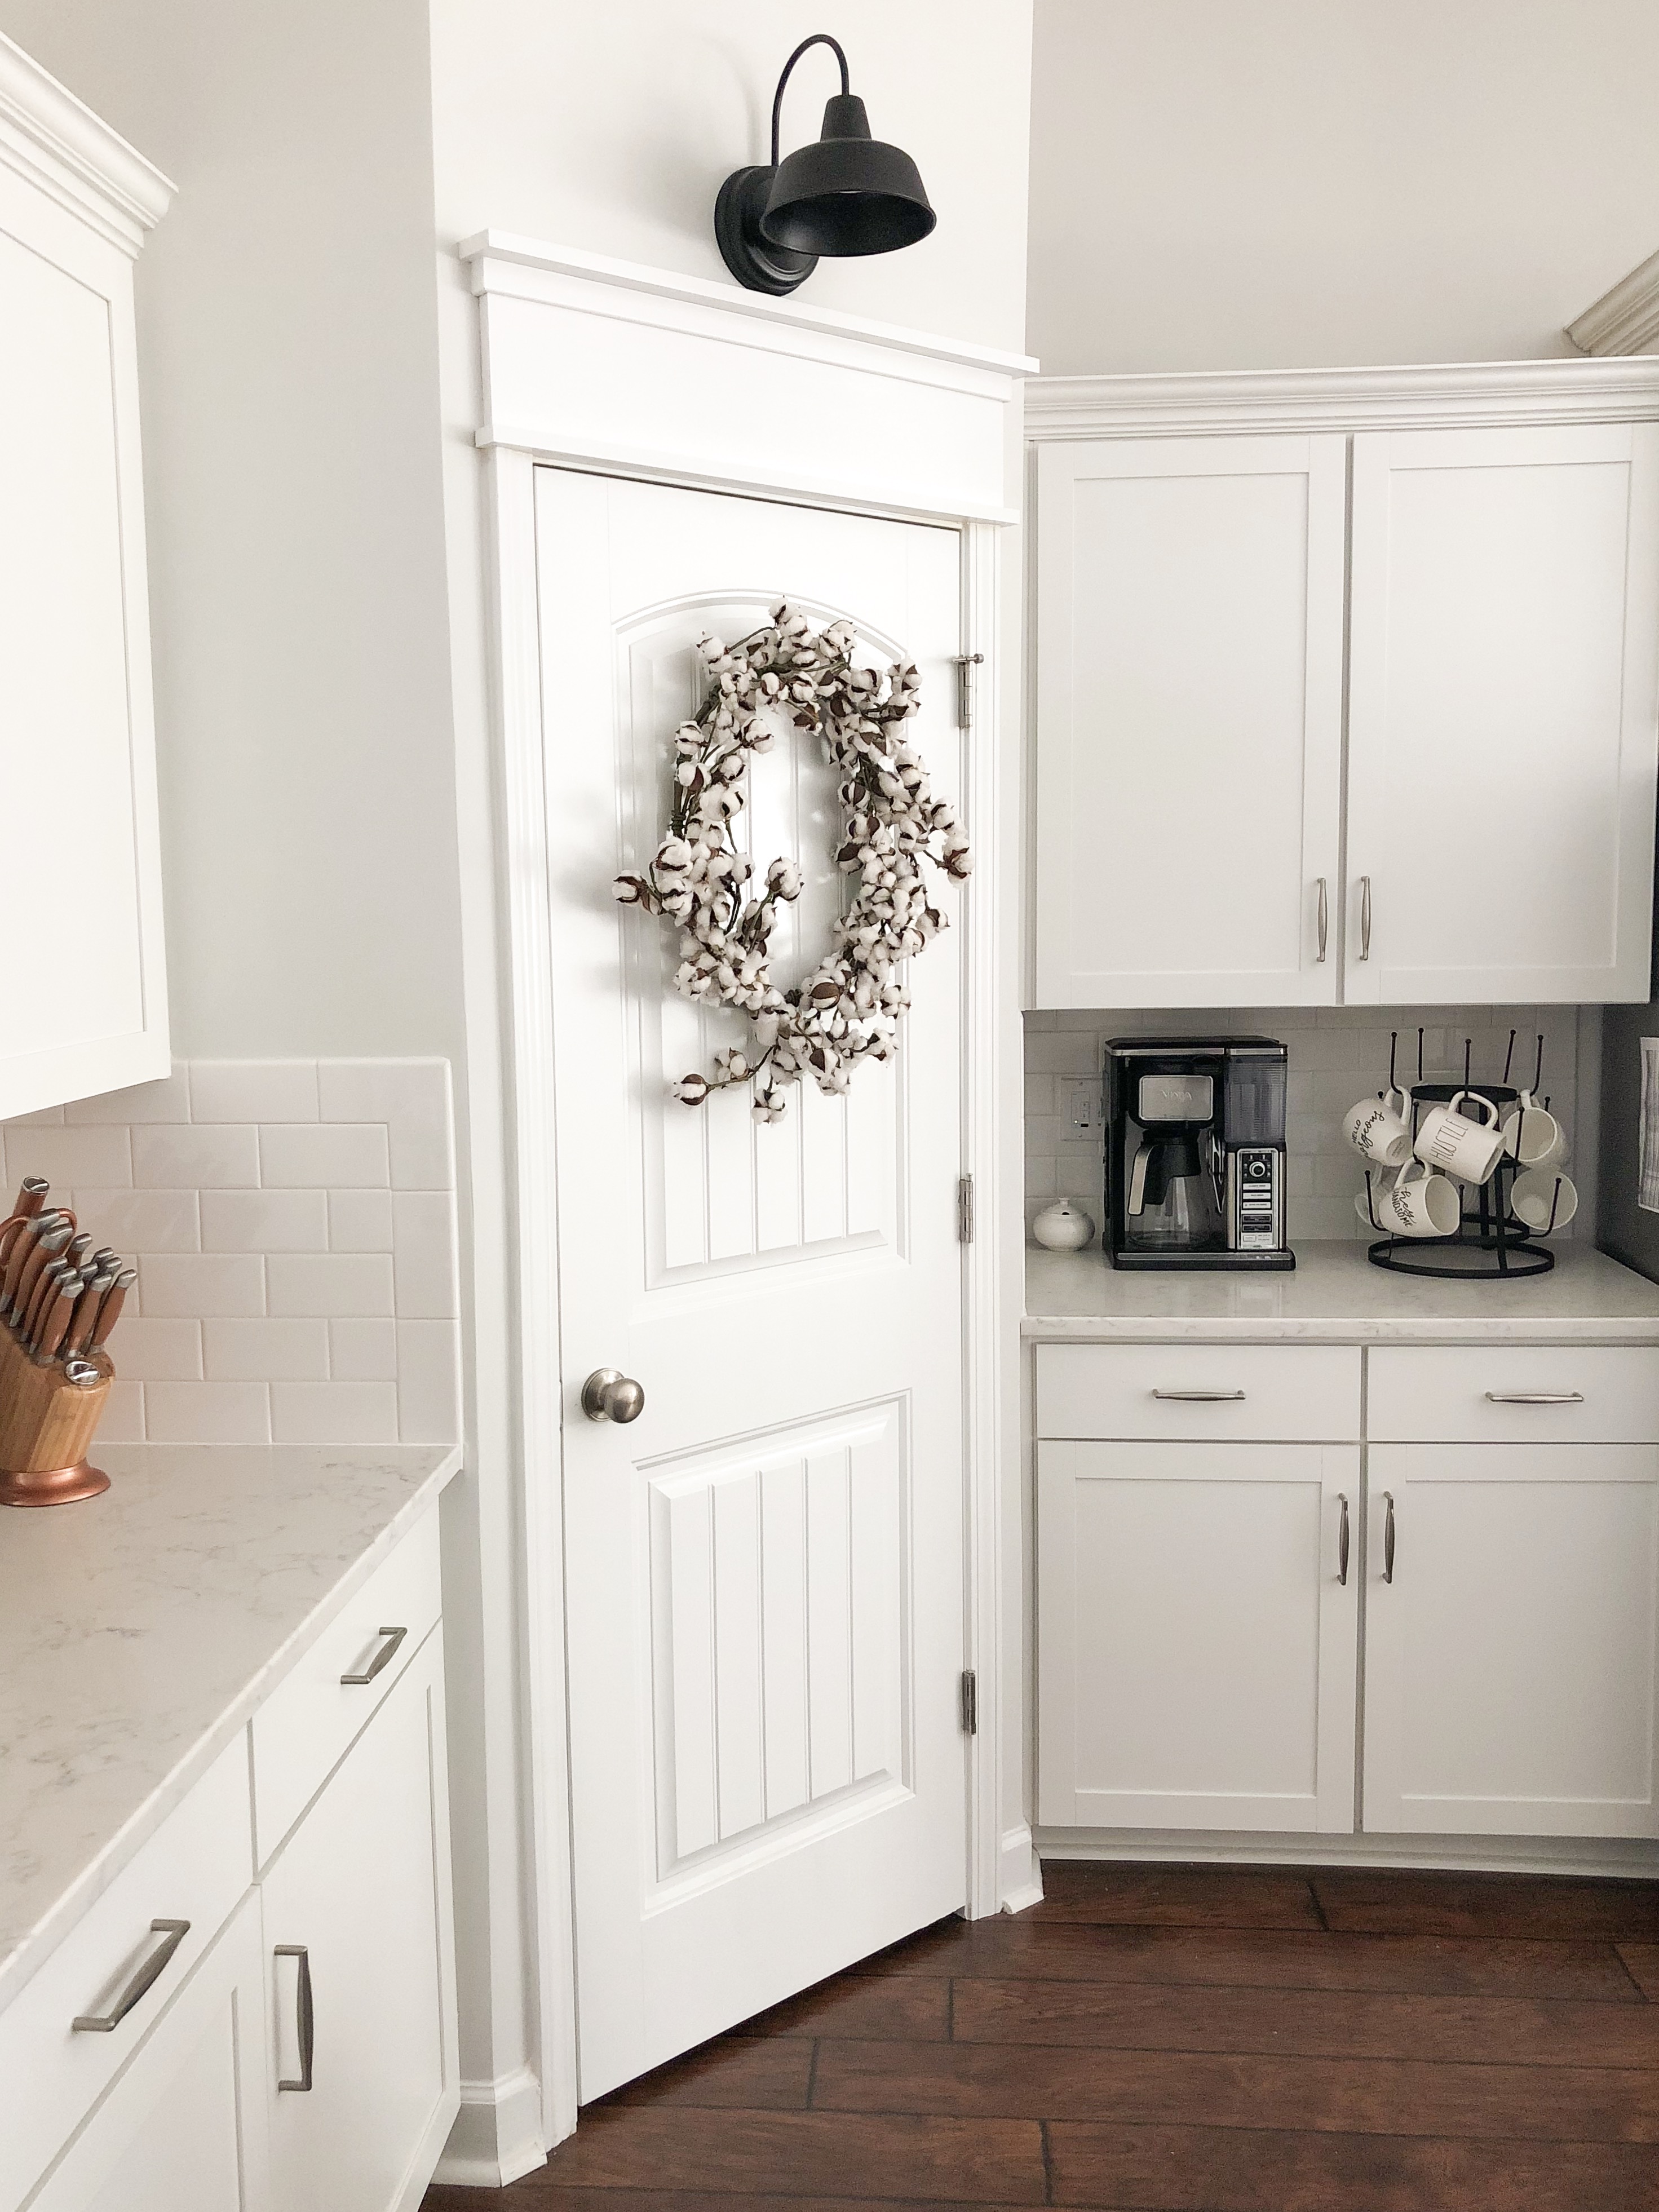
This post talks all about the light and how we are able to use it without hardwiring!
Pin for later:
Other posts you might enjoy:
DIY Faux Brick Fireplace
Guest Bedroom Current State + Inspiration
How To Attach Window Boxes to Vinyl Siding
jordan jean
Leave a Reply


[…] DIY Farmhouse Custom Door Trim […]
[…] Yesterday I shared the DIY farmhouse custom door trim tutorial and wanted to make sure to talk about the other amazing part about this makeover – the light! […]