December 17, 2018
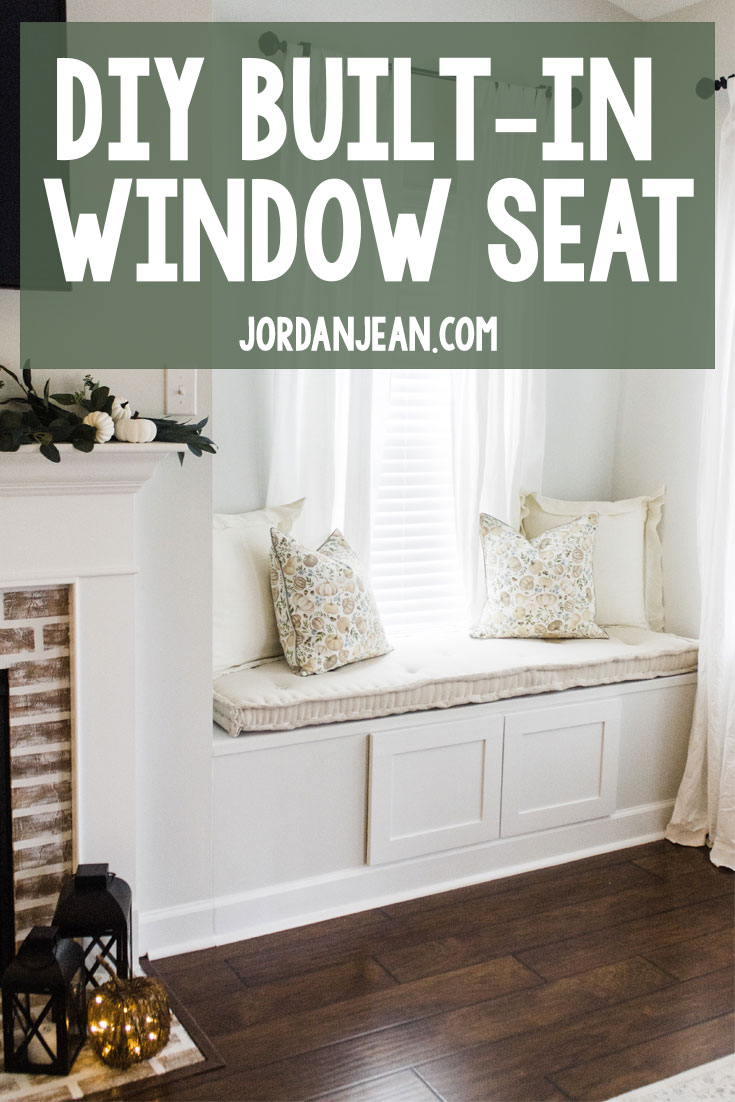
Hey guys! Stephen here. We had this corner in our family room right next to our fireplace that was tucked away and we weren’t quite sure what to do with it. We didn’t know whether we were going to buy a big comfy seat and make it a cozy reading nook or just leave it as an open spot and put up some decorations. We ended up deciding to make a built-in window bench and we’re really glad about our decision. The actual construction of the built-in bench is fairly simple, the only materials you need are 2x4s, some plywood (we went with 1/4 thick), a few nails, and some screws. We decided to add doors to the front so that we could hide/store things underneath liked our WiFi router, DVD’s, and board games.
What You Need (all of this is dependent upon the size of your window seat):
- 2x4s
- Plywood – 1/4″ thick
- Brad nailer
- 18 gauge nails
- Wood screws
- Wood glue
- 1/2″ MDF for the doors (it doesn’t have to be this exactly… We just had this leftover from another project)
- 1/4″ poplar boards for door trim
- Concealed cabinet door hinges
- Baseboard trim to match your existing trim
What to do:
The area we were working with measured 71 inches long by 24.25 inches deep by 24 inches high. We chose to make the seat 23.5 inches high to leave a half an inch of clearance below the bottom of the windowsill for when we put a cushion on top.
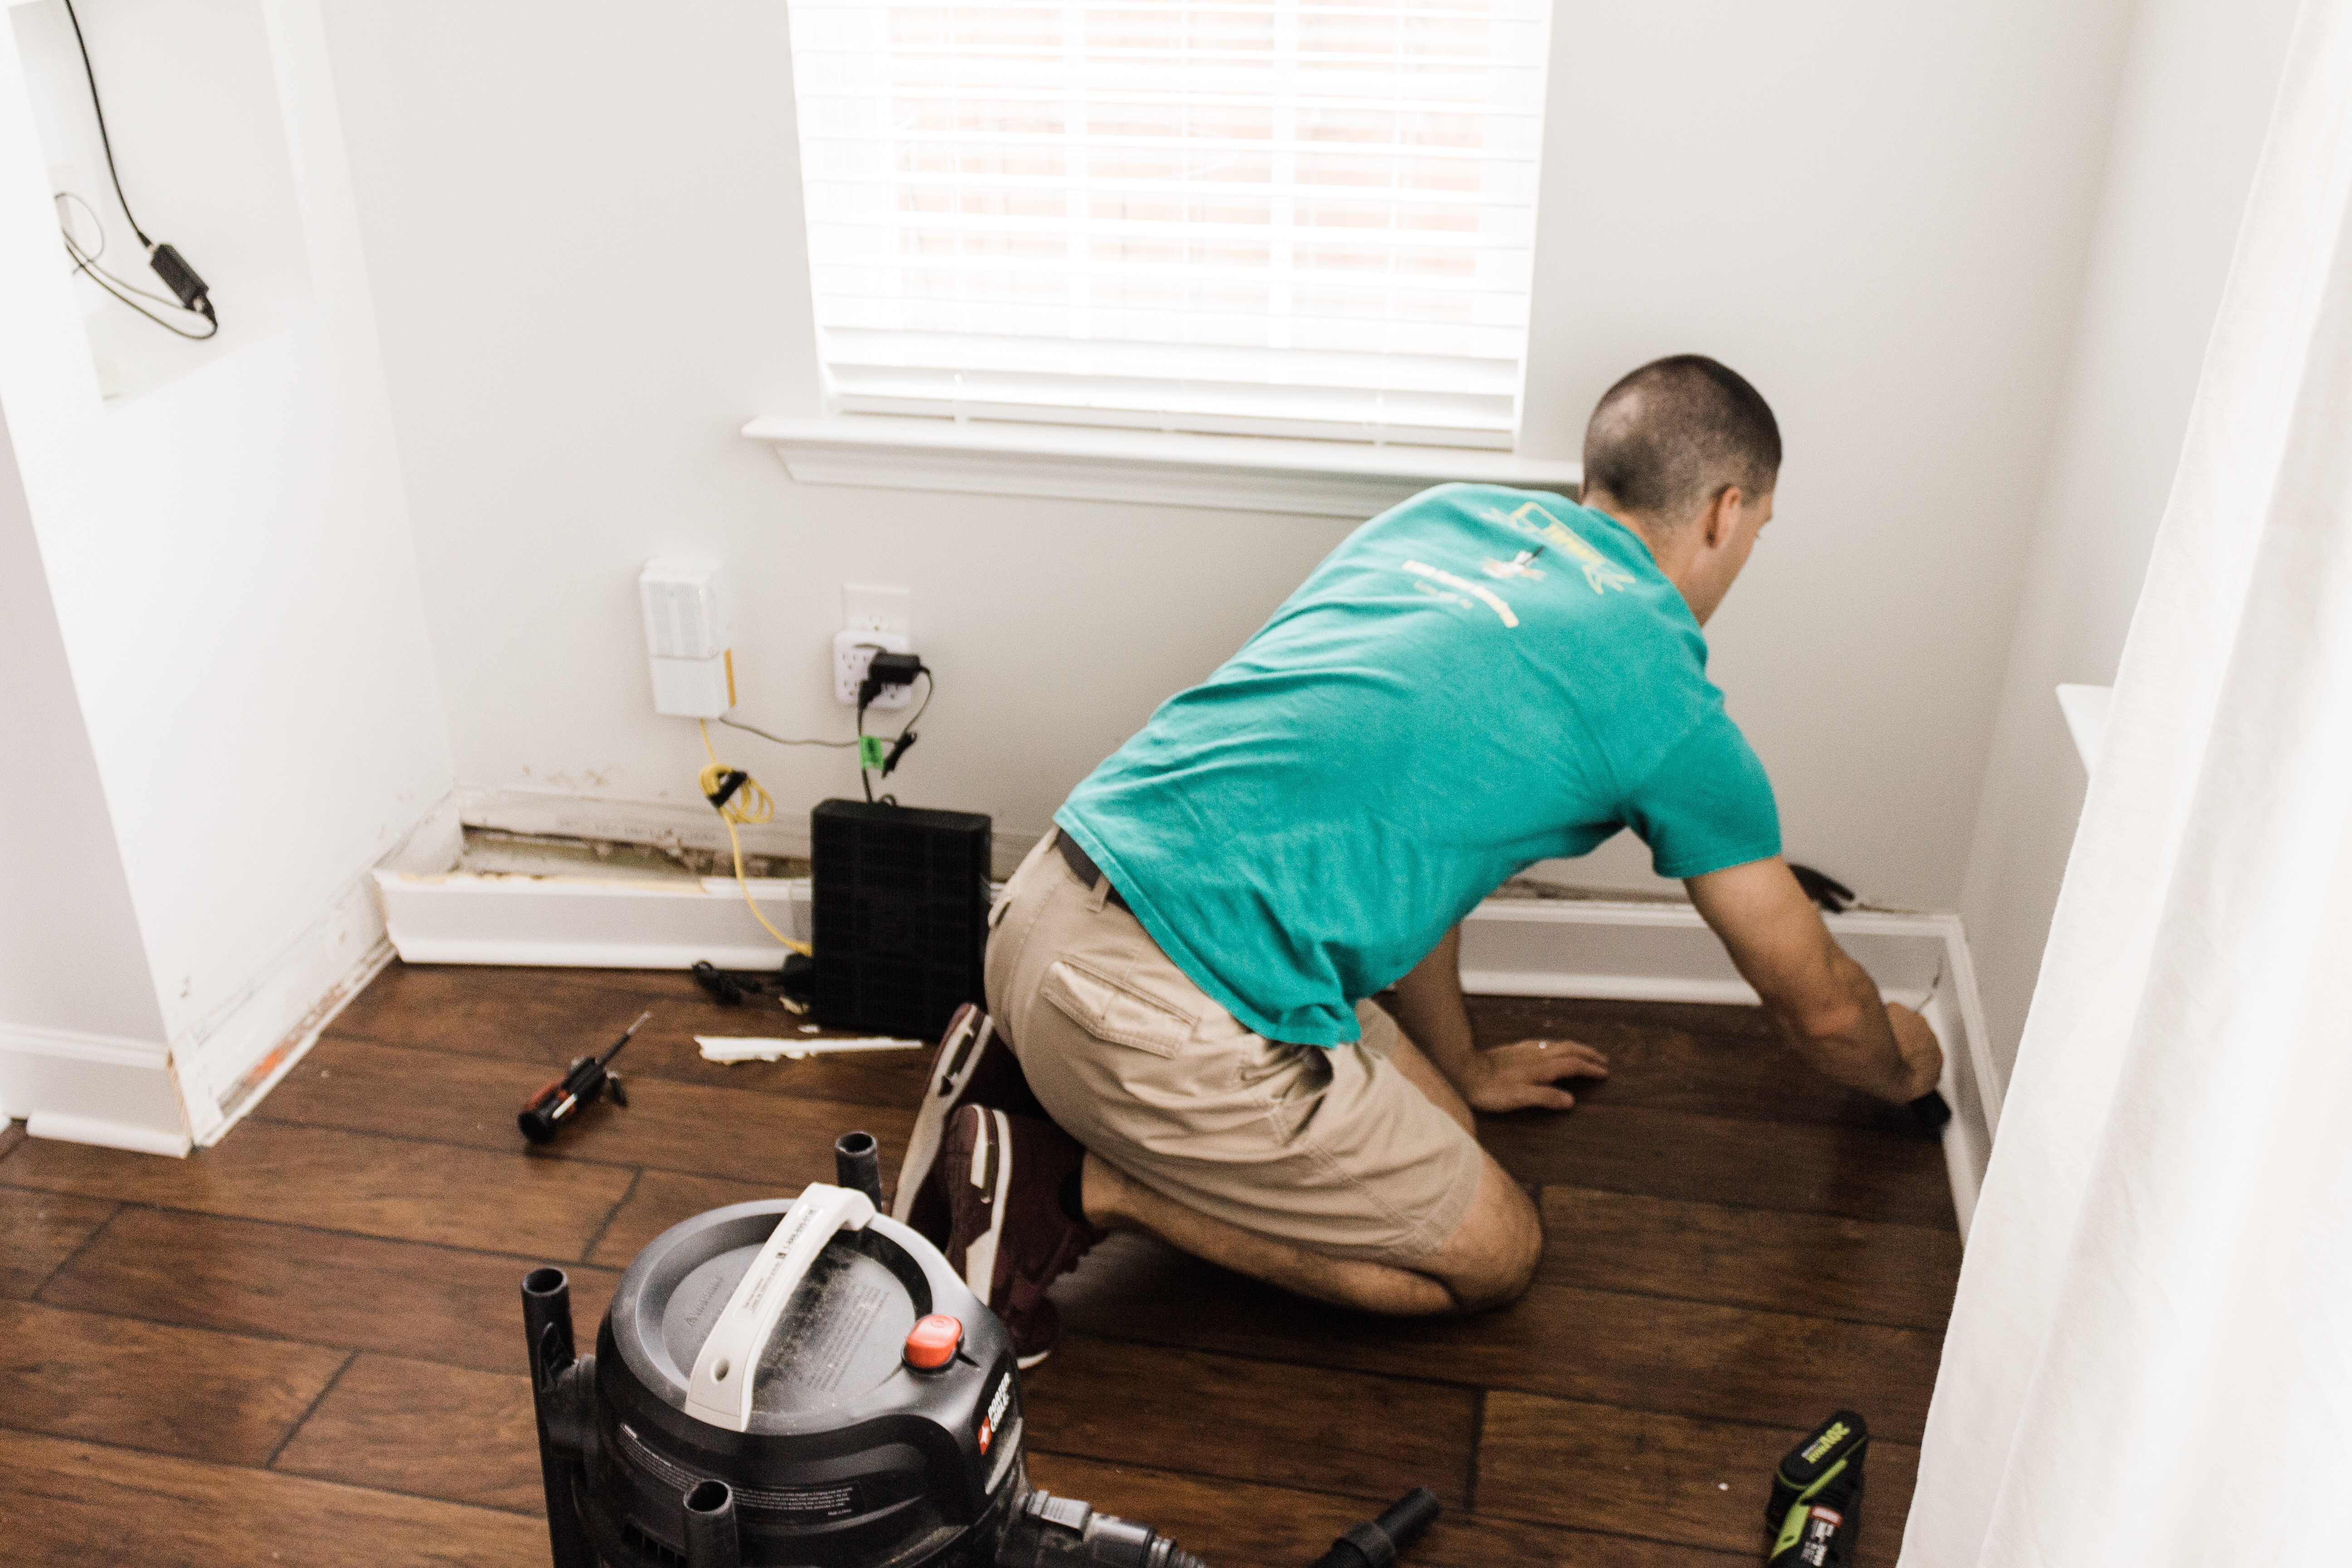
- To begin, we removed the base boards from the wall by using the back end of a hammer to pry it off the wall, although a small crowbar would have made it easier.
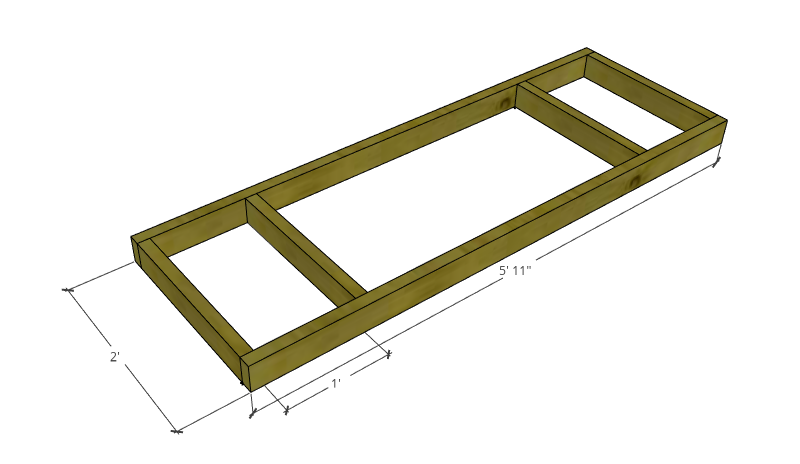
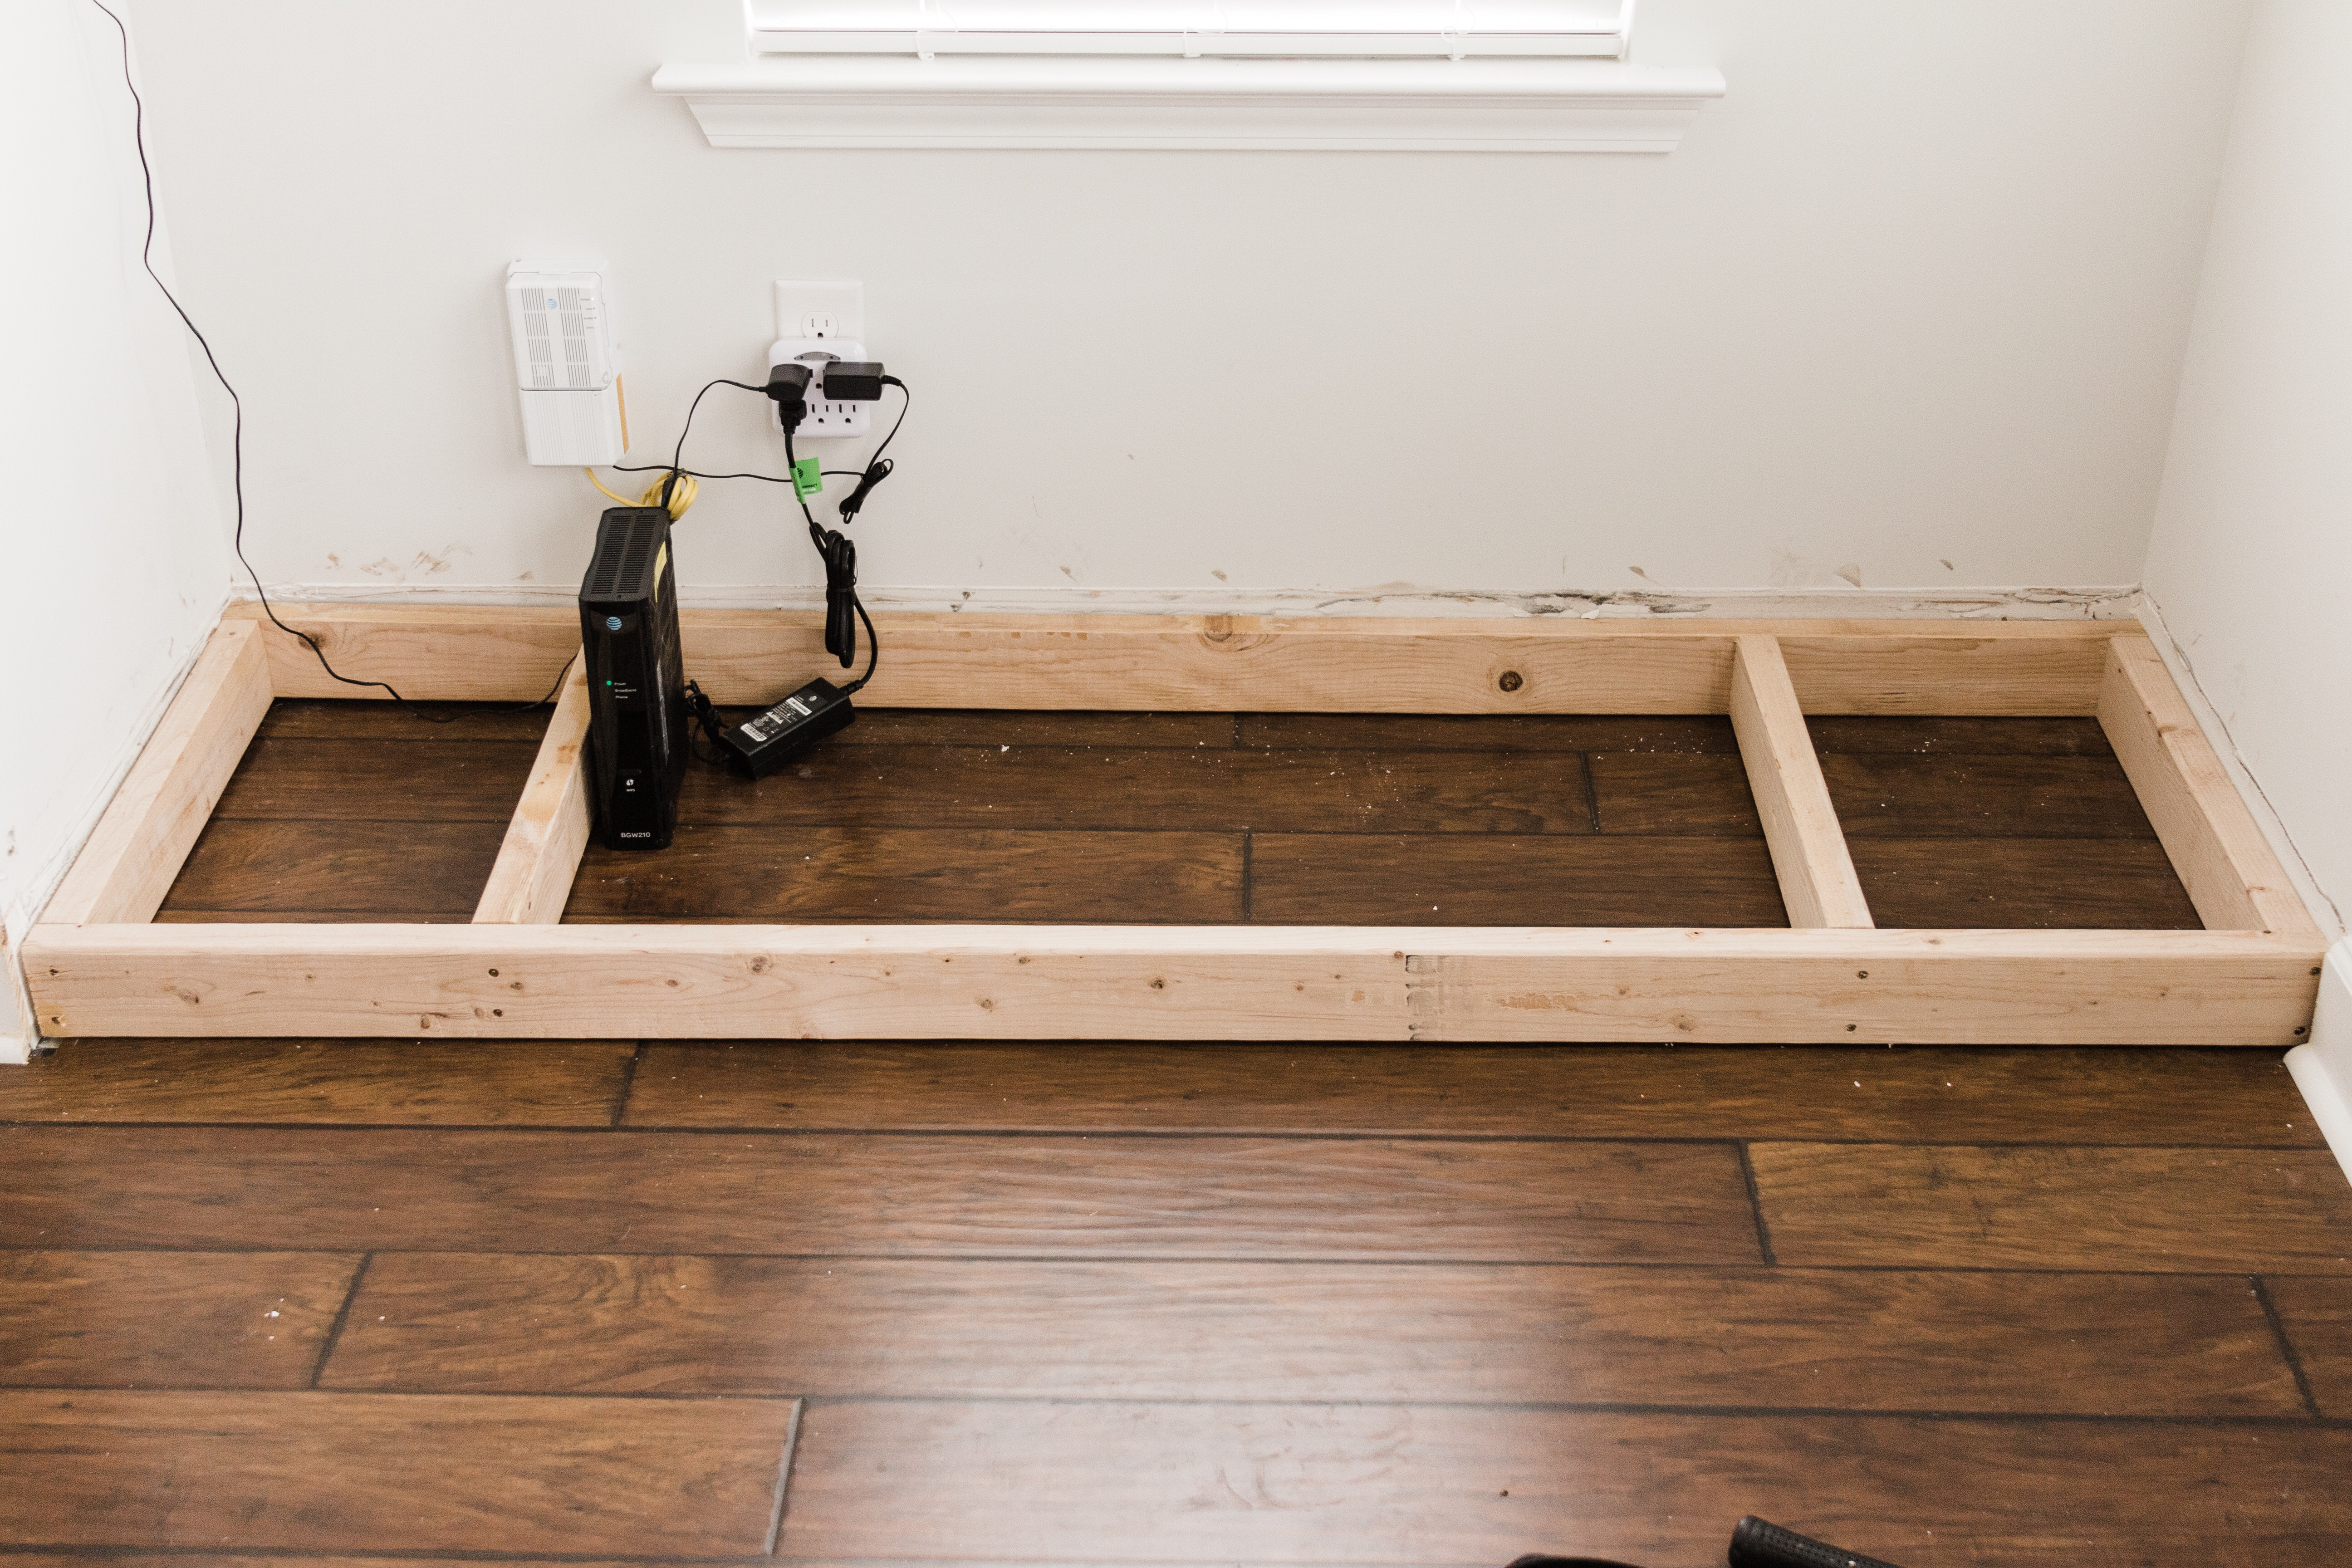
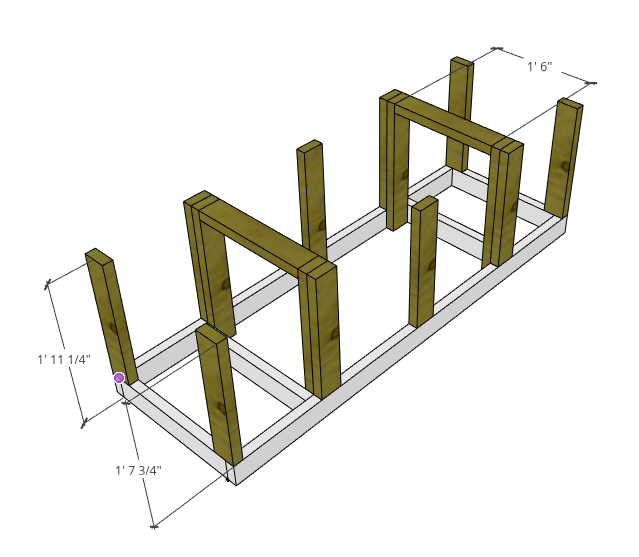
- Next we built a rectangular base 71 inches long by 24 inches deep, keeping it a quarter inch short of the end of the wall so that when we attached the 1/4″ plywood to the front it would be flush. We used two cross beams to help add support then screwed the whole thing into the studs in the wall to make sure it would stay firmly in place.
- Next we added vertical posts to the base which would be the support for the top piece of plywood. We attached a post to each of the four corners of the base and then added double posts just to the inside of the support beams along the front and back of the base. These helped with structural support and also provide a way to attach the hinges to the doors that will go along the front of the bench.
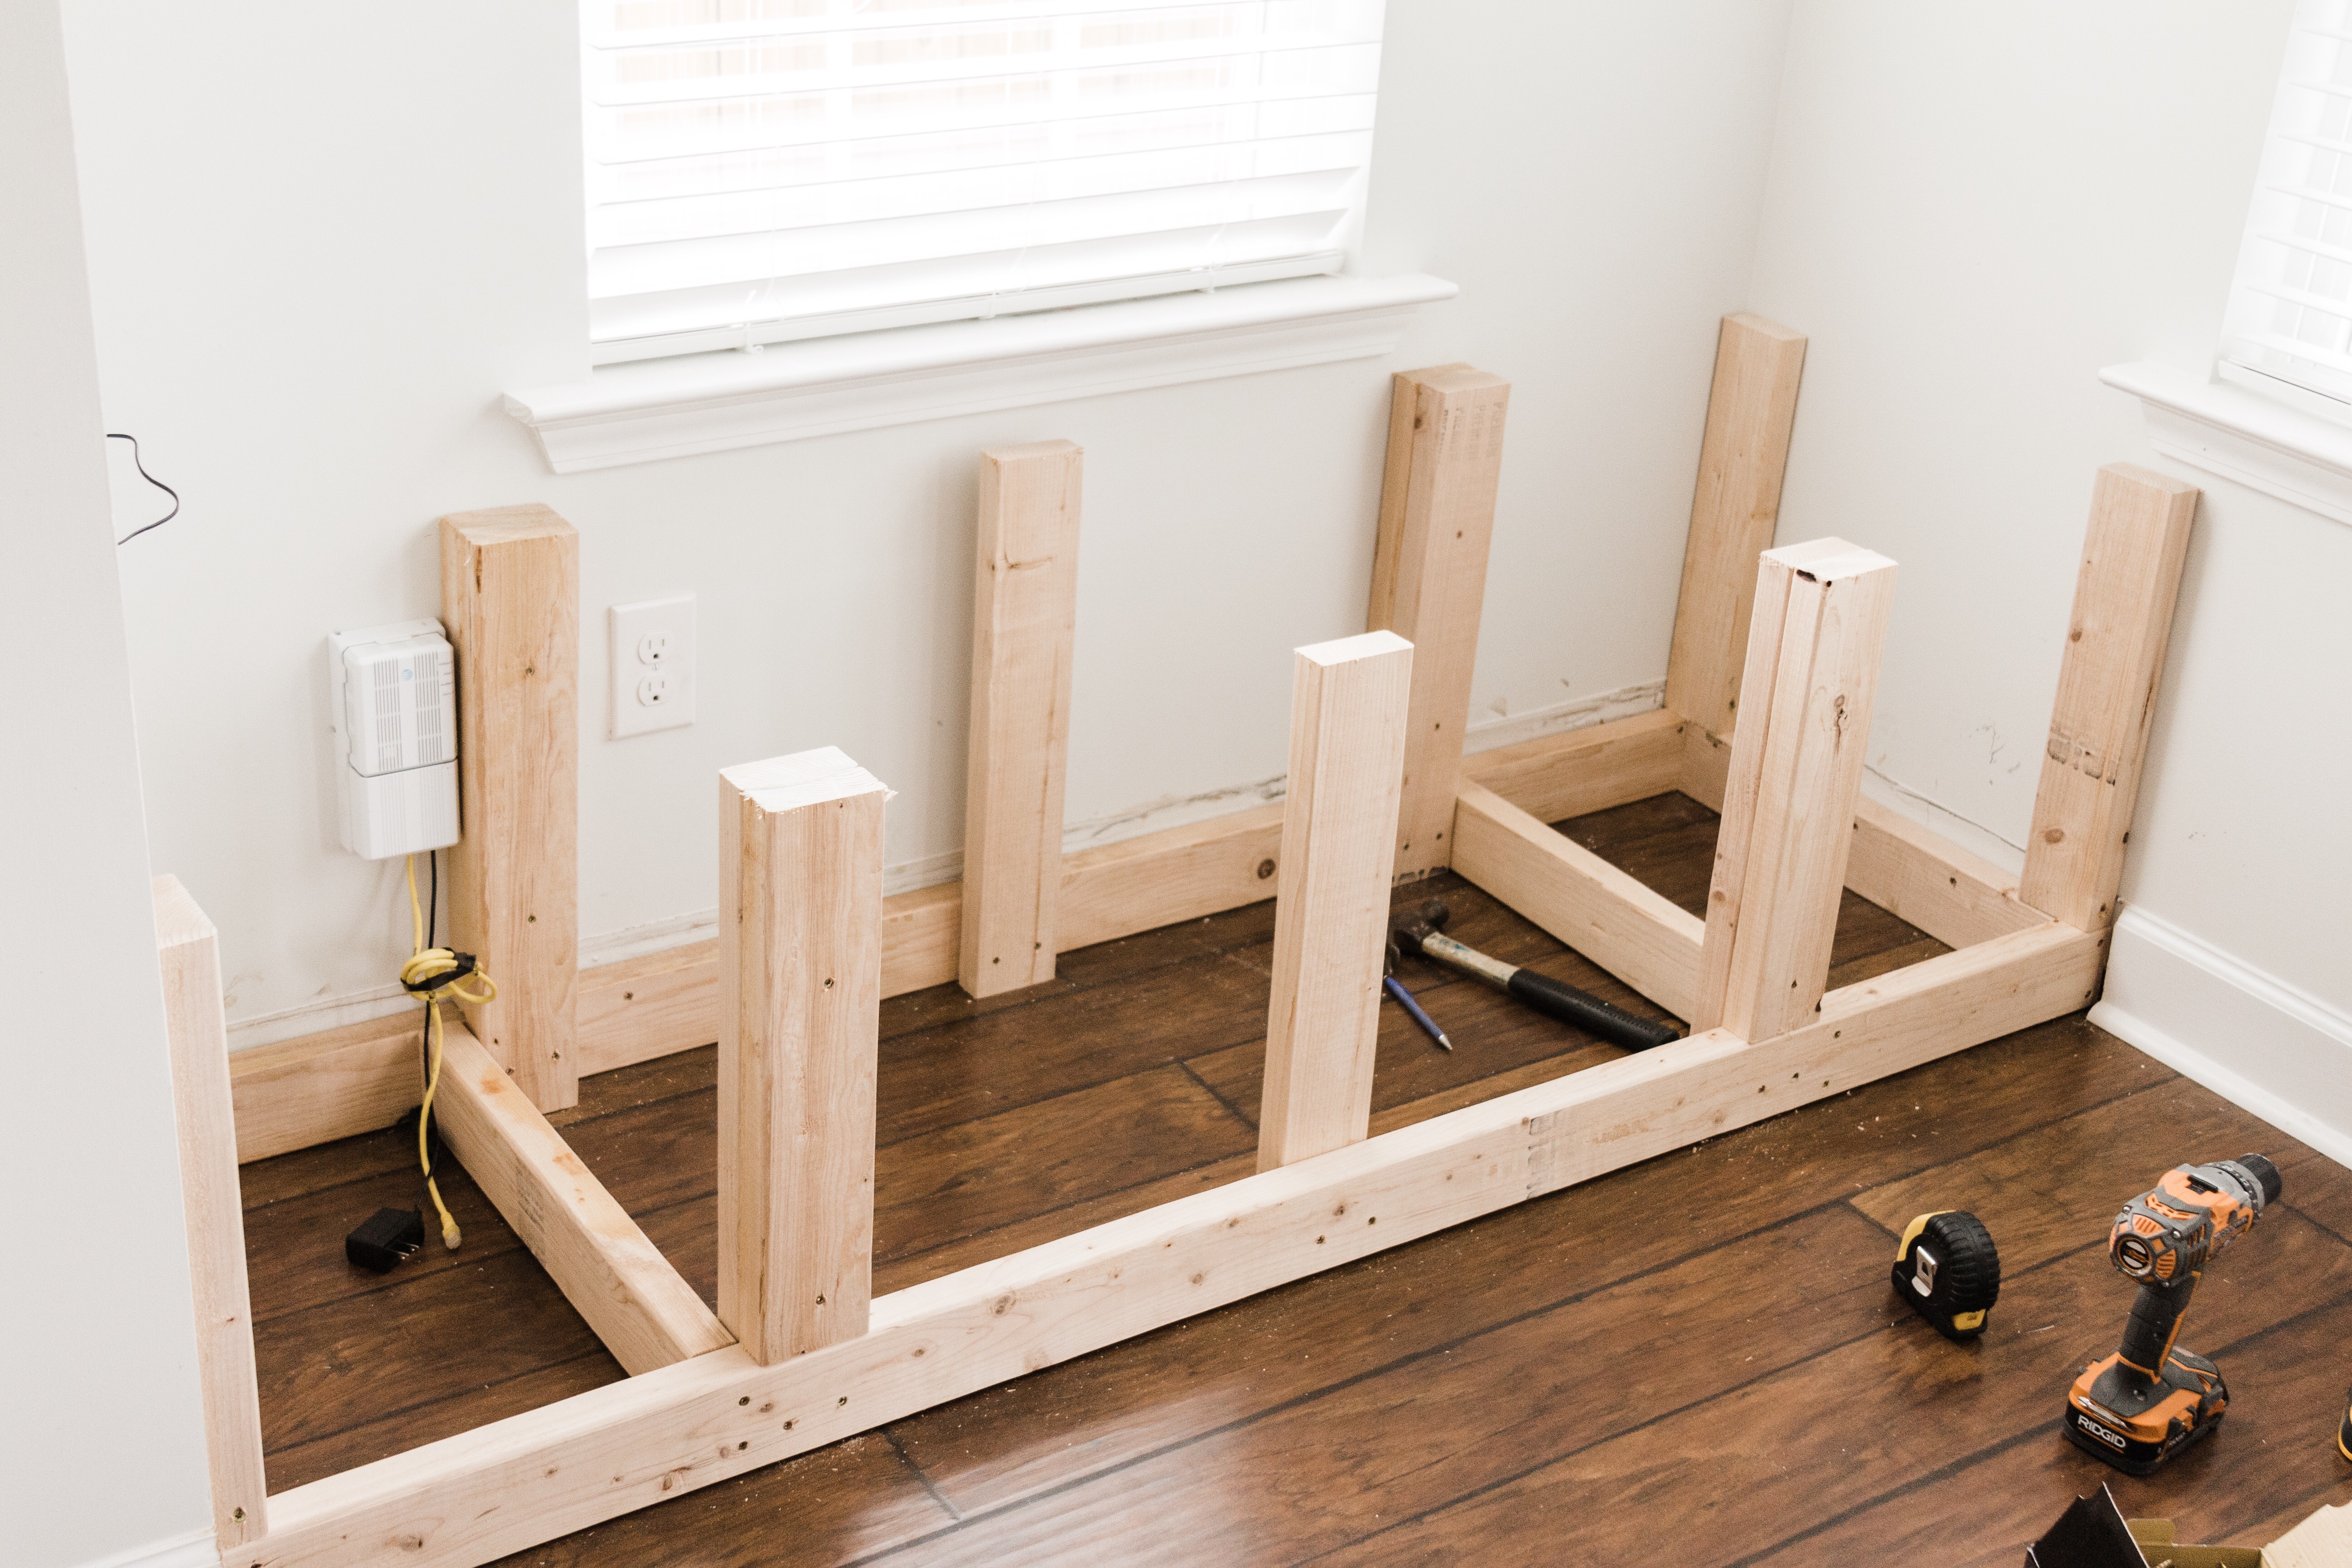
- We laid a 2×4 horizontally stretching from the front to the back double posts to help prevent the plywood from sagging once it is placed on top. Finally we added a post in the middle along the front and back end of the base for additional support. Each of the posts was cut so that they reached 23.25″ from the floor, and they were attached to the base using screws.

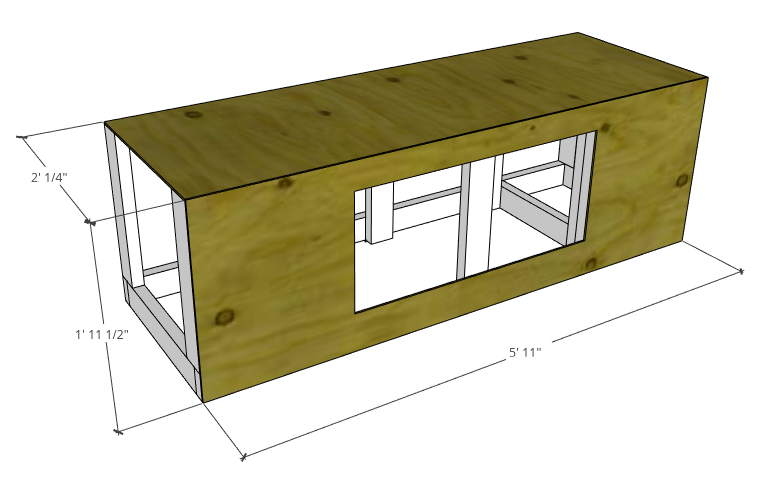
- Next we added the plywood to the top and front of the bench. The top sheet was simply cut 24.25″ x 71″ and placed on top then nailed in to the posts. The front sheet was cut to 23.25″ x 71″ and we made a 15″ x 34″ cutout in the middle of it using a jigsaw to have an opening for the doors. After it was cutout, we placed it against the front of the frame and nailed it in using 18 gauge brad nails.

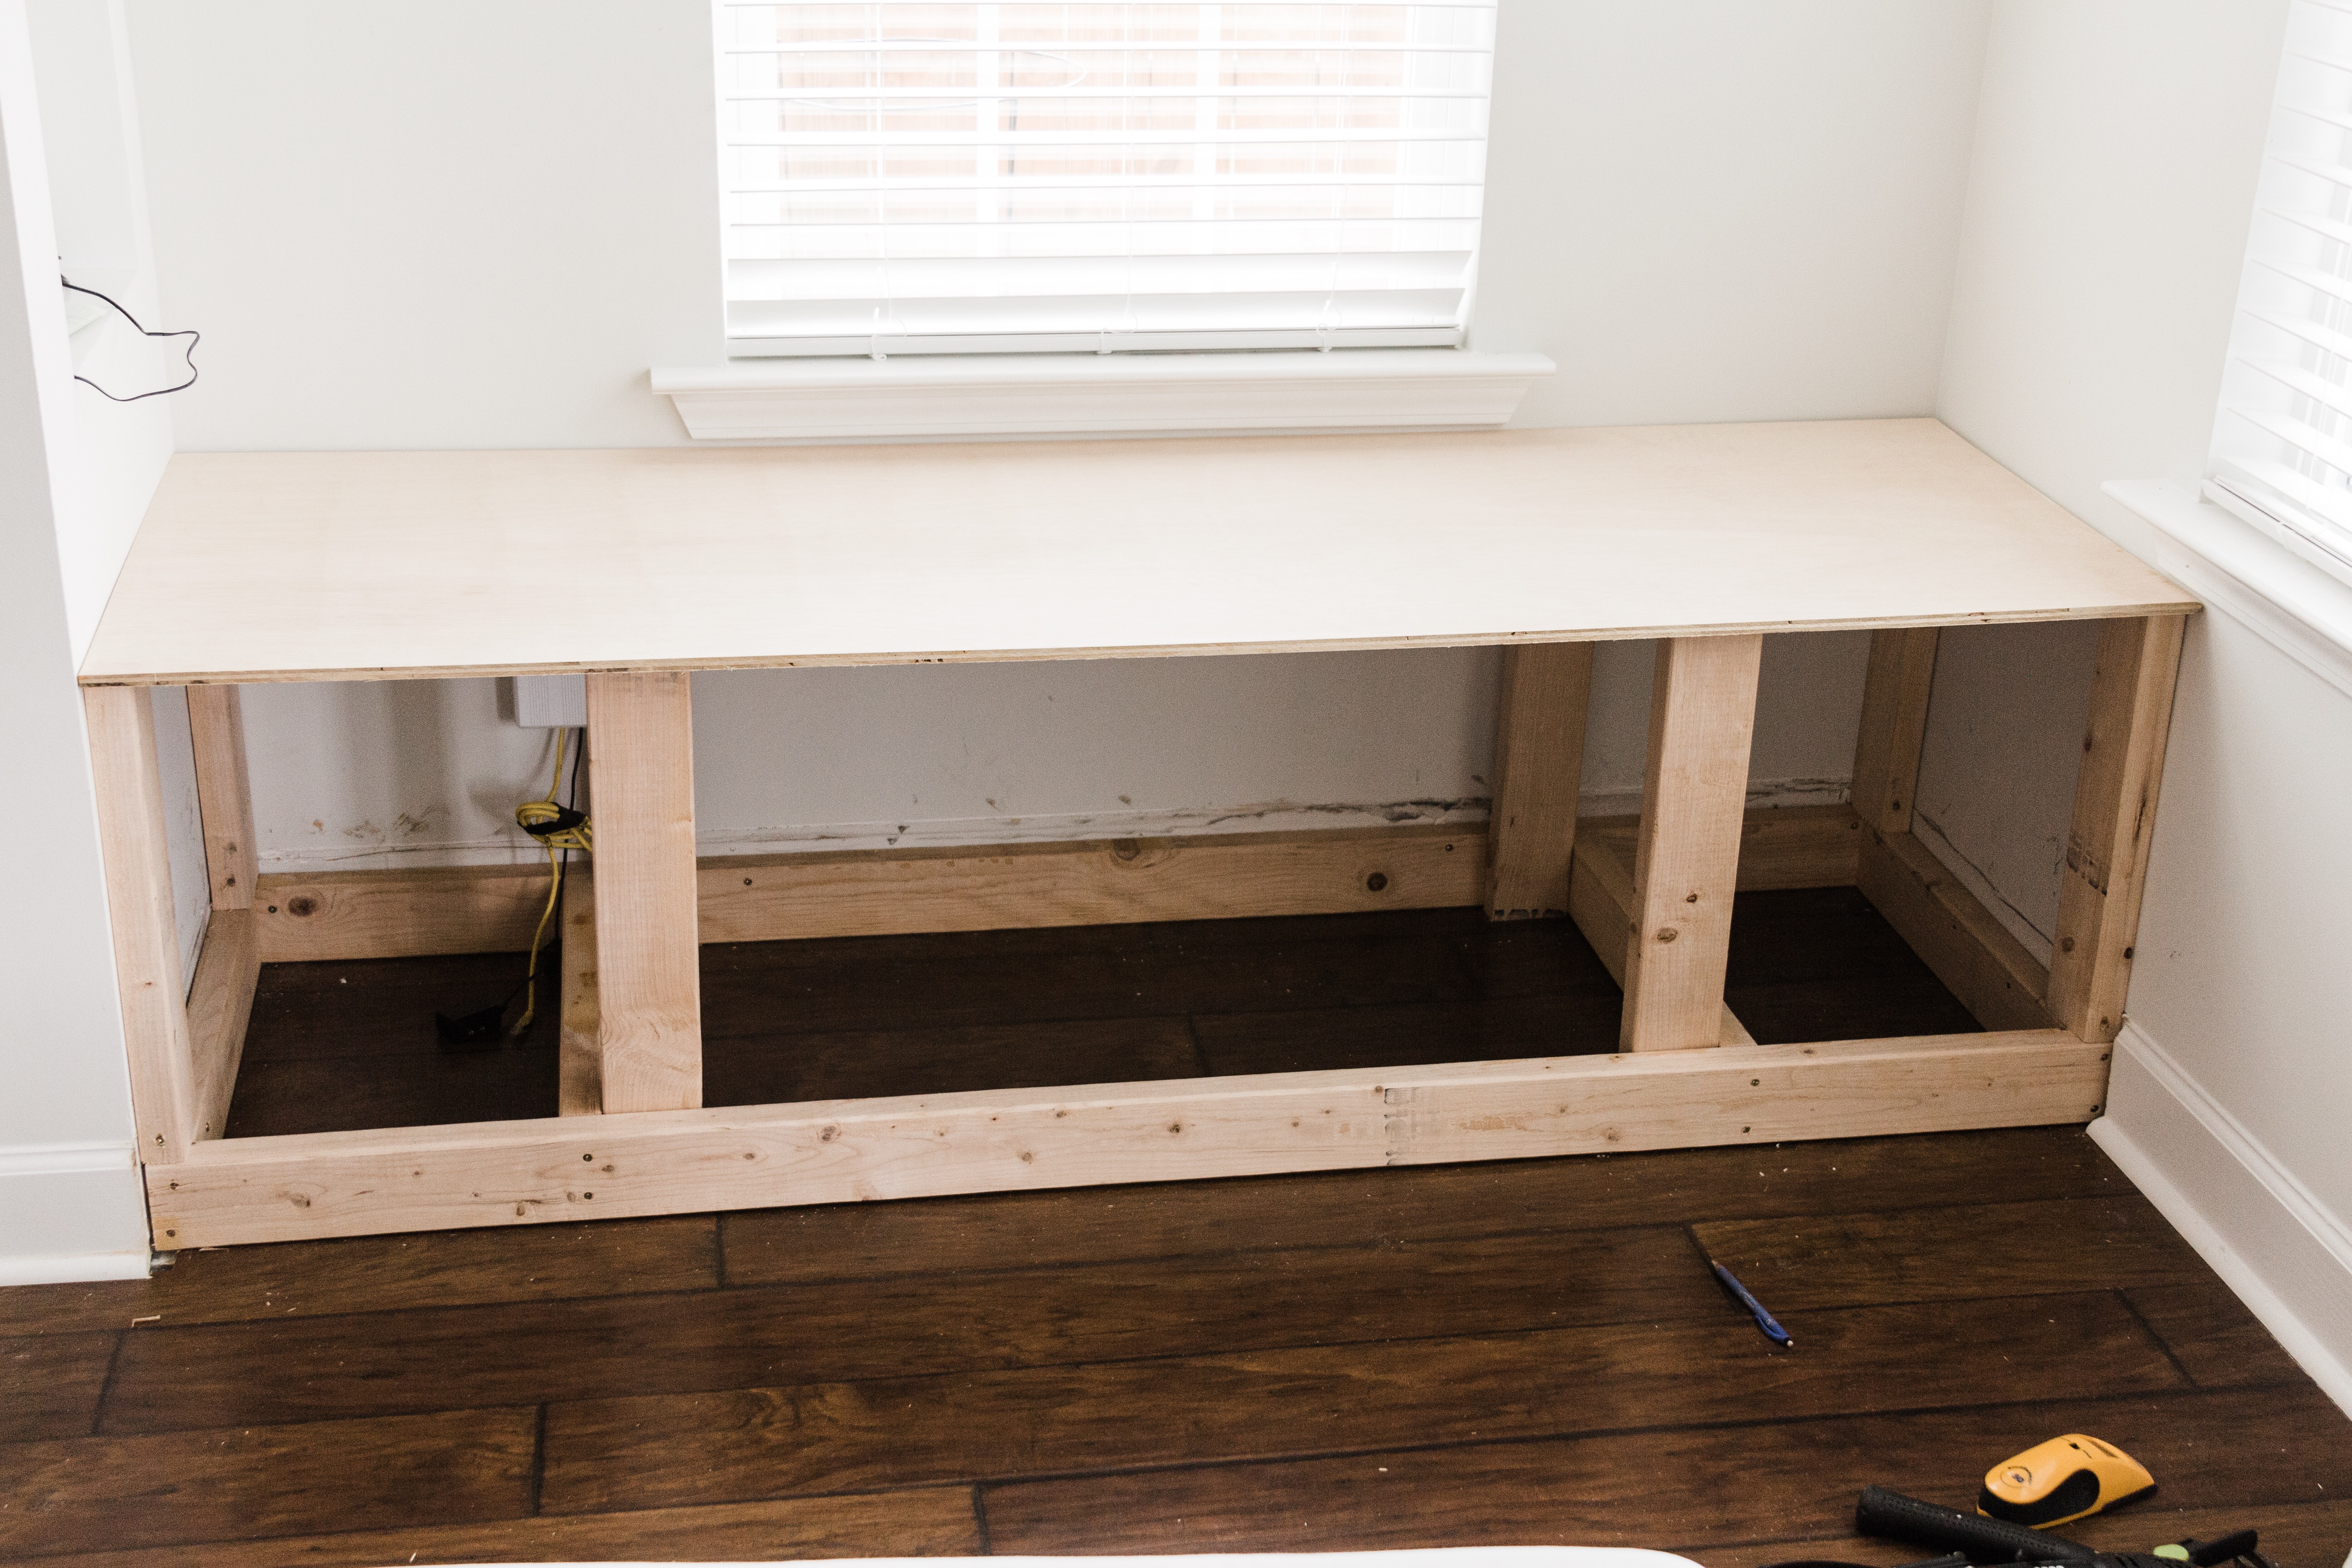
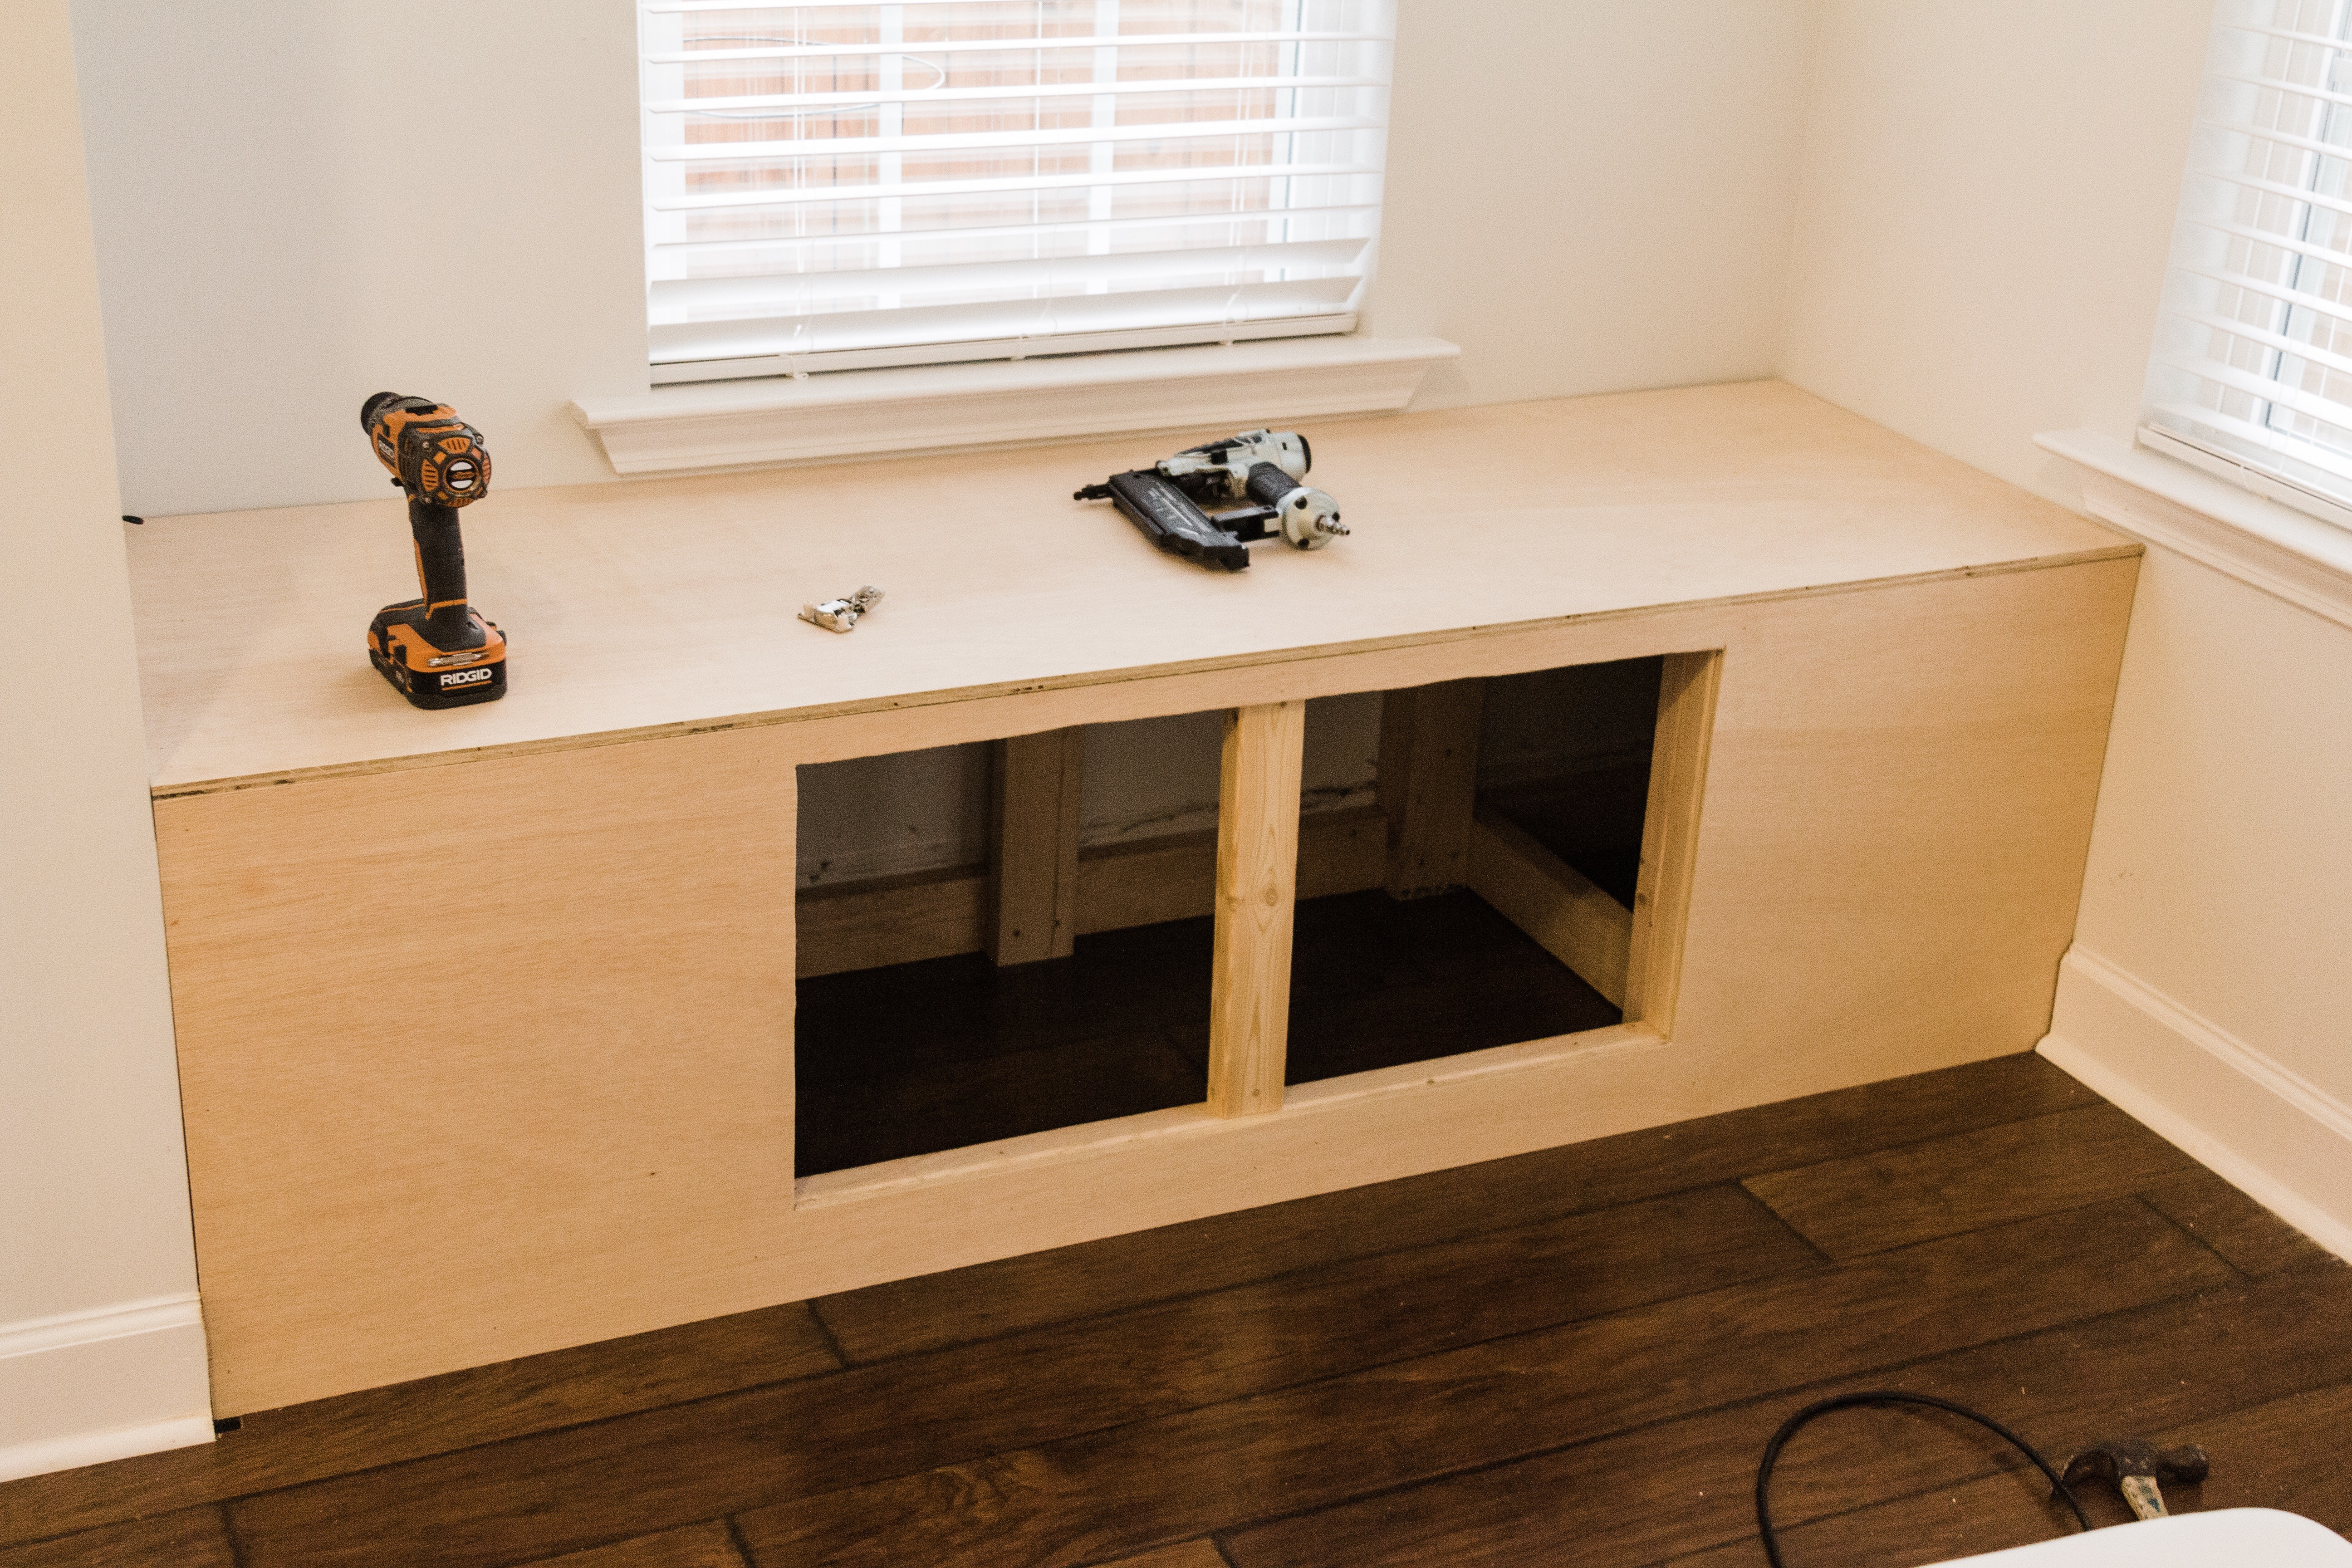
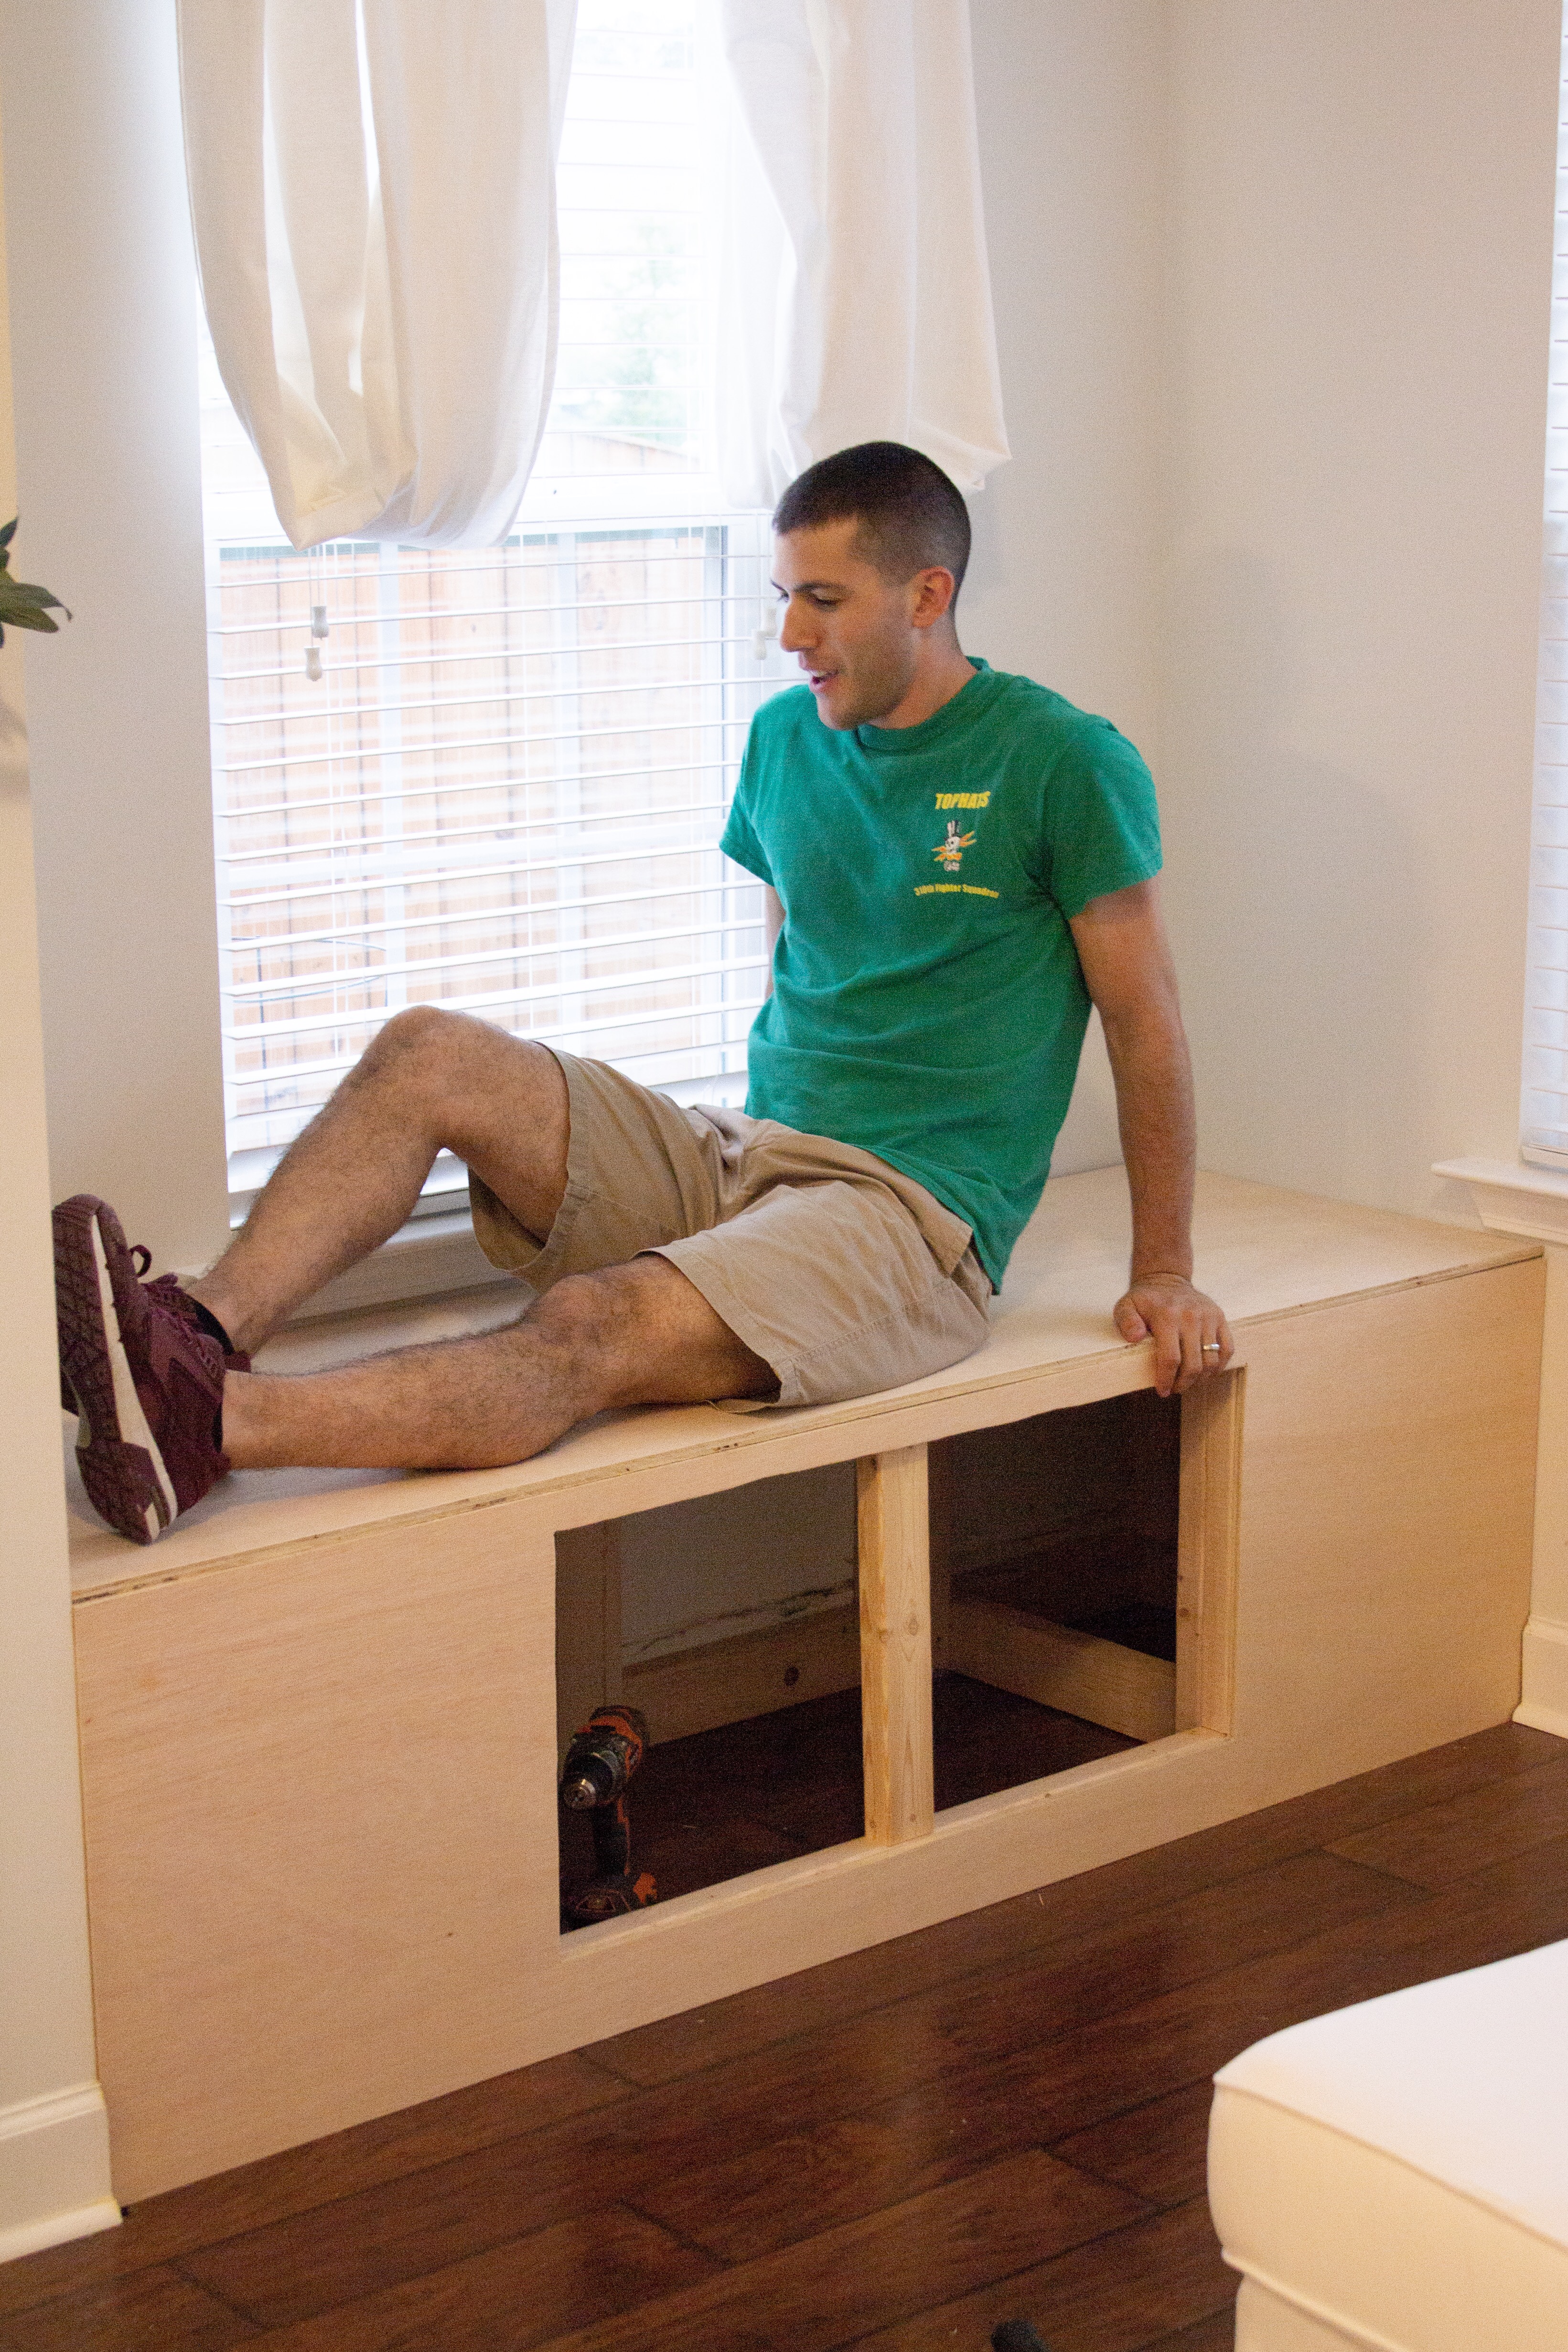
I was excited!
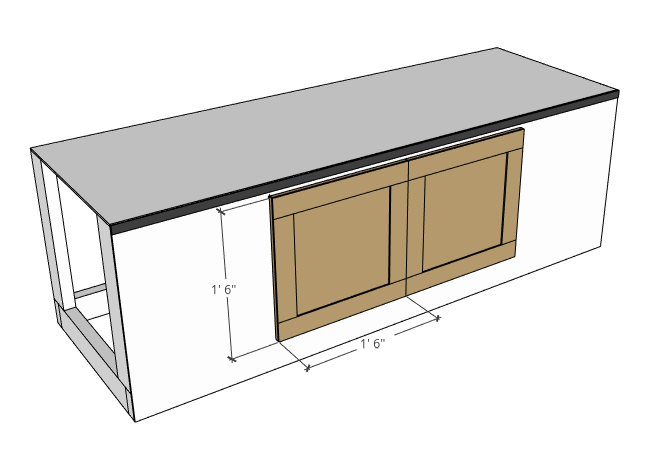
- Finally it was time to make the doors for the front. For these we used some left over 1/2″ MDF board we had laying around and bought 2.5″ x 0.25″ poplar boards to make the square trim around the edges. We wanted these to match the shaker style cabinets we have in our kitchen and these were the best materials we could find to match it without having to order custom doors. The MDF was cut 18″ x 18″ square and the poplar boards were cut to lengths of 18″ and 13″. The poplar trim pieces were attached using wood glue and then clamped in place until the glue dried.
- After they were made, we attached concealed hinges to the inside of them and then attached the other end to the double posts and fine tuned them so they were aligned and level with each other. The very last thing we added was a very thin piece of trim along the top of the front face in order to hide the side cross section of the top sheet of plywood.

Once everything was attached and in place all we added base trim to the bottom that matched our existing trim and then painted the front of the bench the color of the walls (SW Frosty White), the baseboards (SW Pure White glossy), and the cabinet doors (same color as trim).
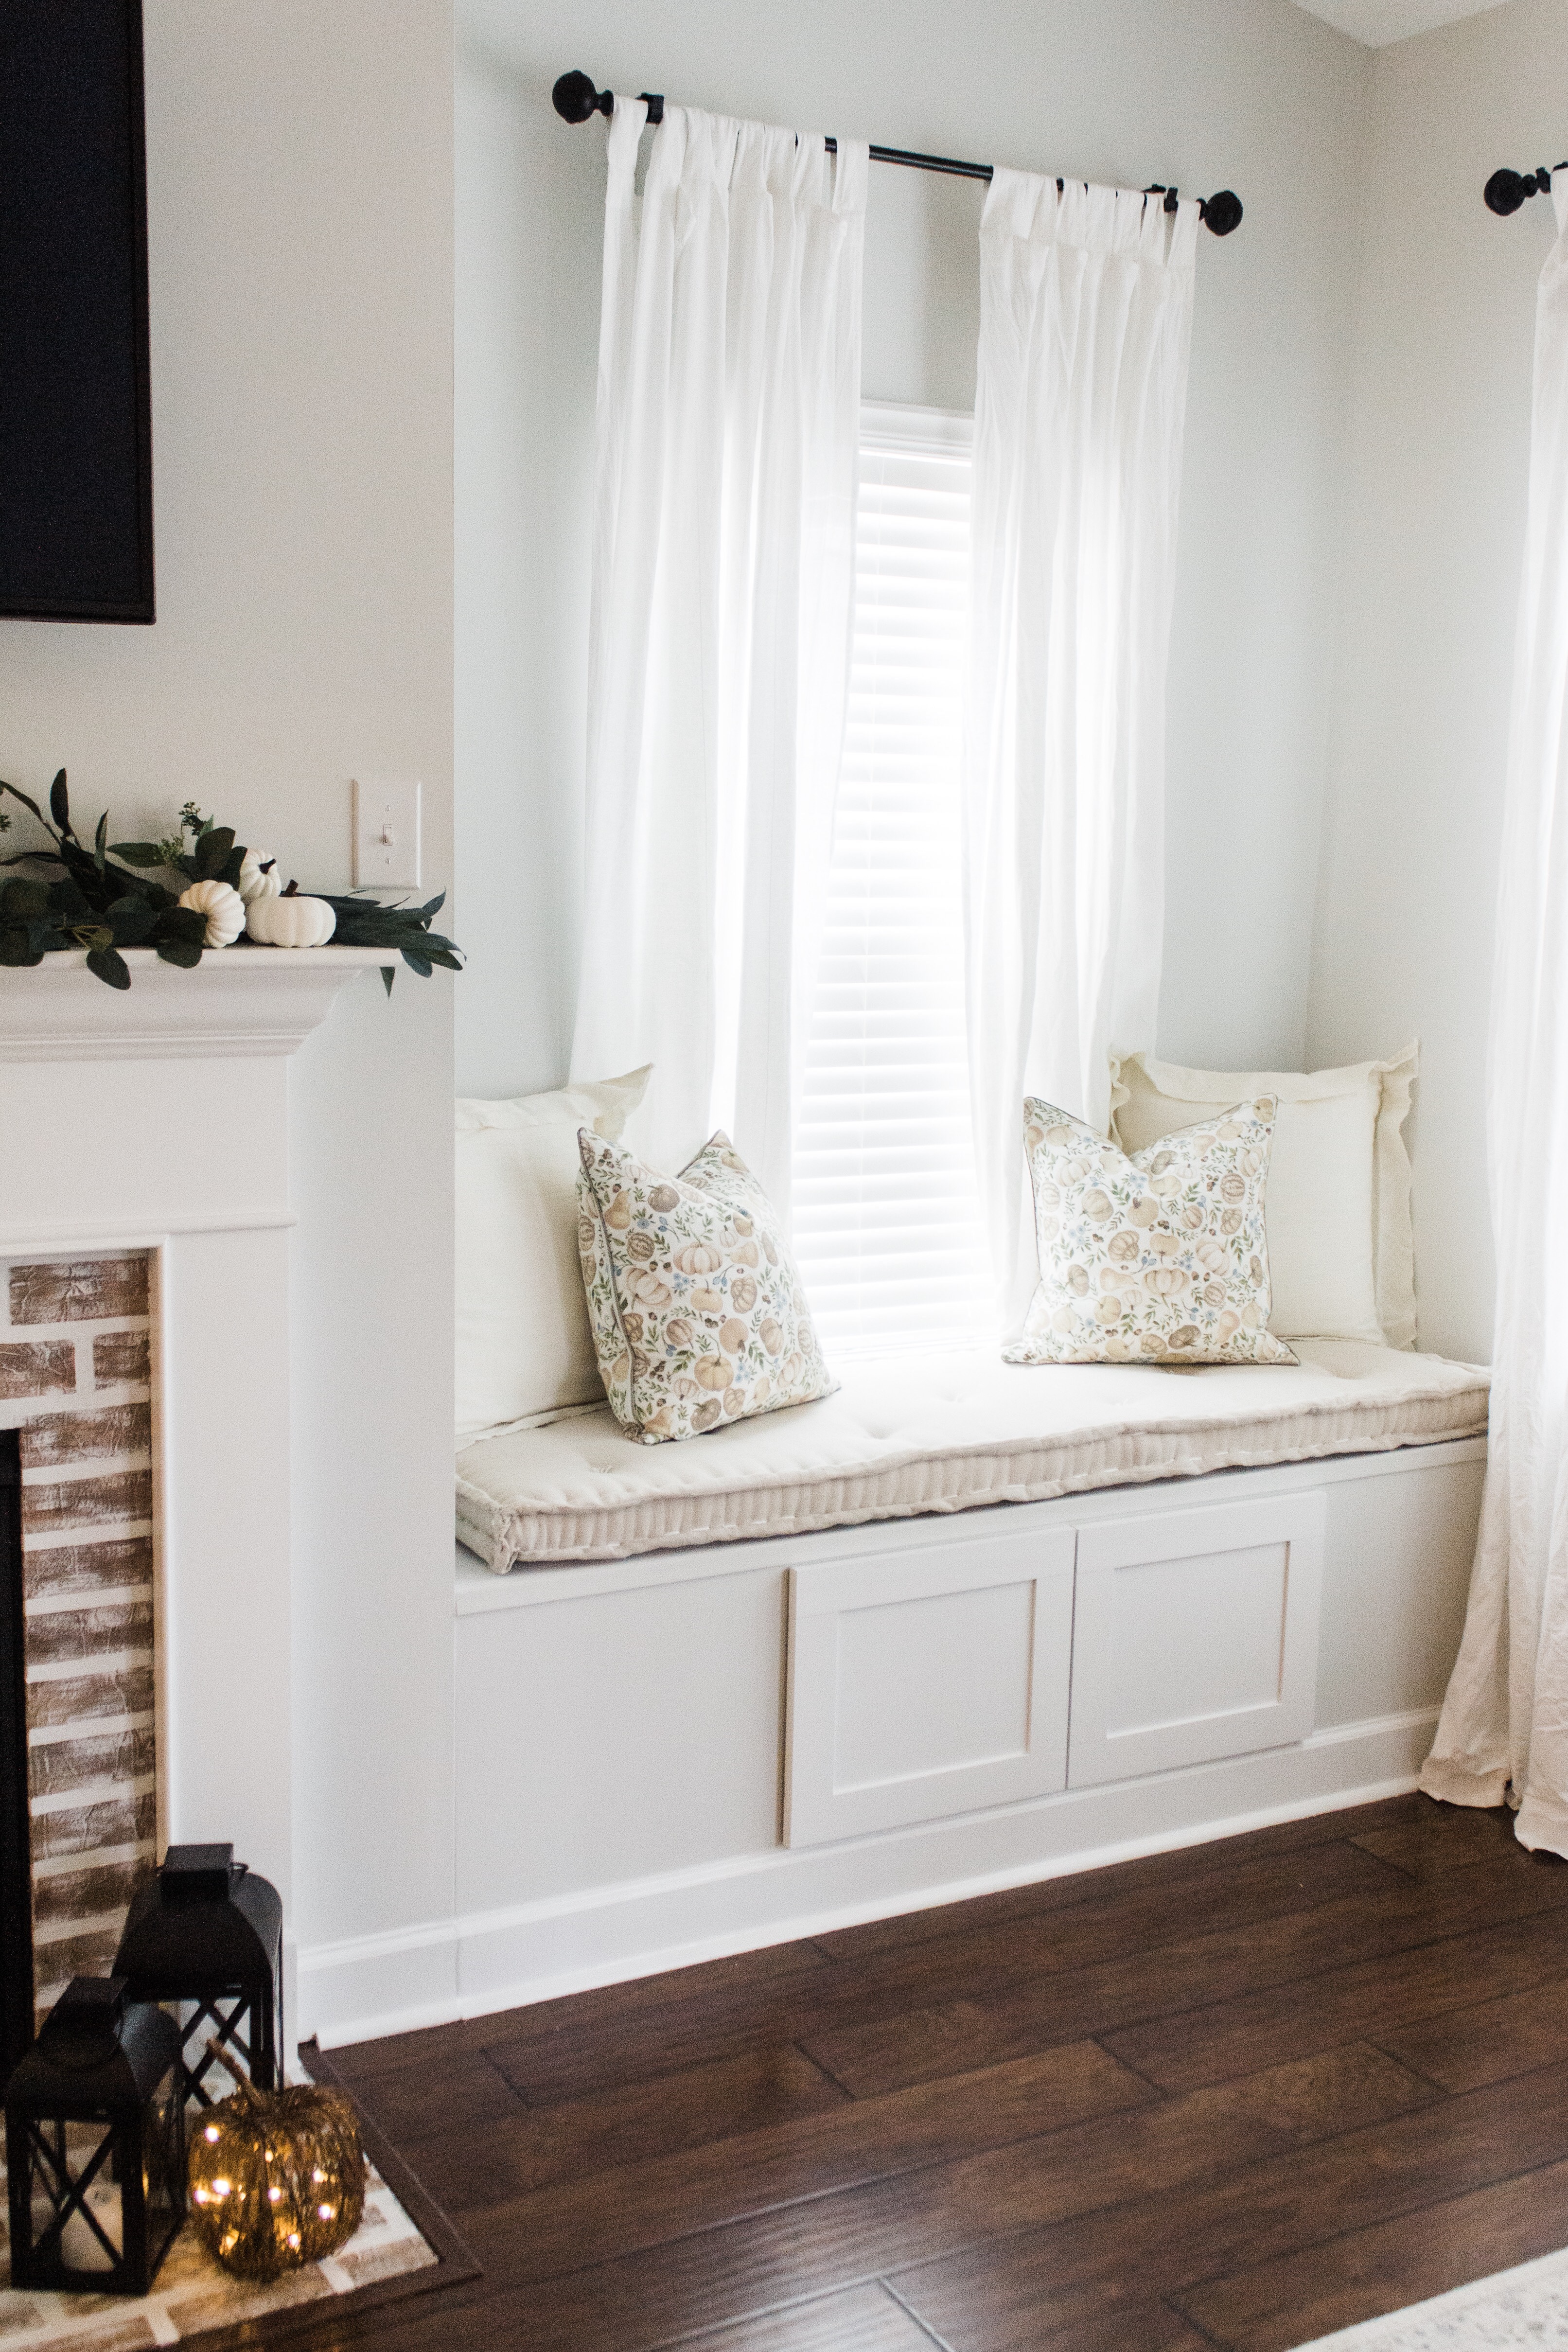
Let Jordan know if you have any questions and I’ll get them answered for you guys!
Pin this post to save for later:
jordan jean
[…] group of people over a week later and I didn’t want them to have to sit on the hard-wooden bench (DIY HERE) so I sucked it up and started to figure it out. Here’s the thing… I’m not a sewer. My mom, […]