November 20, 2018
Hi guys! Happy Tuesday! Stephen here. Today I am going to share with you a homemade DIY weight rack that organizes your weights and saves you space in your garage that you can make for much less than you would buy online (about $30 to be exact).
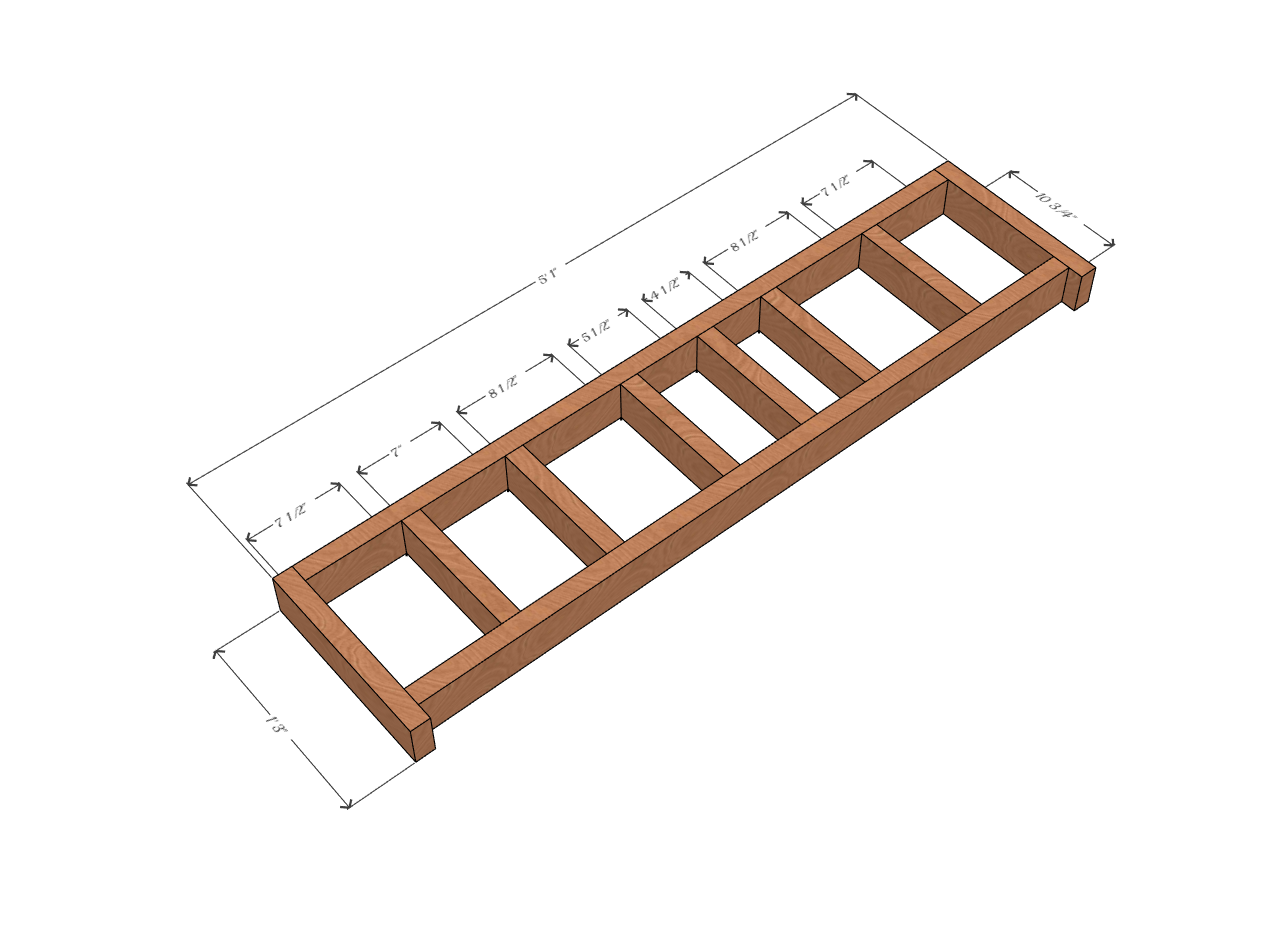
We bought a bunch of weights to start our home gym at a dealer in Charlotte for about a dollar a pound which is pretty good for weights. We also got other things like kettle bells, slam balls, barbells, and some small accessories and we needed a way to store everything in the garage that wouldn’t take up too much space. We decided to build a rack with multiple levels to store everything and it works and fits great in our garage! When building the rack, we first started with the bottom layer which houses all of our bumper plates. We began by laying 2×4’s long side up parallel to each other. We stacked the weights next to each other based on their weight and measured how wide across they were. This would determine how much space we would need between the cross bars on the bottom, this is what we came up with.
- 2 x 45 lb – 6.5″
- 4 x 25 lb – 8″
- 4 x 15 lb – 5″
- 4 x 10 lb – 4″
- 4 x 5 lb – 4″
- 4 x 2.5 lb – 3.5″
We spaced out the cross bar 2×4’s an extra 1/2 inch from what the plates measured so that there would be a little wiggle room when putting them back. We also added an extra 7.5 inch section on either side to add a little extra storage space. We screwed in the cross bars to 2 long parallel 2×4’s using 3″ deck screws. When we were all done with the bottom layer it looked like this.
Next we wanted to build multiple levels to the base to store other things like our kettle bells and slam balls on. With the bumper plates being 18″ in diameter, we decided to make the next level 24″ above the first one so that when you are putting the plates away and they are standing on their edge, there is a few inches of clearance. In total, the whole thing stands 3 feet 10 inches tall which provides plenty of space to put things away and take them out on each level. We cut four 2×4’s to 45.5″and attached them vertically to the second outermost cross beams with 3″ deck screws. On the front two 2×4’s we put a 2×4 horizontally 2 feet up to help support the plywood shelf we would use for the second level. We also cut two 2×4’s to 10.75″ and used them as cross beams with the vertical 2×4’s at the same height as the horizontal one for additional support. For the actual shelves we bought a 2’x4′ piece of 1/2 inch thick plywood and cut it to fit the support pieces which came out to 43″ x 13.25″ for the middle shelf and 46″ x 10.75″ for the top shelf. We attached those using smaller 1.5″ nails we had laying around from some previous projects. Lastly for the middle shelf to add a little more support we held up the back of it with a 2×4 laying vertically so that it would help prevent it from sagging. Here is a picture of everything put together with dimensions. 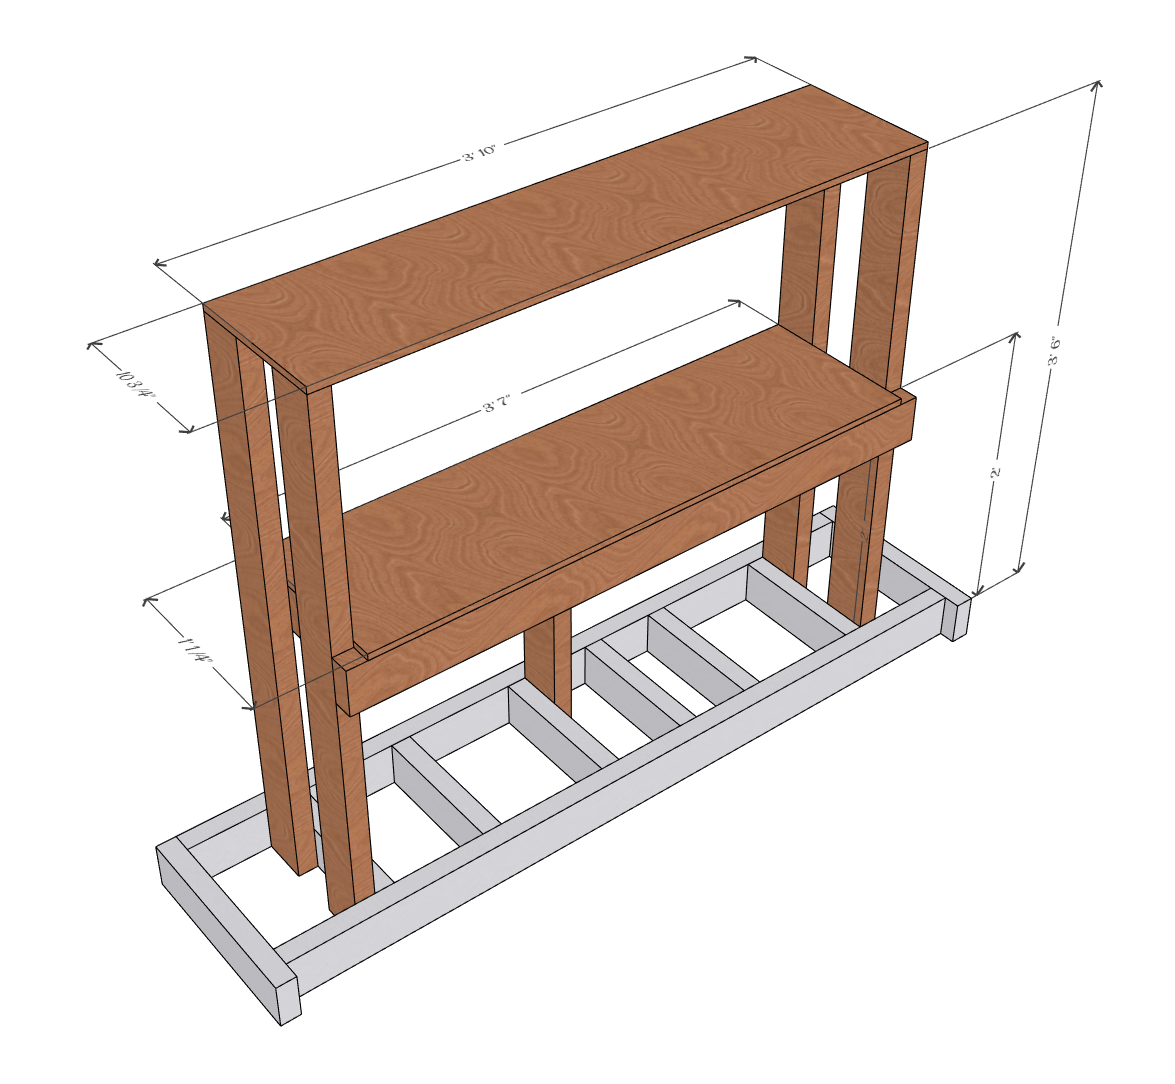
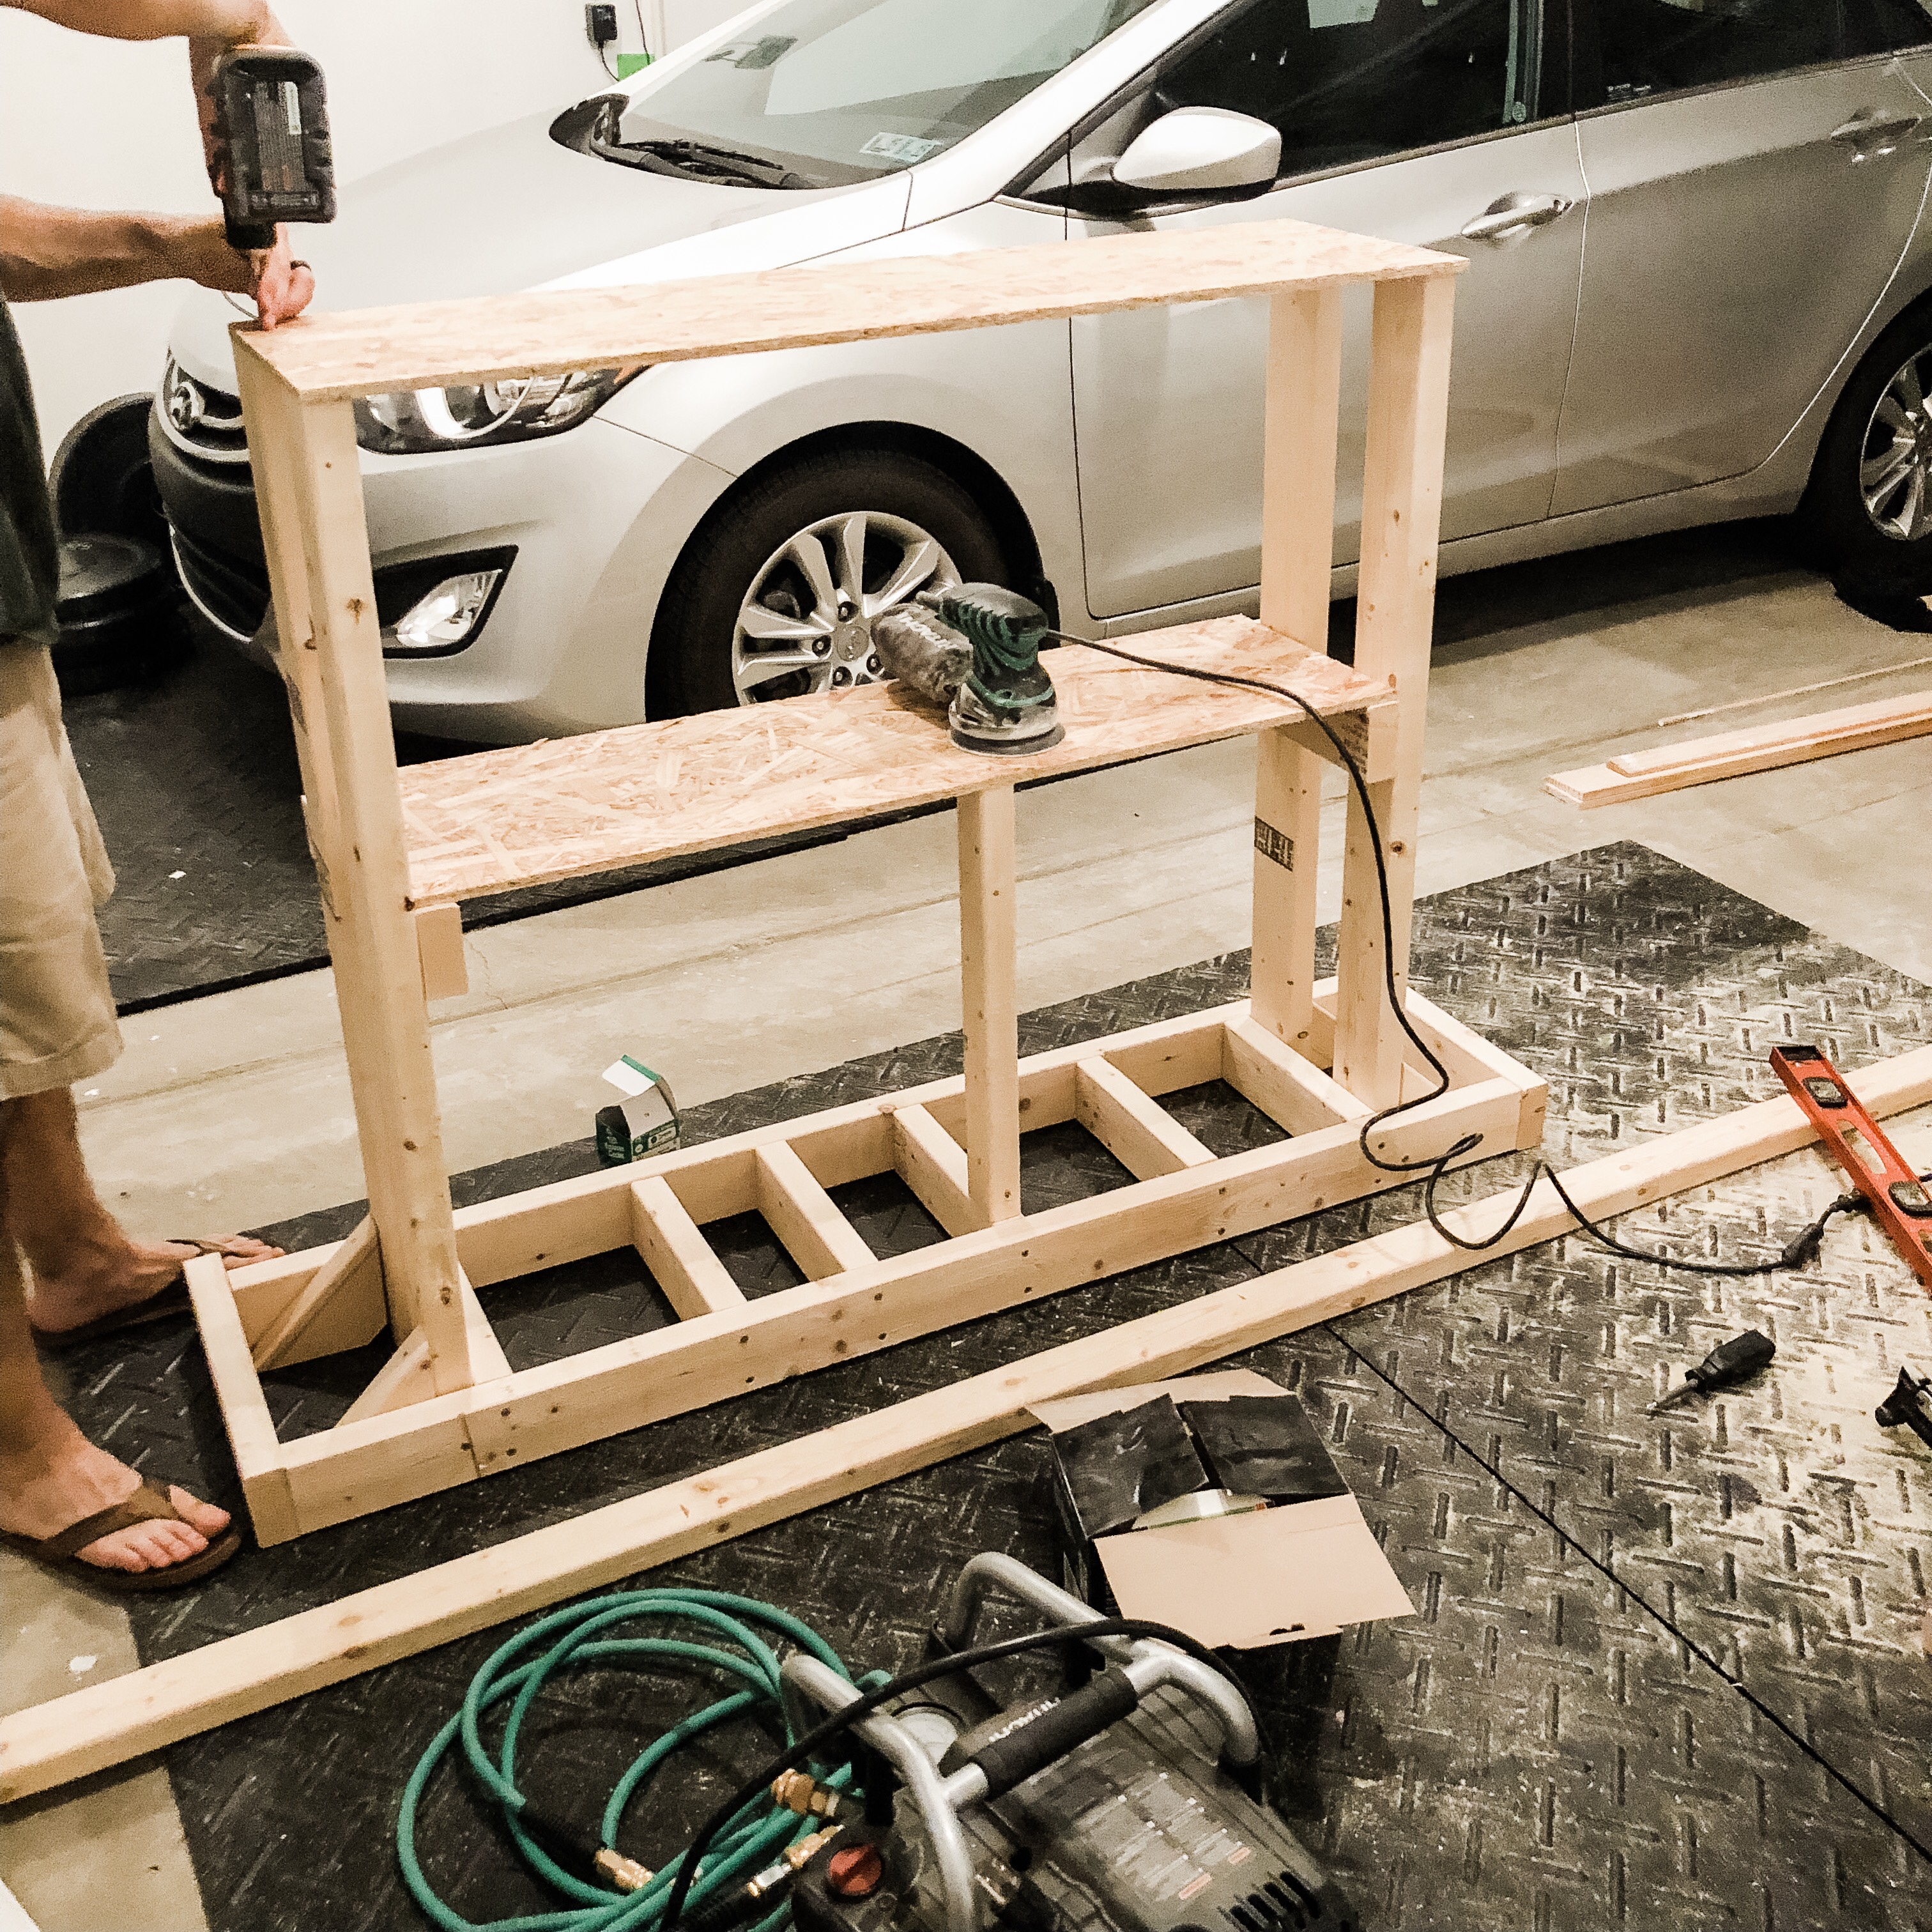
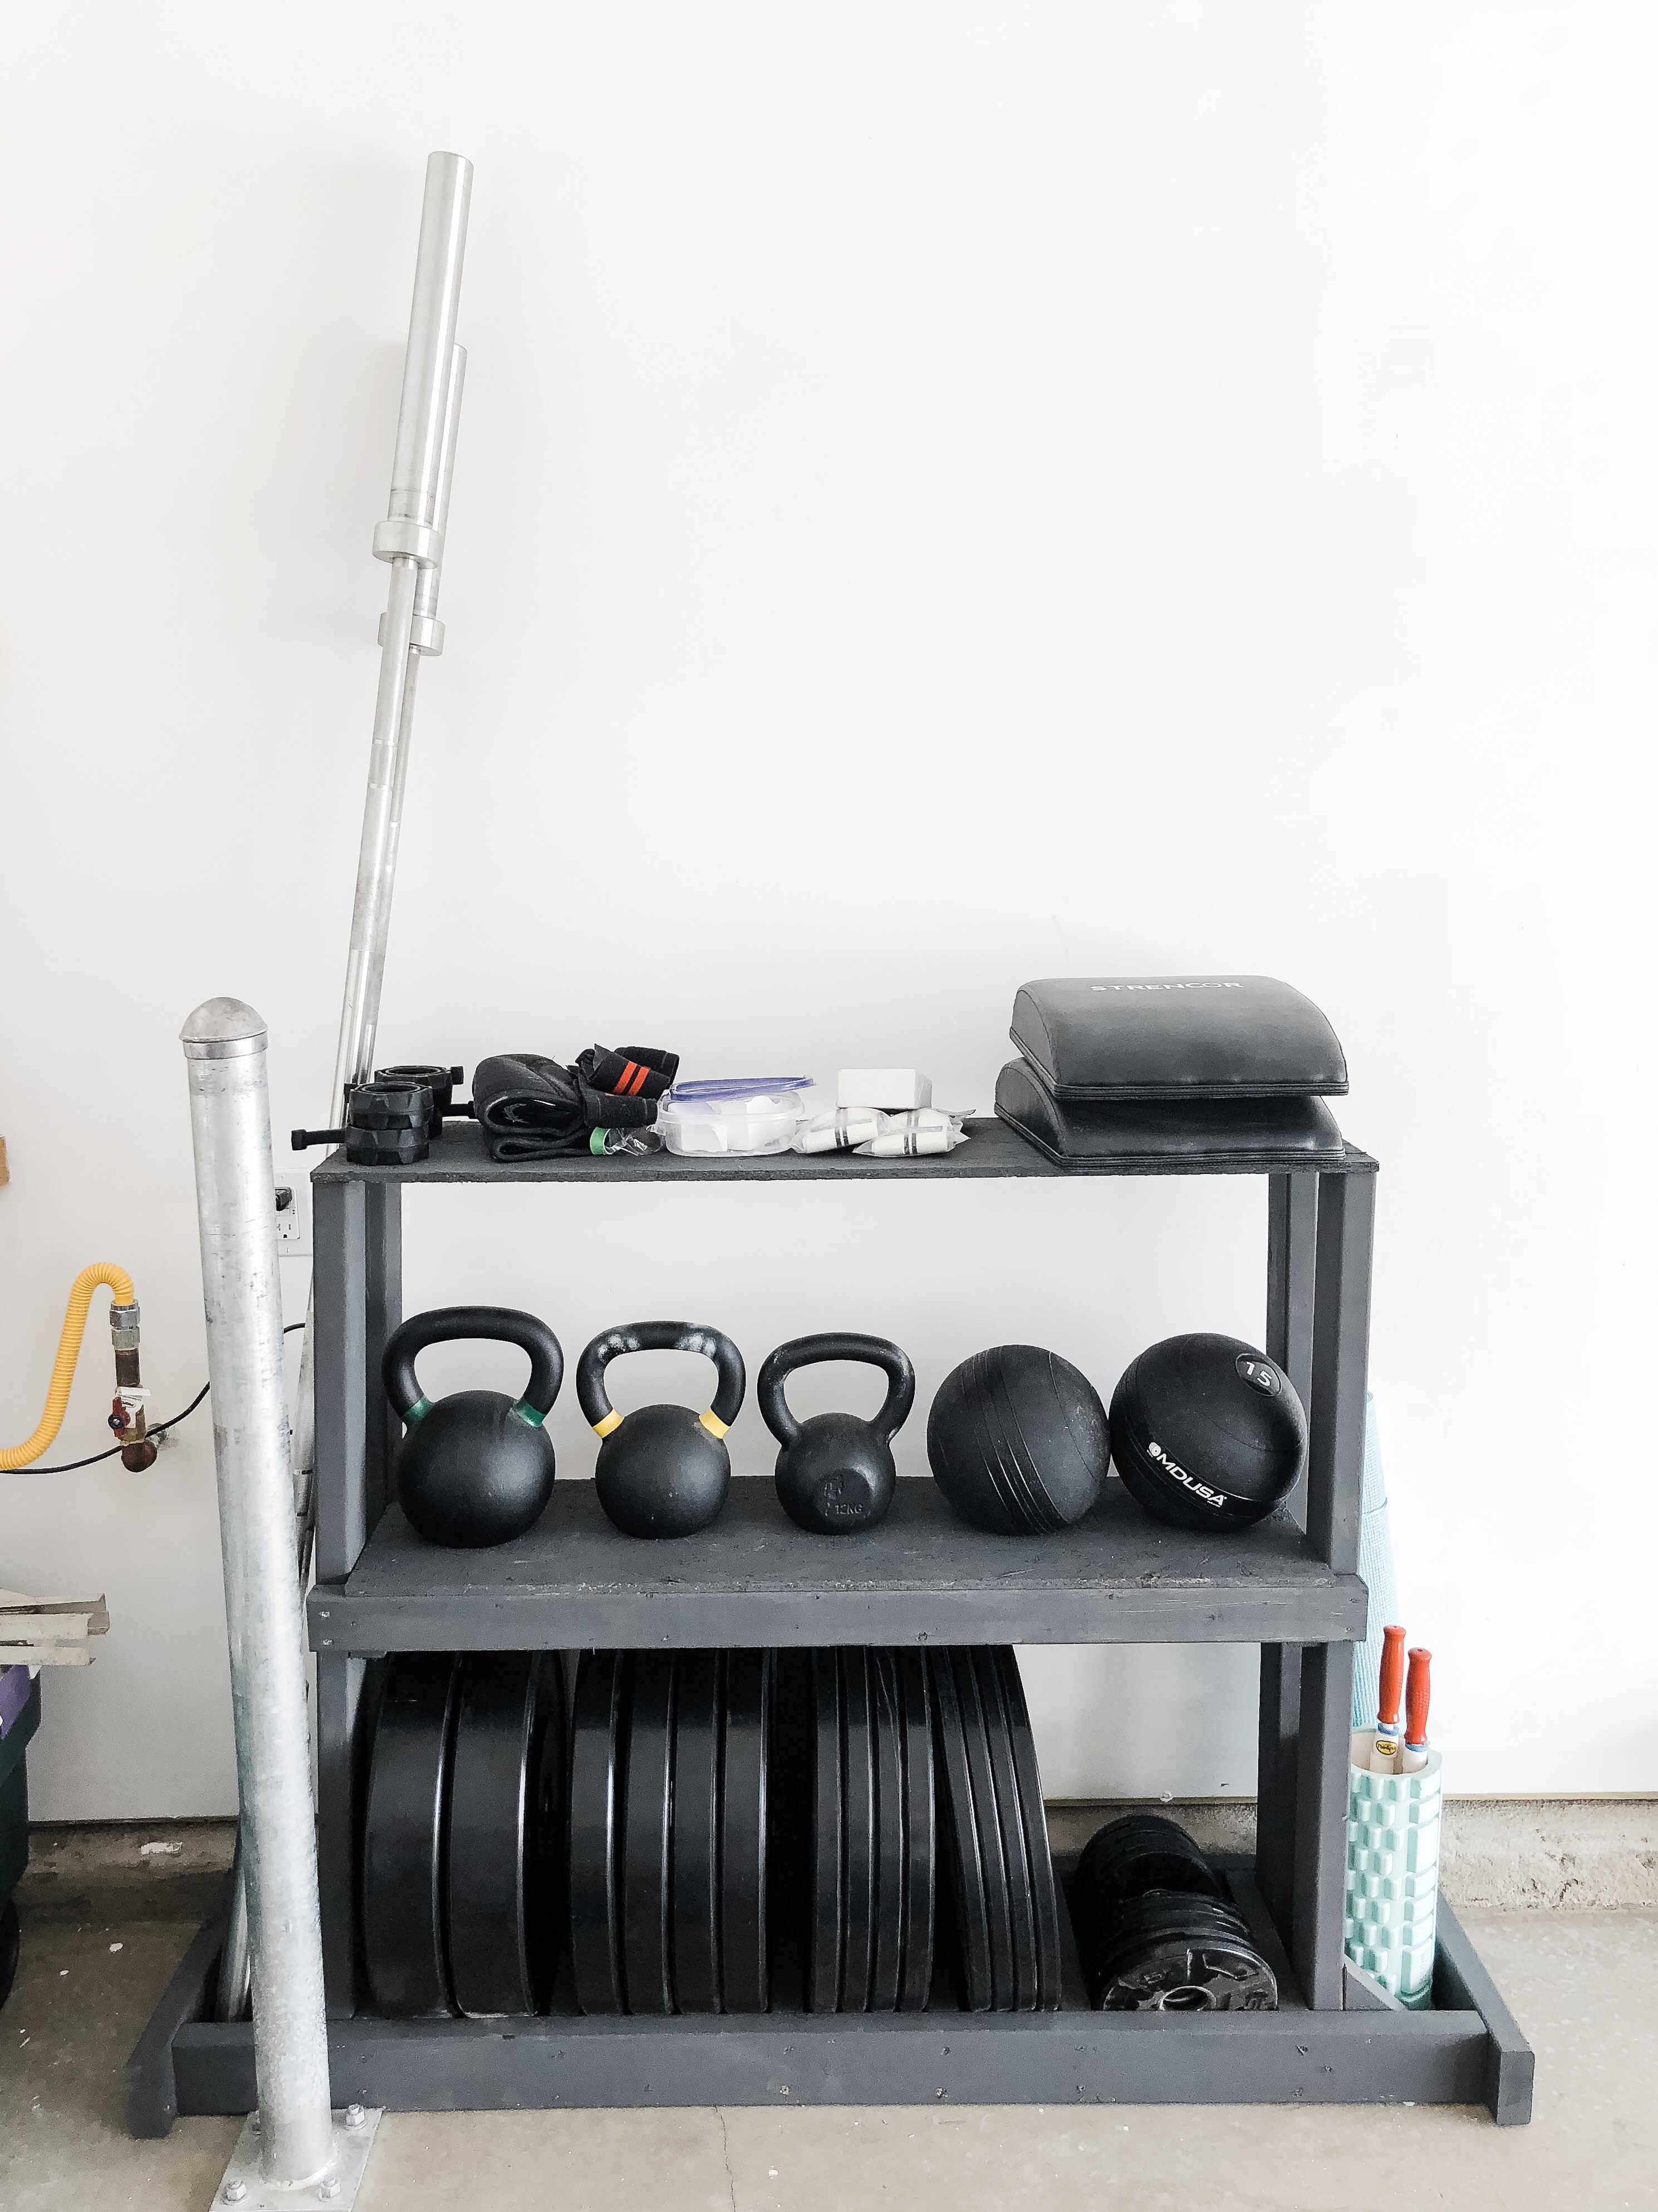
As soon as I finished putting it all together, I sanded it down a bit to prevent us from getting splinters. Then Jordan grabbed some dark gray chalk paint we had on hand and got busy. It took her about 15 minutes before the entire thing was covered! You don’t have to paint it but does it really surprise you that she did? We let it dry overnight and put it to work the next morning.
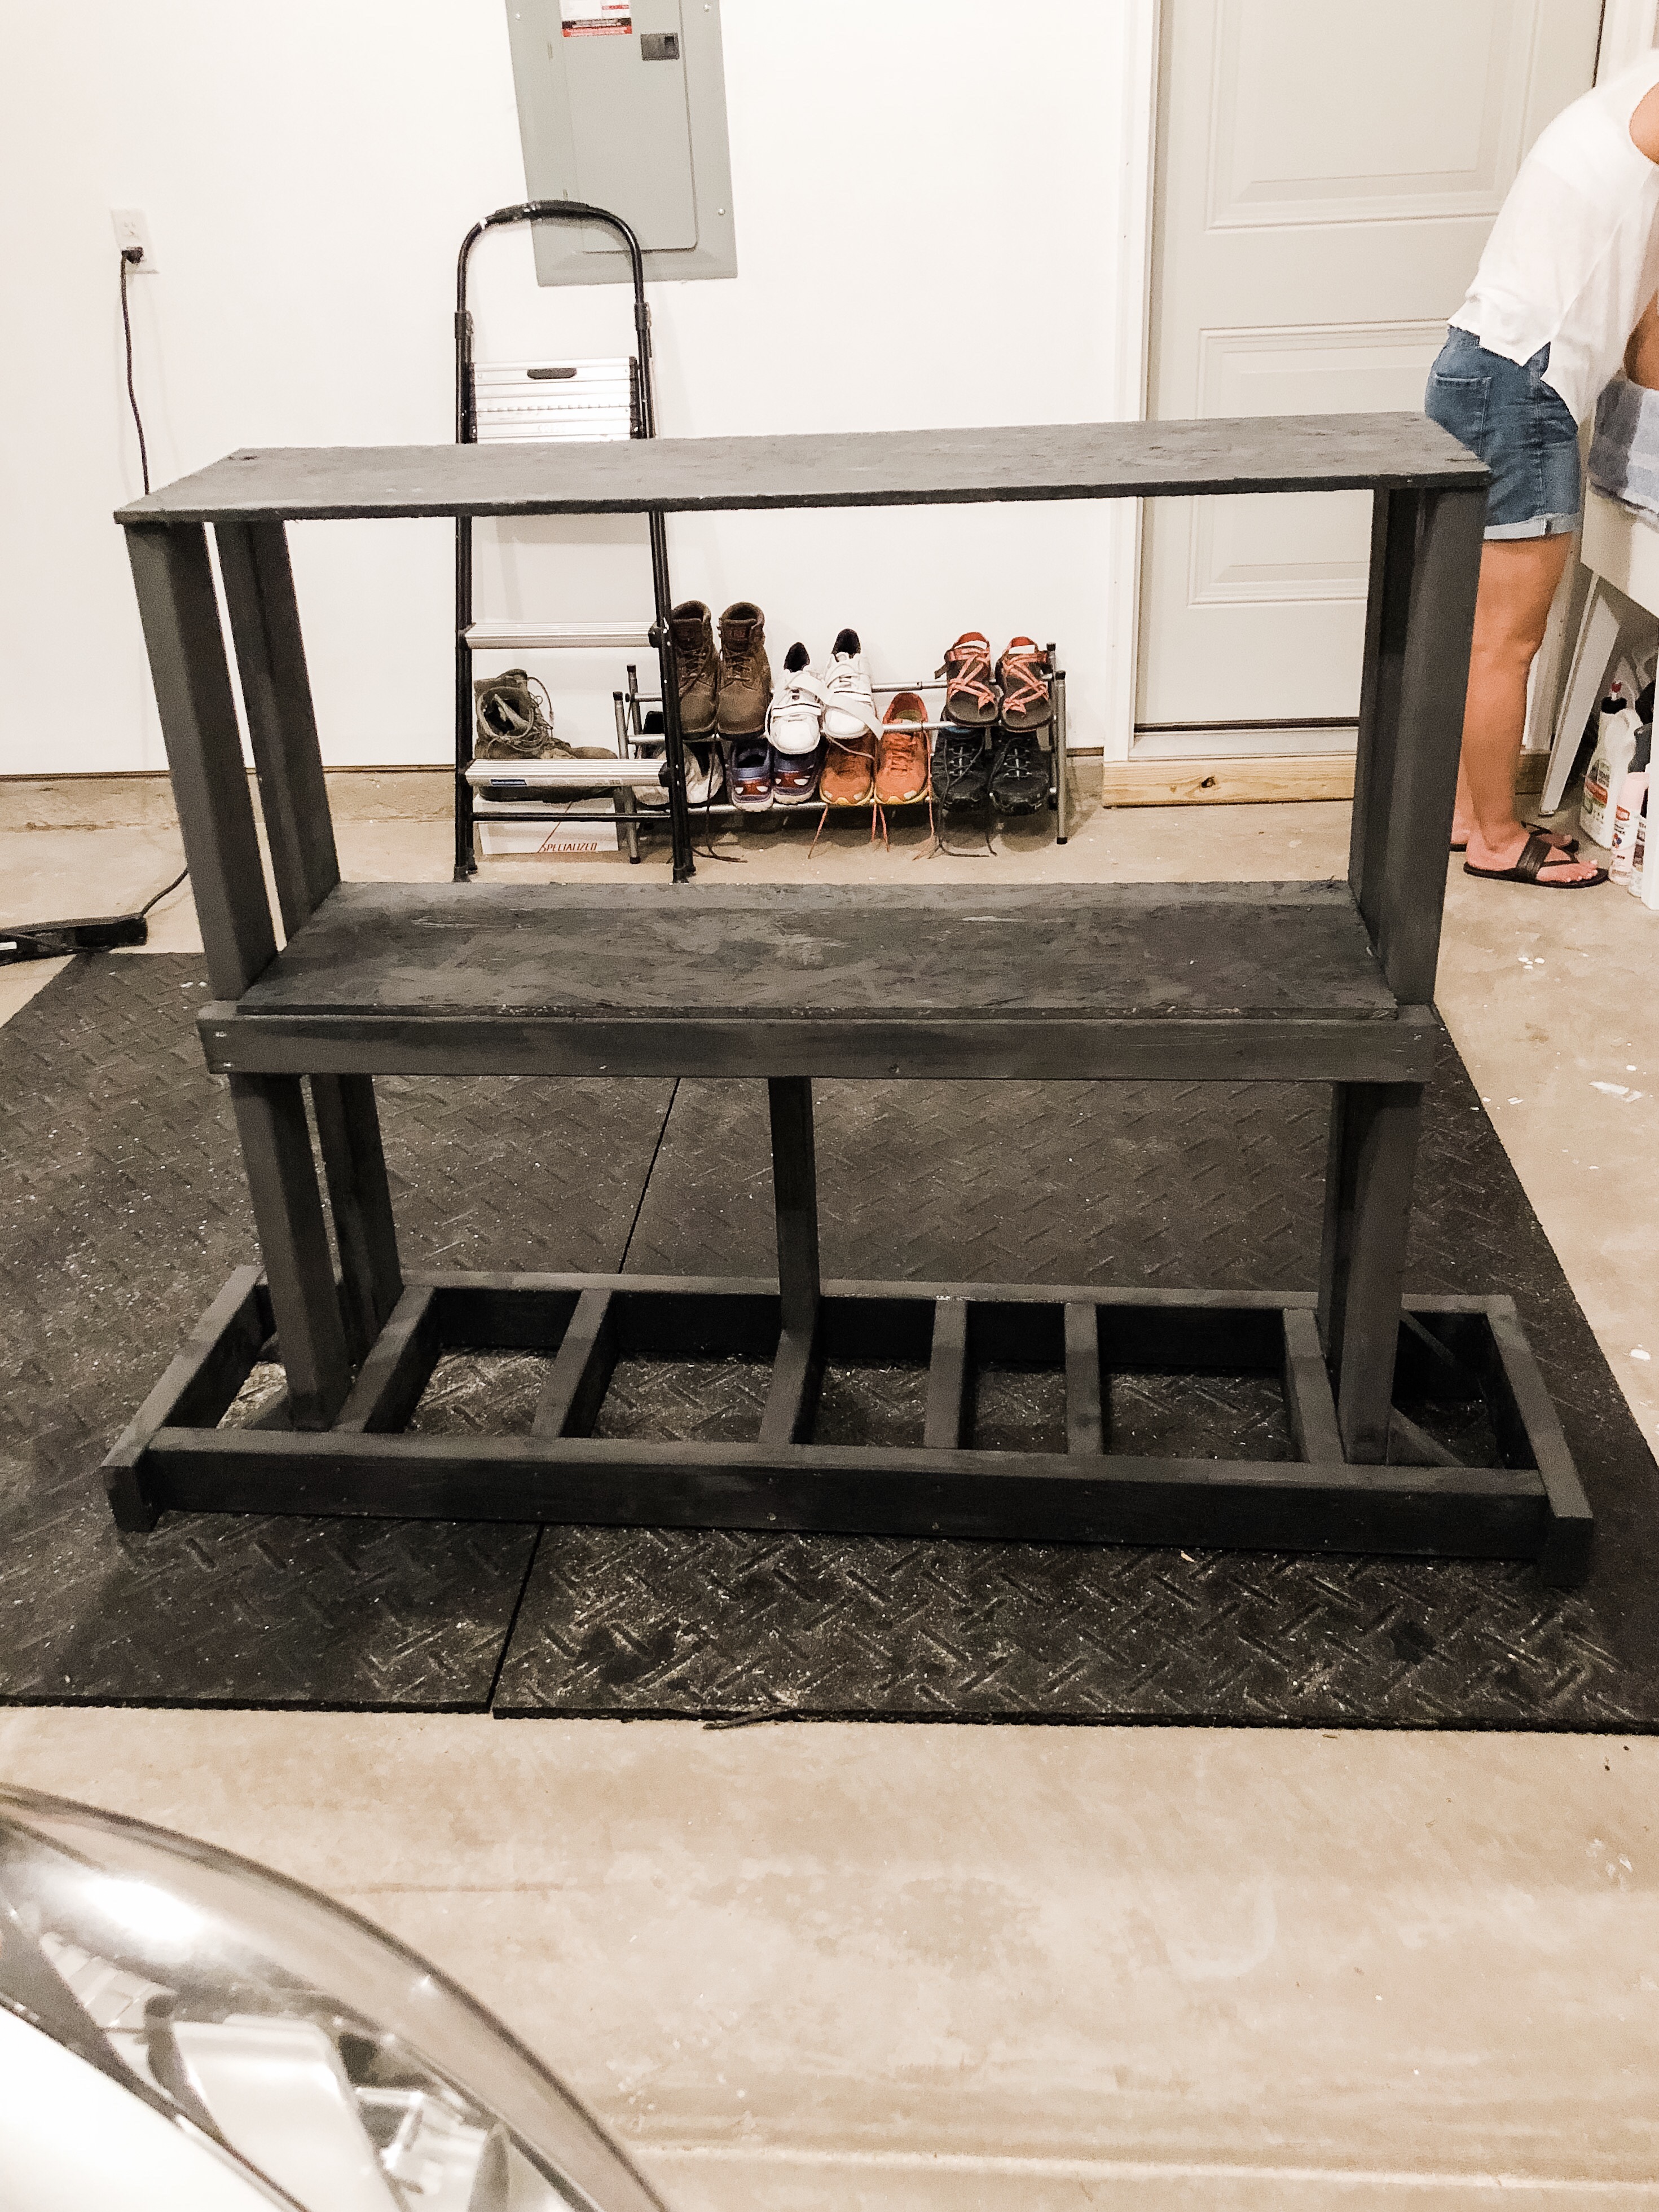
Here’s the finished product. I also want to mention that we are still able to pull both cars into the garage even with this in there. Not bad for $30!
Let us know if you have any questions. Have a good one!
Save this pin for later:
jordan jean
Leave a Reply


[…] Click Here […]
[…] jordanjean […]
[…] Jordanjean […]