August 21, 2018
Happy Monday! I apologize for not sharing this with you all sooner! This project is so simple it’s pretty dumb of me that I forgot to share.
A few months ago when I got the itch to garden, I knew I wanted to start by planting some herbs so I did just that. I picked up some pots from IKEA, bought myself some herbs, and planted them on Saturday with my little buddy, Lorelei (and Adi, of course).
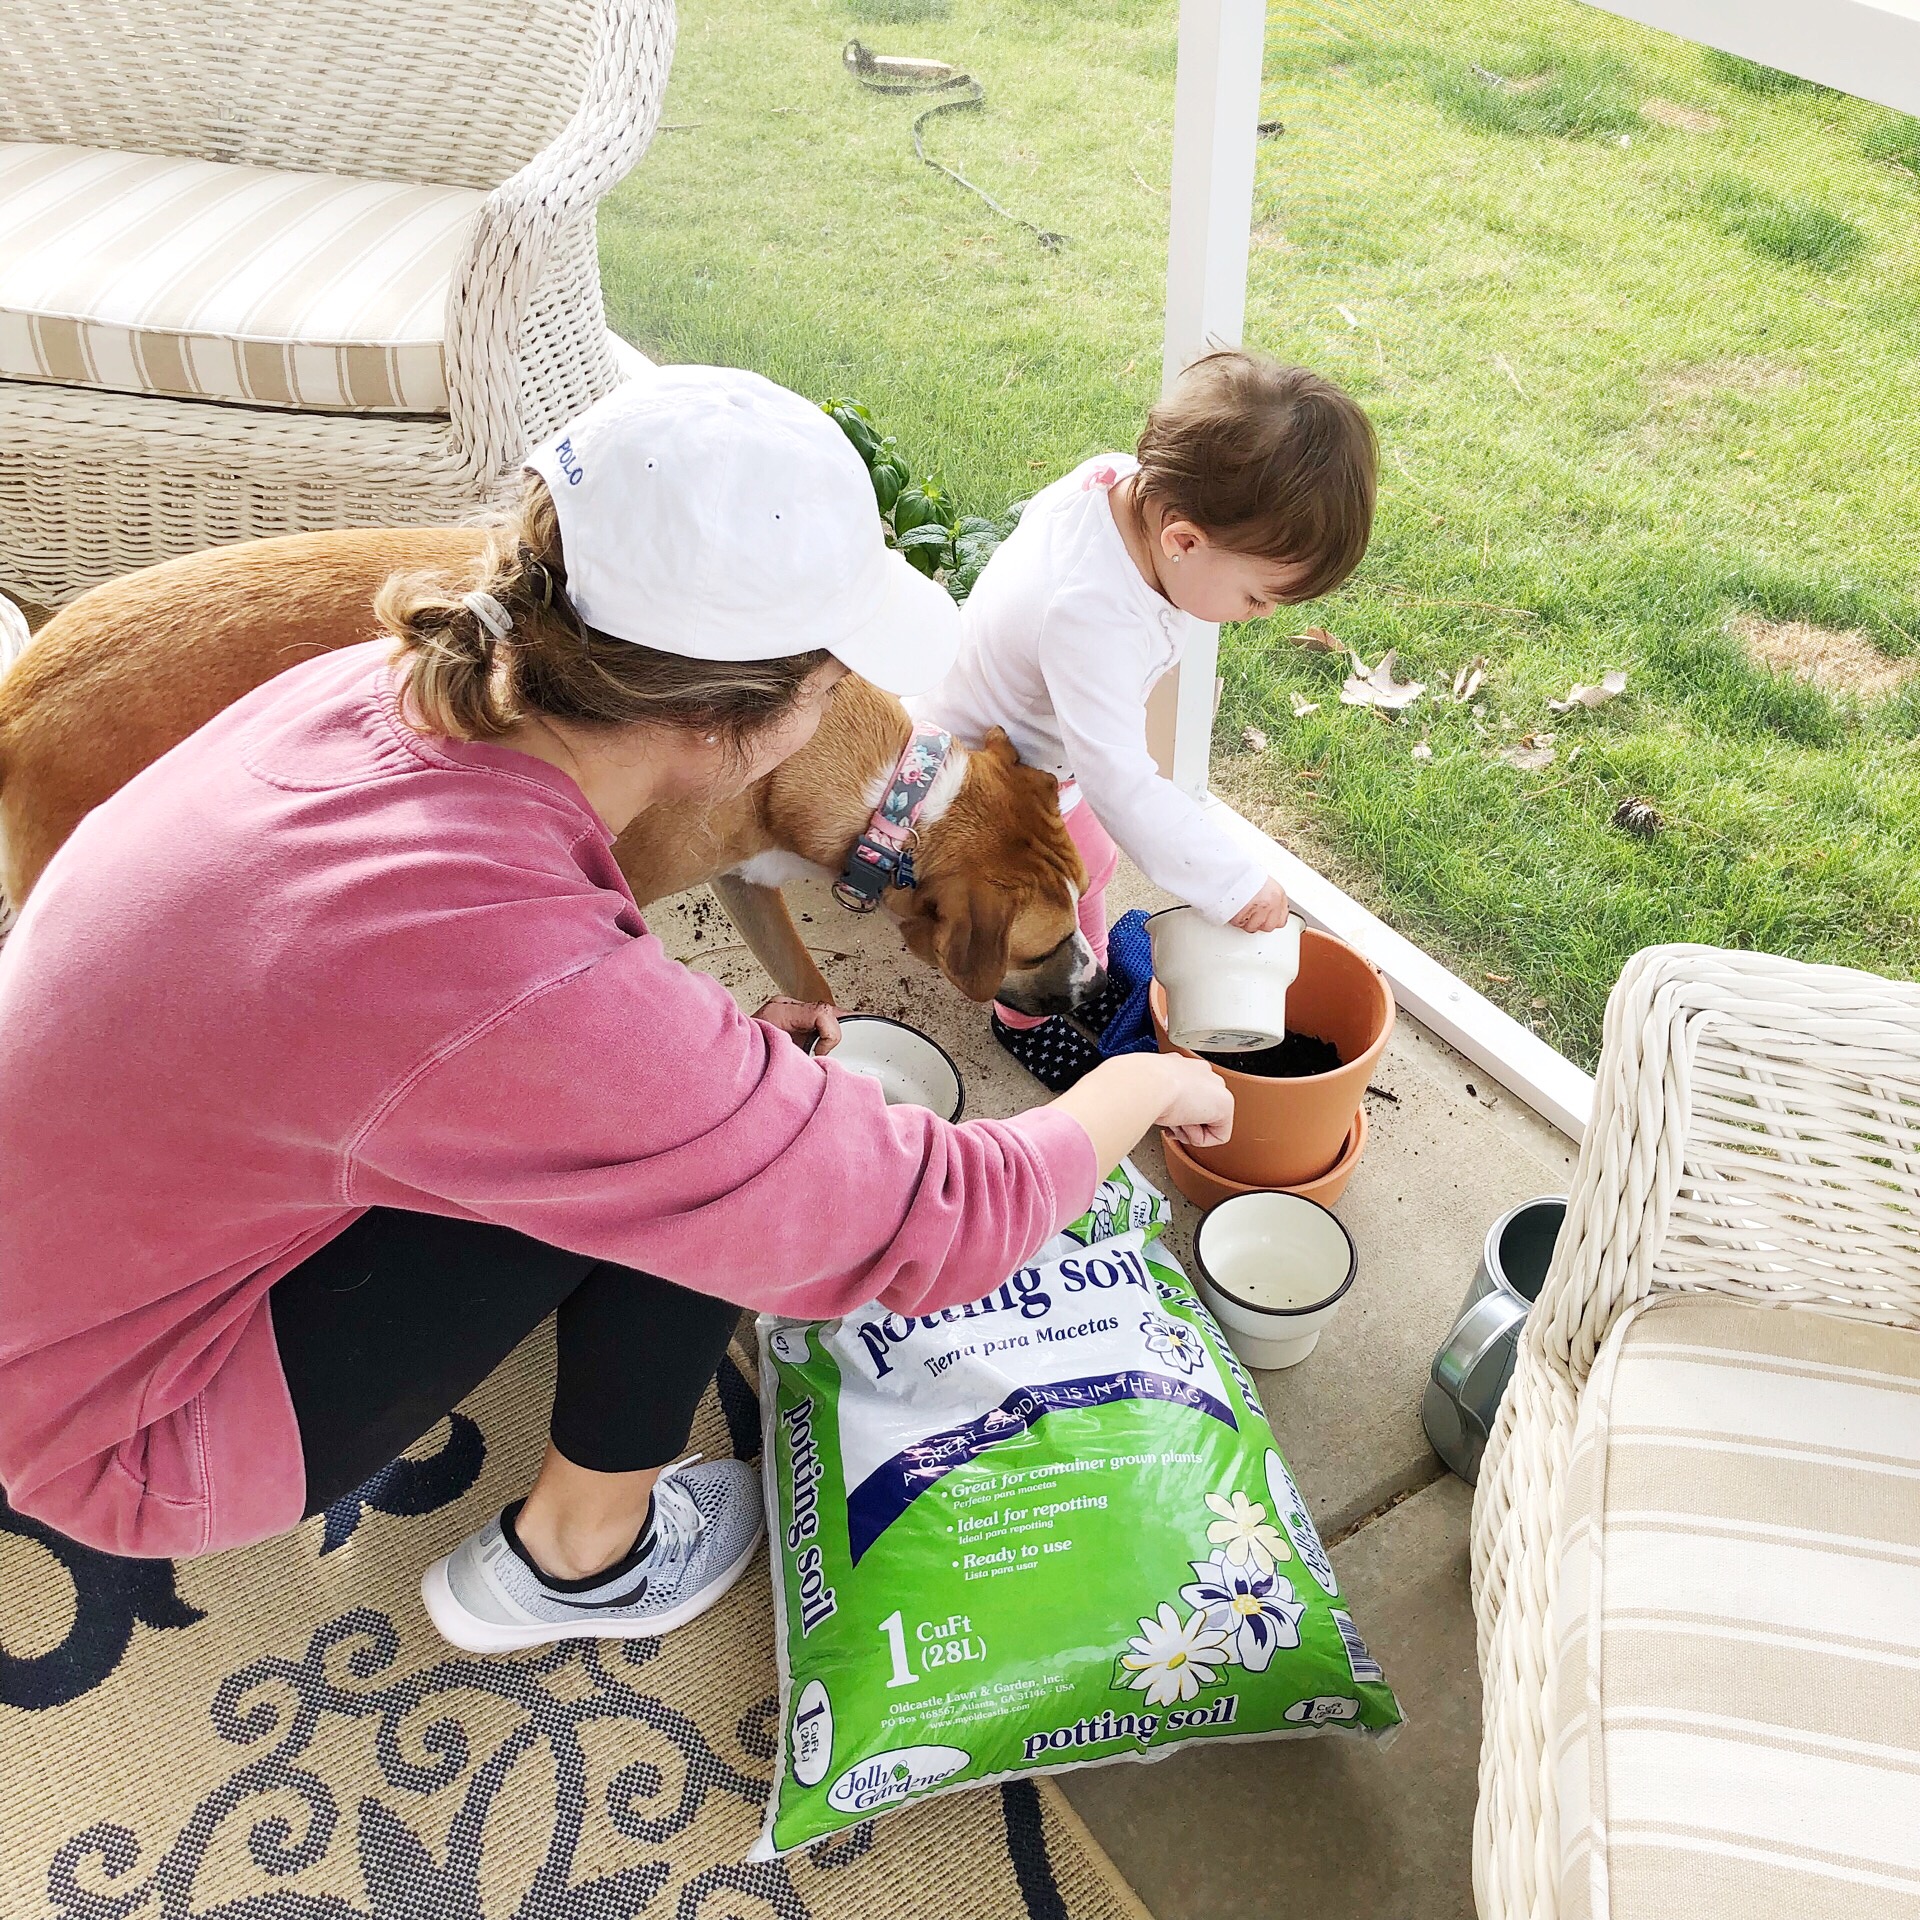
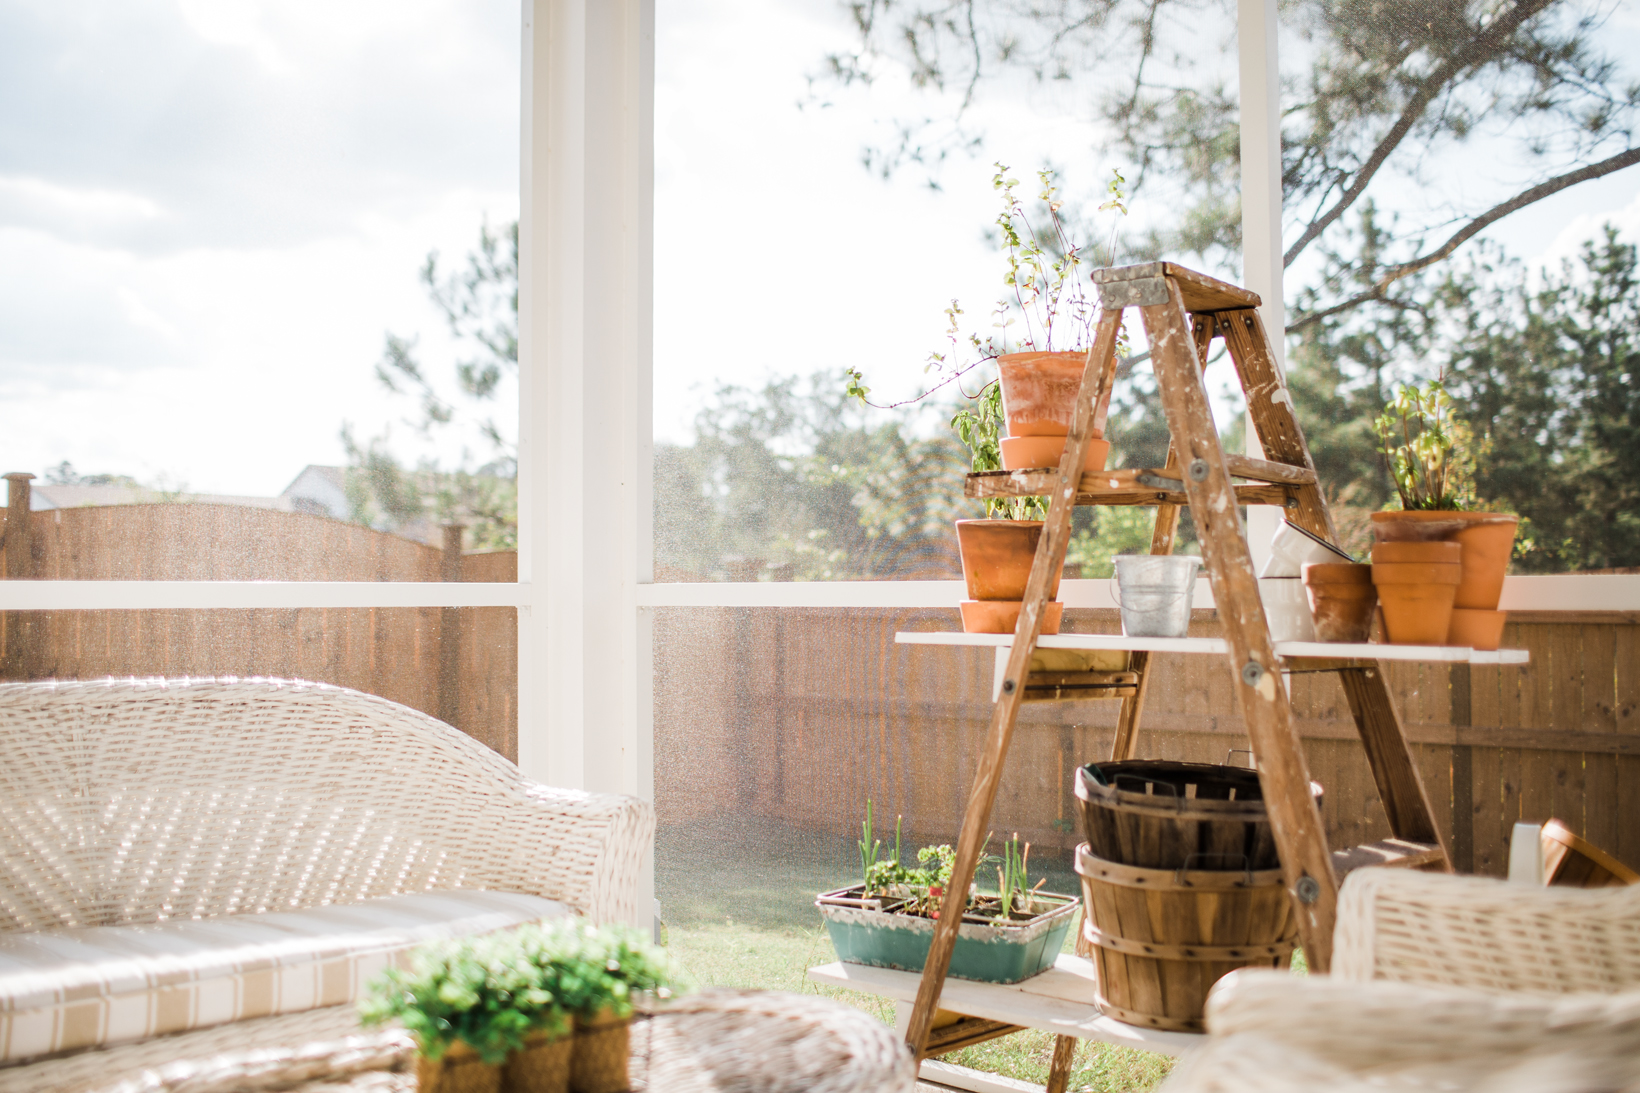
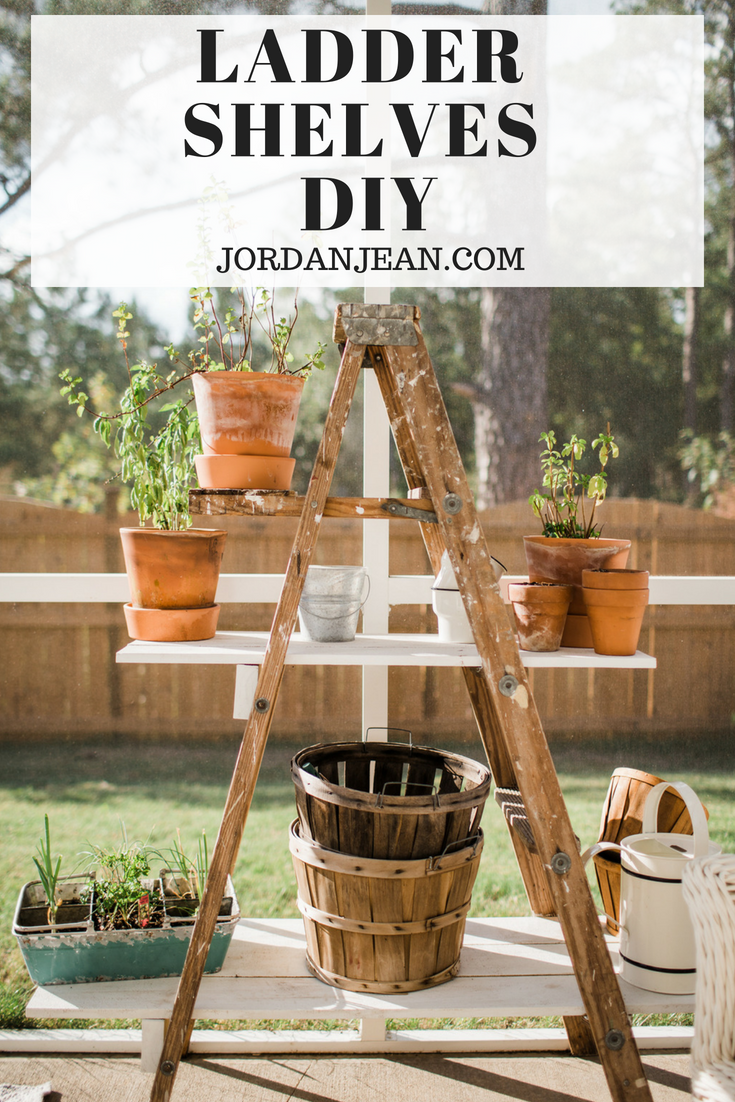
Once my herbs were planted and thriving, I had them all hanging out together on the floor of our screened-in porch which was the perfect height for Adi to have herself a little snack. She wouldn’t eat them too much but she loved to stick her nose in the dirt and get it all over the place. After a while I started to think of ways to get the pots off the ground. I was thinking of doing some shelves on the wall or thinking about updating an old piece of furniture. The issues with those options though were that I was 1. scared to hang shelves on the siding and 2. didn’t want to spend a lot of money and 3. I needed something that could withstand the weather conditions – rain, sun, heat, cold, the occasional snow, you name it. Then I saw this post on what of my favorite blogs, Love Grows Wild, and knew that with the materials we had on hand, we could do this simple project for the cost of an old ladder.
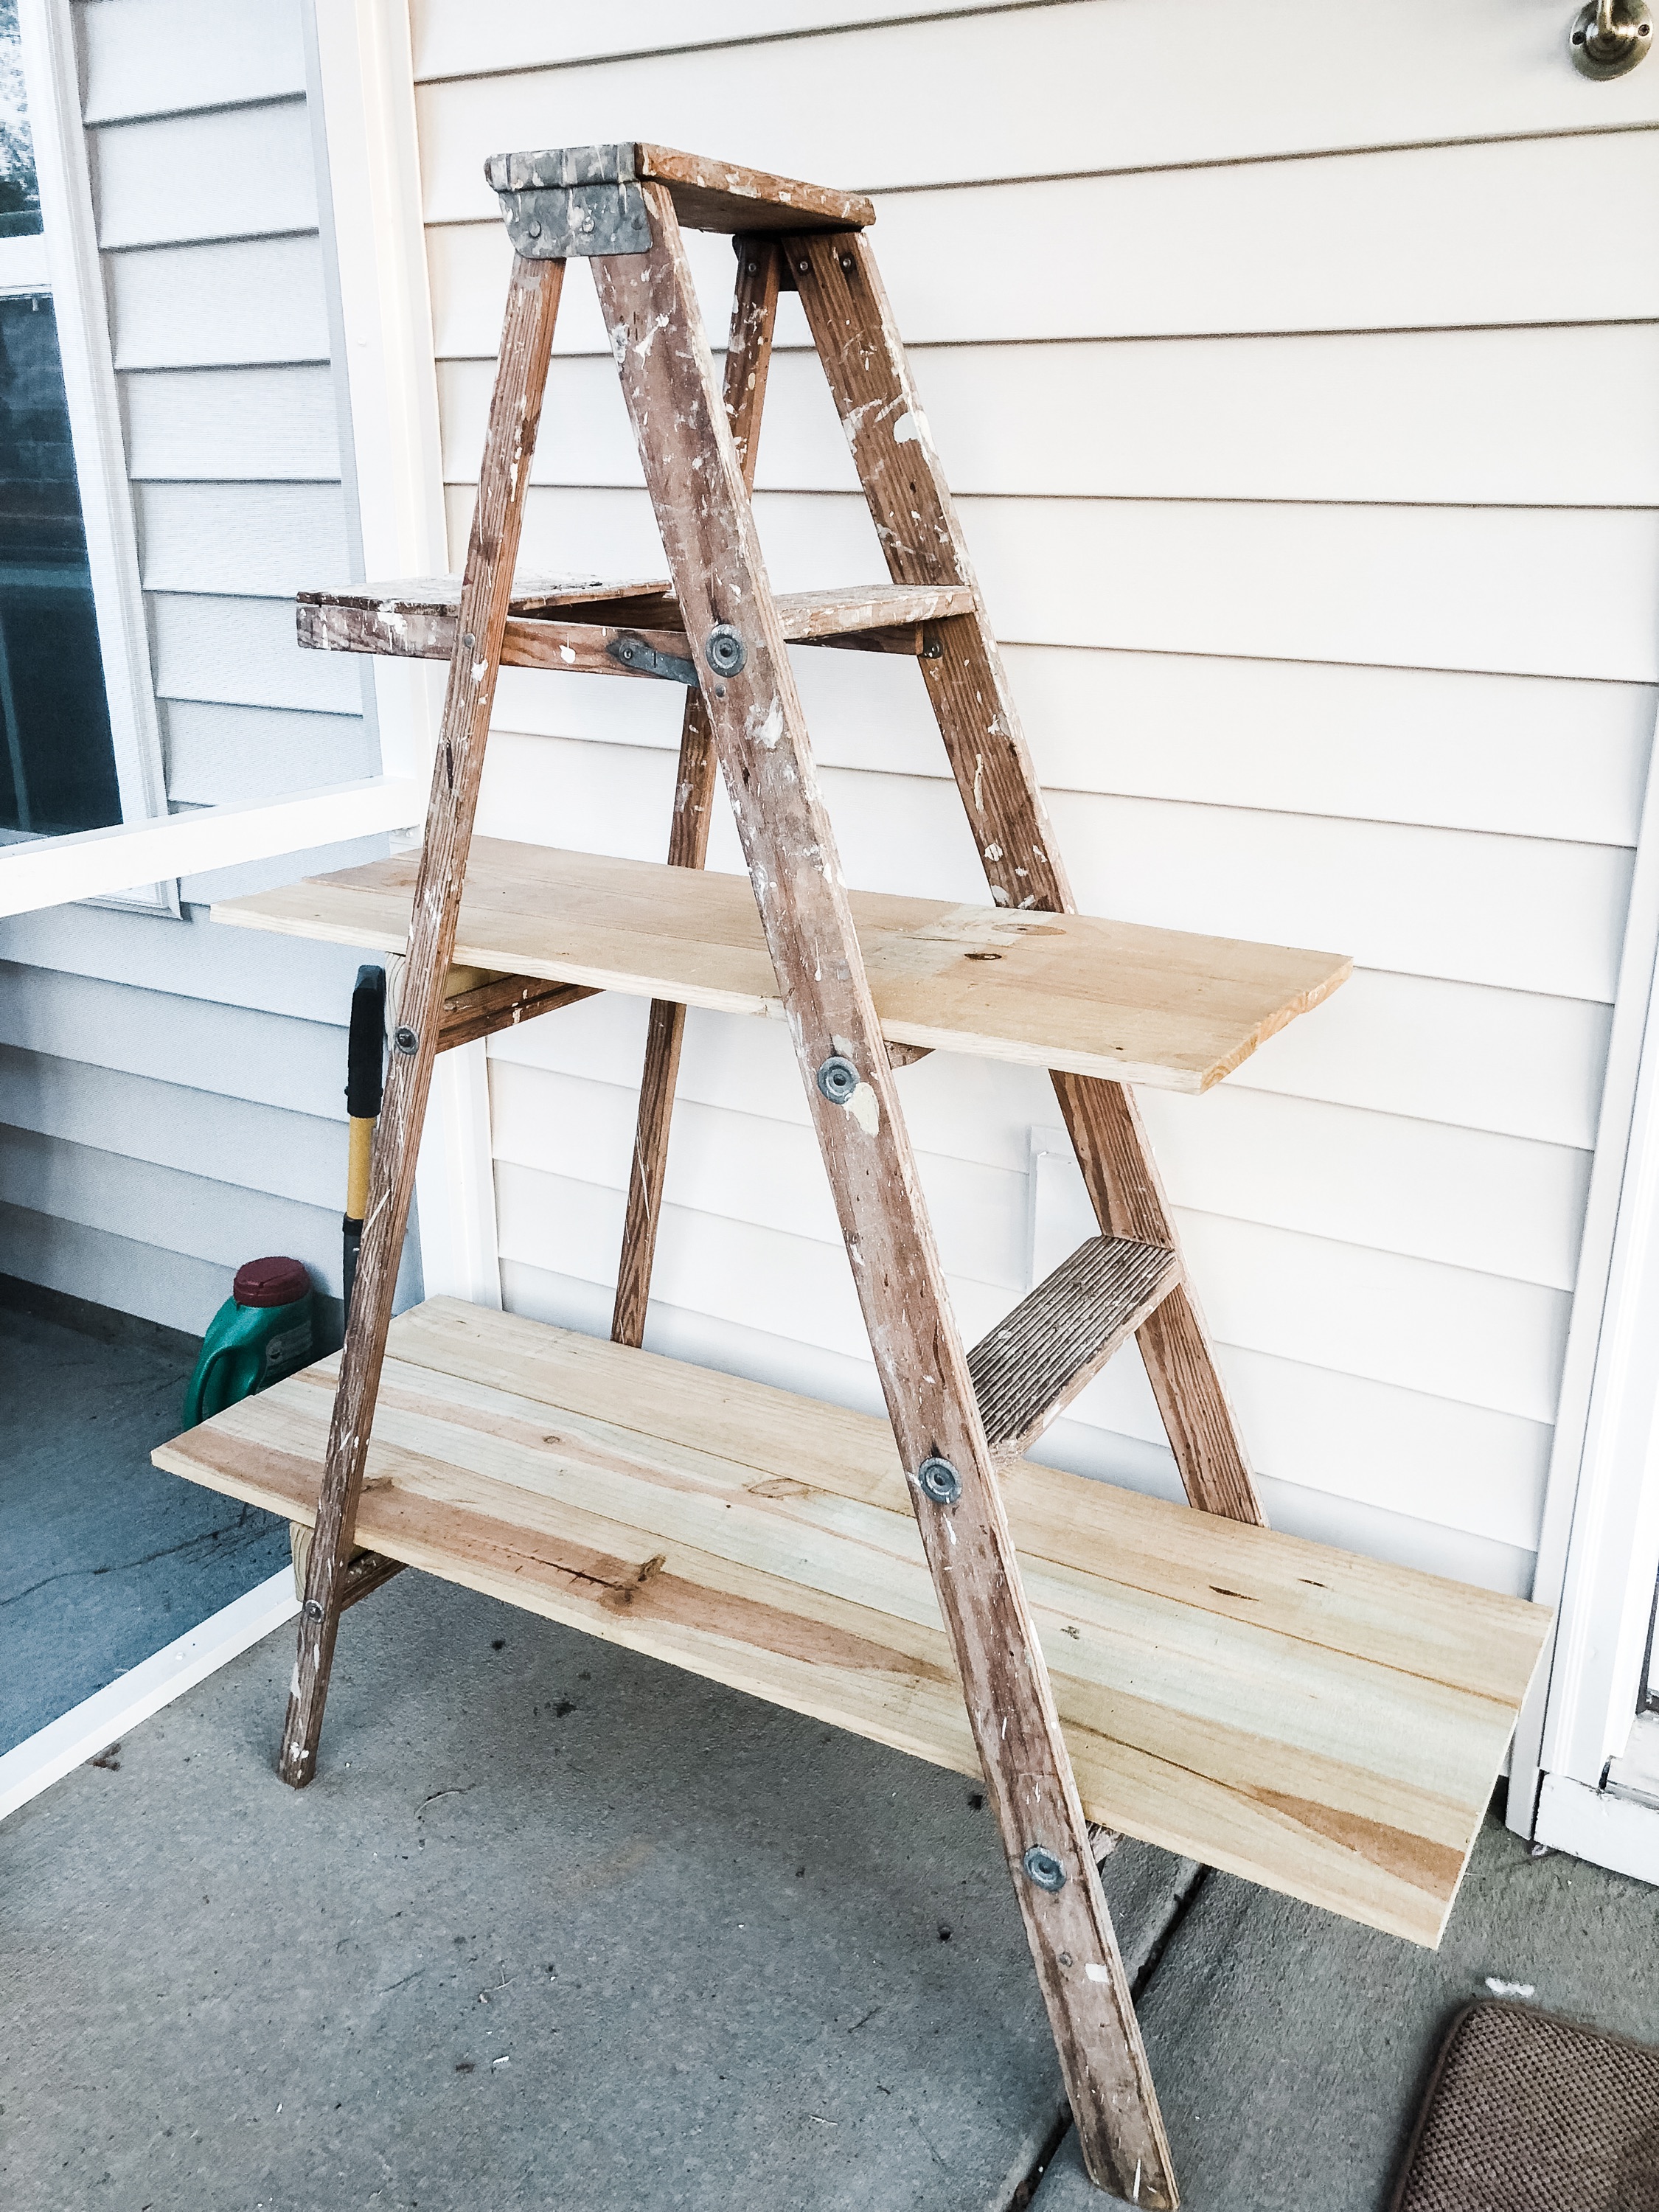
Like a dog with a bone, I was determined to find a ladder and get this done. I went to the local thrift store and sure enough, found a ladder. I honestly paid more than I should’ve ($40) but I immediately loved it and how much character it had. It looks like it has been used for years and years. I was probably a little too excited about it so I just went ahead and bought it.
The DIY to make the ladder functional was quite simple and utilized materials we already had on hand. Even if you don’t have these materials, they’re very inexpensive. The most “difficult” part is making the shelves level because the rungs (the ones you don’t stand on) on the one side of the ladder are not even with the rungs (the ones you do stand on) on the opposite side. The easy way to fix that… Some good ol’ 2″ x 4″.
Since all ladders can vary in size and Stephen just threw this together with what we had, I’m just going to share the general materials and instructions for how to do this yourself. For us it was pretty much a “How far do you want these shelves to hang off the sides?” *I walk up and spread my arms to demonstrate what I’m envisioning*, Stephen nods and goes to cut the wood type of deal. I showed Stephen the picture from Love Goes Wild as an example and he modified it a bit. I think it’s actually easier because you can use pretty much any piece of wood as an anchor versus having to find a specific size to make the shelf level.
What You’ll Need:
- Base – A wooden ladder
- Shelves – Treated pine fence pickets (Or whatever you want to use. We used these because we had multiple leftover from our fence.)
- Anchor – 2″ x 4″ (Or really any piece of wood to nail the shelf and ladder to)
- Miter saw
- Brad nailer (Ours is on sale right now! We LOVE it and have used it on so many projects already) + nails OR a hammer + nails
- Level
- Drill + screws OR screw driver + screws (You could also just use nails for this too. Stephen said the screws were closer so that’s what he used. HAHA!)
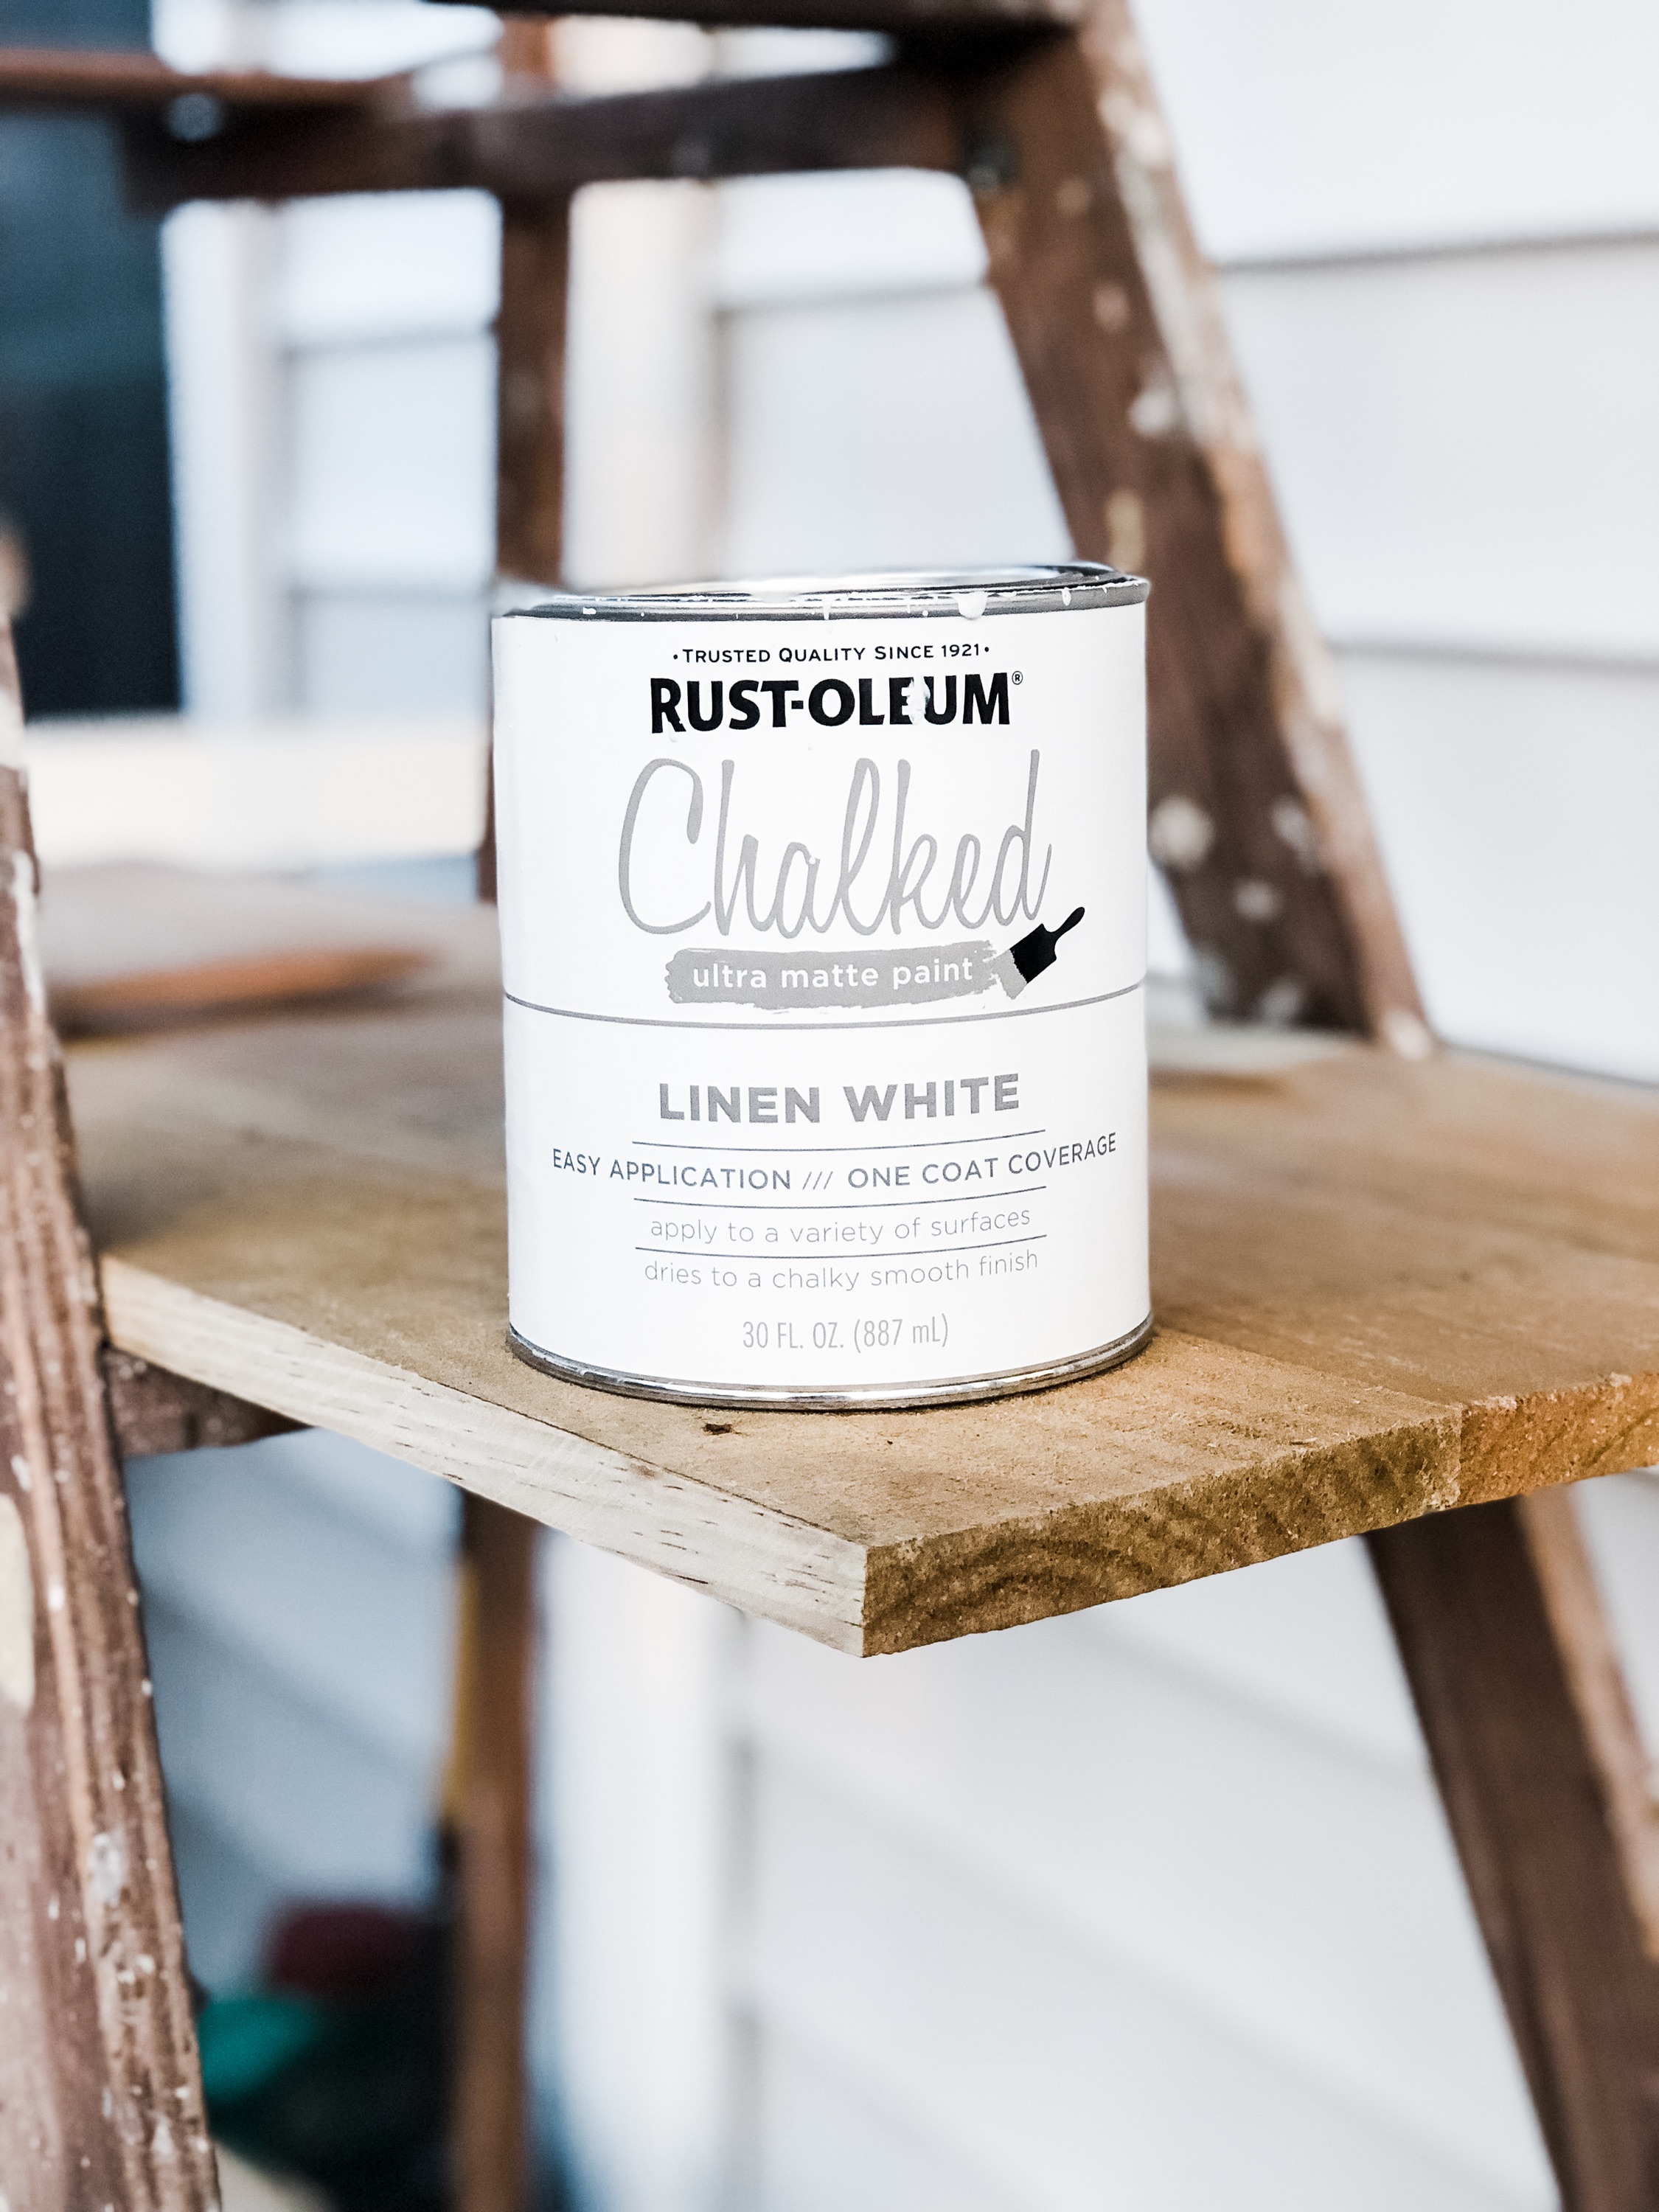
- Rust-Oleum Chalk Paint (MY FAVORITE and always great to have on hand!)
- Paint brush
What To Do:
- Determine how long you want each shelf relative to the ladder (we did ours about 12-18″ hanging off the sides). For each shelf, cut 3 (or however many you need depending on the size of your ladder) fence pickets so that they are the same length.
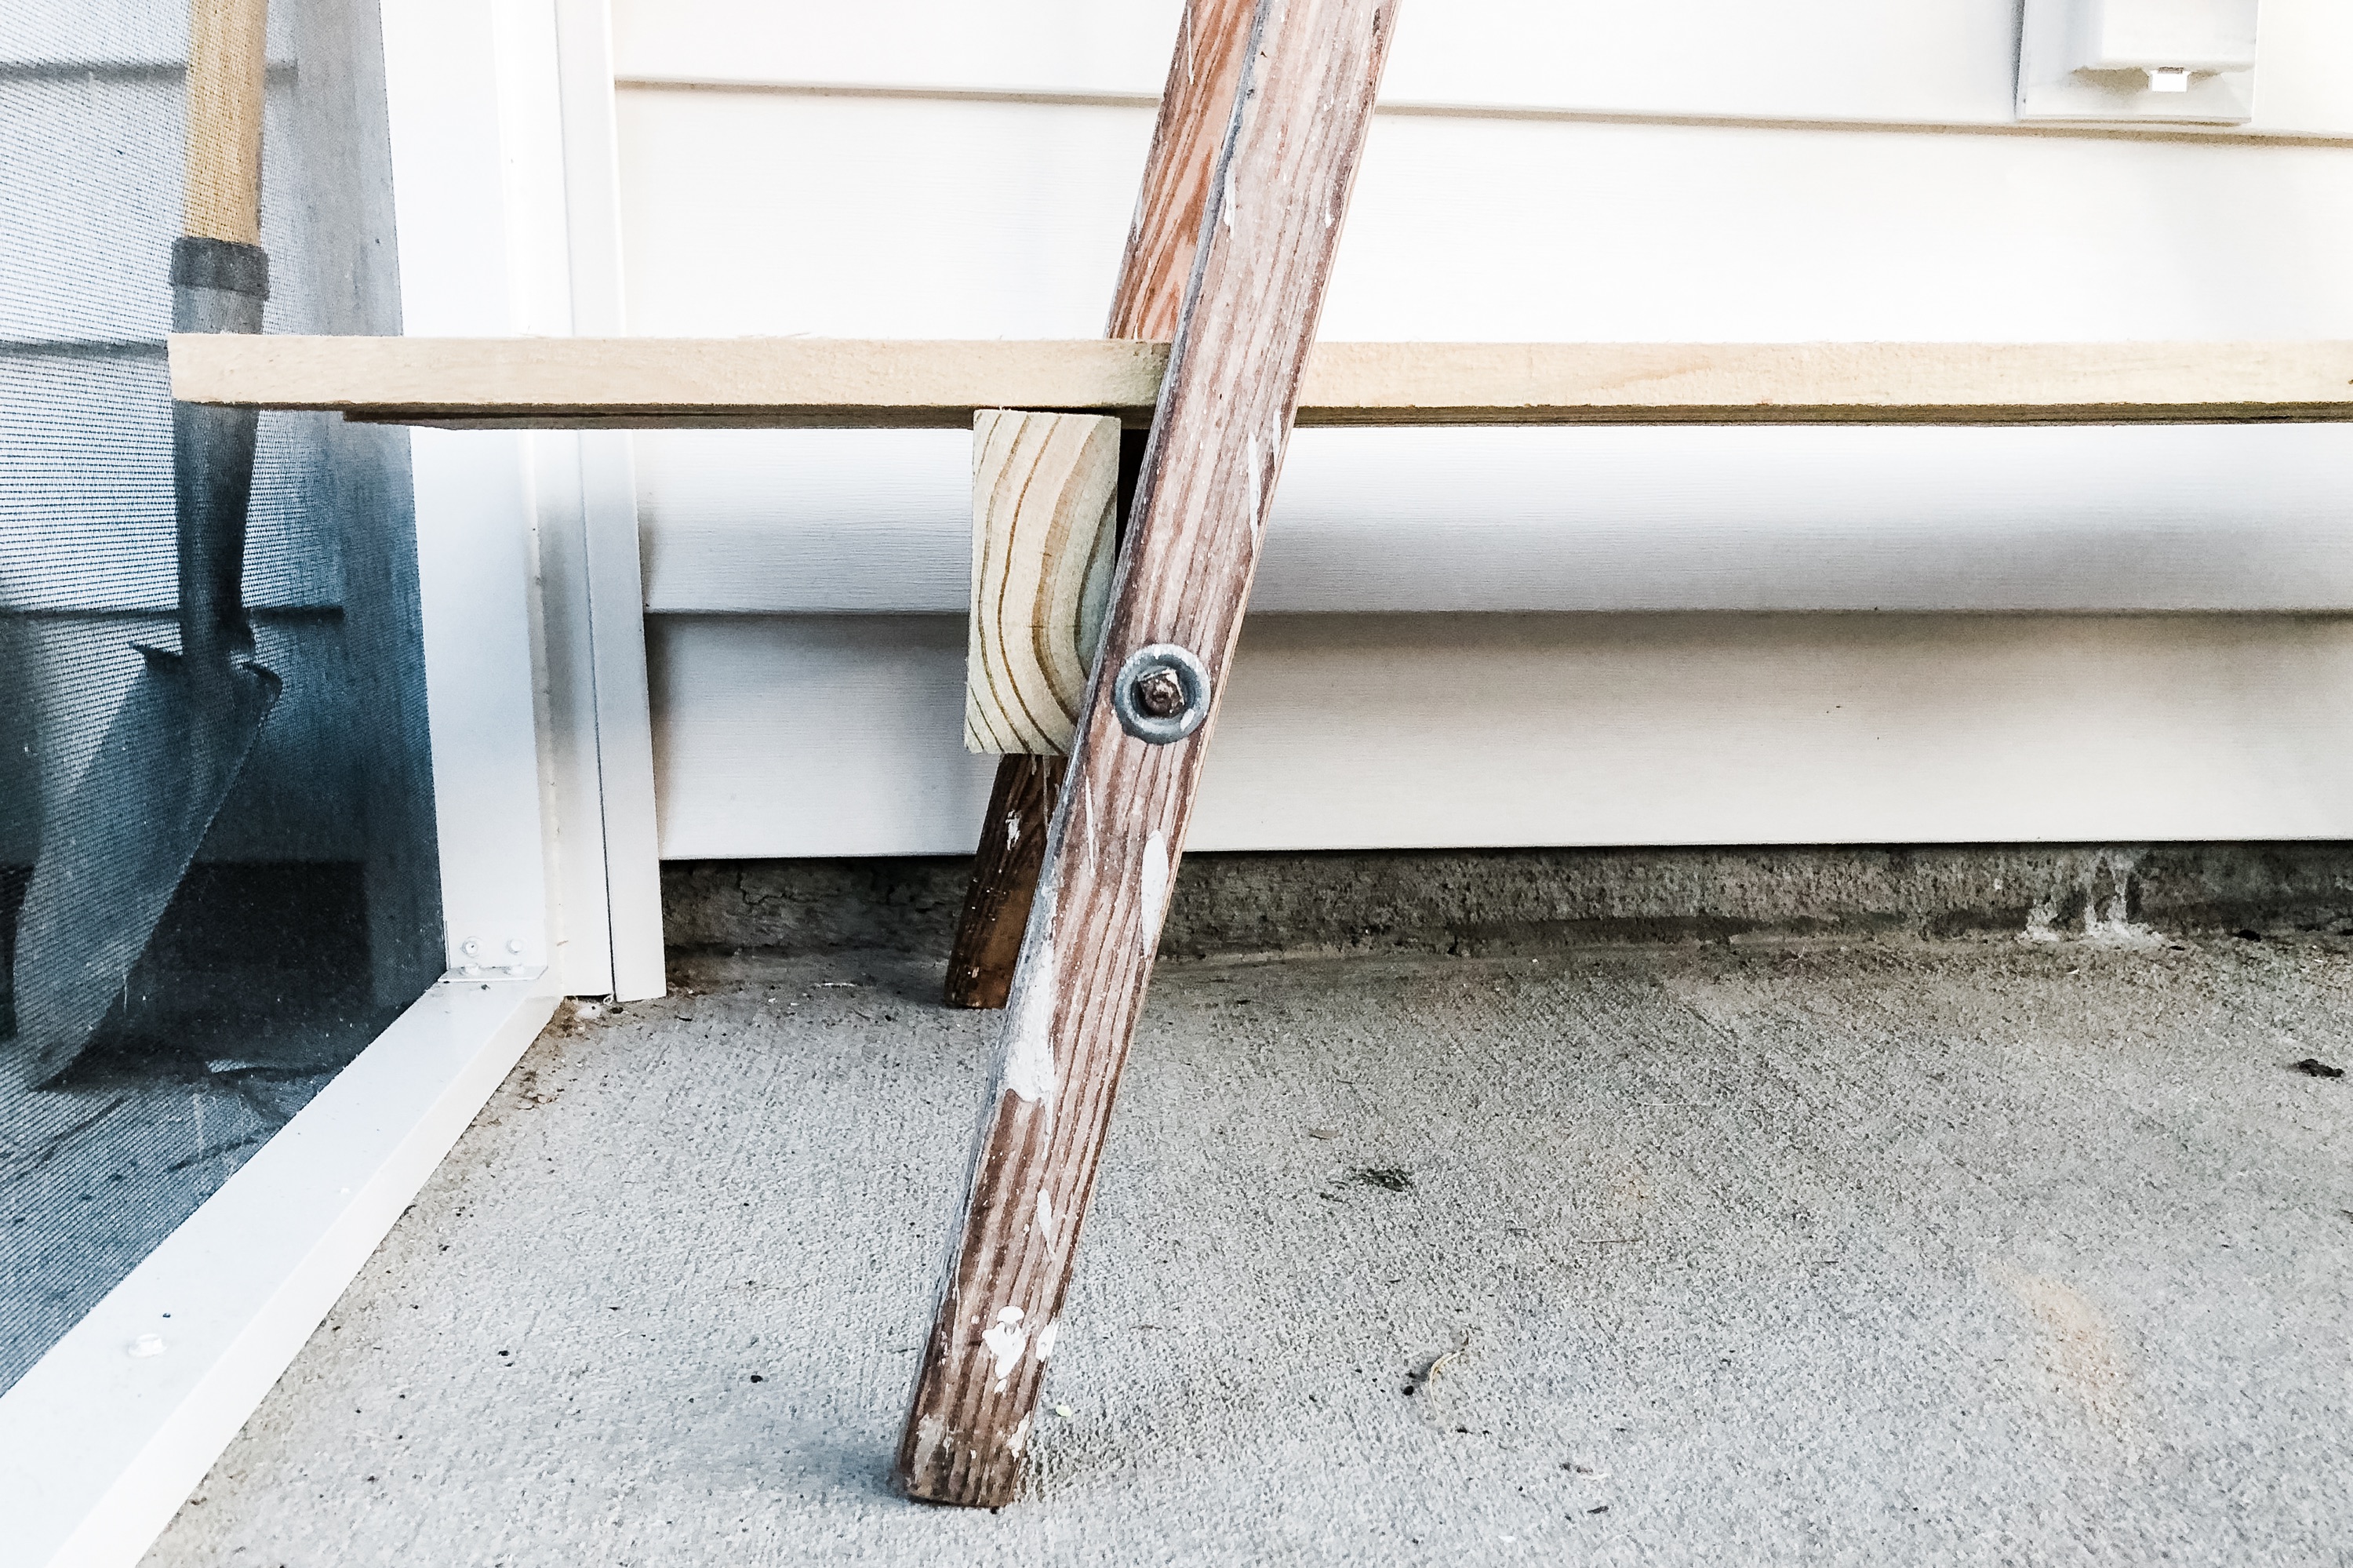
- Cut your piece of 2 x 4″ so that it will serve as an anchor on the side of the ladder with the rungs that are non weight bearing.
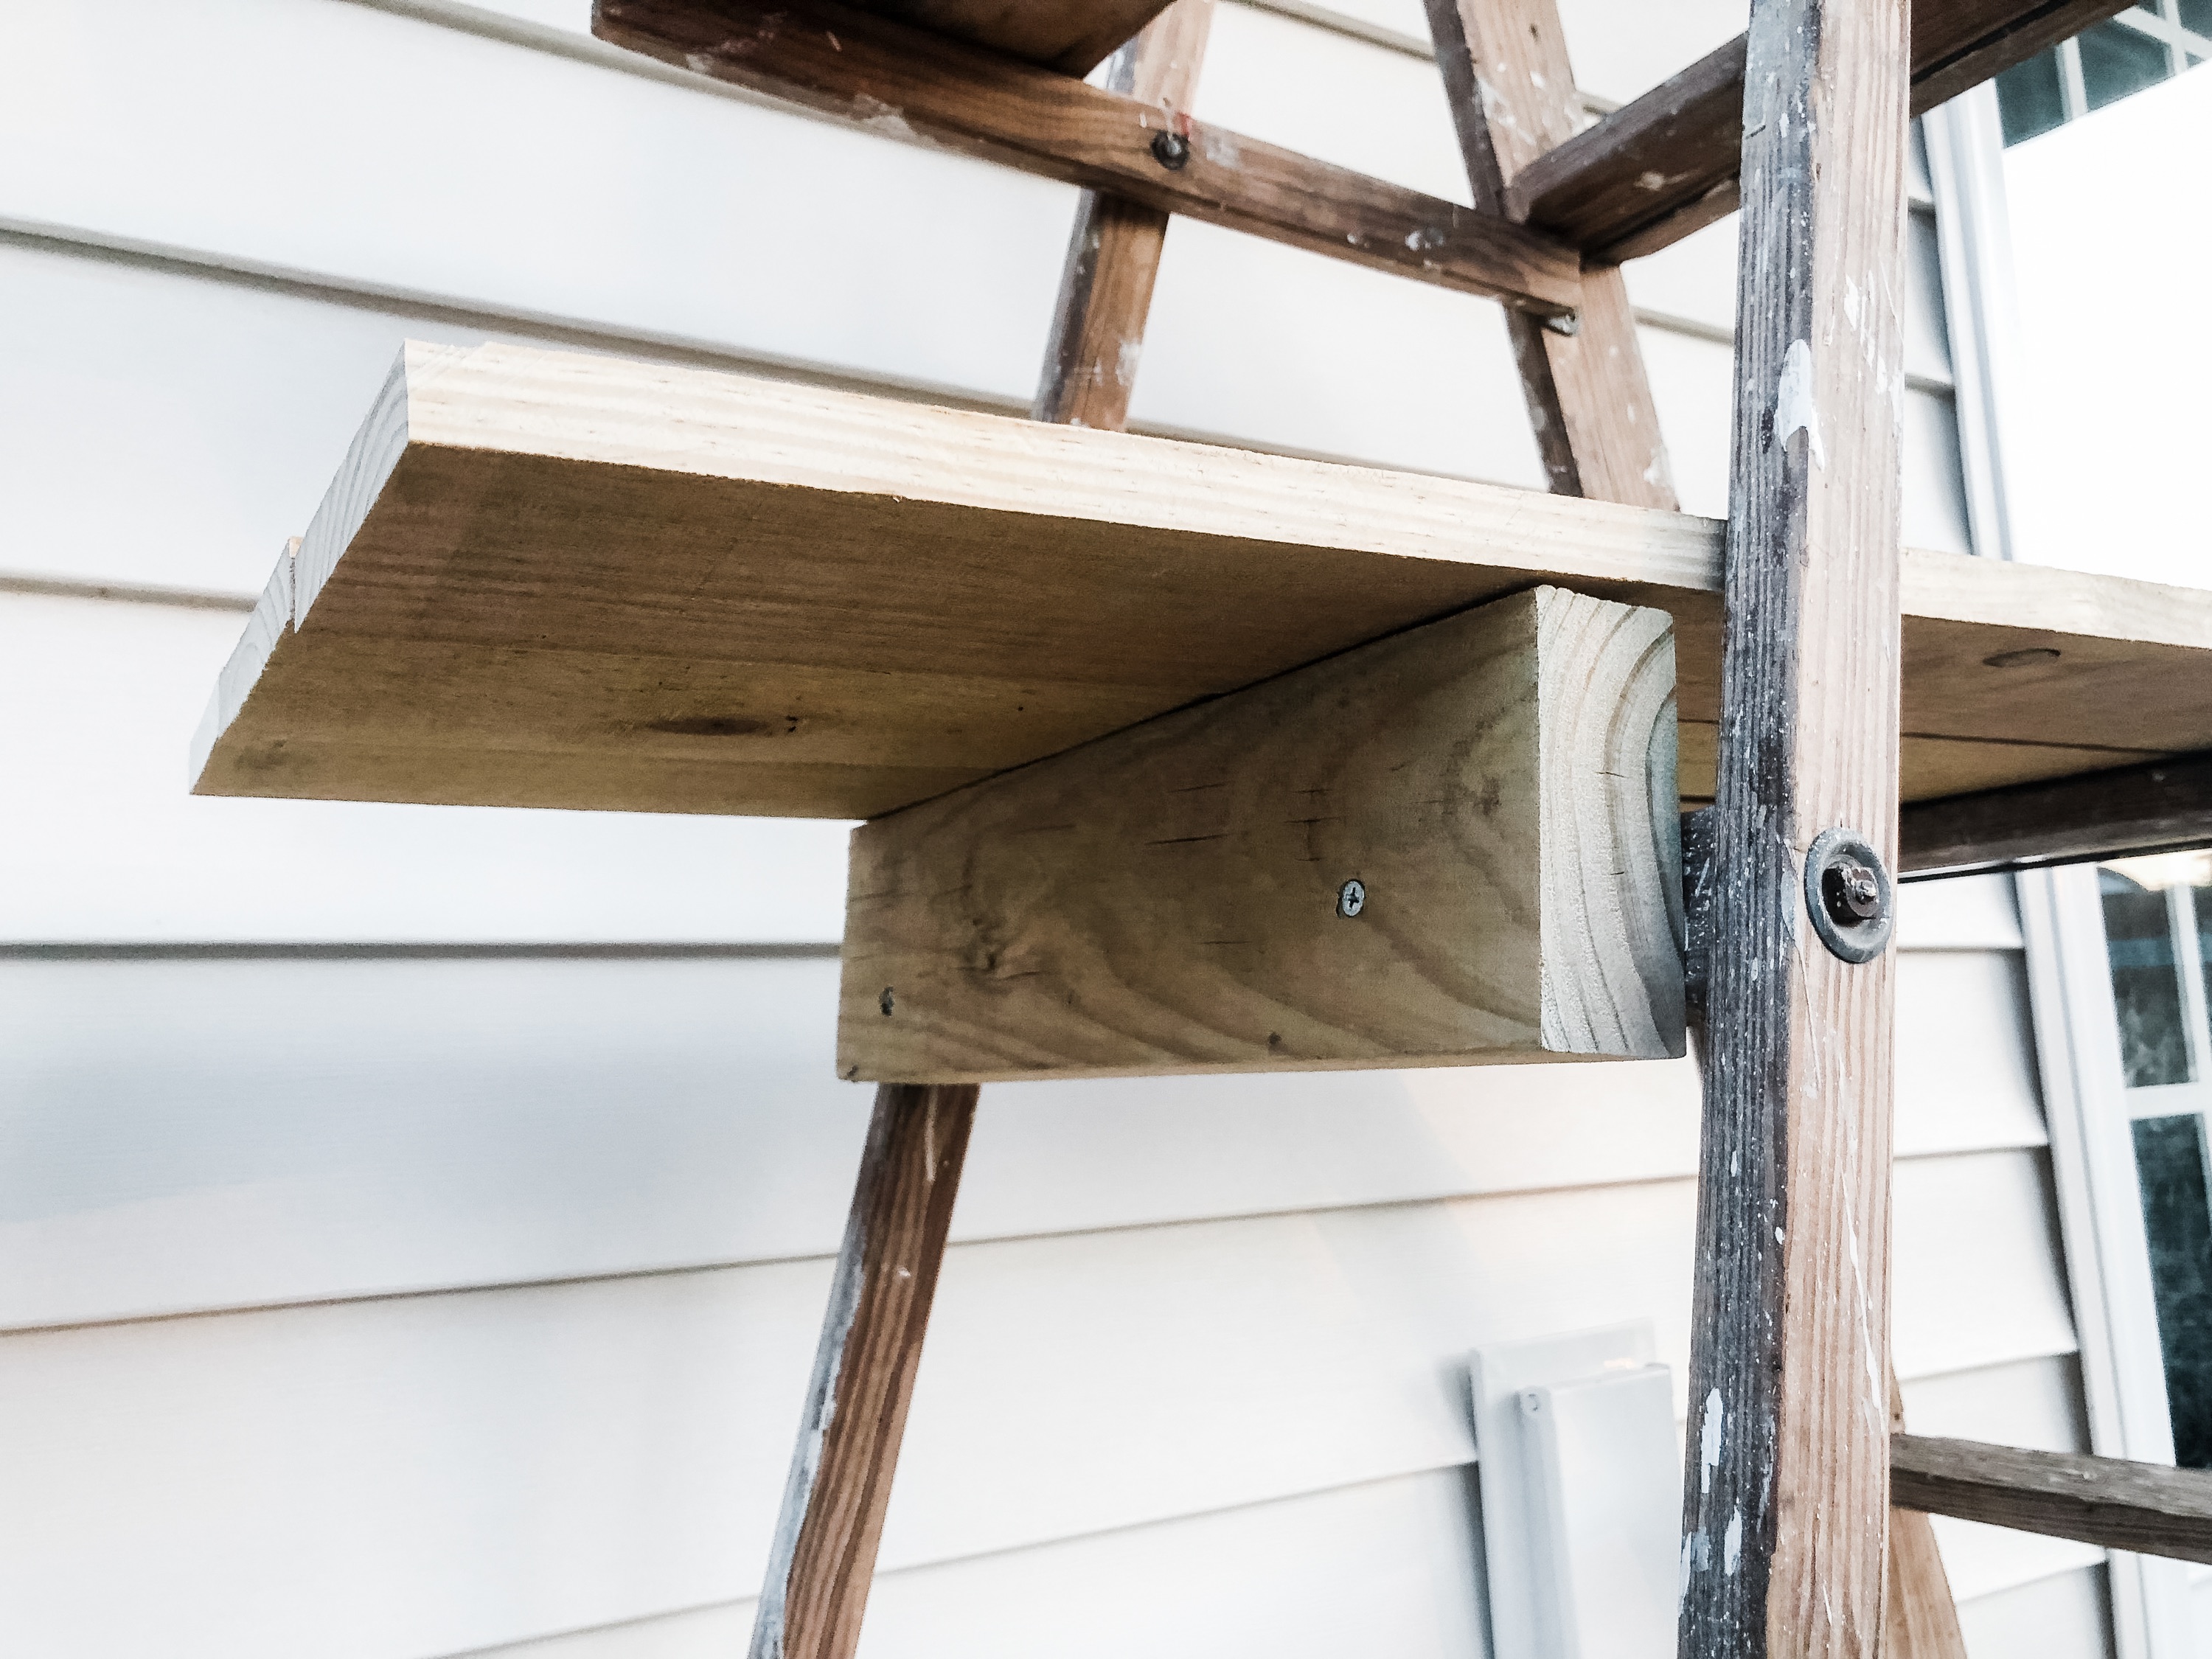
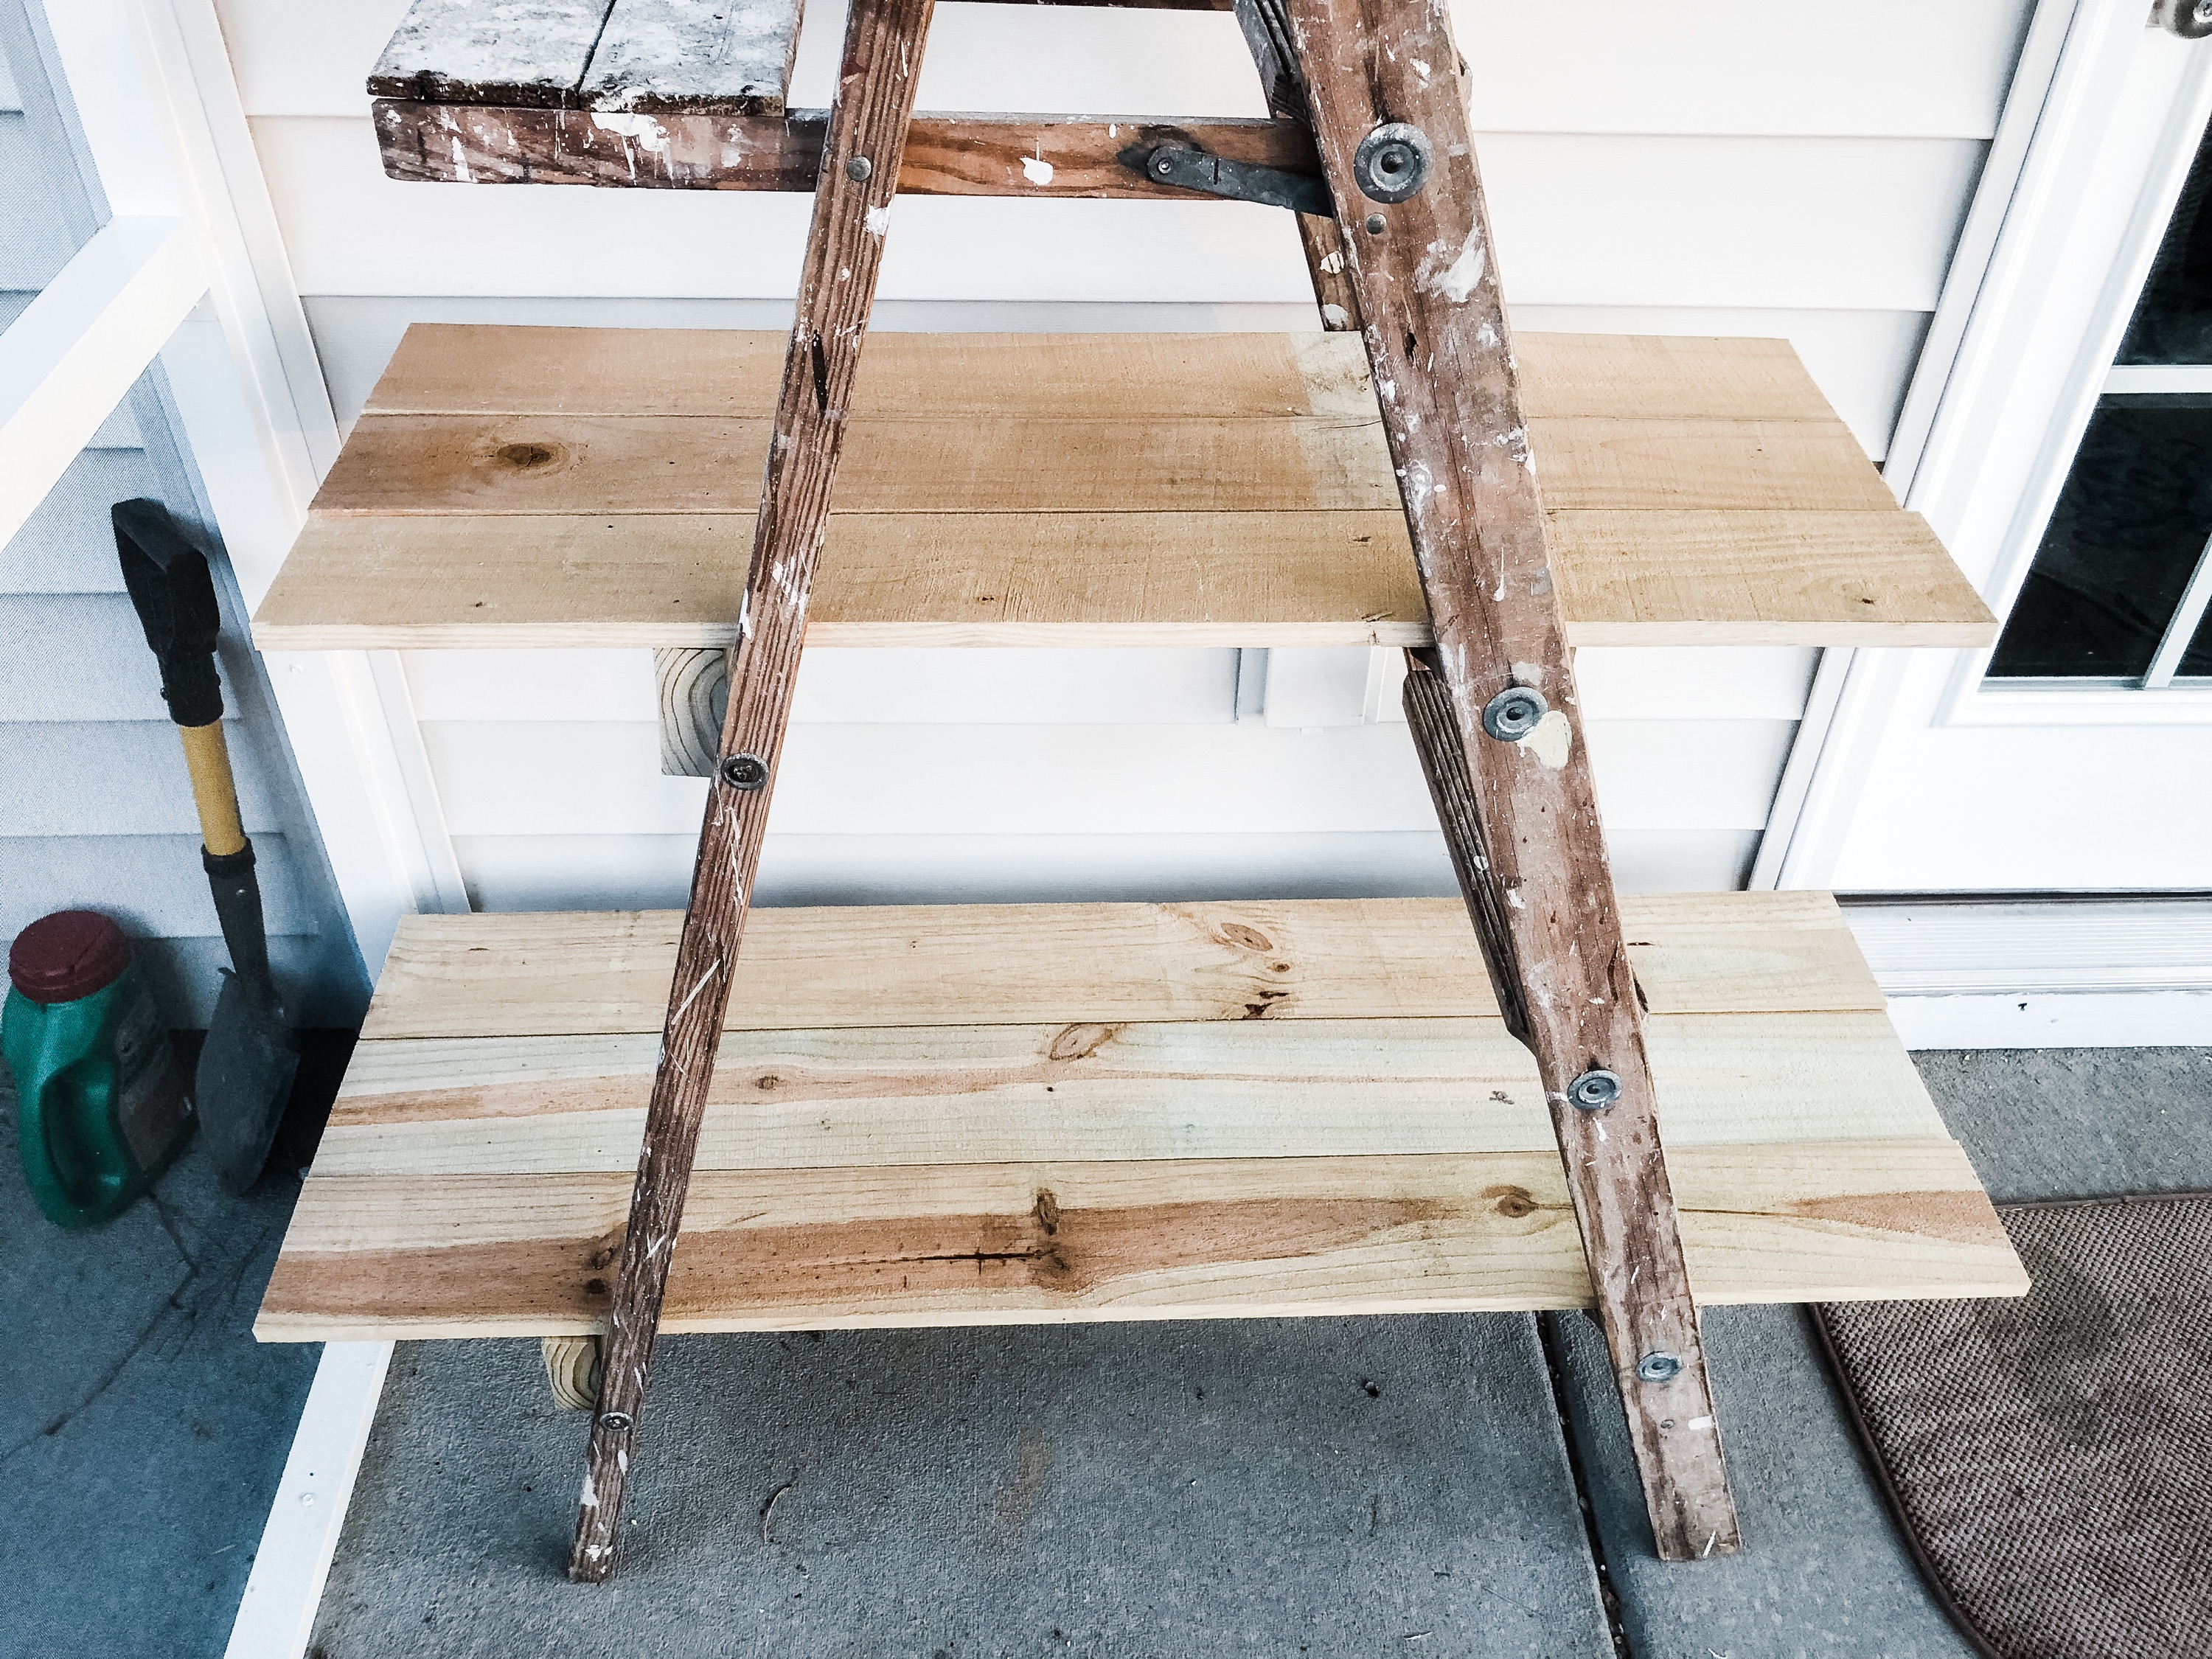
- To determine where to anchor the 2 x 4″ piece, place 1 fence picket across the two rungs that are closest in height. It’ll most likely look very slanted depending on your ladder. Place the level on top of the picket. To make the shelf level, place the 2 x 4″ piece you just cut under the picket against the non weight bearing rung and raise it until the picket is level. Screw or nail the 2 x 4″ into the rung (see picture above).
- Add the remaining pickets to complete the shelf and make sure both sides are even with the other pickets. To attach the pickets, nail downward into the 2 x 4″ on the one side of the ladder and on the other side, nail downward into the ladder rung. If you look very closely, you’ll see a line of holes in the pickets. The 18 gauge brad nails have tiny heads on them so you can barely see them. You can also use a normal hammer and nails. Either will work.
- Paint the shelves and both sides of the 2 x 4″ (I missed one side oops) with chalk paint. I didn’t hesitate to grab this chalk paint because it’s really durable and easy to apply. It has held up great these past few months with lots of rain and heat.
- Add your favorite herbs, décor, etc. Enjoy!
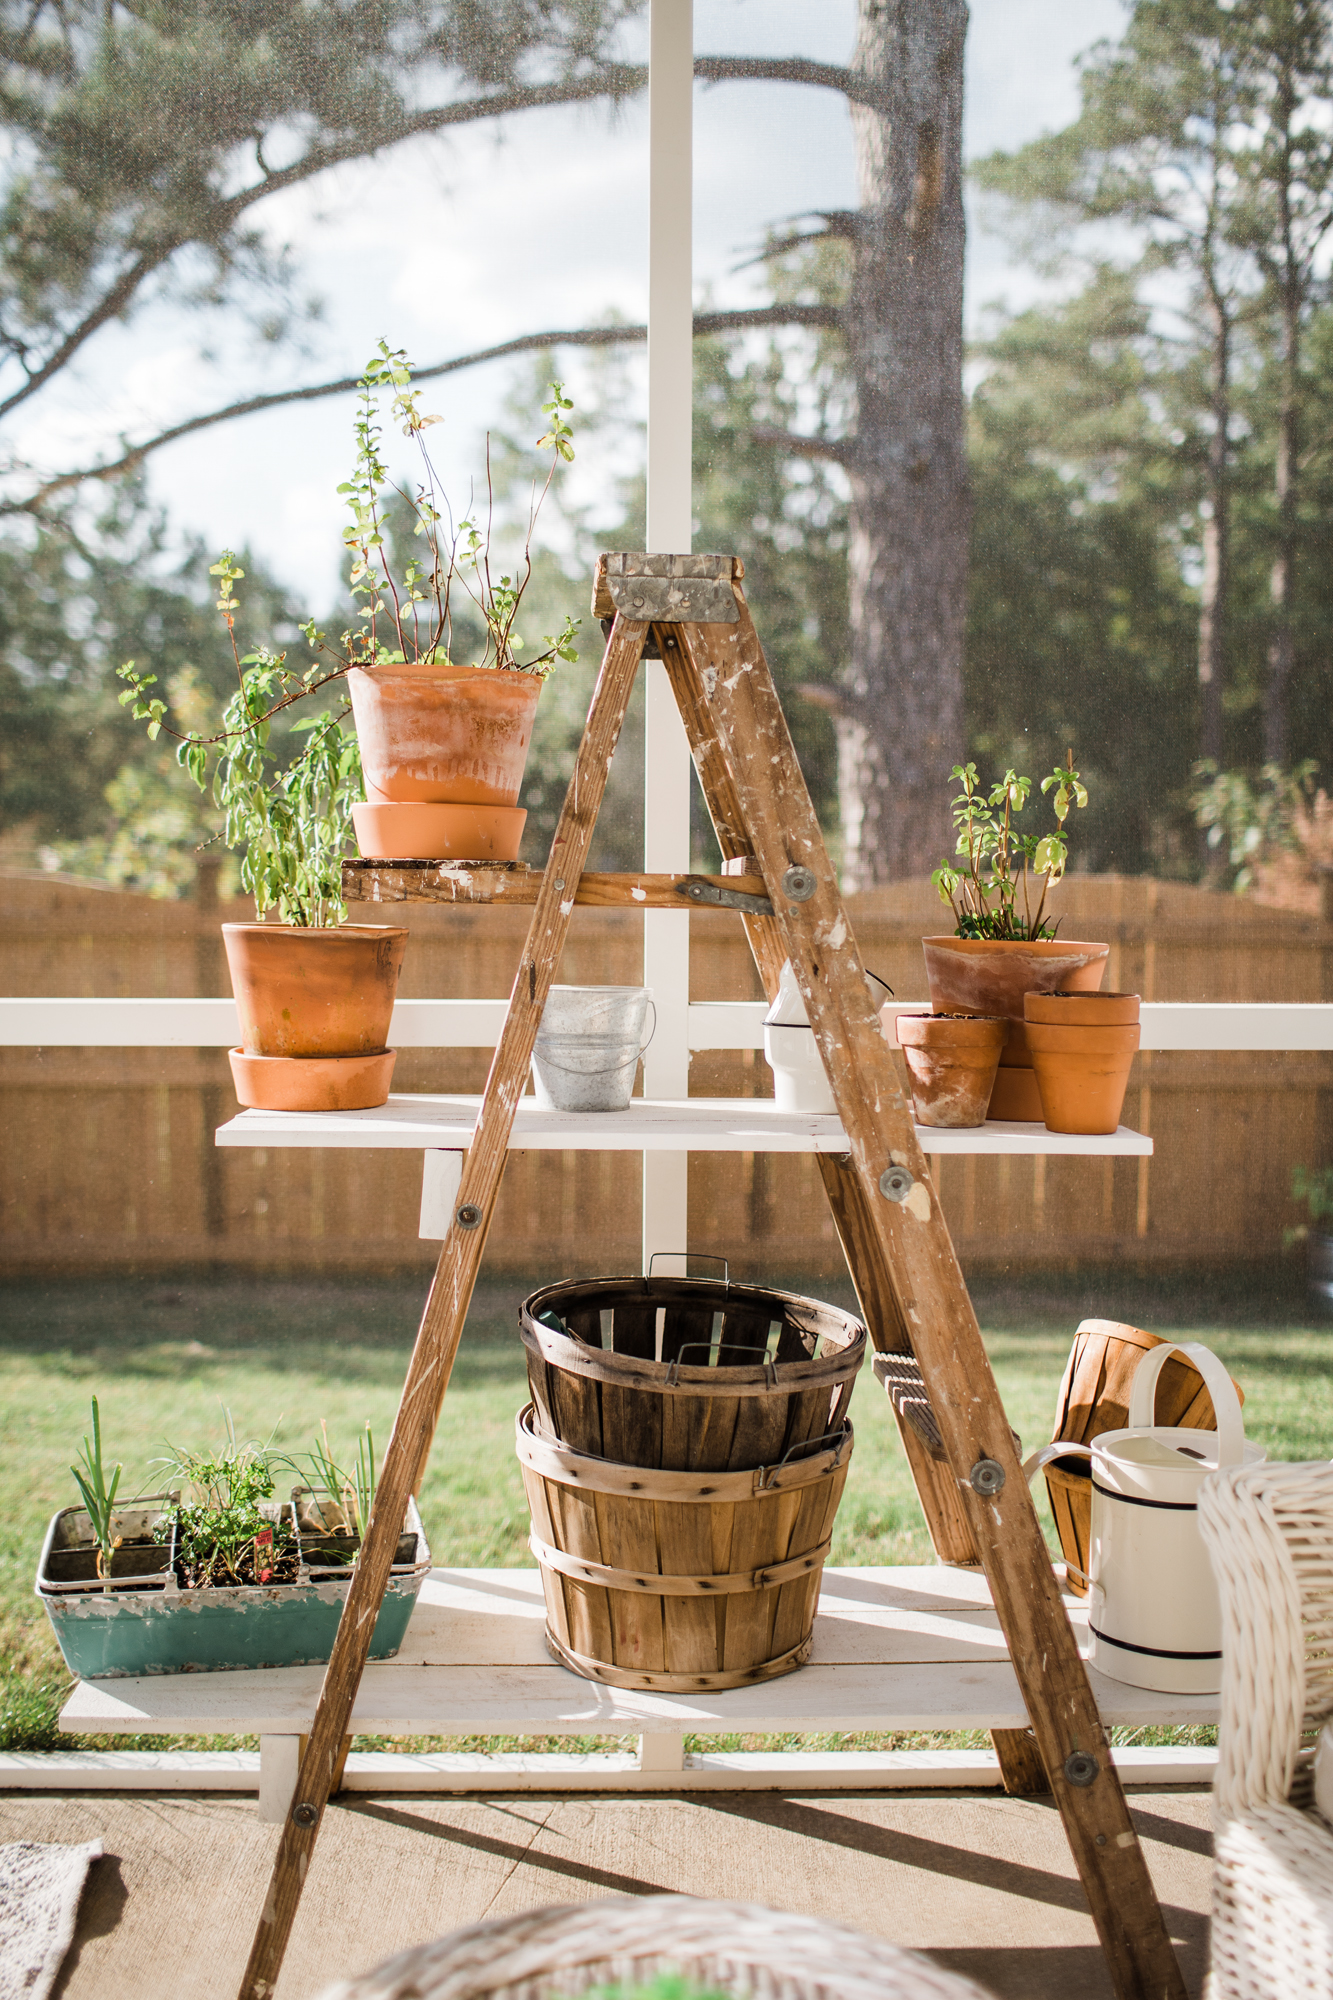
I apologize this isn’t very detailed with measurements. If you can, try to utilize as many scraps you have as possible! With a little TLC, an old ladder can become a functional and cute (at least I think so) piece to add to your outdoor space. If you have any questions please let me know. As always, thank you for the support!
Pin For Later:
Other posts you might enjoy:
All About Our Little Garden
Stock Tank Garden Planters
jordan jean
Leave a Reply


SHARE