June 13, 2016
Happy Monday! I just wrote this entire post and then it got deleted… So I’m going to write this again and say, “Jordan- 1, Monday- 0.” After a long weekend of moving, it is time to share a DIY!
My sweet friend Krystal is getting married this weekend (AHH!!!) and I am so dang excited for her and her soon-to-be hubby, Alex! Their wedding is going to be a B.L.A.S.T. and I’m so honored to be a part of it. Anyway, we found out about Krystal’s bridal shower a couple of months ago and since then I don’t think there was a day that went by when I didn’t think, “What the heck do I give her?!” I wanted to give her something personal and tossed around some ideas such as a crockpot filled with goodies, my favorite cookbook with cooking tools, a monogrammed cutting board, etc. but nothing ever made me think, “YES!! THAT’S WHAT I’LL GET HER!”
The week of her bridal shower I was still stumped and didn’t know what to do. Then one day I saw this beautiful, dark wooden sign with a quote printed on it. I decided that instead of buying it, I would make one myself so that’s exactly what I did.
These are super easy and you can make them however you want. There are so many different ways to do them. Anyway, enough of the blabber. Time to get this party started…
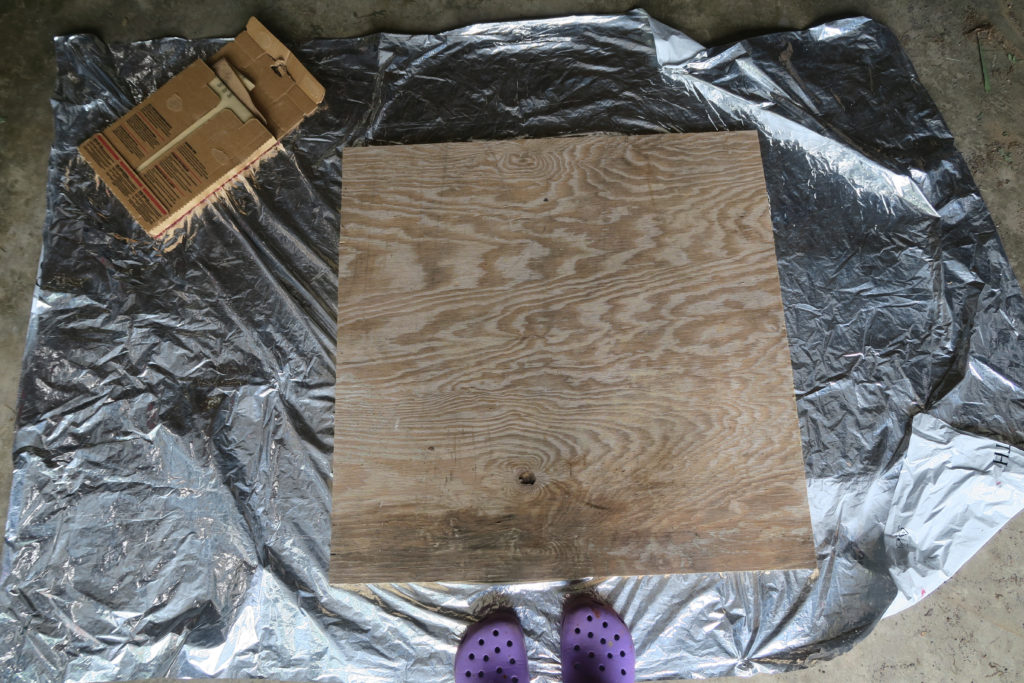
Step 1: Find/buy a board. I found this piece of leftover plywood and cut it into a 2.5′ square. I was looking for a common wood board like this one but I figured I could make the plywood work.
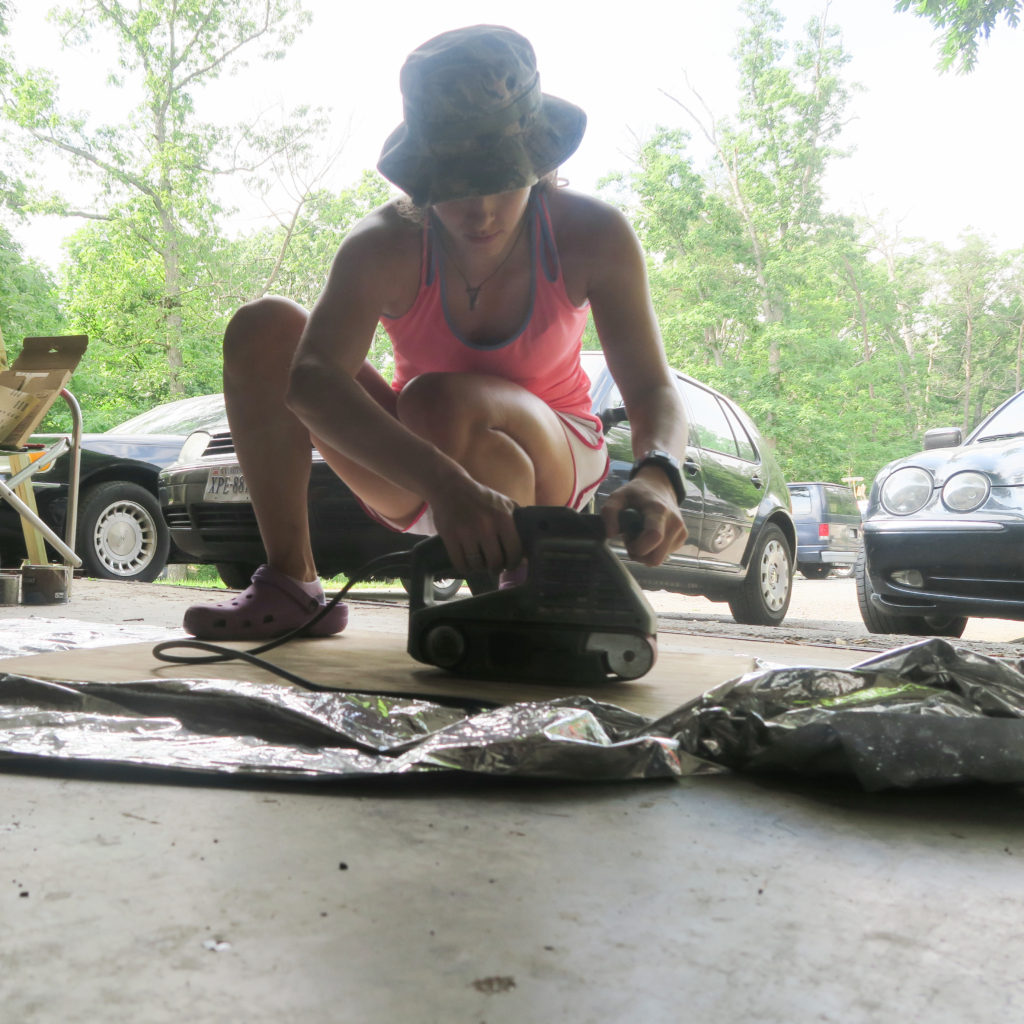
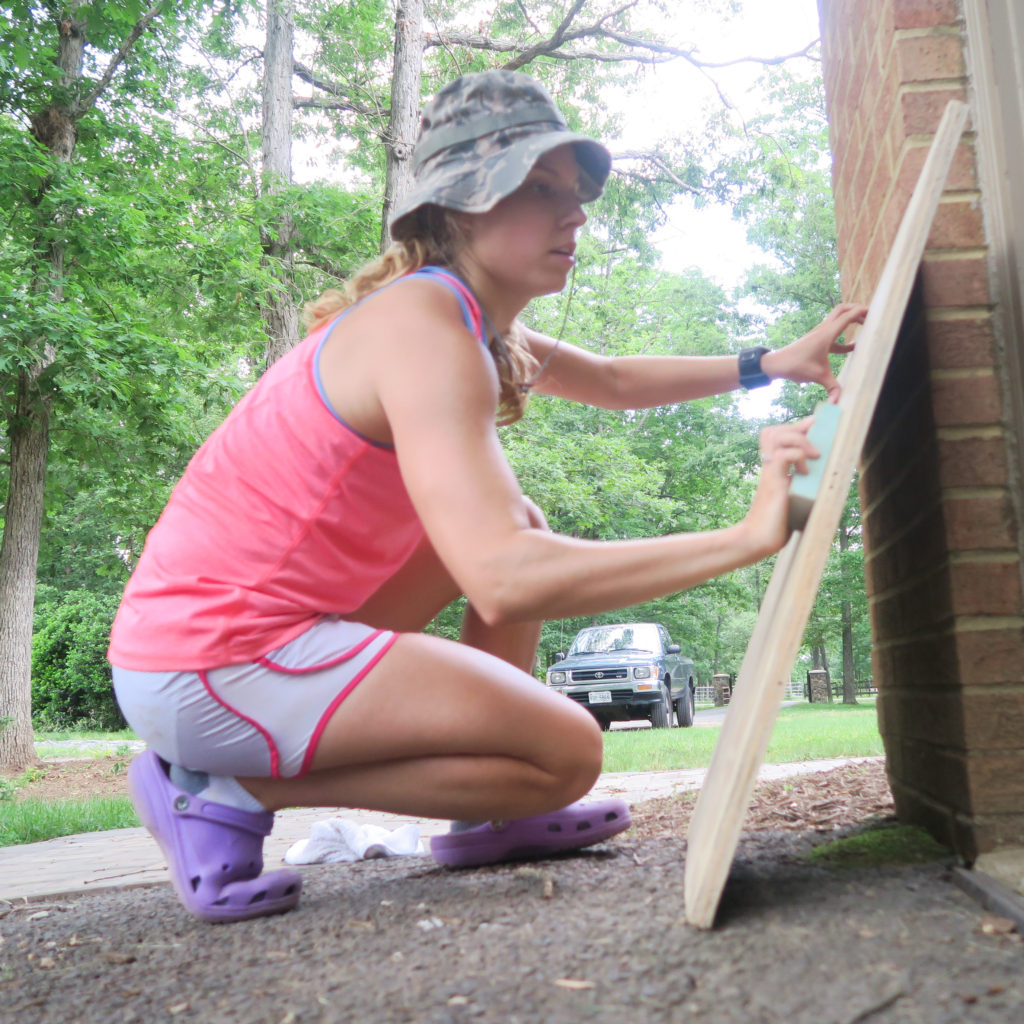
Step 2: Sand the crap out of it. If you buy a common board from the store than you might not have to do as much of this but since the plywood was very rough, I had to sand that bad boy like it was my job. I used the electric sander first with a very course sandpaper followed by a super fine sand block until it was smooth as butta.
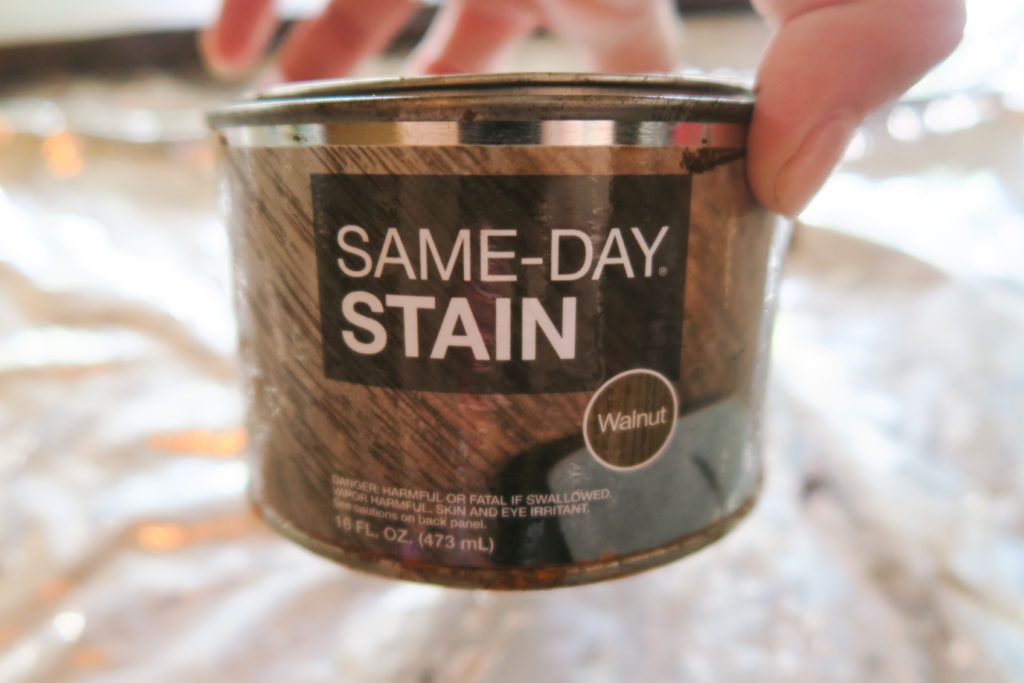
Step 3: Stain. This part was so much fun! I used a walnut colored stain that we already had but I’ve always had good luck with Minwax stains. I used a cloth that I dipped into the stain and then rubbed into the wood with circular motions. I then would wipe any of the excess stain off using the “clean” end of the cloth because I didn’t want the stain to be too dark. It’s really simple and you’ll figure out quickly what color and look you’re going for. I’ve also seen people stain using a foam brush so that could be another option that I’m sure would work well! I would suggest wiping off the excess stain using that method too so that the wood looks more natural. I let the board dry overnight just to insure that it was dry before I painted!
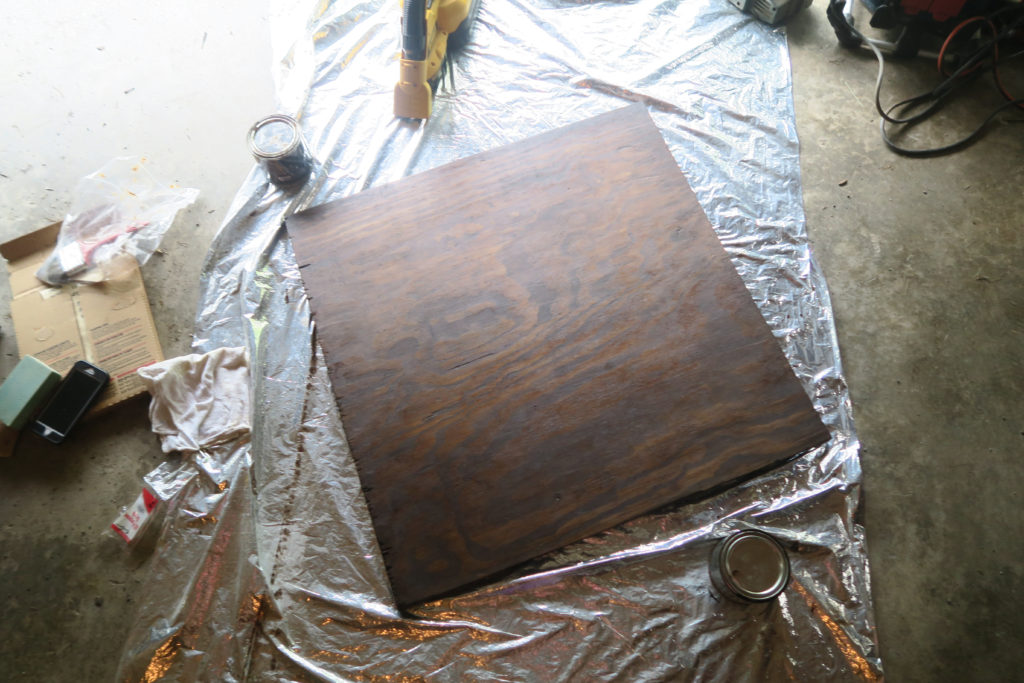
Step 3.5: Sand. Once the stain dries if you want to go for a more “distressed look” you can go back with some sand paper and sand wherever you want to make it look a little bit more rustic. I decided not to do this for this board because I didn’t want the plywood to be what showed underneath the stain. However, I’m sure I will do it eventually! I love me a roughed up, rustic sign!
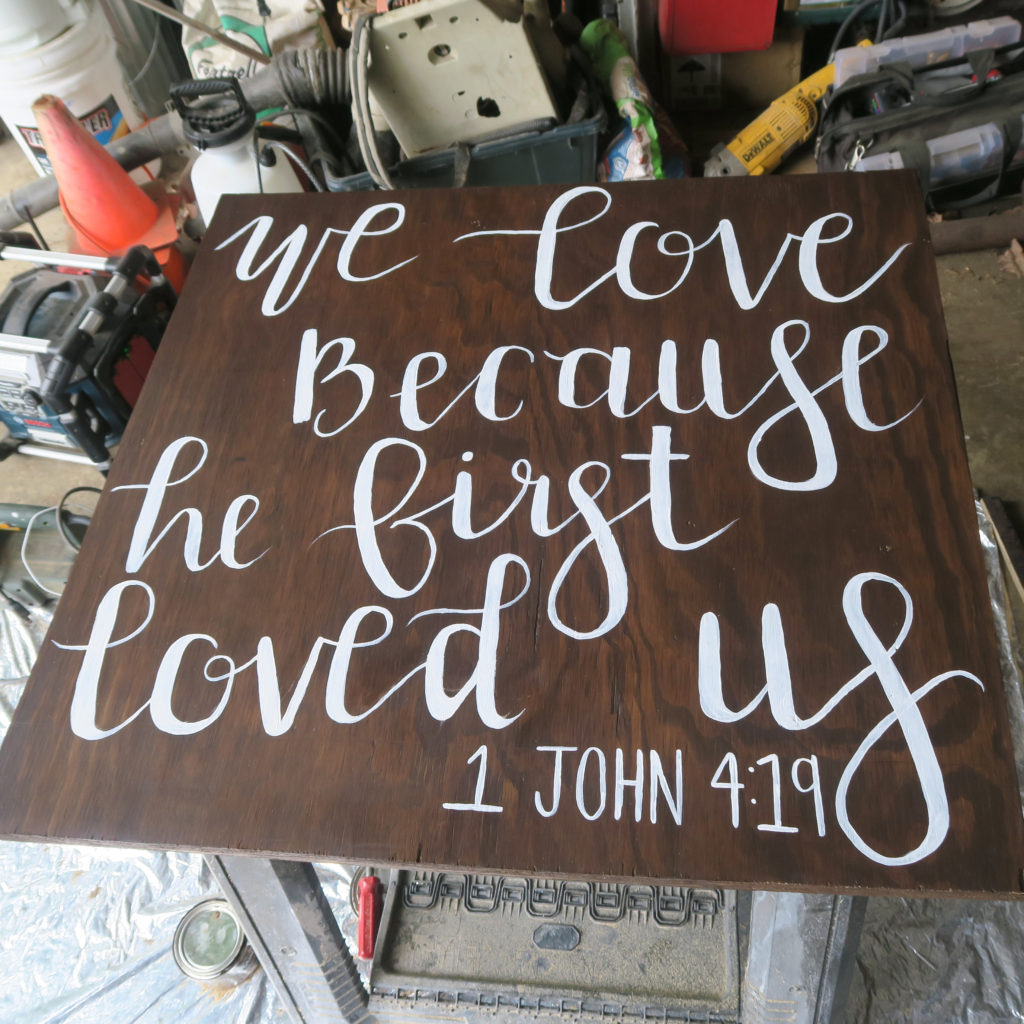
Step 4: Paint! You can paint ANYTHING you want on your sign but I chose scripture that I knew was special to Krystal and Alex. I used acrylic paint in a more calligraphy-like font because I wanted it to look more feminine. It’s not perfect and I know I need to practice more on my calligraphy so don’t hate…
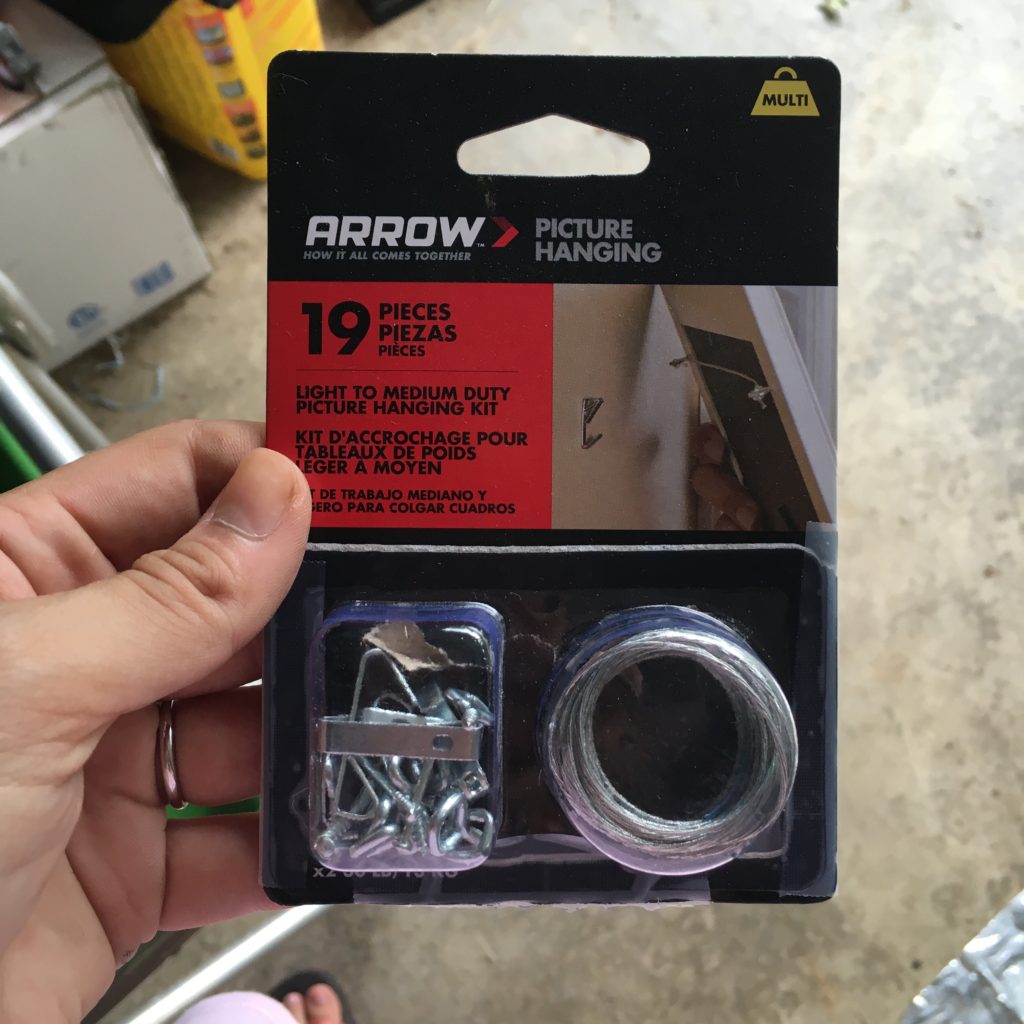
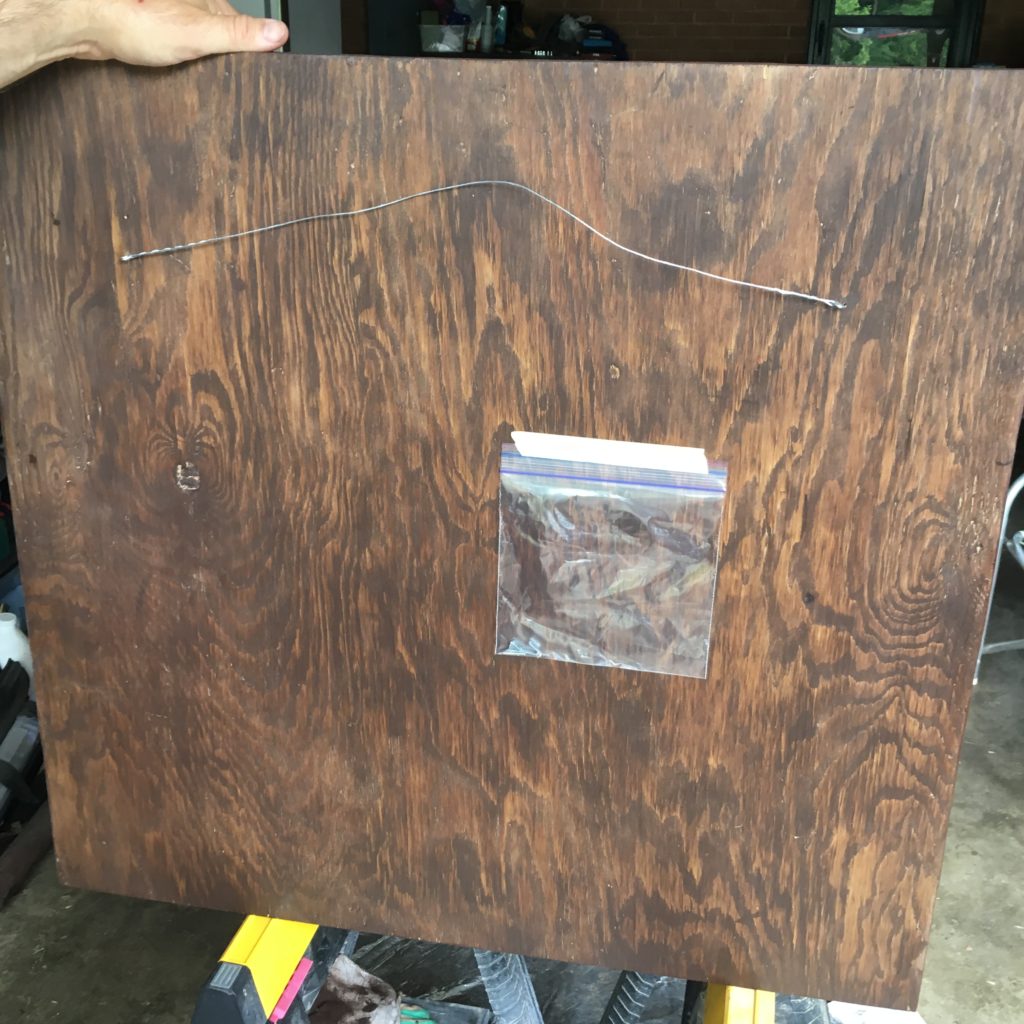
Step 5: Make it hang. I used a kit like this to attach wire to the back of the wood so that it would hang. But let’s be honest…. When I say “I” I mean good ol’ Papa Newk did it because he’s the bees knees. However, I found this handy blog so that you can learn how to do it (and so that I can do it next time too).
Step 6: Give! I have to tell you all… I was SO NERVOUS for Krystal to unwrap this sign in front of everyone at her bridal shower. I was thinking, “Oh no… What if she doesn’t like it? That’s going to be so embarrassing.” However, I was filled with relief when opened it and instantly lit up. It made my heart oh so happy! P.S. Aren’t Krystal and Jami the cutest?!

Like I mentioned before, you really can’t go wrong with one of these! Something else that I might do eventually is stain a piece of wood, paint over that stain with white, and then sand the board so that the stain shows through the white paint before painting words/names etc. on it. That way will have some more dimension with the addition of the white over the walnut wood. Like I said… So many ways to do them! If you all have your own editions I’d love to see them!
I hope you all have a GREAT Monday and week!
jordan jean
Leave a Reply


LOVE this! Something I’ve been meaning to do for quite a while yet just haven’t gotten around to it. Actually I have a piece of wood that would fit nicely above our bed… hmmmm… glad I’m not the only one that likes to get crafty with woodworking, etc!
Thank you so much, Kristen! It is so easy it only took me about two days simply because of the drying time. I’m sure it would be so pretty over your bed! 🙂